TRENDnet TDM-C504 User Manual
4-port adsl 2/2+ modem router
Hide thumbs
Also See for TDM-C504:
- Specifications (2 pages) ,
- Quick installation manual (15 pages) ,
- Manual (15 pages)
Table of Contents
Advertisement
Quick Links
Advertisement
Table of Contents

Related Manuals for TRENDnet TDM-C504


Summary of Contents for TRENDnet TDM-C504
-
Page 2: Table Of Contents
Back Panel ........................... 9 CONNECTION MECHANISM ..................... 10 Connection through Ethernet Cable ..................10 Setting up the TCP/IP in Windows ..................... 12 ADVANCE CONFIGURATION ...................... 2 Login ............................2 Setup Wizard ..........................3 ... - Page 3 Bridging ............................. 35 Routing ............................35 SNMP ............................37 Port Mapping ..........................37 IP QoS ............................39 Remote Access ..........................40 Others ............................41 DIAGNOSTIC ..........................43 Ping ............................43 ATM Loopback ........................... 43 ...
-
Page 4: Compliance
FCC Radiation Norm This equipment has been tested and found to comply with limits for a Class B digital device pursuant to 47 CFR, Part 2 and Part 15 of the Federal Communication Commission (FCC) rules. Operation is subject to the... -
Page 5: Introduction
Protect your data with a dual NAT and SPI firewall. Manage access to the Internet with IP port and MAC address filtering and URL and domain name blocking controls. Additional features include a browser-based management interface, SNMP v1 and v2 support, QoS data prioritization, DMZ controls, Port Forwarding, and Dynamic DNS support. -
Page 6: Features
Features ADSL Standards Compliance Full rate ANSI T1.413 Issue2, ITU-T G.992.1 and ITU-T G.992.2 standards compliant. ITU G.992.3, ITU G.992.5 ADSL2/2+ standards compliant. Support Annex M and Annex L specification. Downstream and Upstream data rates up to 24Mbps and 1Mbps. -
Page 7: System Requirement
TDM-C504 Multi-Language Quick Installation Guide CD-ROM (User’s Guide & Drivers) Power Adapter Cat. 5 Ethernet Cable (1.5m / 5ft.) RJ-11 telephone cable (1.8m / 6ft.) If any of the above items are damaged or missing, please contact your dealer immediately. -
Page 8: Hardware
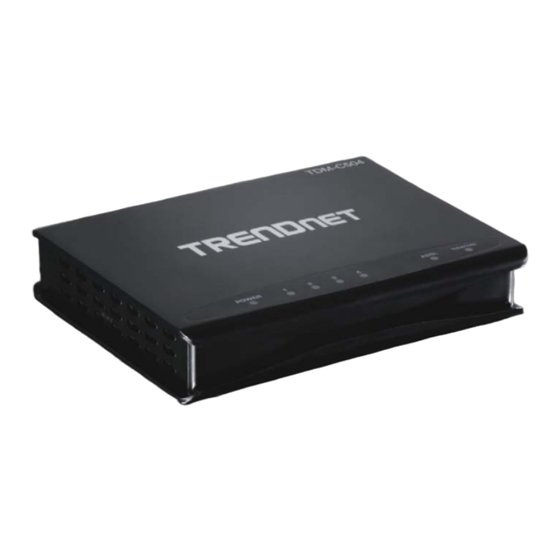
Power Lights up when TDM-C504 4-Port ADSL2/2+ Modem Router is powered on. Blinking when LAN port(s) of this TDM-C504 4-Port ADSL2/2+ Modem Router is sending LAN 1-4 or receiving data. Lights up when a successful 4-Port ADSL2/2+ connection is established. -
Page 9: Back Panel
To “Reset” the TDM-C504 4-Port ADSL2/2+ Modem Router to factory defaults: Ensure that the device is powered on. Press the Reset button for more than 5 seconds and release. Wait for 30 seconds after release the Reset button. Do not power off the device during the reset process. -
Page 10: Connection Mechanism
This section describes the hardware connection mechanism of TDM-C504 4-Port ADSL2/2+ Modem Router on your Local Area Network (LAN) connected to the Internet, how to configure your TDM-C504 4-Port ADSL2/2+ Modem Router for Internet access or how to manually configure your Internet connection. - Page 11 Ethernet Cable (RJ-45): Turn off your computer/notebook. Connect the ADSL port of your TDM-C504 4-Port ADSL2/2+ Modem Router to the wall jack of the ADSL/ADSL2/ADSL2+ Line with a RJ-11 cable. Connect the Ethernet cable (RJ-45) from your TDM-C504 ADSL2/2+ Modem Router to the Ethernet Adaptor on your computer.
-
Page 12: Setting Up The Tcp/Ip In Windows
Setting up the TCP/IP in Windows The instruction in this chapter will help you configure your computers to be able to communicate with this TDM-C504 4-PORT ADSL2/2+ Modem Router. Computers access the Internet using a protocol called TCP/IP (Transmission Control Protocol/ Internet Protocol). - Page 13 Windows ME / 98 Step 1: Click Start→Settings→Control Panel. Step 4: Go to IP Address icon and select Obtain an IP address. Step 2: Double-click the Network icon. Step 5: Go to Gateway icon and erase all previous setting. Step 3: Go to Configuration icon, select network Step 6: Go to DNS Configuration icon, select adapter installed and click Properties.
- Page 14 Step 4: Select Internet Protocol (TCP/IP) and click Properties. Step 2: Double-click the Network and Dial-up Connections. Step 5: Select Obtain an IP address automatically and DNS server address automatically. Then, click OK. Step 3: Right Click the Local Area Connection and select Properties.
- Page 15 Step 1: Click Start→Control Panel→Classic View. Step 4: Go to General icon, select Internet Protocol (TCP/IP) and click Properties. Step 2: Double-click the Network Connections. Step 5: Go to General icon, select Obtain an IP address automatically and DNS server address automatically. Then, click OK.
- Page 16 Step 5: Go to General icon, select Internet Protocol Version 4 (TCP/Ipv4) and click Properties. Step 2: Double-click the Network and Sharing Center. Step 6: Go to General icon, select Obtain an IP Step 3: Click on the Manage network connections. address automatically and DNS server address automatically.
- Page 17 Step 5: Select Internet Protocol Version 4 Step 2: Click the View network status and tasks. (TCP/IPv4) and click Properties. Step 3: Click on the Change adapter settings. Step 6: Go to General icon, select Obtain an IP address automatically and DNS server address automatically.
-
Page 18: Advance Configuration
For your convenience, an Administrative Utility has been programmed into TDM-C504 4-PORT ADSL2/2+ Modem Router. This chapter will explain all the functions in this utility. All the TDM-C504 4-PORT ADSL2/2+ Modem Router based administrative tasks are performed through this web utility. -
Page 19: Setup Wizard
PPP dial up link. Setup Wizard The Setup Wizard is a presetting wizard which is meant to help you install the TDM-C504 ADSL2/2+ Modem Router quickly and easily. Click on “Setup Wizard” and the following screen will pop-up:... - Page 20 Step 1: Select your country from the Country list and the ADSL service provider from the ISP List (If there are more than two ISP in your country) and note the “Encapsulation” type and “VPI & VCI” setting. Note: Click “CONFIG” if you cannot find your parameters available in the pull down menu. Contact your ISP for configuration settings.
- Page 21 Fixed IP: Fixed IP Settings are for users who have a Static IP Address (WAN side) from their ISP. Click the radio button to enable Fixed IP option . Manually enter the “Local IP Address”, “Subnet Mask”, “Remote IP Address”(Default Gateway) and “DNS”...
- Page 22 The following page with the device setup information will be displayed. Note: If the final settings are different from what you’d selected in STEP 1, click Setup Wizard and redo the setup procedures or else check your dealer immediately for technical support.
-
Page 23: Lan
Enable/Disable the IGMP snooping function for the multiple bridged LAN ports. Apply Changes Click to save the setting to the configuration. New parameters will take effect after save into flash memory and reboot the system. See section “Admin” for save details. -
Page 24: Wan
Click Modify to complete the channel modification and apply to the configuration. Delete Select an existing PVC channel to be deleted by clicking the radio button at the Select column of the Current ATM VC Table. Click Delete to delete this PVC channel from configuration. - Page 25 1483 Routed The WAN setup configuration page enable the user to create, save, delete and select connection profiles as required. (In many cases, only one connection profile will be required and only one connection profile will be used at one time).
- Page 26 Most Internet users are provided with a dynamic IP address by their ISP for each session, however certain situations call for a Fixed (Or Static) IP address. Fixed (Or Static) is used whenever a known Fixed (Or Static) IP is assigned. The accompanying information such as the Subnet mask and the gateway should also be specified.
- Page 27 Channel: VPI: Virtual Path Identifier is a virtual path used for cell routing that is identified by an 8-bit field in the ATM cell header. The VPI field specifies this 8-bit identifier for routing. VCI: A Virtual Channel Identifier is a virtual channel that is identified by a unique numerical tag that is defined by a 16-bit field in the ATM cell header.
- Page 28 Fixed IP (Or Static IP) mode. These information/data will be provided by your ADSL Service provider or ISP. Under the WAN IP mode, if you select DHCP as your connection type, nothing needed to fill. In this case the ADSL service provider is using Dynamic IP (Or DHCP) mode.
- Page 29 Channel: VPI: Virtual Path Identifier is a virtual path used for cell routing that is identified by an 8-bit field in the ATM cell header. The VPI field specifies this 8-bit identifier for routing. VCI: A Virtual Channel Identifier is a virtual channel that is identified by a unique numerical tag that is defined by a 16-bit field in the ATM cell header.
- Page 30 PPPoA: When PPPoA mode is selected, the following screen will pop-up. PPPoA is also known as RFC 2364. It is a method of encapsulating PPP packets over ATM cells which are carried over the ADSL line. PPP or Point-to-Point protocol is a method of establishing a network connection/session between network hosts.
- Page 31 Channel: VPI: Virtual Path Identifier is a virtual path used for cell routing that is identified by an 8-bit field in the ATM cell header. The VPI field specifies this 8-bit identifier for routing. VCI: A Virtual Channel Identifier is a virtual channel that is identified by a unique numerical tag that is defined by a 16-bit field in the ATM cell header.
- Page 32 Server (DNS) addresses can also be specified (Click Services – DNS – DNS Server configuration page and fill in the DNS server IP address provided by your ISP). These servers would enable you to have access to other web servers. Valid IP addresses range is from 0.0.0.0 to 255.255.255.255.
- Page 33 Channel: VPI: Virtual Path Identifier is a virtual path used for cell routing that is identified by an 8-bit field in the ATM cell header. The VPI field specifies this 8-bit identifier for routing. VCI: A Virtual Channel Identifier is a virtual channel that is identified by a unique numerical tag that is defined by a 16-bit field in the ATM cell header.
-
Page 34: Atm Settings
Note: provider is using LLC. Check the radio button to “Enable” or “Disable” the NAPT setting. Leave as its default setting if your ADSL provider or ISP didn’t provide any setting information. NAPT: Network Address and Port Translation: An extension of NAT, NAPT maps many Note: private internal addresses into one IP address. -
Page 35: Adsl Settings
Apply Changes Set new PVC OoS mode for the selected PVC. New parameters will take effect after save into flash memory and reboot the system. See section “Admin” for save details. Undo Discard your settings. - Page 36 Tone Mask Choose tones to be masked. Mased tones will not carry any data. Apply Changes Click to save the setting to the configuration and the modem will be retrained.
-
Page 37: Service
This page provides DHCP instructions for implementing it on your network by selecting the role of DHCP protocol that this device wants to play. There are two different DHCP roles that this device can act as: DHCP Server and DHCP Relay. When acting as DHCP server, you can setup the server parameters at the DHCP Server page;... - Page 38 Some ISPs perform the DHCP server function for their customers’ home/small office network. In this case, you can configure this device to act as a DHCP relay agent. When a host on your network requests Internet access, the device contacts your ISP to obtain the IP configuration, and then forward that information to the...
-
Page 39: Dns
Each time your device connects to the Internet, your ISP assigns a different IP address to your device. In order for you or other users to access your device from the WAN-side, you need to manually track the IP that is currently used. - Page 40 Click Modify to modify this registration into the configuration. Remove Select an existing DDNS registration by clicking the radio button at the Select column of the Dynamic DNS Table. Click Remove button to remove the selected registration from the configuration.
-
Page 41: Firewall
Firewall Firewall contains several features that are used to deny or allow traffic from passing through the device. IP/Port Filtering The IP/Port filtering feature allows you to deny/allow specific services or applications in the forwarding path. Field Description Outgoing Default Action Specify the default action on the LAN to WAN forwarding path. -
Page 42: Mac Filtering
Delete selected filtering rules from the filter table. You can click the checkbox at the Select column to select the filtering rule. Delete All Delete all filtering rules from the filter table. MAC Filtering The MAC filtering feature allows you to define rules to allow or deny frames through the device based on source MAC address, destination MAC address, and traffic direction. -
Page 43: Port Forwarding
Delete selected filtering rules from the filter table. You can click the checkbox at the Select column to select the filtering rule. Delete All Delete all filtering rules from the filter table. Port Forwarding Firewall keeps unwanted traffic from the Internet away from your LAN computers. Add a Port Forwarding entry will create a tunnel through your firewall so that the computers on the Internet can communicate to one of the computers on your LAN on a single port. -
Page 44: Url Blocking
For example, www.google.com is the FQDN on the Web for the publisher of this database. The WWW is the host. On the Web, there are millions of hosts named WWW in order to maintain uniformity. GOOGLE.COM is the domain name, with .COM being the top level domain (TLD) name. -
Page 45: Dmz
Delete all keyword entry from the keyword filtering table. A DMZ (Demilitarized Zone) allows a single computer on your LAN to expose all of its ports to the Internet. Enter the IP address of that computer as a DMZ (Demilitarized Zone) host with unrestricted Internet access. -
Page 46: Igmp Proxy
It then forwards the Join to the upstream multicast router. The multicast IP traffic will then be forwarded to the requesting host. On a leave, the proxy removes the route and then forwards the leave to the upstream multicast router. -
Page 47: Upnp
With NAT Traversal, when an UPnP command is received to open ports in NAT, the application translates the request into system commands to open the ports in NAT and the firewall. The interface to open the ports on is given to UPnP when it starts up and is part of the configuration of the application. -
Page 48: Rip
LAN, at your ISP’s location, or on remote networks connected to your network via the ADSL line. Most small home or office networks do not need to use RIP; they have only one router, such as the ADSL Router, and one path to an ISP. In these cases, there is no need to share routes, because all Internet data from the network is sent to the same ISP gateway. - Page 49 Add a RIP entry and the new RIP entry will be display in the table Delete Selected Delete the selected RIP entry. You can click the checkbox at the Select column to select the RIP entry. Delete All Delete all RIP entry from the RIP Config table.
-
Page 50: Advance
Advance You can view Advance link in the left navigation bar. Following are the options available under Advance: ARP table Bridging Routing SNMP Port Mapping IP QoS Remote Access Others ARP table ARP table shows a list of learned MAC address. -
Page 51: Bridging
The Routing page enables you to define specific route for your Internet and network data. Most users do not need to define routes. On a typical small home or office LAN, the existing routes that set up the default gateways for your LAN hosts and for the DSL device provide the most appropriate path for all your Internet traffic. - Page 52 The network IP address of the subnet. The destination can be specified as the IP address of a subnet or a specific host in the subnet. It can also be specified as all zeros to indicate that this route should be used for all destinations for which no other route is defined (this is the route that creates the default gateway).
-
Page 53: Snmp
By default, all the interfaces (LAN and WAN) belong to the default group, and the other four groups are all empty. It is possible to assign any interface to any group but only one group. - Page 54 3. Click “Apply Changes” button to save the changes. Apply Changes Save configuration to system. New configuration will take effect after saving into flash memory and rebooting the system. See section “Admin” for details.
-
Page 55: Ip Qos
The DSL device provides a control mechanism that can provide different priority to different users or data flows. The QoS is enforced by the QoS rules in the QoS table. QoS rule contains two configuration blocks: Traffic Classification and Action. The Traffic Classification enables you to classify packets on the basis of various fields in the packet and perhaps the physical ingress port. -
Page 56: Remote Access
Click to add the rule entry to the configuration. Function buttons for the IP QoS Rules Table: Delete Selected Delete selected IP QoS rules from the table. You can click the checkbox at the Select column to select the IP QoS rule. Delete All Delete all IP QoS rules from the IP QoS Rules table. -
Page 57: Others
When IP Pass Through is enabled, only one PC is able to access the Internet, and the DHCP server will duplicate the WAN IP address from the ISP to the local client PC. Only the PC with the WAN IP address can access the Internet. - Page 58 Allow LAN Access Click to enable LAN Access. Function buttons in this page: Apply Changes Save configuration to system.
-
Page 59: Diagnostic
Ping Once you have your DSL device configured, it is a good idea to make sure you can ping the network. A ping command sends a message to the host you specify. If the host receives the message, it sends messages in reply. -
Page 60: Adsl
This page shows the ADSL diagnostic result. Click Start button to start the ADSL diagnostic. Diagnostic Test The Diagnostic Test page shows the test results for the connectivity of the physical layer and protocol layer for both LAN and WAN sides. - Page 61 Select the Internet The available WAN side interfaces are listed. You have to select one for the WAN Connection side diagnostic.
-
Page 62: Admin
Whenever you use the Web configuration to change system settings, the changes are initially placed in temporary storage. These changes will be lost if the device is reset or turn off. To save your change for future use, you can use the commit function. -
Page 63: System Log
This page shows the system log. Password The first time you log into the system, you use the default password. There are two-level logins: admin and user. The admin and user password configuration allows you to change the password for administrator and user. -
Page 64: Acl
The Access Control List (ACL) is a list of permissions attached to the DSL device. The list specifies who is allowed to access this device. If ACL is enabled, all hosts cannot access this device except for the hosts with IP address in the ACL table. - Page 65 Enable the SNTP client to update the system clock. update SNTP server The IP address or the host name of the SNTP server. You can select from the list or set it manually. Function buttons in this page: Apply Changes...
-
Page 66: Statistics
You can view statistics on the processing of IP packets on the networking interfaces. You will not typically need to view this data, but you may find it helpful when working with your ISP to diagnose network and Internet data transmission problems. -
Page 67: Appendix A
Using information from the log, the administrator can take action with the ISP of the hacker. In some types of intrusions, the firewall can fend off the hacker by discarding all further packets from the hacker’s IP address for a period of time. -
Page 68: Frequently Asked Questions
Ans.NAT translates multiple IP Address on the private LAN to one public IP Address (in WAN) that is sent out to the Internet. NAT adds a level security since the IP address of a PC connected to the private LAN is... - Page 69 Ans.DMZ allows one IP Address (computer) to be exposed to the Internet. Some applications require multiple TCP/IP ports to be open. It is recommended that you set your computer with a static IP if you want to use DMZ features.
-
Page 70: Troubleshooting Guide
3. Make sure the power switch on the TDM-C504 ADSL2/2+ Modem Router is turned on. I changed the LAN IP Address in the LAN configuration page and my PC is no longer able to detect the TDM-C504 ADSL2/2+ Modem Router. - Page 71 3. Refer to Admin – Upgrade Firmware section for the upgrading process. Testing LAN path to your TDM-C504 ADSL2/2+ Modem Router. To verify whether the LAN path from your PC to your TDM-C504 ADSL2/2+ Modem Router is Ans. properly connected, you can “Ping” the TDM-C504 ADSL2/2+ Modem Router with the following procedures: From the Windows toolbar, click “Start”...
-
Page 72: Upnp Setting On Windows Xp (Optional)
UPnP Setting on Windows XP (Optional) Adding UPnP: If you are running Microsoft Windows XP, it is recommended to add the UPnP component to your system. Proceed as follows: Click “Start” “Settings” then “Control Panel”. The “Control Panel” window appears. Click “Add or Remove Programs”. - Page 73 Click “Next” to start the installation and follow the instructions in the Windows Components Wizard. Note :System may ask for original Windows XP CD-ROM. Insert the CD-ROM and direct Windows to the proper location of the CD-ROM. Restart your Windows system to activate your setting might be necessary. Click “OK” to restart your Windows system.
-
Page 74: Glossary
CLP: Cell Loss Priority: ATM cells have two levels of priority, CLP0 and CLP1. CLP0 is of higher priority, and in times of high traffic congestion, CLP1 error cells may be discarded to preserve the Cell Loss Ratio of the CLP0 cells. - Page 75 Fragmentation: Breaking a packet up into smaller packets that is caused either by the transmission medium being unable to support the original size of the packet or the receiving computer not being able to receive a packet of that size. Fragmentation occurs when the sender’s MTU is larger than the receiver’s MRU.
- Page 76 During the PPP negotiation, the peer of the PPP connection will indicate its MRU and will accept any value up to that size. The actual MTU of the PPP connection will be set to the smaller of the two (MTU and the peer’s MRU).
- Page 77 Proxy: A device that closes a straight connection from an outside network (WAN) to an inside network (LAN). All transmissions must go through the proxy to get into or out of the LAN. This makes the internal addresses of the devices in the LAN private.
-
Page 78: Energy-Related Products Information
VBR-nrt: Variable Bit Rate – non real time: With VBR-nrt, cell transfer is variable upon certain criteria. VC: Virtual Circuit: A virtual circuit is a circuit in a network that appears to be a physically discrete path, but is actually a managed collection of circuit resources that allocates specific circuits as needed to satisfy traffic requirements. -
Page 79: Specification
A: 9V, 1A external power adapter Power EU : 9V, 0.5A external power adapter 5 watts Power Consumption 145 x 113 x 27 mm (5.7 x 4.4 x 1.1 in) Dimensions 280 g (9.9 oz) Weight Operating: 5° ~ 45° C (41° ~ 113° F), Temperature Storage: -20°... -
Page 80: Limited Warranty
If a product does not operate as warranted during the applicable warranty period, TRENDnet shall reserve the right, at its expense, to repair or replace the defective product or part and deliver an equivalent product or part to the customer. The repair/replacement unit’s warranty continues from the original date of purchase. All products that are replaced become the property of TRENDnet. - Page 81 FOR ITSELF AND ITS SUPPLIERS ANY LIABILITY, WHETHER BASED IN CONTRACT OR TORT (INCLUDING NEGLIGENCE), FOR INCIDENTAL, CONSEQUENTIAL, INDIRECT, SPECIAL, OR PUNITIVE DAMAGES OF ANY KIND, OR FOR LOSS OF REVENUE OR PROFITS, LOSS OF BUSINESS, LOSS OF INFORMATION OR DATE, OR OTHER FINANCIAL LOSS ARISING OUT OF OR IN CONNECTION WITH...
Need help?
Do you have a question about the TDM-C504 and is the answer not in the manual?
Questions and answers