Table of Contents
Advertisement
Quick Links
Advertisement
Table of Contents

Subscribe to Our Youtube Channel
Related Manuals for Point Mobile PM452


Summary of Contents for Point Mobile PM452
-
Page 2: Instruction
PM452 Android 13 User Manual Instruction This manual provides information about basic features and using the PM452. Please read this manual carefully before using your device and peripherals to ensure safe and proper use. Note: Screenshots in this manual may differ from actual screens. -
Page 3: Pm452 Skus
Numeric Android 13 GMS P452E3824DNE0C N6803FR RAM/Flash: 4G/64G P452E61B4DNE0C N5703 Function-Numeric P452E6IB4DNE0C EX30 P452E6164DNE0C N5703 LTE, P452E6I64DNE0C EX30 Alpha-Numeric Wi-Fi 6E, P452E6864DNE0C N6803FR Bluetooth P452E6124GNE0C N5703 P452E6I24DNE0C EX30 Numeric P452E6824DNE0C N6803FR © 2024 Point Mobile Co., Ltd. All rights reserved... -
Page 4: Table Of Contents
Manage the Files........................33 Lock the Screen ........................34 Settings ........................... 35 USING THE KEYPAD ....................37 Keypad ............................ 37 Use the Buttons ........................49 CAMERA ......................... 52 SCANNER ....................... 53 © 2024 Point Mobile Co., Ltd. All rights reserved... - Page 5 OS Update ..........................73 Factory Data Reset ......................... 76 ACCESSORIES ....................... 77 Hand Strap ..........................77 Gun Handle ..........................78 Charging cradle ........................81 SAFETY INFORMATION ..................83 Battery Safety Information ....................... 83 © 2024 Point Mobile Co., Ltd. All rights reserved...
-
Page 6: Getting Started
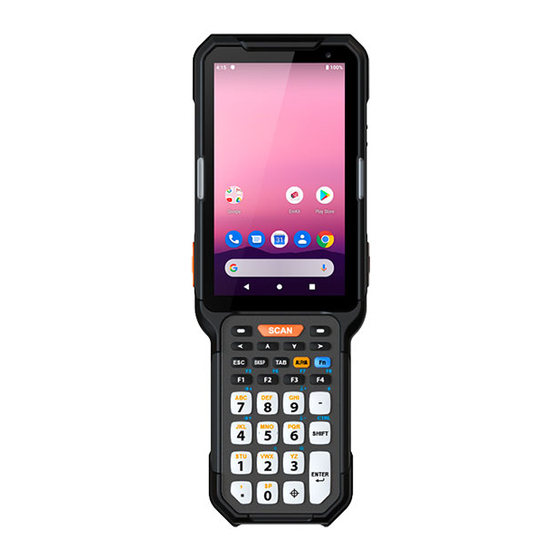
PM452 Android 13 User Manual Getting Started Device Parts Figure 1 PM452 front + left + bottom view Name Description Indicate the power status and notification. LED indicator (Front) Find more details in LED indicator Touch screen Displays all operating screen... - Page 7 PM452 Android 13 User Manual Getting Started Figure 2 PM452 rear + right + top view Name Description Scanner & Top camera Scan a barcode & Take a picture Power button Turn on/off the device Indicate the barcode reading result.
-
Page 8: Product Standard Accessories
The following items are in the product box. Accessory Name Battery pack Charger AC plug Stylus pen LCD protection film Hand strap Note: The images may differ from the actual accessory. © 2024 Point Mobile Co., Ltd. All rights reserved... -
Page 9: Install Sd & Sim Cards
Micro SIM card – WWAN (LTE) SKU only You can find the card slots when removing the battery. Depending on SKU, the equipped card slots are different. Refer to the following table. Wi-Fi SKU WWAN (LTE) SKU © 2024 Point Mobile Co., Ltd. All rights reserved... - Page 10 2. Insert a microSD card with the contacts facing down. Figure 4 Install a SD card 3. Close the card slot cover firmly. To remove the card, gently slide it out of slot. © 2024 Point Mobile Co., Ltd. All rights reserved...
- Page 11 2. Insert a micro SIM card with the contacts facing down. Figure 6 Install a SIM card 3. Close the card slot cover firmly. To remove the card, gently slide it out of slot. © 2024 Point Mobile Co., Ltd. All rights reserved...
-
Page 12: Install & Remove Battery
1. Insert the battery from the top (Opposite side of the gold contacts). 2. Push the battery’s bottom firmly. Confirm that the battery release buttons are completely outward. Figure 7 Installing the battery © 2024 Point Mobile Co., Ltd. All rights reserved... -
Page 13: Remove The Battery
1. Press and hold the both sides of battery release buttons simultaneously. Figure 8 Removing the battery - 1 2. While pressing the battery release button in, pull the battery’s bottom side up. Figure 9 Removing the battery - 2 © 2024 Point Mobile Co., Ltd. All rights reserved... -
Page 14: Battery Hot Swap
Battery hot swap is a feature that allows users to replace the battery without powering off. PM452 supports two types of hot swap mode, Enterprise Hot Swap, and Legacy hot swap. Basically, the device enters Enterprise Hot Swap mode. You can change the preferred hot swap mode in EmSettings. -
Page 15: Charge The Device
PM452 Android 13 User Manual Getting Started Charge the Device Before using PM452, charge the device enough to use. PM452 can be charged with power adapter or charging cradle. For best charging performance and safety, follow the normal charging temperature. -
Page 16: Smart Charging
PM452 Android 13 User Manual Getting Started Smart Charging PM452 supports three charging modes to provide optimal battery performance for your work. Life-X mode (Default) An optimized charging mode that improves the battery’s lifespan and stability. Normal mode A typical charging mode. - Page 17 Charge with power adapter 1. Assemble a proper country plug and charger, and rotate the plug clockwise to engage firmly. 2. Open the USB connector’s cover cap on the PM452. Figure 11 USB connector with cap 3. Connect the cable to the USB connector.
-
Page 18: Charging Cradle
Charging Cradle There are three types of charging cradle for PM452. Single slot (ethernet) cradle (SSC / SEC), 4 slot cradle (4SC), 4 slot battery cradle (4SBC). The cradles are sold separately and can be used in common with PM451. -
Page 19: Led Indicator
Blinking red (Refer to Charging temperature) / Battery is very low Cannot recognize the battery Alternately blinking red & green Red flash Barcode reading failed Center LED Blue flash Barcode reading success © 2024 Point Mobile Co., Ltd. All rights reserved... -
Page 20: Turn On / Off The Device
To turn off the device, Press and hold the power button when the display is on until the power menu is shown. Then, tap Power off. Figure 15 Power menu - Power off © 2024 Point Mobile Co., Ltd. All rights reserved... -
Page 21: Use A Touch Screen
One-finger press, wait, move, lift for pick up and move, or select multiple items action Pinch Open & Close Two-finger press, move outwards and inwards, lift for zoom in / out action Rotate When PM452 is turning sideways, screen orientation is changing © 2024 Point Mobile Co., Ltd. All rights reserved... -
Page 22: System Navigation
Tap to see the recently used app list. Tap to go to home screen. Home button Long-press to launch the Google Assistant. Back button Tap to go back to previous screen. © 2024 Point Mobile Co., Ltd. All rights reserved... - Page 23 Swipe up from the center-bottom of the screen. Back to previous screen Swipe from the left or right edge of the screen. Launch Google Assistant Swipe up from either the left-bottom or right-bottom. © 2024 Point Mobile Co., Ltd. All rights reserved...
-
Page 24: Learning The Basics
Learning the Basics Setup Wizard When PM452 starts very first time or boot after factory reset, Setup Wizard is launched. Following the steps on the screen, set system language, Google account, Wi-Fi connection and copy the data, etc. Some settings can be skipped, but there may be some restrictions on the use of the system. -
Page 25: Home Screen
Tap to run the application Long-press to see the application's options Favorites tray Place the frequently used apps App folder Apps are organized in the folder. Tap to open the App folder © 2024 Point Mobile Co., Ltd. All rights reserved... -
Page 26: Status Bar
Numeric input mode Lowercase alphabet input mode Uppercase alphabet input mode Uppercase alphabet input mode (Temporary) (Fixed) Functions input mode Functions input mode (Temporary) (Fixed) CTRL functions mode ALT functions mode © 2024 Point Mobile Co., Ltd. All rights reserved... -
Page 27: Notification Panel
Notification panel displays a list of all notifications. Tap a notification to respond. To open the Notification panel, drag the Status bar down. To close the panel, swipe it up. Figure 21 Notification panel © 2024 Point Mobile Co., Ltd. All rights reserved... -
Page 28: Quick Setting Panel
Figure 22 Quick setting panel To edit the configuration of Quick setting panel, 1. Tap on the bottom of the panel. 2. By long-press and dragging the icon, customize the configuration of the panel. © 2024 Point Mobile Co., Ltd. All rights reserved... - Page 29 To create the app folder, long-press an app icon and drag it to another app icon. Figure 23 Create app folder To change the folder name, tap the Edit Name and input a new name. Figure 24 Change app folder name © 2024 Point Mobile Co., Ltd. All rights reserved...
- Page 30 1. Long-press an app icon from the App drawer. Then, drag it slightly until the Home screen is shown. 2. Place the app icon in the Favorites tray. Figure 26 Add an app to Favorites tray © 2024 Point Mobile Co., Ltd. All rights reserved...
- Page 31 To remove an app or widget in the Home screen, 1. Long-press an app icon or widget. 2. Drag it to Remove area and release. Figure 28 Remove from Home screen © 2024 Point Mobile Co., Ltd. All rights reserved...
- Page 32 2. In three menus, select Widgets. Figure 29 Widget menus 3. Among the list, tap and hold a widget you want to add. 4. Place the widget to the Home screen by dragging. © 2024 Point Mobile Co., Ltd. All rights reserved...
-
Page 33: Mtp Connection With Pc
3. Change the option to File Transfer from No data transfer. Figure 31 USB Preferences 4. Now PC can recognize the connected device. Find PM452 device from file explorer of the PC. © 2024 Point Mobile Co., Ltd. All rights reserved... -
Page 34: Manage The Files
Launch Files to manage the files in the storage. You can find the folders and files, move / copy them to other location, and delete them from the storage. Figure 32 Files © 2024 Point Mobile Co., Ltd. All rights reserved... -
Page 35: Lock The Screen
Swipe: Swipe the lock screen to unlock (Default) Pattern: Draw a pattern to unlock PIN: Input a PIN to unlock (At least 4 digits) Password: Input a password to unlock (At least 4 characters) © 2024 Point Mobile Co., Ltd. All rights reserved... -
Page 36: Settings
> Sound and control the Media, Call, Alarm, Ring volume bars. Figure 36 Volume bars Caution: Using high volume levels for long periods may cause ear strain and increase battery consumption. © 2024 Point Mobile Co., Ltd. All rights reserved... - Page 37 Figure 37 Set display and text size Use Keyboard Backlight The buttons in the keypad may not be visible in the dark. For this inconvenience, PM452 have keyboard backlight so that you can find the proper keys easily. To use the keyboard backlight, 1.
-
Page 38: Using The Keypad
Scan (Orange) SCANNER_F Scan the barcode Left / Up / Down / Right DPAD_LEFT / UP / DOWN / RIGHT Moves left / up / down / right ESCAPE Escape function © 2024 Point Mobile Co., Ltd. All rights reserved... - Page 39 Function 1 ~ 4 (5 ~ 8) Executes the function mapped to F1 ~ F4 F1 ~ F8 In Function input mode Execute the function mapped to F5 to F8 © 2024 Point Mobile Co., Ltd. All rights reserved...
- Page 40 Press three times Back to default input mode In Function input mode Press once Activates CTRL function mode temporarily icon appears on status bar. Press twice Back to Function input mode © 2024 Point Mobile Co., Ltd. All rights reserved...
- Page 41 Provides a 3x3 grid on the screen with nine additional symbols. Choose a symbol you want. Symbol You can change the configuration of the grid with Program Buttons. Refer to Symbol grid. Press three times Hides the grid © 2024 Point Mobile Co., Ltd. All rights reserved...
-
Page 42: Alphanumeric Keypad
Scan (Orange) SCANNER_F Scan the barcode Left / Up / Down / Right DPAD_LEFT / UP / DOWN / RIGHT Moves left / up / down / right ESCAPE Escape function © 2024 Point Mobile Co., Ltd. All rights reserved... - Page 43 0 ~ 9 / F1 ~ F24 In Function input mode Executes the function mapped to F1 to F10 In Shift combination mode Executes the function mapped to F11 to F20 © 2024 Point Mobile Co., Ltd. All rights reserved...
- Page 44 Press twice Maintains the functions input mode icon appears on status bar Press three times Back to default input mode Enter ENTER Enter function © 2024 Point Mobile Co., Ltd. All rights reserved...
- Page 45 Hides the grid Note: The 5250 terminal emulation keypad configuration is only used when the 5250 emulation software runs on PM452. ex) ERP INP, CLR EOF, SYS RQ keys in CTRL function mode © 2024 Point Mobile Co., Ltd. All rights reserved...
- Page 46 Scan (Orange) SCANNER_F Scan the barcode Left / Up / Down / Right DPAD_LEFT / UP / DOWN / RIGHT Moves left / up / down / right ESCAPE Escape function © 2024 Point Mobile Co., Ltd. All rights reserved...
- Page 47 In Default input mode Controls the keyboard backlight’s brightness Keyboard backlight brightness keys Refer to Functions section for more detail. In Alphabet input mode Inputs alphabet M or N © 2024 Point Mobile Co., Ltd. All rights reserved...
- Page 48 Fn (Blue) icon appears on status bar Press twice Maintains the functions input mode icon appears on status bar Press three times Back to default input mode © 2024 Point Mobile Co., Ltd. All rights reserved...
- Page 49 Provides a 3x3 grid on the screen with nine additional symbols. Choose a symbol you want. Symbol You can change the configuration of the grid with Program Buttons. Refer to Symbol grid. Press three times Hides the grid © 2024 Point Mobile Co., Ltd. All rights reserved...
-
Page 50: Use The Buttons
ALT function mode Fn + CTRL Home screen CTRL + A Screenshot To take a screenshot, simultaneously press the Power button + P1 key (on the left side of the front scan button). © 2024 Point Mobile Co., Ltd. All rights reserved... -
Page 51: Program Buttons
PM452 Android 13 User Manual Using the Keyapd Program Buttons Most buttons on the PM452 except power button can be optimized as you want. To map the button to other functions from default, 1. Navigate to EmKit > Program Buttons. - Page 52 3. Input the Unicode of the desired symbol in the dialog. 4. Tap OK. 5. After setting up the symbol grid, tap Apply on the bottom to save the changes. Note: To find the Unicode, see this page of Wikipedia. © 2024 Point Mobile Co., Ltd. All rights reserved...
-
Page 53: Camera
You can change the focusing area by touching the other area Picture / Video Swipe or tap to change the mode (Picture / Video) Gallery Tap to see the recently taken pictures Shutter button Take a picture or recode a video © 2024 Point Mobile Co., Ltd. All rights reserved... -
Page 54: Scanner
Settings and tap ScanSettings. 2. Tap toggle button to turn on/off the barcode scanner. 3. Check if the scanner icon is placed on Status bar. Figure 45 Turn on scanner © 2024 Point Mobile Co., Ltd. All rights reserved... -
Page 55: Scansettings
Enable or disable the TouchScan, which is a software scanner button. Place a scan icon in any position and tap the icon to read a barcode. Figure 46 ScanSettings - TouchScan Figure 47 ScanSettings - Basic © 2024 Point Mobile Co., Ltd. All rights reserved... - Page 56 Intent Broadcast Custom Intent Set Terminator as, None Space Tap & LF Options Enable / Disable the center window, Aimer, Illumination. And set scanner decoding settings. Figure 48 ScanSettings - Options © 2024 Point Mobile Co., Ltd. All rights reserved...
- Page 57 PM452 Android 13 User Manual Scanner Notification Control the beep sound, LED and vibration option when scanning the barcode. Figure 49 ScanSettings - Notification © 2024 Point Mobile Co., Ltd. All rights reserved...
- Page 58 Wedge Set below items in Wedge settings Barcode ID AIM ID Group separator Prefix Suffix Character set Extended Wedge Figure 50 ScanSettings - Wedge © 2024 Point Mobile Co., Ltd. All rights reserved...
- Page 59 Configuration extended wedge. Figure 51 ScanSettings - Extended wedge For example, make a rule that add a string “Point Mobile” at the start of decoded data whenever decoding CODE128. 1. Tap Style (1) and select Condition (2).
- Page 60 PM452 Android 13 User Manual Scanner 2. Tap Symbologies and select CODE128 among the symbologies. Figure 53 Extended wedge example_2 3. Tap Style (1) and select Actions (2). Figure 54 Extended wedge example_3 © 2024 Point Mobile Co., Ltd. All rights reserved...
- Page 61 4. Tap ADD and select Move to start to point the start of the decoded data. Figure 55 Extended wedge example_4 5. Add another action of which action type is Send string. Set value as “Point Mobile”. Figure 56 Extended wedge example_5...
- Page 62 PM452 Android 13 User Manual Scanner 6. “Point Mobile” string will be added to decoded COD 128 data. Before After © 2024 Point Mobile Co., Ltd. All rights reserved...
- Page 63 Enable or disable the specific symbology or set detail options. By tapping each symbology name to access detail options. Figure 57 ScanSettings - Symbologies About Find the scanner information or restore the scanner settings to default. Figure 58 ScanSettings - About © 2024 Point Mobile Co., Ltd. All rights reserved...
-
Page 64: Scan A Barcode
You can tilt the aimer slightly for a comfortable angle to scan. Figure 59 Aiming barcode (N5703) N6803FR / EX30 Scanner SKU Center the red dot aimer over the barcode. Figure 60 Aiming barcode (N6803FR / EX30) © 2024 Point Mobile Co., Ltd. All rights reserved... -
Page 65: Scandemo
1. Execute EmKit > ScanDemo. 2. Scan a barcode by pressing the scan button on the device or tapping Start scan button on the screen. 3. Find scan result Figure 61 ScanDemo © 2024 Point Mobile Co., Ltd. All rights reserved... -
Page 66: Wireless
PM452 Android 13 User Manual Wireless Mobile Network Note: Mobile network is supported on PM452 WWAN (LTE) SKU only. To connect mobile network, SIM card is required. Insert SIM card first referring Install SD & SIM cards. After inserting the SIM card, reboot the device. When network is connected, a network icon will be appeared on the status bar. -
Page 67: Wi-Fi
If there is a saved Wi-Fi network, simply turn on the Wi-Fi through the Quick setting panel. The saved network will be connected automatically. Figure 67 Wi-Fi in Quick setting panel © 2024 Point Mobile Co., Ltd. All rights reserved... -
Page 68: Bluetooth
3. Select the device you want to pair among Available devices list. Figure 69 Bluetooth available devices 4. Follow instructions on the screen (Pairing code or pairing confirmation dialog) and tap PAIR. © 2024 Point Mobile Co., Ltd. All rights reserved... - Page 69 To unpair the device, select the name of the device you want to unpair from the Other devices list and tap FORGET Or tap DISCONNECT to disconnect only and not unpair. Figure 72 Forget device © 2024 Point Mobile Co., Ltd. All rights reserved...
- Page 70 If the device you want is not listed under the Saved devices, tap See all. Figure 73 Bluetooth device detail To change the device’s name, tap on the top of the screen Turn other settings on or off (Available on some devices) © 2024 Point Mobile Co., Ltd. All rights reserved...
-
Page 71: Nfc
PM452 Android 13 User Manual Wireless PM452’s NFC antenna is located on the rear-top side of the device. Bring the NFC tag close to the antenna location as Figure 74. NFC feature is enabled by default. But if NFC does not work, make sure the NFC is enabled from the Settings >... -
Page 72: System Maintenance
(Android version, OS image version, SDK version, etc.) Manufacturer information (Serial number, Part number, etc.) Device information (Scanner, Audio, Display, etc.) Battery information (Battery charging status, etc.) App version information (Version of EmKit apps) © 2024 Point Mobile Co., Ltd. All rights reserved... -
Page 73: Check Device Health
Device life time estimation type A Battery Level Device life time estimation type B Battery First Use Date Battery Voltage Battery Temperature System Temperature Battery Manufacture Date Smart Charging Mode (Refer to Smart Charging) © 2024 Point Mobile Co., Ltd. All rights reserved... -
Page 74: Os Update
System Maintenance OS Update Periodic update improves the performance of the device. Point Mobile provides up-to-date OS version via Service Portal and FOTA. Update the device via storage, OTG port, and FOTA server. Depending on the workspace environment, choose more suitable method. - Page 75 5. Check if the OS image file shows up under AVAILABLE VERSIONS. 6. Tap UPDATE to start the update process. OS update via FOTA If PM452 can connect to a network, use the FOTA server for the update. 1. Connect the device with a network. 2. Go to Settings >...
- Page 76 Note: Basically, OS update via FOTA works over Wi-Fi or Ethernet only. To enable the OS update over Mobile Network too, uncheck the setting value in FOTA Settings. Downloading over the Mobile network may result in additional charges. Figure 78 FOTA Settings © 2024 Point Mobile Co., Ltd. All rights reserved...
-
Page 77: Factory Data Reset
System Maintenance Factory Data Reset When PM452 work abnormal or there is a need to reset the device, follow the steps below to perform a factory data reset. Caution: Factory data reset will erase all personalized settings and data saved in the device, such as Google account, apps, user data, etc. -
Page 78: Accessories
Charges up to four pieces of PM452’s batteries 4SBC (4 Slot Battery Cradle) Hand Strap The hand strap is enclosed in the PM452 standard package. Attach the strap and you can grab the device more firmly. Attach hand strap 1. Attach the hook of the hand strap to the pole on the rear side of the PM452 firmly. -
Page 79: Gun Handle
SCANNER_B to the desired function. Attach gun handle 1. Using a screwdriver, remove the four latch screws on the rear side of the PM452. 2. Open the gun handle connector cap. Figure 80 Attaching gun handle - 1 3. - Page 80 1. Thread the thin strap through the hole on the bottom side of gun handle. 2. Pass the other parts through the loop of the strap, and pull it tight. Figure 83 Attaching gun handle hand strap - 1 © 2024 Point Mobile Co., Ltd. All rights reserved...
- Page 81 PM452 Android 13 User Manual Accessories 3. Thread wide strap through the hand strap bottom hole on the PM452. 4. Pull the strap and set the buckle at the desired length. Figure 84 Attaching gun handle hand strap - 2...
-
Page 82: Charging Cradle
Single Slot Cradle / Single Slot Ethernet Cradle (SSC/SEC) Figure 85 PM452 SSC, SEC SSC can charge the followings. PM452 only PM452 + Gun handle mounted PM452 battery For more detail, find SSC Quick start guide. © 2024 Point Mobile Co., Ltd. All rights reserved... - Page 83 Accessories 4SC (4 Slot Cradle) 4SC has 4 device slots so it can charge up to two units of PM452 simultaneously. PM452 with a gun handle mounted also can be charged with 4SC. For more detail, find 4SC Quick start guide.
-
Page 84: Safety Information
Battery Safety Guidelines Use only Point Mobile approved batteries and charging accessories. Other batteries and chargers may damage the device or result in a fire, leakage, or other hazards. - Page 85 Do not dispose of the battery in fire. It may cause explosion. Notice: The battery is consumable. Point Mobile provides a warranty for the battery for 12 months after purchase. If you suspect the battery swelling, change the battery immediately and contact Point Mobile.
Need help?
Do you have a question about the PM452 and is the answer not in the manual?
Questions and answers