
Related Manuals for Point Mobile PM500


Summary of Contents for Point Mobile PM500
- Page 1 For Android Mobile POS Terminal PM500 User Manual Copyright © 2006 – 2020 Google, Android, Google Play and other marks are trademarks of Google LLC. Point Mobile Co., Ltd. All rights reserved...
-
Page 2: Instruction
PM500 Android 7.1 User Manual Instruction This manual provides information about basic features and using the PM500. Please read this manual carefully before using your handy payment device and peripherals to ensure safe and proper use. Note: Screenshots in this manual may differ from actual screens. -
Page 3: Related Document
PM500 Android 7.1 User Manual Instruction Related Document PM500 MasterApplication Guide – describes how to use the features of MasterApp. PM500 SKUs The contents of this manual can cover the following SKUs. SKU configuration can be changed depending on location. -
Page 4: Table Of Contents
Install and remove microSD card ....................13 Charge the device ......................14 Battery Specification ......................... 15 LED Indicator ..........................15 Turn on & off PM500 ......................16 Thermal Printer ........................17 Paper Roll Recommendation ....................17 Paper Roll Installation ......................17 Reassemble Printer Roller .................... - Page 5 PM500 Android 7.1 User Manual Download Application ......................23 Run Application ........................24 Magnetic Stripe Card ......................25 IC Card ..........................25 Contactless Payment ......................26 LEARNING THE BASICS ..................27 Home Screen ......................... 27 Status Bar ........................... 28 Icons ............................28 Notification Panel ........................
- Page 6 PM500 Android 7.1 User Manual Wedge ..........................44 Extended Wedge ........................44 Symbologies ........................47 About ..........................47 Scan a barcode ........................48 ScanDemo .......................... 49 WIRELESS ......................50 Cellular Network ........................50 WLAN ............................ 51 NFC ............................51 Bluetooth ..........................52 UHF RFID ..........................
-
Page 7: Getting Started
PM500 Android 7.1 User Manual Getting Started Device Parts Figure 1 PM500 front view Name Description Indicate the power status and notification Front LED indicators Find more details in LED Indicator Front camera Take a picture Display Display all operating screen... - Page 8 PM500 Android 7.1 User Manual Getting Started Figure 2 PM500 back+right view Figure 3 PM500 back view Name Description Communicate with NFC cards/devices NFC Antenna Make contactless payment Thermal printer Print a bill by thermal printer and paper roll Power button...
-
Page 9: Product Standard Accessories
PM500 Android 7.1 User Manual Getting Started Product Standard Accessories The following items are in the product box. Accessory Name Standard battery pack (2,900mAh) AC/DC power supply Country plug (UK / US / EU / KR plug) USB type C cable LCD protection film Note: The images may differ from the actual accessory. -
Page 10: Setup
PM500 Android 7.1 User Manual Getting Started Setup Install & Remove Battery Install the battery 1. Insert the top of the battery first, and then push down the bottom Figure 4 Installing battery 2. Attach the bottom of the battery cover first, and then push down the top 3. -
Page 11: Remove The Battery
PM500 Android 7.1 User Manual Getting Started Remove the battery 1. Release the battery lock to unlock side to open the battery cover Figure 6 Unlock battery lock 2. Pull up the top of the battery cover using side holes Figure 7 Open battery cover ©... -
Page 12: Sim, Sam, And Microsd Cards
Figure 8 Removing battery SIM, SAM, and microSD cards PM500 has 1 Micro SIM card slot, 4 PSAM card slots, and 1 microSD card slot. Find the correct slot for your card in Figure 9. Figure 9 SIM & SD card slot Caution: Use micro SIM card, micro SAM card, and microSD card only. -
Page 13: Install And Remove Sim And Sam Cards
PM500 Android 7.1 User Manual Getting Started Install and remove SIM and SAM cards Following steps describe how to install the SIM and SAM cards. 1. Open the battery cover and remove the battery 2. Slide the card holder up and swing upwards to open the holder (Refer to Figure 10) Figure 10 Open SIM, PSAM slot 3. -
Page 14: Install And Remove Microsd Card
PM500 Android 7.1 User Manual Getting Started Install and remove microSD card 1. Open the battery cover and remove the battery 2. Slide the card holder down and swing upwards to open the holder (Refer to Figure 12) Figure 12 Open SD card slot 3. -
Page 15: Charge The Device
2. Assemble the proper country plug and the AC/DC power supply 3. Plug USB type C cable to the AC/DC power supply 4. Connect the cable to PM500 and provide power by plugging the power supply to the wall socket Figure 15 Charging PM500 Caution: Always use an original charger and cable from Point Mobile. -
Page 16: Battery Specification
PM500 Android 7.1 User Manual Getting Started Battery Specification 2,900mAh / 7.4V Capacity Charging time About 4 hours LED Indicator Figure 16 LED indicator No Indicator Status Indication Solid green Device is completely charged Device is charging / Solid red... -
Page 17: Turn On & Off Pm500
Turn on & off PM500 To turn on the device, 1. Press and hold the Power button on the right side of the PM500 for a few seconds Figure 17 Power button 2. When SMART BEYOND RUGGED logo displays on the screen, release the button and wait... -
Page 18: Thermal Printer
PM500 Android 7.1 User Manual Getting Started Thermal Printer Paper Roll Recommendation Purchase thermal paper roll, which is proper to PM500. Refer to the below specification of matching paper roll. Specification Precisions Type Thermal paper Width 58mm Diameter 40mm Paper Roll Installation 1. - Page 19 PM500 Android 7.1 User Manual Getting Started 3. Referring to Figure 19, put the paper roll into the printer in the correct orientation. The end of the paper roll should be a little unrolled Figure 19 Insert paper roll 4. Close the printer cover firmly Figure 20 Close printer cover ©...
-
Page 20: Reassemble Printer Roller
PM500 Android 7.1 User Manual Getting Started Reassemble Printer Roller When the printer roller is separated accidentally, it can be simply reassembled. Figure 21 Printer roller In order to reassemble the printer roller, follow the steps. 1. Open the printer cover 2. -
Page 21: Use A Touch Screen
PM500 Android 7.1 User Manual Getting Started Use a touch screen Action Description One-finger press and release Double tap Tap twice quickly for “Zoom in" Long press Press and hold for "Select an item" Swipe Press and move, and then release for "Scroll" or "Tilt"... - Page 22 Vertical or horizontal swipe in a single direction Pinch Open & Close Two-finger press, move outwards and inwards, lift for "Zoom in and out." Rotate When PM500 is turning sideways, screen orientation is changing © 2020 POINTMOBILE Co., Ltd. All rights reserved...
-
Page 23: Payment
Recover the device from tamper scenario This manual describes the feature of the application only. If you want to find how to use the other features, please refer to PM500 MasterApplication Guide document. © 2020 POINTMOBILE Co., Ltd. All rights reserved... -
Page 24: Download Application
PM500 Android 7.1 User Manual Payment Download Application To download the application from local, 1. Connect device and PC through USB cable 2. Go to Local Loading > Load Apk from the main menu, then, MasterApp will enter application loading mode Figure 25 MasterApp - Local Loading 3. -
Page 25: Run Application
PM500 Android 7.1 User Manual Payment To download the application remotely, 1. Connect the device to the network through WLAN or Mobile data 2. Go to Remote Load Apk from the main menu 3. Set the server’s IP & port, and tap Load. Then MasterApp will enter application remote loading mode 4. -
Page 26: Magnetic Stripe Card
PM500 Android 7.1 User Manual Payment Magnetic Stripe Card To read a magnetic stripe card, swipe the card through the MSR (Magnetic Stripe Reader) at a proper and steady speed. The magnetic stripe must be facing down as Figure 28, and you can read the card bi-direction. -
Page 27: Contactless Payment
Contactless Payment Make contactless payment with NFC (Near Field Communication) feature. Bring the card close to the NFC symbol on the top of the PM500, and keep the position during the transaction. Refer to Figure 30. Figure 30 Contactless payment... -
Page 28: Learning The Basics
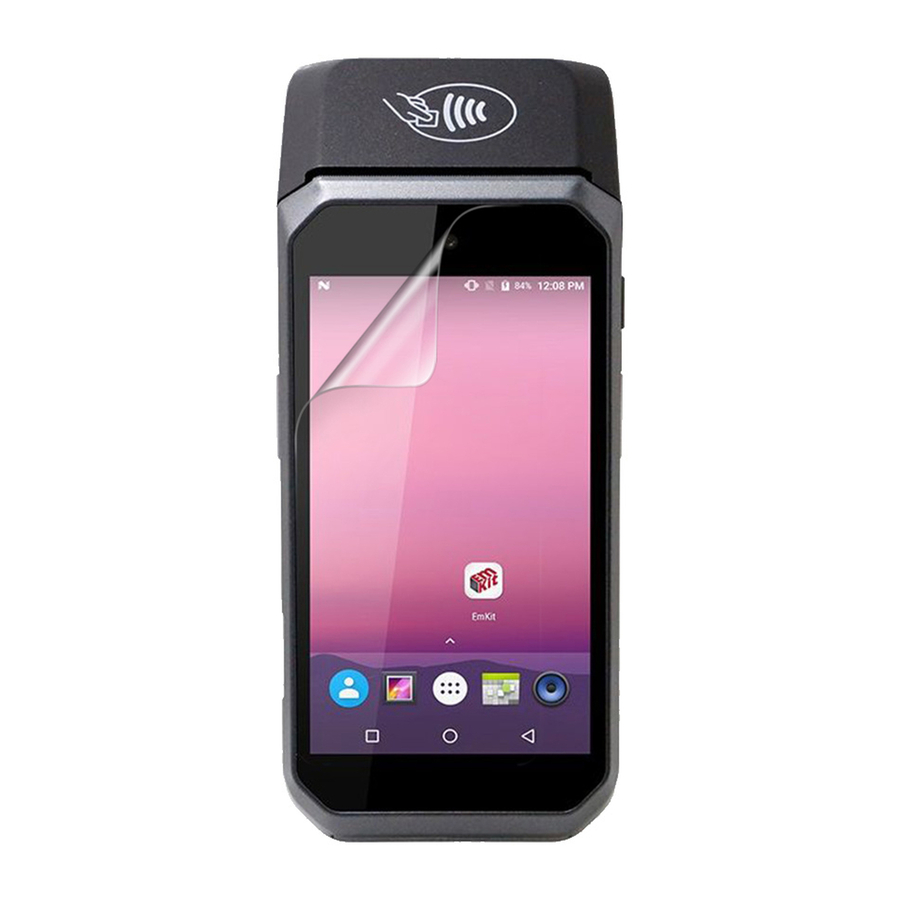
PM500 Android 7.1 User Manual Learning the basics Home Screen Home screen is a screen displayed when you boot your PM500 or unlock the screen. Figure 31 Home screen Item Description Status bar Indicate device status and notification. Tap to run the application... -
Page 29: Status Bar
PM500 Android 7.1 User Manual Learning the basics Status Bar Icons You can see the time, status icons, and notification icons on the Status bar. Status icons Icon Description Icon Description 3G connected LTE connected No SIM card installed... -
Page 30: Notification Panel
PM500 Android 7.1 User Manual Learning the basics Notification Icons Icon Description Icon Description OTG device connected Connected to VPN network Upcoming event Other input methods available Preparing SD card SD card removed, unexpectedly File uploaded File downloaded File copied... -
Page 31: Quick Setting Panel
PM500 Android 7.1 User Manual Learning the basics Quick Setting Panel In Quick setting panel, easily control some frequently used settings such as WLAN, Bluetooth. To use the Quick setting panel, 1. Open the Notification panel 2. Drag down the Notification panel Figure 33 Quick setting panel 3. -
Page 32: Apps & Widget
PM500 Android 7.1 User Manual Learning the basics Apps & Widget App Folder To create the app folder, long-press an app icon and drag it to another app icon. Figure 34 Create app folder If you want to set the folder name, tap the Unnamed Folder and input a new name. -
Page 33: App Drawer
PM500 Android 7.1 User Manual Learning the basics App Drawer All installed apps are listed alphabetically in App drawer. To open the App drawer, swipe up the Home screen or tap icon To close the App drawer, swipe down the screen... -
Page 34: Organize App In Home Screen
PM500 Android 7.1 User Manual Learning the basics Organize App in Home screen To organize an app in the home screen, 1. Long-press an app icon from the App drawer. Then, drag it slightly until the Home screen is shown 2. - Page 35 PM500 Android 7.1 User Manual Learning the basics 3. Tap Widgets 4. Among the list, tap and hold the widget you want to add Figure 39 Widget list 5. Place the widget to the Home screen by dragging Note: To remove an app or a widget from the Home screen, long-press and drag it to Remove area.
-
Page 36: Recently Used Apps
PM500 Android 7.1 User Manual Learning the basics Recently Used Apps Tap Recent apps button on the bottom of the screen to see recently used apps. You can open an app from the list, or completely close the app by swiping it left/right. Tap CLEAR ALL to close all the apps. -
Page 37: Mtp Connection With Pc
PM500 Android 7.1 User Manual Learning the basics MTP Connection with PC To transfer the files with your PC, connect the device to PC via USB cable first. 1. Drag down the Status bar and tap Android System notification to change USB preference... -
Page 38: Manage Files And Folders
PM500 Android 7.1 User Manual Learning the basics 3. Now your PC recognizes the connected device. In file explorer, you can find PM500 device Figure 44 File explorer on PC Manage Files and Folders To manage or share the files on the device, open FileExplorer in App drawer. - Page 39 PM500 Android 7.1 User Manual Learning the basics When you select a file or folder, the screen changes like below. Figure 46 FileExplorer screen when file selected Description Share the file via Bluetooth. Sharing is possible only with files Delete the files or folders...
-
Page 40: Settings
PM500 Android 7.1 User Manual Learning the basics Settings There are two ways to go to Settings: Open the App drawer and tap Settings Open the Quick setting panel and tap gear icon Adjust Display Brightness To adjust the display brightness level, ... -
Page 41: Camera
PM500 Android 7.1 User Manual Camera PM500 supports th e front camera basically. Especially in SKU1~4 there is a rear camera, too. To use the camera, open App drawer, and tap Camera . Figure 49 is the main screen of the Camera application, and Figure 50 is a screen that is displayed when you swipe the screen to the right. -
Page 42: Scanner
PM500 Android 7.1 User Manual Scanner PM500 SKU5~9 has a scan engine on the back of the device instead of the rear camera. The scanner is disabled by default. Therefore, turn on the scanner to use. Turn on the Scanner If you want to enable the scanner, follow the steps. -
Page 43: Basic
PM500 Android 7.1 User Manual Scanner Basic In Basic, you can set the Scanning option and Wedge mode option. 1. Scanning - You can change the scanner's trigger timeout and set Auto scan & continuous scan. - You can use TouchScan, which is a software scanner button. Place a scan icon in any position and tap the icon to read a barcode. -
Page 44: Options
PM500 Android 7.1 User Manual Scanner Options In Options, you can enable/disable the center window & Aimer & Illumination and set Decode mode & Power save mode. Figure 53 ScanSetting - Options Notification In Notification, you can change or control the beep sound, and manage LED option Figure 54 ScanSetting - Notification ©... -
Page 45: Wedge
Figure 55 ScanSetting - Wedge Extended Wedge PM500 supports Extended wedge that allows you to edit the decoded data. Tap Enable extended wedge toggle button, and then set a rule in Configuration extended wedge. Figure 56 ScanSetting - Extended wedge... - Page 46 PM500 Android 7.1 User Manual Scanner For example, if you want to add "Point Mobile" at the start of decoded data whenever decoding CODE128, 1. Tap Style(1) and select Condition(2) Figure 57 Extended wedge example_1 2. Tap Symbologies and select CODE128 between the symbologies Figure 58 Extended wedge example_2 ©...
- Page 47 4. Tap ADD and select Move to start to point the start of the decoded data. And then, add another action of which action type is Send string and set value as "Point Mobile". Now you can get decoded data with "Point Mobile" text Figure 60 Extended wedge example_4 ©...
-
Page 48: Symbologies
PM500 Android 7.1 User Manual Scanner Symbologies In Symbologies, you can enable/disable specific barcode type or set a detail option. By tapping each symbology name, you can set a detail option. Figure 61 ScanSetting - Symbologies Figure 62 ScanSetting - Select a symbology About In About, you can find your Scanner's information and restore Scanner's settings to default. -
Page 49: Scan A Barcode
PM500 Android 7.1 User Manual Scanner Scan a barcode Idle barcode scan - Please aim the middle of the barcode. - Even you aim the barcode slightly upper or down area, or angle is slightly tilted, you can read the barcode. -
Page 50: Scandemo
PM500 Android 7.1 User Manual Scanner ScanDemo After turning on the scanner, you can test the scan feature with ScanDemo. 1. Execute EmKit > ScanDemo 2. Scan a barcode by pressing the scan button 3. Find scan result Figure 64 Scan Demo... -
Page 51: Wireless
> (Wireless & networks) Data usage Figure 67 Cellular network setting Figure 68 Cellular network setting_2 Note: PM500 can connect to cellular network, but cannot use the phone feature because PM500 doesn’t have a microphone and receiver. © 2020 POINTMOBILE Co., Ltd. All rights reserved... -
Page 52: Wlan
5. The message Connected under the SSID means the device complete connecting to the WLAN Figure 69 WLAN connected Caution: PM500 cannot connect to Open WLAN network because of security. Make sure that the selected WLAN is not open WLAN network. You can tell those apart by lock icon ). -
Page 53: Bluetooth
3. Select the desired device in Available devices 4. Check the pairing code in the dialog, tap PAIR Figure 70 Pair new device Caution: PM500 cannot connect with Just-works Bluetooth devices due to security. © 2020 POINTMOBILE Co., Ltd. All rights reserved... -
Page 54: Uhf Rfid
PM500 Android 7.1 User Manual Wireless UHF RFID PM500 SKU10~13 supports UHF RFID reading instead of the rear camera and scan engine. Difference between UHF RFID SKU and the others can find in Figure 71. Read RFID tag referring to Figure 72. - Page 55 PM500 Android 7.1 User Manual Wireless Set up the RFID feature details with RFIDSettings and test the feature with RFID Demo They are installed in EmKit . In RFIDSettings, below options can be set up. Radio Power Tx Cycle ...
-
Page 56: System Maintenance
PM500 Android 7.1 User Manual System Maintenance System Information There are two locations for checking system information. First, you can find the following information in Settings > About phone, Status Battery & SIM status IMEI information IP & WLAN MAC address Bluetooth address Serial number &... -
Page 57: Os Update
PM500 Android 7.1 User Manual System Maintenance OS Update To improve the performance of your device, Point Mobile provides up-to-date OS (Operating System) version. You can update your device via FOTA server. Note: Please backup your data before starting the update process. - Page 58 PM500 Android 7.1 User Manual System Maintenance 4. Tap OK on the OS Update dialog to start to download the OS image file Figure 75 OS update dialog 5. When completing the download, you may restart the device. Tap OK on the Restart required...
-
Page 59: Factory Data Reset
PM500 Android 7.1 User Manual System Maintenance Factory Data Reset When you have a problem with your device or want to reset your device, follow the steps below to do a factory data reset. Caution: Factory data reset will erase all security keys, personalized settings, and data saved in your device. -
Page 60: Cradle (Optional Accessory)
PM500 Android 7.1 User Manual Cradle (Optional Accessory) Single slot PSTN Cradle (SPC) Attach Rubber Support The standard package of SPC contains 2 types of rubber support. Depending on your PM500 SKU, select a proper rubber support. Rubber Support Type Figure... -
Page 61: Ports
Find the location of each port in Figure 81. Figure 81 SPC ports Port Description Plug PM500 by contacting this point to PM500’s dock connector Dock connector Power DJ-Jack. Provide power to cradle and charges PM500 with cradle Ethernet RJ45 socket. -
Page 62: Provide Power To Cradle
Provide Power to Cradle To use PM500 with cradle, provide power to the cradle by DC-jack like Figure 82. Plug PM500 to the cradle and verify the connection by Power LED indicator of PM500. Power LED will light on red or green. -
Page 63: Security
Security Tamper Protection PM500 meets PCI PTS security requirements. You should inspect the tamper evidence listed below periodically for keeping the security of your device. Serial number on the back label is same as the one recorded in system. Refer to... -
Page 64: Safety Information
When using PM500 holding in hand, keep separation distance of at least 20 cm from the user's body. Please note PM500 is a battery-embedded design with a removable battery. Unauthorized personnel is strictly prohibited from disassembling the device. © 2020 POINTMOBILE Co., Ltd. All rights reserved... - Page 65 Copyright © 2006-2020 Point Mobile Co., Ltd. All rights reserved. Point Mobile Co., Ltd. is the designer and manufacturer of handheld mobiles. Point Mobile Co., Ltd. Logo are registered trademarks and symbols of Point Mobile Co., Ltd. Features and specifications are subject to change without prior notice.
Need help?
Do you have a question about the PM500 and is the answer not in the manual?
Questions and answers