Table of Contents
Advertisement
Quick Links
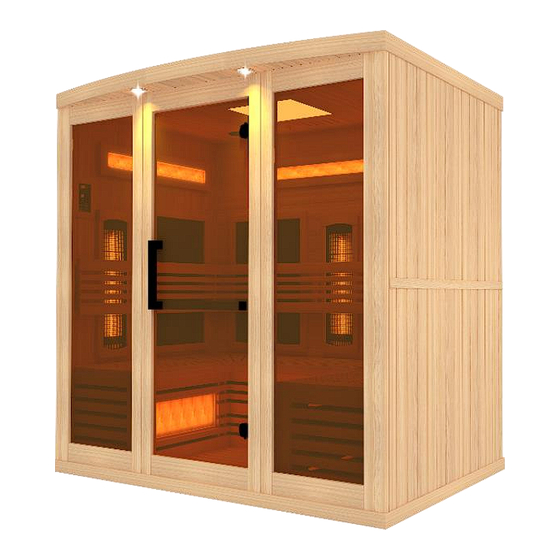
GDI-8230-01 / GDI-8260-01
2 and 3 Person Infrared Saunas
Owner's Manual
CARBON MODEL SAUNA
SAUNA IS FOR INDOOR USE ONLY
Two 120VAC 15AMP Separate Dedicated Circuits Required
Carefully and thoroughly read this Owner's Manual before using/operating the
sauna. We recommend keeping this Owner's Manual for regular review and
future reference. Follow your local codes and ordinances.
1
Advertisement
Table of Contents

Subscribe to Our Youtube Channel
Related Manuals for GoldenDesigns GDI-8230-01


Summary of Contents for GoldenDesigns GDI-8230-01
- Page 1 GDI-8230-01 / GDI-8260-01 2 and 3 Person Infrared Saunas Owner’s Manual CARBON MODEL SAUNA SAUNA IS FOR INDOOR USE ONLY Two 120VAC 15AMP Separate Dedicated Circuits Required Carefully and thoroughly read this Owner’s Manual before using/operating the sauna. We recommend keeping this Owner’s Manual for regular review and...
-
Page 2: Table Of Contents
TABLE OF CONTENTS Packing List Visual Assembly Diagrams Parts Description Dimensional Diagram Screw Identification and Location Chart Assembly Instructions Operating the Sauna Tips for Using Your Sauna Safety Instructions Safeguards for Your Sauna Troubleshooting Guide Warranty Warranty Card WARNING: Visually inspect all heaters before assembly to make sure they are not damaged. -
Page 3: Are Infrared Rays Safe
What Are Infrared Rays? Infrared is the band of light we perceive as heat. We cannot see this band of light with the naked eye, but we can feel this type of light in the form of heat. Our sun produces most of its energy output in the infrared segment of the spectrum. - Page 4 EMF Levels from Common Homes Sources After many years and numerous studies on EMF exposure, no government body including the Occupational Safety and Health Administration (OSHA) have established permissible exposure limits (PEL). Currently, there is no consensus on the potential health hazard from any exposure to EMF.
-
Page 5: How It Works
HOW IT WORKS Infrared Saunas differ from traditional saunas in that they use infrared radiant energy to directly penetrate into the body's tissue to produce perspiration. Traditional saunas use steam to heat the air inside the sauna, which then heats your body until you begin to perspire. -
Page 6: Visual Assembly Diagrams
*PLEASE READ INSTRUCTIONS THOROUGHLY BEFORE ASSEMBLY* Visual Assembly Diagram GDI-8230-01 FS *THE ABOVE ASSEMBLY DIAGRAM IS FOR A QUICK REFERENCE VISUAL GUIDE ONLY. ALL SAUNA MODELS MAY NOT BE SHOWN. PARTS AND ACCESSORIES DO VARY AND ARE SUBJECT TO CHANGE. MOVEABLE BACKRESTS NOT INCLUDED. - Page 7 *PLEASE READ INSTRUCTIONS THOROUGHLY BEFORE ASSEMBLY* Visual Assembly Diagram GDI-8260-01 FS *THE ABOVE ASSEMBLY DIAGRAM IS FOR A QUICK REFERENCE VISUAL GUIDE ONLY. ALL SAUNA MODELS MAY NOT BE SHOWN. PARTS AND ACCESSORIES DO VARY AND ARE SUBJECT TO CHANGE. MOVEABLE BACKRESTS NOT INCLUDED.
-
Page 8: Parts Description
*PLEASE READ INSTRUCTIONS THOROUGHLY BEFORE ASSEMBLY* PARTS DESCRIPTION GDI-8230-01 FS *THE ABOVE ASSEMBLY DIAGRAM IS FOR A QUICK REFERENCE VISUAL GUIDE ONLY. ALL SAUNA MODELS MAY NOT BE SHOWN. PARTS AND ACCESSORIES DO VARY AND ARE SUBJECT TO CHANGE. MOVEABLE BACKRESTS NOT INCLUDED. - Page 9 *PLEASE READ INSTRUCTIONS THOROUGHLY BEFORE ASSEMBLY* PARTS DESCRIPTION GDI-8260-01 FS *THE ABOVE ASSEMBLY DIAGRAM IS FOR A QUICK REFERENCE VISUAL GUIDE ONLY. ALL SAUNA MODELS MAY NOT BE SHOWN. PARTS AND ACCESSORIES DO VARY AND ARE SUBJECT TO CHANGE. MOVEABLE BACKRESTS NOT INCLUDED.
-
Page 10: Dimensional Diagram
DIMENSIONAL DIAGRAM GDI-8230-01 FS *THE ABOVE ASSEMBLY DIAGRAM IS FOR A QUICK REFERENCE VISUAL GUIDE ONLY. ALL SAUNA MODELS MAY NOT BE SHOWN. PARTS AND ACCESSORIES DO VARY AND ARE SUBJECT TO CHANGE. MOVEABLE BACKRESTS NOT INCLUDED. - Page 11 DIMENSIONAL DIAGRAM GDI-8260-01 FS *THE ABOVE ASSEMBLY DIAGRAM IS FOR A QUICK REFERENCE VISUAL GUIDE ONLY. ALL SAUNA MODELS MAY NOT BE SHOWN. PARTS AND ACCESSORIES DO VARY AND ARE SUBJECT TO CHANGE. MOVEABLE BACKRESTS NOT INCLUDED.
-
Page 12: Screw Identification And Location Chart
SCREW IDENTIFICATION AND LOCATION CHART... - Page 13 Power Supply The POWER SUPPLY is the control center of the sauna room. It is installed on the rooftop and has inputs/outputs connected to it. Your sauna should have two POWER SUPPLIES. (see Figure 1) Figure 1 POWER IN - main power of the sauna room HT1, HT2, HT3, HT4, HT5, HT6 –...
- Page 14 III. MP3 Auxiliary Port The MP3 Auxiliary Port allows you to connect a MP3 player or other device with the auxiliary function to the speakers in the sauna room for your listening pleasure. (see Figure 2) Figure 2 Guide and Guide Inserts The guide and guide inserts are used to connect the wall panels to one another.
- Page 15 FLOOR HEATER Cord FLOOR HEATER Figure 4 Understanding the Difference Between the Top and Bottom of the Wall Panels The wall panels are in the upright position when the Warning Labels and HIMALAYAN SALT panels are closer to the top of the wall. In addition, you will see the heat emitter cords coming from the topside of the wall panels.
-
Page 16: Assembly Instructions
Assembly Instructions 1. Choose a good location to assembly the sauna The location must be dry, level, and away from any source of water. The dedicated outlet must be easily accessible. Two adults will be needed to assemble. Wood Cabin Assembly: Floor Panel Front Panel Left Side Panel Right Side Panel... - Page 17 NOTE: If any of the wall panels do not slide all the way down, then follow this tip: 1. First, remove the side wall panel. 2. Locate the guide and guide insert brackets on the two wall panels (6 pieces total). 3.
- Page 18 5. Installing the REAR PANEL A. Please note that the REAR PANEL comes in two pieces. It would be easiest to assemble the two pieces on your floor and then lift the entire REAR PANEL (as a single panel) up and onto the FLOOR PANEL. You may need to open up the RIGHT SIDE PANEL and LEFT SIDE PANEL to fit the REAR PANEL between the two.
-
Page 19: Front Panel
PANEL SUPPORT connection to the connection coming from the RIGHT PANEL. C. You will have (3) BENCH pieces for sauna model GDI-8230-01 and (5) pieces for sauna model GDI-8260-01. When installing the BENCHES, start from the left and work your way to the right. Install the BENCHES by sliding them over the BENCH HEAT EMITTER PANEL SUPPORT and HIMAYLAYAN SALT PANEL SUPPORT. - Page 20 Figure 16 7. Installing the BACKRESTS A. It is time to install the BACKRESTS. If you have sauna model GDI-8230-01, then you will have (3) BACKRESTS of which the longer one will be installed on the REAR PANEL and the shorter ones on the RIGHT SIDE PANEL and LEFT SIDE PANEL.
- Page 21 Figure 17 Figure 18 8. Installing the REAR WALL HIMAYLAYAN SALT BAR A. Locate the area on the REAR PANEL to install the REAR WALL HIMAYLAYAN SALT BAR. You will first need to connect the LED BACKGROUND LIGHT as seen in Figure 19. Use the provided (6) screws to mount the REAR WALL HIMAYLAYAN SALT BAR to the REAR PANEL.
- Page 22 Figure 20 9. Installing the ROOF PANEL A. The side of the ROOF PANEL with the power supply (control box) is the top of the roof panel. B. The edge with the curve is the front of the ROOF PANEL. Be careful of the wires coming from the SIDE and REAR PANELS when you set the ROOF PANEL down onto the panels.
- Page 23 10. Connecting the plugs on the ROOF PANEL A. Connect the cords according to their respective labels. (see Figure 22) B. Connect the CTRL connection from the power supply to the CTRL connection from the control panel. (see Figure 22 & 23) C.
- Page 24 the long handle and rotate clockwise. Finally, you can secure the other end of the vertical handle by screwing it to the glass door. (see Figure 26) Figure 26 Please Note: The black plastic protective corners around the glass door corners will need to be removed upon using the sauna.
- Page 25 Please Note: Some sauna models are shipped with a spare TEMPERATURE SENSOR (inside the Accessory Box) in the case that the TEMPERATURE SENSOR is damaged during transit. The manufacturer decides this according to sauna models and packaging. 11. Installing the ROOF DUST COVER (optional) A.
-
Page 26: Operating The Sauna
Operating the Sauna Control Panel Power On/Off: Press to control the main power of the sauna Power Indicator: Indicates the status of the sauna’s main power Work Start/Stop: Press to control the working functions of the sauna Work Indicator: Indicates the working status of the sauna Heat Indicator: Indicates the status of heating function Light: Press to control the lighting function Time Display: Displays the heating time of the sauna in... - Page 27 preheat the sauna to the average used temperature range of approximately 118 degrees Fahrenheit / 48 degrees Celsius. When the ambient temperature is low, heating requires additional time. For the first few times of use, you may use 115 degrees Fahrenheit / 46 degrees Celsius as a reference starting point for a time period of about 20 to 30 minutes (this represents the actual time you are in the sauna at the desired temperature).
- Page 28 10. Bluetooth can be used on the sauna room. You first will need to pair your device with the sauna room. Open your device’s Settings Menu and then locate and open Bluetooth. You will find “iSauna” or “BT100” or “Bluetooth”. Now you can pair your device.
-
Page 29: Tips For Using Your Sauna
Tips for using Your Sauna 1. If you take a hot/warm shower or bath before using your sauna, you may perspire more and experience more comfort. 2. Drink water prior to, during, and after your sauna session to replenish body fluids. 3. - Page 30 5. Pregnant or possibly pregnant women should contact their medical physician prior to using the sauna. Excessive temperatures have a high potential for causing fetal harm during pregnancy. 6. Hyperthermia Danger: The normal body temperature can’t rise above 103°F (39°C). Symptoms of excessive hyperthermia include dizziness, lethargy, drowsiness, and/or fainting.
-
Page 31: Safeguards For Your Sauna
its agent immediately to avoid safety risks. Unauthorized repair attempts will void the manufacturer’s warranty. 20. Please make sure the outlet power supply meets the specifications required. Failure to meet the requirements may cause safety risks. 21. Some sauna models are equipped with reading and/or roof lamps. Because the lamp temperature will become very hot once powered ON, do not attempt to touch the lamp to avoid being burned. - Page 32 Indicator light for The heating indicator light is Replace the relevant control function is not working broken panel The circuit board or components Replace the circuit board are broken The temperature sensor is check the connection of the broken temperature sensor Infrared Heater not The heater is broken Replace heater panel...
- Page 33 Radio player protection fuses is Replace the fuses burnt out 12. The Glass Door Is Rubbing The Door Jamb Solution: The glass door may need to be adjusted. The hinge styles do vary, but the adjustment is the same. To adjust the glass door, you will need two pieces of cardboard like in the image below.
-
Page 34: Maintenance
Maintenance: Cleaning Do not use liquid cleaners or aerosol cleansers inside the sauna. Unplug the sauna from the wall outlet before cleaning. Use plain water and a soft cloth for cleaning. Do not use benzene, alcohol, or strong cleaning chemicals in or on the sauna. NOTE: Any chemical that can damage wood or be absorbed into the wood will damage the sauna. -
Page 35: Limited Lifetime Warranty
Limited Lifetime Warranty 5 Year Limited Warranty*: Golden Designs, Inc. under the Dynamic brand name warranties the wood, structure, heating elements, and electronics against defects in material and workmanship for a period of 1 to 5 years from the original date of purchase. This sauna is for INDOOR use only. - Page 36 ▪ Outdoor applications ▪ Normal wear and tear or weathering ▪ Use of product not in accordance with instructions ▪ Worn out receptacle Surface cracks are not considered defects in material or workmanship, as they are normal characteristics of all woods. This includes minor cracks due to wood expansion and contraction.
-
Page 37: Warranty Card
WARRANTY CARD Congratulations on your purchase of an Infrared Sauna from Golden Designs, Inc. Please take the time to complete the following Warranty Card and mail it back to: Golden Designs, Inc. 3550 Jurupa Street, Unit B Ontario, CA 91761 Please include a copy of your sales receipt showing date of purchase as this will serve as proof of purchase.
Need help?
Do you have a question about the GDI-8230-01 and is the answer not in the manual?
Questions and answers