Table of Contents
Advertisement
Quick Links
Overview
This quick installation guide describes the objectives; organization and basic installation
of the PLANET VIP-154T/VIP-154PT/VIP-154NT SIP IP Phone ("IP Phone" in the following
term), and explains how to establish your first voice over IP communication via PLANET
product. Also, this guide shows you how to find additional information on related products
and services.
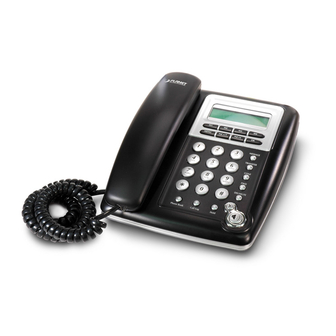
Respective model/descriptions are shown below:
VIP-154T: SIP SIP Phone
VIP-154PT: 802.3af PoE SIP IP Phone
VIP-154NT: SIP IP Phone with PSTN connectivity
The VIP-154 series IP Phone integrate web-based graphical user interface that can cover
most configurations and machine status monitoring. Via standard, web browser, you can
configure and check machine status from anywhere around the world.
Document Objectives
This guide provides physical installation, network configurations, and Internet access
establishment information for the PLANET IP Phones.
Document Organization
This guide is organized as follows:
• Preparation before beginning administration on PLANET IP Phone
• Administration interface
• Network Interface quick configurations
• Internet access setup guide
Quick Installation Guide
Advertisement
Table of Contents

Subscribe to Our Youtube Channel
Related Manuals for Planet VIP-154T


Summary of Contents for Planet VIP-154T
- Page 1 PLANET VIP-154T/VIP-154PT/VIP-154NT SIP IP Phone (“IP Phone” in the following term), and explains how to establish your first voice over IP communication via PLANET product. Also, this guide shows you how to find additional information on related products and services.
-
Page 2: Table Of Contents
Table of Contents PREPARATION BEFORE BEGINNING ADMINISTRATION ON THE IP PHONE 1 Administration interface Web configuration access Network Interface quick configurations VOICE COMMUNICATION SAMPLES Peer to peer (P2P) mode SIP Proxy mode Voice communication via IP PBX system – IPX-2000 (Auto-config) QUICK REFERENCE IN CD-ROM GUIDE... -
Page 3: Preparation Before Beginning Administration On The Ip Phone
Preparation before beginning administration on the IP Phone Physical Interfaces VIP-154T: SIP IP Phone (2 x RJ-45) VIP-154PT: 802.3af PoE SIP IP Phone (2 x RJ-45, 1 x PoE for LAN interface) VIP-154NT: SIP IP Phone with PSTN connectivity (2 x RJ-45, 1 x RJ-11 for PSTN connector) - Page 4 RESET Reset to the factory default setting 12V DC 12V DC Power input outlet RJ-45 connector, to maintain the existing network structure, connected directly to the PC through straight CAT-5 cable RJ-45 connector, for Internet access, connected directly to Switch/Hub through straight CAT-5 cable. The LAN interface also can be connected with 802.3af PoE switch or converter for power supply (VIP-154PT only) LINE...
-
Page 5: Administration Interface
Keypad Description LCD Display Menu and all status shall be displayed for users. Speed Dial To make a speed dial call by pressing the speed dial key M1~M4 M1 ~ M4. MENU To bring out the menu selection while IP Phone is in idle state. -
Page 6: Web Configuration Access
Web configuration access To start IP Phone web configuration, you must have one of these web browsers installed on computer for management • Netscape Communicator 4.03 or higher • Microsoft Internet Explorer 4.01 or higher with Java support Default IP address of IP Phone is 192.168.0.1. You may now open your web browser, and insert http://192.168.0.1 in the address bar of your web browser to logon IP Phone web configuration page. -
Page 7: Network Interface Quick Configurations
Network Interface quick configurations Execute your web browser, and insert the LAN IP address (default: 192.168.0.1) of SIP IP Pohne in the adddress bar. After logging on machine with username/password (default: root / not passwrd), browse to “Network” --> “Network settings” configuration menu: Parameter Description IP address LAN IP address of the IP Phone... -
Page 8: Voice Communication Samples
Assuming there are two VIP-154T in the network the IP address are 192.168.0.1 and 192.168.0.2 STEP 2: Pick up handset or press “Hand Free” key from keypad of VIP-154T-A and dial “192.168.0.2#”. Then the phone of VIP-154T-B should ring. You can do the same thing to the VIP-154T-B. -
Page 9: Sip Proxy Mode
(for VIP-154T-A), and 200 / 123 (for VIP-154T-B) for the voice calls. STEP 2: Please log in VIP-154T-A via web browser, browse to the SIP setting menu and select the Domain Service config menu. In the setting page, please insert the account/password information obtained from your service provider (in this sample, we’re using PLANET SIP-50 as the SIP Proxy server for SIP account, call... -
Page 10: Voice Communication Via Ip Pbx System - Ipx-2000 (Auto-Config)
STEP 3: Repeat the same configuration steps on VIP-154T-B, and check the machine registration status, make sure the registrations are completed. STEP 4: To verify the VoIP communication, please pick up the telephone. Dial the destination number to make call between SIP clients. For example, VIP-154T-A (with number 100) with keypad number 200 to VIP-154T-B, or reversely makes calls from SIP client (VIP-154T-B) to the number 100 (VIP-154T-A). - Page 11 STEP 2: Please browse to the Device menu and create new device for the auto configuration. STEP 3: Please press the Show extensions button to create the two extension accounts/ password: 1001/123 (for VIP-154T-A), and 2002/123(for VIP-154T-B) for the voice calls.
-
Page 12: Quick Reference In Cd-Rom Guide
To verify the VoIP communication, please pick up the telephone. Dial the destination number to make call between IP PBX. For example, VIP-154T-A (with number 1001) with keypad number 2002 to VIP-154T-B, or reversely makes calls from IP PBX (VIP-154T-B) to the number 1001 (VIP-154T-A).
Need help?
Do you have a question about the VIP-154T and is the answer not in the manual?
Questions and answers