Table of Contents
Advertisement
Available languages
Available languages
Quick Links
RASENMÄHROBOTER RLM 500
DE
AT
RASENMÄHROBOTER RLM 500
Bedienungs- und Sicherheitshinweise
Originalbetriebsanleitung
FR
ROBOT TONDEUSE RLM 500
Consignes d'utilisation et de sécurité
Traduction des instructions d'origine
GB
ROBOT MOWER RLM 500
Operating and Safety Instructions
Translation of Original Operating Manual
PL
ROBOT KOSIARKA RLM 500
Wskazówki dotyczące obsługi i bezpieczeństwa
Tłumaczenie oryginalnej instrukcji obsługi
DE
GB
FR
PL
Advertisement
Chapters
Table of Contents

Related Manuals for Scheppach RLM 500


Summary of Contents for Scheppach RLM 500
- Page 1 RASENMÄHROBOTER RLM 500 ROBOT MOWER RLM 500 RASENMÄHROBOTER RLM 500 Operating and Safety Instructions Bedienungs- und Sicherheitshinweise Translation of Original Operating Manual Originalbetriebsanleitung ROBOT TONDEUSE RLM 500 ROBOT KOSIARKA RLM 500 Consignes d‘utilisation et de sécurité Wskazówki dotyczące obsługi i bezpieczeństwa Traduction des instructions d’origine...
- Page 2 Klappen Sie vor dem Lesen die Seite mit den Abbildungen aus und machen Sie sich anschließend mit allen Funktionen des Gerätes vertraut. Before reading, unfold the page containing the illustrations and familiarise yourself with all functions of the device. Avant de lire le mode d‘emploi, ouvrez la page contenant les illustrations et familiarisez-vous ensuite avec toutes les fonctions de l‘appareil. Przed przeczytaniem proszę...
- Page 3 GERÄTEBESCHREIBUNG/DESCRIPTION OF THE DEVICE...
- Page 4 Ladestation/Base Ladestation Base...
- Page 5 Falsch! Richtig! Wrong! Correct! Max. Steigung von 35% Max. slope of 35% 100 cm Länge / Length...
- Page 6 Grünes Licht blinkt Grünes Licht an Green light flashing Green light on Rotes Licht blinkt Red light flashing Bluetooth Zeiteinstellung Time setting WiFi Passworteinstellung Ladezustand Password setting Power Bestätigung Ein-/Aus Confirm Turn on/off Zurück zur Ladestation Mähstart Back to station Start working...
- Page 8 www.scheppach.com...
-
Page 9: Table Of Contents
Aufbau / Vor Inbetriebnahme ............ 8 In Betrieb nehmen / Einstellungen ..........11 Reinigung .................. 14 Transport ................... 14 Lagerung/Winterschlaf .............. 14 Wartung / Update ..............14 Entsorgung und Wiederverwertung .......... 16 Störungsabhilfe / Fehlercodes ..........17 DE | 1 www.scheppach.com... - Page 10 Start-Taster / Wahl-Taster (nach oben) Home-Taster (zurück zur Ladestation) / - Wahl-Taster (nach unten) OK-Taster PIN-Code Einstellung Datum/Uhrzeit Einstellung WiFi (W-Lan) Bluetooth In dieser Bedienungsanleitung haben wir Stellen, die Ihre Sicherheit betreffen, mit die- m Achtung! sem Zeichen versehen. 2 | DE www.scheppach.com...
-
Page 11: Einleitung
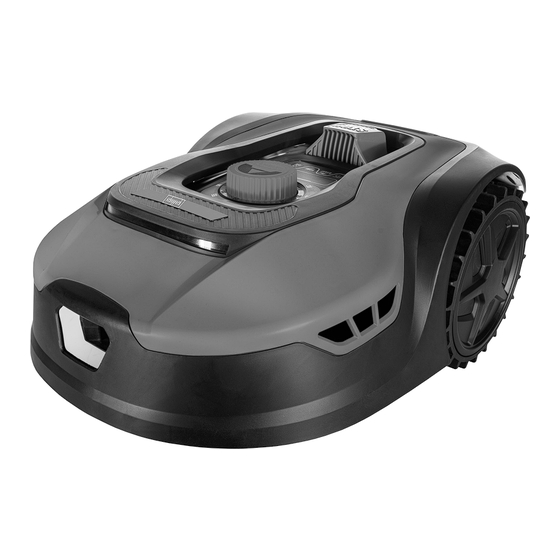
1. Einleitung Wir übernehmen keine Haftung für Unfälle oder Schäden, die durch Nichtbeachten dieser Anleitung Hersteller: und den Sicherheitshinweisen entstehen. Scheppach GmbH 2. Produktbeschreibung Günzburger Straße 69 D-89335 Ichenhausen 1. Mähroboter Verehrter Kunde 2. Drehknopf Schnitthöhenverstellung Wir wünschen Ihnen viel Freude und Erfolg beim Ar- 3. -
Page 12: Sicherheitshinweise
Schalten Sie das Produkt immer mit der PO- sungen des Herstellers hinsichtlich Betrieb/War- WER ON/OFF-Taste aus, bevor Sie eine Blockie- tung sind genau einzuhalten. rung entfernen. Prüfen Sie das Produkt auf Schä- den, bevor Sie es wieder in Betrieb nehmen. 4 | DE www.scheppach.com... - Page 13 • Metallische Gegenstände im Boden (z. B. Stahlbe- ku vermeiden kann. ton oder Anti-Maulwurfnetze) können zum Anhal- ten des Mähers führen. Die metallischen Gegen- stände können eine Interferenz mit dem Schleifen- signal verursachen, was zum Anhalten des Mä- hers führen kann. DE | 5 www.scheppach.com...
- Page 14 Verwenden Sie das Werkzeug, das in die- von Kindern auf. ser Bedienungsanleitung empfohlen wird. So errei- • Bewahren Sie die Originalproduktbeschreibung chen Sie, dass Ihre Maschine optimale Leistungen zum späteren Nachschlagen auf. erbringt. • Entsorgen Sie das Produkt ordnungsgemäß. 6 | DE www.scheppach.com...
-
Page 15: Technische Daten
Folien und Kleinteilen spielen! Es IP-Schutzklassen besteht Verschluckungs- und Erstickungsge- fahr! Mähroboter IPX5 Ladestation IPX4 Netzteil IP67 Gesamtgewicht (netto) ca. 7,4 kg Technische Änderungen vorbehalten! m WICHTIG: Das Ladegerät ist ausschließlich zum Laden des Produkttyps RLM 500 geeignet. DE | 7 www.scheppach.com... -
Page 16: Aufbau / Vor Inbetriebnahme
Meter Fläche, ohne Hindernisse 8.3.1 Allgemeine Hinweise/Verlegearten o.ä., befindet. (Abbildung 3) m ACHTUNG: Um Schäden am Produkt zu verhindern, muss ein Hindernis von min. 15 cm Höhe zwischen dem Be- grenzungsdraht (11) und Gewässern/Hängen/Bö- schungen und/oder öffentlichen Straßen sein. 8 | DE www.scheppach.com... - Page 17 Vertikutierer zu verwenden, ist es zwingend er- der Außenkante und dem Hindernis erreicht ha- forderlich den Begrenzungsdraht (11) zu vergra- ben. ben. • Verlegen Sie den Begrenzungsdraht (11) als „Zu- leitung“ auf dem kürzesten Weg zum Hindernis. DE | 9 www.scheppach.com...
- Page 18 über die „HOME“-Taste (siehe Punkt ne LED auf. (siehe Abbildung 17). 9) den Befehl zur Ladestation (10) zurückzukehren. Der Mäher fährt nun entlang des kompletten Begren- zungsdrahtes (11) zur Ladestation (10) zurück (Abbil- dung 2) 10 | DE www.scheppach.com...
-
Page 19: In Betrieb Nehmen / Einstellungen
• Nachdem Bestätigen der vierten Ziffer mit der „OK- Schäden überprüfen. Achten Sie darauf, dass beim Taste“ ist der Mähroboter einsatzbereit. Auf dem Überprüfen die Anschlussleitung nicht am Stromnetz Display erscheint der Schriftzug „IdLE“. hängt. DE | 11 www.scheppach.com... - Page 20 Ziffer zu wählen. • Auf dem Display erscheint die eingestellte Mähzeit • Bestätigen Sie die Ziffer mit der „OK“-Taste. z.B. 06 H, wobei die erste Ziffer blinkt. • Die nächste Ziffer blinkt (z.B. „10--). 12 | DE www.scheppach.com...
- Page 21 über Bluetooth oder WiFi. 9.4 App-Steuerung m HINWEIS Der Mähroboter RLM 500 kann per App bedient wer- Aufgrund der Datenübermittlung von der App ins In- den. Die App ist in den jeweiligen App-Stores für An- ternet entstehen abhängig von Ihrem Vertrag mit Ih- droid und iOS erhältlich.
-
Page 22: Reinigung
Ziehen Sie vor allen Wartungsarbeiten den Netzste- langen kann. cker. Anschlüsse und Reparaturen Anschlüsse und Reparaturen der elektrischen Aus- rüstung dürfen nur von einer Elektro-Fachkraft durch- geführt werden. Bei Rückfragen bitte folgende Daten angeben: • Stromart des Motors • Daten des Maschinen-Typenschildes 14 | DE www.scheppach.com... - Page 23 Der Austausch einzelner Messer (7) Die Software für die USB-Übermittelung kann auf ist nicht erlaubt. unserer Homepage www.scheppach.com herunter- Sind die Kreuzschlitzschrauben (8) beschädigt oder geladen werden. lassen sich nicht mehr festziehen, sind diese eben- falls zu ersetzten.
-
Page 24: Entsorgung Und Wiederverwertung
Sie ohne vorherigen Erwerb eines Neu- mesystems für Geräte-Altbatterien gerätes vom Hersteller kostenfrei bei diesem ab- - Rücknahmestelle des Herstellers (falls nicht Mit- geben oder einer anderen autorisierten Sammel- glied des gemeinsamen Rücknahmesystems) stelle in Ihrer Nähe zuführen. 16 | DE www.scheppach.com... -
Page 25: Störungsabhilfe / Fehlercodes
• Stellen Sie sicher, dass die Ladestation ordnungsgemäß an das Ladege- Mäher außerhalb des rät und das Ladegerät an eine geeignete Stromversorgung angeschlos- Arbeitsbereiches sen ist. Wenn sie ordnungsgemäß angeschlossen sind, sind die Begren- zungsdrähte falsch geklemmt und müssen vertauscht werden. DE | 17 www.scheppach.com... - Page 26 • 10 Minuten warten, bis der PIN erneut eingegeben werden kann Mähroboter gesperrt (PIN LOCK • Schalten Sie den Mähroboter nicht aus zu oft falsch eingegeben) • Tritt der Fehler weiterhin auf, kontaktieren Sie Ihren Fachhändler. 18 | DE www.scheppach.com...
- Page 27 Assembly / Before commissioning ..........25 Starting up / adjustments ............28 Cleaning ..................31 Transport ................... 31 Storage/Hibernation ..............31 Maintenance / Update ............... 31 Disposal and recycling .............. 33 Troubleshooting / fault codes ............ 34 GB | 19 www.scheppach.com...
- Page 28 Home button (back to charging station) / - Select button (down) OK button PIN code setting Date/Time setting WiFi (WLAN) Bluetooth m Attention! We have marked points in this operating manual that impact your safety with this symbol. 20 | GB www.scheppach.com...
-
Page 29: Introduction
1. Introduction 2. Description of the product Manufacturer: 1. Robot mower Scheppach GmbH 2. Cutting height adjustment knob Günzburger Straße 69 3. Display with control panel D-89335 Ichenhausen 4. Stop button 5. Front axle Dear Customer 6. Blade plate We hope your new product brings you much enjoy- 7. -
Page 30: Safety Instructions
Note that certain animals, e.g. er living creatures. If a person or other living crea- hedgehogs, are nocturnal. They could potentially ture enters the travel path of the product, it must be be injured by the product. stopped immediately. 22 | GB www.scheppach.com... - Page 31 • Keep the rechargeable battery clean and dry. m In the event of eye contact, consult a doctor. • The rechargeable battery performs best when op- erated at normal room temperature (20 °C ± 5 °C). GB | 23 www.scheppach.com...
-
Page 32: Technical Data
1,1 A • Before performing setting or maintenance work, re- lease the start button and pull out the power plug. • Furthermore, despite all precautions having been met, some non-obvious residual risks may still re- main. 24 | GB www.scheppach.com... -
Page 33: Unpacking
If you intend to use a scarifier within the working area of the robotic mower, the boundary wire (11) This charging unit is suitable exclusively for charging must be buried. the product type RLM 500. m ATTENTION! Noise & vibration Do not use a strimmer near the boundary wire m Warning: Noise can have serious effects on your (11). - Page 34 (11) may be covered with max. 3 cm of earth. • After covering the boundary wire (11) with soil, it is m ATTENTION: sufficient to compact the loose soil with your body Do not operate the mower on gravel/stones. weight. 26 | GB www.scheppach.com...
- Page 35 5 mm. • Continue to lay the cable along the outer edge. Illumi- The boundary nates wire is connected green correctly. The robot is fully charged. Flashes robot green charging. GB | 27 www.scheppach.com...
-
Page 36: Starting Up / Adjustments
• To stop the robot mower, press the stop button (4). The electrical motor installed is connected and ready • The robot mower stops immediately and the blade for operation. The connection complies with the appli- disc (6) stops. cable VDE and DIN provisions. 28 | GB www.scheppach.com... - Page 37 (“POWER multaneously for at least 3 seconds. ON/OFF” button) until “PIN” appears on the display. • The display shows the set start time, e.g. 13:25, with the first digit flashing. GB | 29 www.scheppach.com...
- Page 38 9.4 App control 9.4.3.1 Viewing and editing the mowing plan The RLM 500 robot mower can be operated via app. With this function you can set when the robot mower The app is available in the respective app stores for should start mowing and how long it should mow for Android and iOS.
-
Page 39: Cleaning
To prevent damage, avoid the robot mower (1) falling to the ground from greater heights. If this does happen, it must be immediately taken to a specialist workshop for inspection. Do not continue to use the robot mower (1) before this has been done. GB | 31 www.scheppach.com... - Page 40 (The latest software version can be found on our homepage. The software can be installed via USB or the app. The software for USB transmission can be download- ed from our homepage www.scheppach.com. 32 | GB www.scheppach.com...
-
Page 41: Disposal And Recycling
• Mask off the contacts and package the recharge- of waste electrical and electronic equipment. able battery such that it cannot move in the pack- aging. Please also observe any further national regulations. GB | 33 www.scheppach.com... -
Page 42: Troubleshooting / Fault Codes
• Turn the mower upside down and check what is preventing the blades from turning. Cutter disc blocked • Remove the objects and turn the mower over. • Place the mower in an area with short grass. • Then press “START” and “OK”. 34 | GB www.scheppach.com... - Page 43 Robot mower locked (PIN • Wait 10 minutes and then enter the PIN again LOCK entered incorrectly too • Do not switch the robot mower off many times) • If the error still occurs, contact your specialist dealer. GB | 35 www.scheppach.com...
- Page 44 Déballage .................. 42 Structure/avant mise en service ..........43 Mise en service/réglages ............46 Nettoyage .................. 49 Transport ................... 49 Stockage/hivernage ..............49 Maintenance/mise à jour ............50 Élimination et recyclage ............51 Dépannage/codes d’erreur ............53 36 | FR www.scheppach.com...
- Page 45 Bouton OK Réglage du code PIN Réglage de la date/l’heure WiFi (W-Lan) Bluetooth Dans cette notice d’utilisation, nous avons placé les signes qui concernent votre sécurité m Attention ! précédés de cette mention à certains emplacements. FR | 37 www.scheppach.com...
-
Page 46: Introduction
Outre les consignes de sécurité reprises dans la présente notice d‘utilisation et les prescriptions par- Fabricant : ticulières en vigueur dans votre pays, respecter éga- Scheppach GmbH lement les règles techniques générales concernant Günzburger Straße 69 l‘utilisation des machines similaires. -
Page 47: Consignes De Sécurité
• Il est interdit de modifier la conception d’origine du • Ce produit doit être débranché du réseau d’électri- produit. L’utilisateur assume les risques liés aux cité avant le retrait de la batterie. modifications effectuées. FR | 39 www.scheppach.com... - Page 48 PIN correct a été saisi. • Si le câble d’alimentation est endommagé pendant l’utilisation, appuyez sur le bouton « STOP « pour arrêter le robot et pouvoir débrancher le câble d’ali- mentation de la prise de courant. 40 | FR www.scheppach.com...
- Page 49 • Lors de l’élimination des batteries, conservez conformes. les batteries des différents dispositifs électro- • Avant d’entreprendre une intervention de réglage chimiques à l’écart les unes des autres. ou de maintenance, relâcher la touche de démar- rage et retirer le connecteur secteur. FR | 41 www.scheppach.com...
-
Page 50: Caractéristiques Techniques
IMPORTANT : Tension 20 V Le chargeur est uniquement conçu pour charger le Régime ralenti n 2800 min produit RLM 500. Largeur de coupe 18 cm Hauteur de coupe 20-60 mm Bruits et vibrations m Avertissement : Le bruit peut avoir des consé- Positions de hauteur de quences graves sur la santé. -
Page 51: Structure/Avant Mise En Service
• La station de charge (10) peut être installée à périphérique (11). Lorsqu’elle atteint le câble périphé- proximité d’un cabanon, d’un abri de jardin ou de rique (11), la tondeuse change de direction selon un la maison. angle aléatoire. FR | 43 www.scheppach.com... - Page 52 • Le robot tondeuse (1) peut passer dans les zones/ quence. passages avec des rétrécissements/une largeur ≥ 0,8 m (figure 10). • La largeur minimale de la surface à tondre est de 0,8 m (figure 10). 44 | FR www.scheppach.com...
- Page 53 8.2. n’est pas rompu. m ATTENTION Ne fixez la station de charge (10) à l’aide d’un maillet (non fourni) et la sardine de fixation (13) que lorsque vous avez délimité toute la zone de travail. FR | 45 www.scheppach.com...
-
Page 54: Mise En Service/Réglages
(2) montre des chiffres situés hors une fois raccordé. Le raccordement correspond aux du bouton. Vous pouvez y lire la hauteur de coupe dispositions de la VDE et DIN en vigueur. actuellement réglée par incréments de 5 mm. 46 | FR www.scheppach.com... - Page 55 (10). • Le chiffre suivant s’affiche ensuite (mois.jour, p. ex. (Par défaut, le robot tond du lundi au vendredi de 08.25 pour le 25 août). 9 h 00 à 15 h 00.) FR | 47 www.scheppach.com...
- Page 56 « START «, « HOME « et « OK «. • Enfin, l’heure s’affiche (p. ex. 13:25). Le robot tondeuse RLM 500 peut être commandé via • Réglez l’heure actuelle en suivant la procédure une application. L’application est disponible sur les ci-dessus.
-
Page 57: Nettoyage
être hors de portée des enfants. Cette fonction vous permet de faire commencer la La température de stockage optimale se situe entre tonte dans les passages difficiles d’accès et d’y ga- 5 et 40 °C. rantir une tonte impeccable. FR | 49 www.scheppach.com... -
Page 58: Maintenance/Mise À Jour
Mettez des gants de protection avant de remplacer tion. les lames (7). Le logiciel pour le transfert via USB peut être télé- chargé sur notre page d’accueil www.scheppach. m ATTENTION com. Vous devez toujours remplacer toutes les lames (7) simultanément. Le remplacement individuel de lames 13.3.1 Mise à... -
Page 59: Élimination Et Recyclage
(dépôts municipaux p. ex.) Vous trouverez la dernière version du logiciel dans - Dans les points de vente d’appareils électro- l’application ou sur www.scheppach.com. niques (sur place ou en ligne) si le distributeur est tenu de les reprendre ou propose ce service. - Page 60 éliminée séparément de manière respectueuse de l’environnement. • Recouvrez les contacts ouverts et emballez la bat- terie de manière à ce qu’elle ne bouge pas dans l’emballage. Veuillez également observer les éven- tuelles prescriptions nationales en vigueur. 52 | FR www.scheppach.com...
-
Page 61: Dépannage/Codes D'erreur
• Retirez les objets qui bloquent la roue/les roues, retournez la ton- deuse. • Appuyez ensuite sur les touches « START « et « OK «. FR | 53 www.scheppach.com... - Page 62 • Attendez 10 minutes pour que le code PIN puisse à nouveau être Robot tondeuse bloqué saisi LOCK (trop de saisies de PIN • Ne désactivez pas le robot tondeuse incorrectes) • Si l’erreur se reproduit, contactez votre revendeur. 54 | FR www.scheppach.com...
- Page 63 Montaż / Przed uruchomieniem ..........62 Uruchamianie / ustawianie ............65 Czyszczenie ................68 Transport ................... 68 Przechowywanie/przerwa zimowa ..........68 Konserwacja / aktualizacja ............69 Utylizacja i ponowne wykorzystanie .......... 70 Usuwanie usterek / kody błędów ..........72 PL | 55 www.scheppach.com...
- Page 64 Przycisk Home (powrót do stacji ładowania) / przycisk wyboru (w dół) Przycisk OK Ustawianie kodu PIN Ustawianie daty/godziny WiFi (W-Lan) Bluetooth Miejsca w niniejszej instrukcji obsługi, które dotyczą bezpieczeństwa użytkownika, zosta- m Uwaga! ły oznaczone następującym znakiem. 56 | PL www.scheppach.com...
-
Page 65: Wprowadzenie
1. Wprowadzenie Nie ponosimy odpowiedzialności za wypadki ani szkody powstałe wskutek nieprzestrzegania niniej- Producent: szej instrukcji oraz wskazówek dotyczących bezpie- Scheppach GmbH czeństwa. Günzburger Straße 69 2. Opis produktu D-89335 Ichenhausen Szanowny Kliencie, 1. Robot koszący Życzymy dużo satysfakcji i powodzenia podczas pra- 2. -
Page 66: Wskazówki Dotyczące Bezpieczeństwa
Przed rozpoczęciem użytkowania produktu należy dokładnie przeczytać instrukcję obsługi i zapoznać się z jej treścią. • Zabrania się ingerowania w oryginalny wygląd pro- duktu. Wszystkie tego typu zmiany dokonywane są na własną odpowiedzialność. 58 | PL www.scheppach.com... - Page 67 • Firma Riwall Pro nie gwarantuje pełnej kompaty- bilności pomiędzy produktem a innymi systema- mi bezprzewodowymi, jak np. układ zdalnego ste- rowania, nadajniki, zainstalowane w podłożu elek- tryczne ogrodzenia pastwisk itp. PL | 59 www.scheppach.com...
- Page 68 • Akumulator gwarantuje największą wydajność, gdy przewodów przyłączeniowych. jest eksploatowany w temperaturze pokojowej (20 • Przed podjęciem prac nastawczych lub konserwa- °C ± 5 °C). cyjnych zwolnić przycisk Start i wyciągnąć wtyczkę sieciową. 60 | PL www.scheppach.com...
-
Page 69: Dane Techniczne
Napięcie 20 V m WAŻNE: Prędkość obrotowa na bie- 2800 min Ładowarka jest przeznaczona wyłącznie do ładowa- gu jałowym n nia produktu typu RLM 500. Szerokość koszenia 18 cm Wysokość cięcia 20-60 mm Hałas i drgania Pozycje wysokości cięcia m Ostrzeżenie: Hałas może negatywnie oddzia- ływać... -
Page 70: Montaż / Przed Uruchomieniem
(11) należy go zaizolować na długości m UWAGA ok. 10 mm, a następnie wprowadzić do czarnego Kabel przedłużający oraz zasilający musi się zacisku kablowego „IN”. znajdować poza obszarem roboczym, aby nie doszło do jego uszkodzenia. 62 | PL www.scheppach.com... - Page 71 • Przewód ograniczający (11) można zakopać lub za- • Kołki do przewodu (12) wbić w ziemię przy pomo- mocować przy pomocy dostarczonych kołków do cy młotka (nie jest objęty zakresem dostawy) (ry- przewodu (12). sunek 13). PL | 63 www.scheppach.com...
- Page 72 Po całkowitym wyznaczeniu obszaru roboczego, działa. przewód ograniczający (11) należy podłączyć do Skontrolować, czy stacji ładowania (10) w sposób opisany w punk- przewód ograni- cie 8.2. czający nie został przerwany. 64 | PL www.scheppach.com...
-
Page 73: Uruchamianie / Ustawianie
Zainstalowany silnik elektryczny jest gotowy do eks- wskazuje na liczby znajdujące się poza pokrętłem. ploatacji. Przyłącze odpowiada właściwym przepisom Tutaj można odczytać aktualnie ustawioną wysokość VDE (Związek Elektryków Niemieckich) oraz normom koszenia w 5 mm krokach. DIN. PL | 65 www.scheppach.com... - Page 74 (Standardowo robot pracuje od poniedziałku do piąt- ustawić odpowiedni miesiąc oraz dzień. ku, w godzinach 09:00 - 15:00.) • Na samym końcu wyświetla się godzina (np. 13:25). • Ustawić aktualną godzinę w sposób opisany powy- żej. 66 | PL www.scheppach.com...
- Page 75 • Po potwierdzeniu czwartej cyfry przyciskiem „OK” data i godzina zostaje zapisana. Na wyświetlaczu pojawi się ciąg znaków „IdLE”. Robot koszący RLM 500 może być obsługiwany przy pomocy aplikacji. Aplikacja ta jest dostępna sklepie 9.2.3 Edycja czasu początkowego (rys. 23) dla Androida oraz iOS.
-
Page 76: Czyszczenie
Produkt i jego wyposażenie przechowywać w miej- czynać koszenie np. w miejscach trudno dostępnych scu zaciemnionym, suchym i zabezpieczonym przed i zapewnić tam odpowiednią jakość koszenia. mrozem oraz niedostępnym dla dzieci. Optymalna temperatura przechowywania wynosi od 5 do 40˚C. 68 | PL www.scheppach.com... -
Page 77: Konserwacja / Aktualizacja
Oprogramowanie dla przekazywania z nośnika USB można ściągnąć z naszej strony internetowej www. m UWAGA scheppach.com. Należy zawsze wymieniać wszystkie noże (7) na raz. 13.3.1 Aktualizacja oprogramowania przez USB Wymiana pojedynczych noży (7) jest zabroniona. Jeżeli wkręty z rowkiem krzyżowym (8) są uszkodzo- •... -
Page 78: Utylizacja I Ponowne Wykorzystanie
- Punkty sprzedaży urządzeń elektrycznych (sta- cjonarne i internetowe), o ile sprzedawcy są zo- Najnowsza wersja oprogramowania jest dostępna w bowiązani do ich odbioru lub oferują je dobrowol- aplikacji lub na stronie www.scheppach.com. nie. - Do trzech sztuk urządzeń elektrycznych i elek- Informacje serwisowe tronicznych każdego typu, o długości krawędzi... - Page 79 • Przed przystąpieniem do utylizacji urządzenia na- leży wyjąć zintegrowany akumulator i zutylizować go oddzielnie w sposób przyjazny dla środowiska. • Zakleić nieosłonięte styki i zapakować akumulator w taki sposób, aby nie poruszał się w opakowaniu. Proszę przestrzegać ewentualnych dodatkowych przepisów krajowych. PL | 71 www.scheppach.com...
-
Page 80: Usuwanie Usterek / Kody Błędów
• Wyłączyć kosiarkę. • Obrócić kosiarkę i skontrolować, co mogło spowodować zablokowanie noża. Tarcza noża zablokowana • Usunąć przedmioty i obrócić kosiarkę. • Kosiarkę ustawić w miejscu z krótką trawą. • Następnie wcisnąć przycisk „START” i „OK”. 72 | PL www.scheppach.com... - Page 81 • Zaczekać 10 minut, aż możliwe będzie ponowne wprowadzenie PIN’u (zbyt wiele prób wprowa- • Nie wyłączać robota koszącego LOCK dzenia nieprawidłowego • Jeżeli błąd będzie się nadal pojawiał, należy skontaktować się z dystry- PIN’u) butorem. PL | 73 www.scheppach.com...
- Page 82 www.scheppach.com...
- Page 83 9. Andere Ansprüche, als die oben genannten, können nicht geltend gemacht werden. Die Garantiebedingungen gelten nur in der jeweils aktuellen Fassung zum Zeitpunkt der Reklamation und können ggf. unserer Homepage (www.scheppach.com) entnommen werden. Bei Übersetzungen ist stets die deutsche Fassung maßgeblich.
- Page 84 www.scheppach.com...
- Page 85 www.scheppach.com...
- Page 86 www.scheppach.com...
- Page 87 EG-Konformitätserklärung Originalkonformitätserklärung EC Declaration of Conformity Déclaration de conformité EC Scheppach GmbH, Günzburger Str. 69, D-89335 Ichenhausen erklärt folgende Konformität gemäß EU-Richtlinie und déclare la conformité suivante selon la directive UE et les Normen für den Artikel normes pour l’article...
- Page 88 Stand der Informationen · Last Information Update Update: 07/2022 · Ident.-No.: 5913001917...
Need help?
Do you have a question about the RLM 500 and is the answer not in the manual?
Questions and answers