
Related Manuals for FM RXD 384 V2,4


Summary of Contents for FM RXD 384 V2,4
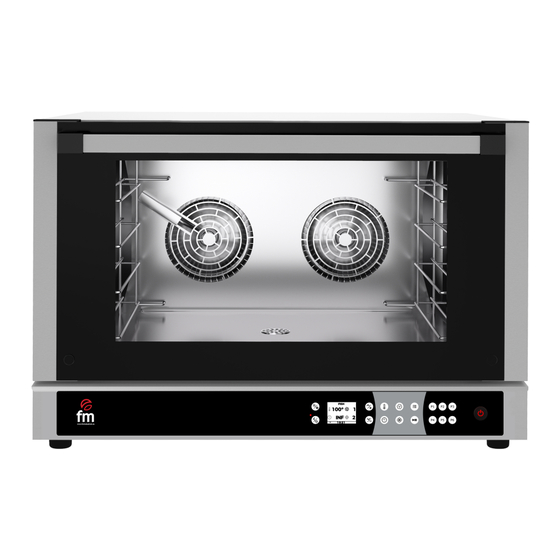
- Page 1 Instruction Manual Electric Ovens Models: RXD 384 V2,4/604PLUS V2,4 RXDL 384 V2,4/604PLUS V2,4 ATTENTION: Please, read these instructions before using the unit.
-
Page 3: Table Of Contents
CONTENTS CE CERTIFICATION WARRANTY GENERAL AND SAFETY STANDARDS SAFETY INSTRUCTIONS, TRANSPORT AND MAINTENANCE INSTALLING THE UNIT INSTRUCTIONS OF USE FUNCTIONALITIES ADVANCED SETTINGS ALARMS AND ERRORS Ed.:23 – Ver.:01 – 01/01/2023... -
Page 4: Ce Certification
UNE-EN 60335-1:2012 + AC:2014 + A11:2014 + A13:2017 + A14:2014 +A2:2020 + A1:2020; UNE- EN 60335-2-42:2004 + Corr:2007 + A1:2008 + A11:2012; UNE-EN 55014-1:2017 + A11:2021; UNE- EN 55014-2:2015; UNE-EN 61000-3-2:2014; UNE-EN 61000-3-3:2013 +A1:2020 Manufacturer: FM CALEFACCIÓN S.L. CIF: B-14343594 Manufacturer’s address: CTRA. de Rute km.2.700, C.P.:14900, Lucena... -
Page 5: Warranty
2. Warranty The warranty period is 12 months from the date of purchase of the unit. The warranty does not cover damage to glass, lamps, door seals or deterioration of the insulating material or damage attributable to improper installation, maintenance, inadequate repair or lack thereof, as well as improper use of appliance. -
Page 6: General And Safety Standards
Damages, injuries or fatal accidents could be produced due to the non-observance of the manufacturer’s indications. If the oven is installed on supports or overlaying parts, use the ones supplied by FM only and follow the assembly instructions inside the packaging. ... - Page 7 Risk of burns. Read these warnings carefully and follow its indications when the oven is working or not completely cooled down. Only touch the unit control elements and the door handle. Avoid touching any other external element of the oven as it may reach temperatures over 60ºC.
-
Page 8: Safety Instructions, Transport And Maintenance
If visible damages are detected when receiving the packaged machine, indicate “hits to the oven” at the time of the delivery, take photos of the damages and transport agency label on the packaging. Please, contact FM Industrial immediately. If package is apparently in good conditions, and damages are detected when unpacking, place the original packaging again on the machine, take pictures of the packaging and transport agency label on the packaging. - Page 9 4.3 Preliminary operations. Remove the protection film from the unit. Clean the adhesive residues with an appropriate solvent. Never use abrasive or acid products or tools that may damage the surface. 4.4 Placing the unit Place the oven in the selected work place and keep a safe distance as indicated below. Check that the unit has sufficient cold air inlets through the ventilation registers ensuring correct operation.
-
Page 10: Installing The Unit
5. Installing the unit 5.1 Electrical connection. Before connecting the unit to the power supply, check that the electrical grid characteristics match those described in the technical characteristics of each unit. The electrical installation must be performed by authorised technicians and meet the regulations in force. - Page 11 Remove the back cover of the oven. Disconnect the phases S and R from the connection terminals. Connect the bridges supplied together with this manual as described. Switching connection from three-phase 400 Vac to three-phase 230 Vac ...
-
Page 12: Instructions Of Use
6. Instructions of use Read this manual thoroughly before starting the unit and keep it for further consultation. If you need technical support, contact an authorised technical centre. The oven has been designed to bake or regenerate fresh or frozen bakery and pastry products with maximum regulation ranges of 60 minutes and 250ºC. - Page 13 9. Phase management 10. Start/stop 11. Favorite recipes 6.3 Ignition If the display is in standby mode, the ON/OFF button must be pressed to access the standby screen. If the display is on, the ON/OFF button must be pressed and held down to access the standby screen. Image 1: Standby screen Image 2: Start screen 6.4 Display...
- Page 14 At the top of the display you can see a series of segments indicating the phases of the current cooking program: Each time the display is turned on, starting from standby mode, the manual mode is acceded by default. The oven status icons are displayed at the bottom of the 23°...
-
Page 15: Functionalities
7. Functionalities__________________________________________ This oven can store in memory up to 100 cooking programs, each of which can be configured in up to 4 phases with different parameters (3 phases + preheating phase), in addition to parameters relating to the firing settings, as follows: ... - Page 16 Adjustment of MOTOR SPEED in phases Press button to access the desired phase. Press button to access the SPEED setting. Press buttons to select the desired SPEED value. Press the button again to confirm the selected value. 7.2 Last 10 recipes used Selection of LAST RECIPE used Press the button once to access the list of the 10 most recently...
- Page 17 7.5 Saving a recipe Access to submenu EDIT RECIPE In case you need to edit a program from scratch, select the MANUAL cooking mode and, after setting the desired parameters, press the button three times to access the EDIT RECIPE submenu.
- Page 18 Quick recipe editing Press the button 3 times to access the EDIT RECIPE submenu. Press the buttons to position yourself on the QUICK EDIT function. Note that this option is enabled when we start this procedure from a recipe that has already been saved. NOTE: For quick access to this function, simply press the button Press the button to access.
- Page 19 7.9 Assigning an image to a recipe (associate) To be able to assign an image to a recipe, it must have been previously saved. Assign image to a recipe (ASSOCIATE) Press the button three times to access the EDIT RECIPE submenu Press the buttons to position on the ASSOCIATE function.
- Page 20 If a favorite button does not have a recipe assigned to it (it is empty), clicking on it will cause an acoustic alarm to sound indicating this event. The same recipe can be supported by more than one favorite recipe button, so it may create some conflict when executing a cooking cycle.
- Page 21 ACTIVE PHASE: the parameters are highlighted NON-ACTIVE PHASE: parameters appear shaded To ENABLE or ACTIVATE a PHASE, simply click on one of its adjustable parameters (time, temperature, humidity or motor speed, if the latter is adjustable) and select the desired value. To DISABLE or DISABLE A PHASE, access the TIME parameter and set it to 0.
- Page 22 If the door is opened and closed before the end of the preheating phase, that phase will be interrupted immediately. 7.14 Setting the parameters of a recipe Modification of the parameters of a recipe can be carried out even when the recipe is already running. As for manual recipe settings, any adjustments made before or during the cooking process are temporary, i.e.
- Page 23 7.15 Display of the cooking time When the oven is not running, the display will remain in STANDBY MODE, where, as mentioned in previous sections, the parameters of the cooking cycle that will be carried out when the START key is pressed can be displayed. ...
-
Page 24: Advanced Settings
8. Advanced settings________________________________________ 8.1 Displaying the firmware Firmware version Press four times the button to access the submenu SERVICE. Press the button to place yourself over the option INFO. Press the button to display the information. 8.2 Setting date/time Adjusting date/time Press four times the button to access the submenu SERVICE. - Page 25 8.4 Deleting images Deleting images Press four times the button to access the submenu SERVICE. Press the buttons to click on the option DELETE IMAGES. Press the button to access the deletion option. Press the buttons to confirm the deletion. 8.4 Loading images The procedure discussed in this section is different from the procedure described in section 7.9.
-
Page 26: Alarms And Errors
9. Alarms and errors________________________________________ Chamber probe error/failure REASON: this alarm is triggered if any of the following events occur: Short circuit in the oven chamber temperature probe wire. Cut in the oven chamber temperature probe wire. Reading error in the measuring range of the probe. CONSEQUENCES: no firing cycles are allowed to be executed. - Page 27 Ed.:23 – Ver.:01 – 01/01/2023...
Need help?
Do you have a question about the RXD 384 V2,4 and is the answer not in the manual?
Questions and answers