Table of Contents
Advertisement
Quick Links
Advertisement
Table of Contents

Related Manuals for KODERA CASTUGNON C551SSA


Summary of Contents for KODERA CASTUGNON C551SSA
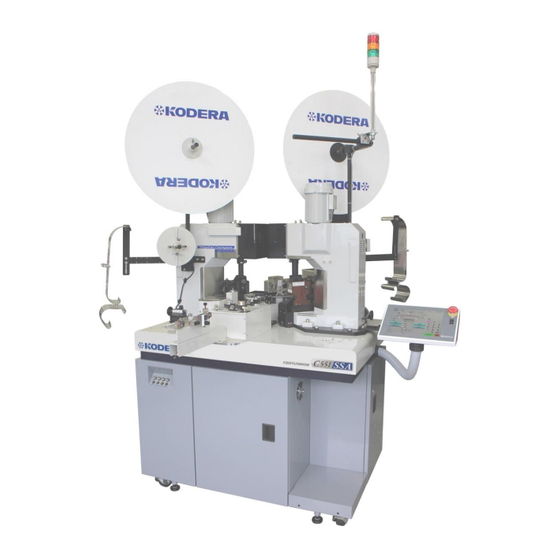
- Page 1 INSTRUCTION MANUAL Ver. 8 Important : Please read this instruction manual carefully before using CASTUGNON C551SSA(z)/C555SSA(z)/C558SSA(z). Please observe the safety precautions to operate this machine safely. Please keep this manual at hand so that you can read it whenever necessary.
-
Page 2: Safety Instructions
Safety instructions If you do not operate the device properly, it may result in failure or accident. Please read this instruction manual carefully before operating the device. In this manual, safety instructions are indicated with “DANGER” or “CAUTION”. Danger : If you do not observe this item properly, it may result in death or severe injury. Caution : If you do not observe this item properly, it may result in moderate disorder, slightly injury or material damage. - Page 3 Caution ・ Do not put hands and other objects around the guide pipe during processing. -> It moves left and right, it may cause injuries. Caution ・ Do not put hands and other objects around the roller during processing. -> The roller rotates at a high speed, it may cause injuries. Caution ・...
- Page 4 Caution ・ Do not block out the fans. -> It may overload the unit and cause a failure. Caution ・ Keep the capacity of the circuit breaker. -> If the circuit breaker shuts off frequently, please consult the sales representative where you purchased the product.
-
Page 5: Precautions For Installation
Precautions for installation Danger ・ Install the unit on a horizontal place that can fully take the weight of the unit. -> Improper installation may result in injuries due to falling of the unit, vibration, or increasing operating noise. Caution ・ Ground an electric wire. Do not connect the ground wire to gas pipe, water pipe, lightning rod, and the grounding wire of the telephone. - Page 6 C551SSA (z) Layout Drawing (Waterproof unit is installed in C555SSA and C558SSA) 先端側プレス機 Front Crimper M7 Unit 7メカ CN-4501, M8 Unit CN-4501 8メカ CN-4503, or CN-4503 CN-4505のどれか CN-4505 Rear Crimper 後端側プレス機 Operation 操作パネル Panel 1メカ M1 Unit 2メカ,刃ブロック M2 Unit, Cutter Block View of the three-blade block for the C551SSA from the M7 Unit side Rear end strip Cutting...
-
Page 7: Table Of Contents
Index Safety instructions ..................... 1 Handling Instructions ..................1 Precautions for installation ................4 1) Handling instruction ..................7 2) Unpacking and installing the unit ..............7 3) Before operation ..................8 4) Power on and power off ................11 5) Description of touch panel ................. -
Page 8: Handling Instruction
1) Handling instruction * Power voltage is single phase 200V to 240V. Be sure to use the supplied power cord for the device. * Use an outlet with enough power capacity as a power source. * Do not block the air outlet. * Install the unit on a horizontal place with a strong floor as much as possible. -
Page 9: Before Operation
3) Before operation Power Box Power Box 電源ボックス Operation Panel 1. Connecting the power cable ① Make sure that the power switch on the operation panel is set to OFF (O). ② Insert the supplied power cable plug firmly into the plug slot in the power box at the bottom left of the front of the machine unit. - Page 10 4. How to check the air pressure There is an air regulator that also works as an air filter under the No.1 crimper. When air is connected to the unit and the air valve is set to “open”, the pressure scale of the air regulator will increase.
- Page 11 5. Check the front door If the front door is open at the start of processing, the message “Confirm a front door” is displayed on the screen, and processing does not start for safety. Close the front door before starting operation.
-
Page 12: Power On And Power Off
4) Power on and power off ① How to power on Circuit breaker 1. Turn the circuit breaker of the main body on. (Push [|]) Emergency Stop Switch 2. Turn the emergency stop switch on the operation panel to the right, make sure that the button is not pushed. -
Page 13: Description Of Touch Panel
5) Description of touch panel The screen is a touch panel. When you touch each part on the screen, it works as a switch. It is pressure-sensitive, so it works even with gloves. Caution: Do not press the touch panel strongly with your finger, give it a shock, or press it with a sharp object. - Page 14 ・Description of each screen Basics: Set the dimensions and the number of wires etc. ① Core diameter: The depth of the blade when stripping the wire. (Refer to P. 36.) ② Blade move back: The amount of the blade back when stripping the wire. (Refer to P. 36.) ③...
- Page 15 When it is set to “0”, the next operation does not start until the [Start] is touched again. When it is set between “1” and “240”, it stops for a specified time after a batch process is over before starting the next batch process automatically. ⑧...
- Page 16 ⑪ Standard/thin wire: if the [Thin wire] is selected when processing thin wire, the amount of blade opening will be reduced and processing speed will be faster. You can select whether to display or not by ㉖ in [Machine setting screen] on P.
- Page 17 Barrel a: The wire is stripped. Shift up [Start position]: Sets the position where the shift up starts after crimping, Wire with the bottom dead center at 0 mm. b: The wire is brought down to the Terminal Normally, use [0 (zero)] and set crimp position.
- Page 18 ⑦ Detection mode: This setting is the detection mode of the state of the core wire when using the strip sensor. Select one of them. The mode shown in blue is selected. ⑧ Sensor value: The left value shows the maximum value of the light receiving status between the upper and lower fiber sensors.
- Page 19 Crimper 1 and Crimper 2: Set the crimp height and crimp force for Crimper 1 and Crimper 2. The operation and input methods are the same for Crimper 1 and 2. The setting of the crimp force monitor is directly related to the detection of defective products. Refer to P.
- Page 20 ⑤ Whole: It can be set the start position of monitoring the crimp This range is ignored. waveform by the crimp force monitor. (0 to 269) Normally, it is used with [0], but if it is necessary to ignore unstable pressure fluctuations when cutting the carrier, enter the start position of monitoring.
- Page 21 Caution: Touching the [Crimp] will activate the crimper. Make sure that there are no problems with the applicator settings and terminals, etc., and keep your hands and other objects away from the operating parts. ⑪ Height adjustment: Use this when the crimp height of an already crimped terminal is measured by height gauge and adjusted further.
- Page 22 Operation : This is the selection of the C551SSA operation, including the discharge position and operating speed setting. ① Select discharge position: This is the setting of the discharge position of the wire after processing. Select A, B, or C by touching them. Discharge good products to the green circle positions and defective products or sample processed products to the red x positions.
- Page 23 Depending on the wire, a high motor speed may cause stepping out of the motor. In such a case, you can change the speed of the motor that is running each operation independently. Normal High ④ Speed・Feed wire: The rotation speed of the roller when measuring the length. ⑤...
- Page 24 ⑱ Total operation hours: Cannot be reset. This is the total of cumulated time for the processing time. Cumulated for [Production mode] only. ⑲ Conveyor Drive Length: Conveyors are automatically started when processing the total length longer than the entered value. (When an optional conveyor is connected) ⑳...
- Page 25 Machine setting 1 : Various Setting for the machine body and whether the options are installed or not. The light color indicates ON (Selected) and the gray color indicates OFF. ① Wide gripper: When the M7 Unit Grip is replaced from the standard width to wide chuck, be sure to enable (blue) this button.
- Page 26 machine will stop and a message will appear to ask for a replacement when the wire is remaining low. Enter the remaining length of the wire inside the feeder if the wires were connected inside the feeder. This is usually used with 0 (zero). Example of use: Total pieces: 100 Total length: 1000 mm...
- Page 27 ㉒ CHA adjustment: This is an adjustment for CHA encoder. Do not change it by user. ㉓ Origin adjustment: Moves to the origin adjustment screen. (Refer to P. 28.) ㉔ Test mode: Moves to the test mode screen. (Refer to P. 30.) ㉕...
- Page 28 Machine Adjustment 2 : Second page of the machine setting screen. ① Camera: Select this button when connecting and using the camera unit (image recognition device, etc.). (Please consult with your agent when using it.) ② Stripping with a cutting blade: This is the mode in which all cutting and stripping operations of wires are performed only with the center blade.
- Page 29 Origin adjustment screen: This screen shows how to adjust the origin of each unit. Adjust each part when changing the V blade or replacing a unit. The pre-entered values are adjusted at the time of factory shipment. Do not change them unreasonably.
- Page 30 Enter value of [+] to move the guide pipe to crimper #2, and enter value of [-] to move the guide pipe to crimper ③ Origin adjustment・Rear move back & forth: This is the correction of the origin position of the M7 Unit grip.
- Page 31 Test mode: The operation of solenoid valves and the operation signals of each board can be checked. Air supply is required to check the operation of the solenoid valves. The bottom screen is all off, but there is a part that is turned on in the normal time. Main ①...
- Page 32 ⑭ Rear crimp signal: It is possible to test the signal to the CTGP board of the rear end crimper. The CRP2 on the CTGM3 board turns off. ⑮ Bucket: It is possible to test the signal to the optional bucket device. The LED55 on the CTGM3 board lights up.
-
Page 33: Before Crimping The Terminals: Wire Strip Processing Only
6) Before crimping the terminals : Wire strip processing only The terminals cannot be crimped before the wire can be cut and stripped. Operate in the order described in this manual until it is ready to process the strip only. For C555SSA/C558SSA (Waterproof seal insertion device), refer to P. - Page 34 The front end of the wire drawing turns into the stripped state. If you make a mistake in inputting, touch the [Front Strip length] and input again. Setting of the total length 200mm. ④: Touch the [Total length]. The [Total length] input area blinks yellow. ⑤: Input [2] [0] [0] [SET] in turn and it blinks yellow, then lights up and it is determined.
- Page 35 2. Setting wire 1. Set the power switch of the operation panel to ON. GUIDE PIPE 2. Turn the ROLL UP volume to the left to widen the rollers. Roller 3. Remove curl of the wire to be processed and pass it through ROLL UP the inlet guide and guide pipe.
- Page 36 Rear grip position: Set which position of the wire to be grabbed for rear end processing. The larger the number, the closer position of the cutting blade is grabbed. A As shown in A, it is better to grab the position which is close to the position of the cutting blade to reduce the influence of the wire material tendency.
- Page 37 4. Blade depth setting when stripping [Core diameter] These values are the diameter of the core wire for the wire to be processed. Input the core diameter according to the table below and do test processing, and if the core wire is scratched, increase the value and if it cannot be stripped, decrease the value and determine the best value.
- Page 38 When the blade is move back only 0.27 mm ⑫: Touch the [Blade move back]. The [Blade move back] input area blinks yellow. ⑬: Input [0] [.] [2] [7] [SET] in turn and it blinks yellow, then lights up and it is determined. [Blade depth] (Core diameter) and [Blade move back] are very important items.
- Page 39 6. Setting of number of pieces to be processed: When it is necessary to process 10 pieces ⑭: Touch the [Setting pieces] The [Setting pieces] input area blinks yellow. ⑮: Input [1] [0] [SET] in turn and it blinks yellow, then lights up and it is determined.
- Page 40 7. Adjustment for roller pressure and guide pipe Blade Pressure: It is the pressure of the roller that is GUIDE PIPE sandwiching the wire. The roller is used to measure the length of the wire while feeding it and to strip the front end.
- Page 41 Adjustment for the top and bottom position of the guide pipe Cap screw (M3) ・ To adjust the top and bottom, loosen the lock nut Lock nut (5.5 mm) shown in the left photograph and adjust the cap screw. The height of the guide pipe is lowered by turning the cap screw clockwise.
- Page 42 8. Process start ・Verify that all previous entries are correct and start the actual processing. ① Touch the [Process start] to switch to the processing operation selection screen. Select one from the four patterns of machining operations. Processing operation selection screen A.
- Page 43 In the case of an emergency stop, it will stop until you touch the [Origin reset] on the screen. C. The origin reset is executed by touching the [Origin reset] button. Make sure that there are no problems with the operation, then touch the [Origin reset]. 9.
-
Page 44: How To Install The Terminal Reel
7) How to install the terminal reel In the case of side feed terminals ① A: Remove the reel stopper, and B: Pass the terminal reel through the reel stand bar. ② A: Pinch the terminal reel with the reel stopper. If the reel stand bar is short C: Loosen the reel stopper screws and B: Pull out the reel stand bar by the required amount. -
Page 45: Position Adjustment At Each Position By Step By Step Mode For Crimping
8) Position adjustment at each position by step by step mode for crimping (For C555SSA and C558SSA, go to “Position adjustment in the step by step mode by operating the waterproof unit” on P. 78.) Use the one touch base to install the applicator on the crimper (crimping machine) at the front and rear ends, and then set the terminal. - Page 46 ③ Return to the [Basic] screen to check the wire processing conditions, and [Set] the front and rear end strip lengths to match the terminals. ④ Touch the [Process start]. [Process start] It switches to the processing operation selection screen. ⑤...
- Page 47 ⑤ In the fifth step, the guide pipe moves to the front crimp position. If you touch A. [Finish Step Feed] while the screen on the left is displayed, one sample without crimping is processed and discharged, and the Step by step mode is finished.
- Page 48 ⑧ Adjusting the front shift down position Touch [Shift down] to shift down. When the guide pipe comes to the slide cutter of the applicator, loosen the lock nut of A, and turn the volume B to adjust the height (a) of the guide pipe.
- Page 49 Switched to the target pressure input screen and the [Target pressure] key is displayed. When the [Target pressure] is touched, the input area blinks yellow. If the standard pressure value of the terminal to be crimped is confirmed, input the pressure value.
- Page 50 ・ Visually check that the wire is properly positioned at the back and forth of the terminal barrel. ・ As shown in Figure 6, the back and forth position (deep or shallow) of the wire can be adjusted by touching the key.
- Page 51 ⑯ If touch the [Next Step], the screen on the left is displayed. Touch the [Automatic crimp force adjustment crimp]. Set the [Target Pressure] and execute [Automatic crimp force adjustment crimp] in the same way as the crimping of the front end. Touch the [Next Step] several times, make sure that there is nothing wrong with that.
- Page 52 Procedure for adjusting the crimp position The crimp position can be adjusted by inputting a value in addition to the crimp position adjustment by the step by step mode. Both the amount of the core wire protrusion and the position of the sheath are bad Method Operation...
-
Page 53: Automatic Processing
9) Automatic processing Before starting automatic (continuous) processing, please check that the following items are completed. 1. There are no problems with the strip processing without crimping the terminals. (Refer to P. 32 and later.) 2. The position adjustment of the crimping machine for the guide pipe. 3. -
Page 54: Strip Sensor And Sensor Set
10)Strip sensor and sensor set If the optional [Strip sensor] is installed (standard on C555SSA and C558SSA) and activated in P. 24 the [Machine setting screen], the section of [Core wire detection] will be displayed in the [Front Crimp] or [Rear Crimp] screen (Refer to P. - Page 55 Sensor set at the [Step by step mode] The [Step by step mode] allows you to automatically or arbitrarily adjust the detection position of the strip sensor. Touch the [Process start], proceed to the [Step by step mode]. After a few touches of the [Next Step], it will turn to the screen of the sensor detection position after stripping the front end.
-
Page 56: Crimp Force Monitor
11)Crimp force monitor This machine monitors (monitoring) the amount of pressure (crimp force) applied to the terminals when the terminals are crimped one by one using the pressure sensor built into the ram bolt. Defective products such as non-core crimping, core wire break crimping, and sheath biting crimping will have differences in the amount of pressure compared to normal one. - Page 57 ③ Error-allowable value setting (for both ends of crimping, it is necessary to set the front and rear end respectively) Basic settings (only the upper and lower allowances against the standard waveform) A: Input the upper and lower limits in the [Tolerance value] field.
- Page 58 ⑥ If there is no problem with the [crimp shape], [height], [tensile strength], etc., and the product is within the standard, increase the error allowable range. In the case shown in Figure 1 on the previous page, increase the upper limit value of the tolerance value. (You can enter up to 20% for both the upper and lower limits.) Caution: Check the [crimp shape], [height], [tensile strength], etc.
- Page 59 On the [Crimper 1] and [Crimper 2] screens, touch the [Whole] and enter the point at which the judgment becomes effective. (Settable up to 269.) The standard line is 100, 200, 270 as they show. Figure In Figure 2, the value is set to 180. It ignores pressure changes up to 180 and monitors the pressure after that.
- Page 60 How to set up ① Input the endpoint for Area B. (e.g.: 280) Area A ② Input the starting point for Area B. (e.g.: 230) ③ Input the starting point for Area A. (e.g.:99) In the case of the figure on the left, since 50 is set for the [Whole], the error is judged from 51.
- Page 61 Example of selection of tolerance 1. Make a good product (crimp height, crimp position and tensile are all OK). 2. Determine the waveform, set the tolerance value to 5% of the upper and lower limits, and process 10 or more pieces. 3.
- Page 62 Control Mount an encoder to the crankshaft of the crimping machine, and while the encoder detects the height of the ram during crimping, it measures the electrical resistance value in real time as the ram moves. The measured value is displayed in the waveform, and it is precisely compared with the pre-determined good waveform according to the tolerance value setting to determine whether it is good or bad.
- Page 63 Management In order to use the Crimp Force Monitor well, daily maintenance with focus on applicator is very important. This will enhance detection capacity to prevent false judgment and increase production capacity. Here are some representative checkpoints. 1) The shank of the applicator should not have any rattles on the sliding surface. 2) The shank part of the applicator is slippery.
- Page 64 Memory function The memory function of the SSA Series uses the “master registration” method, of which management is more efficient, instead of the conventional method of “registering the entire configuration screen in one memory.” The respective masters of "wire", "front crimp", "rear crimp", "front waterproof", "rear waterproof", "marker", and "middle strip"...
- Page 65 [Front crimp] master Memory name Front strip length Front crimp Front crimp Whether or Whether or Whether or Normal (optional) position back position right not to not to operate not to operation or and forth and left perform front front shift operate front reverse crimp...
- Page 66 rubber insertion insertion length [Marker] master Memory name Marker Print interval Output time Standby time Front print Front print Front print (optional) position position 1 position 2 position 3 Front print Front print Whether or not to print a marker position 4 position 5 [Middle strip] master...
- Page 67 When [Memory] is touched, the display in Figure 1 appears. Figure 1 It is possible to manage the [Wire], [Rear Crimp], and [Front Crimp] memories separately. It is also possible to create a memory that combines them. (See p. 68.) Writing memory [Wire] When [Wire] is touched on the screen in Fig.
- Page 68 Writing memory [Front crimp] [Rear crimp] [Front waterproof] [Rear waterproof] When [Front crimp] or [Rear crimp] is touched on the screen in Fig. 1, each memory screen will be displayed. Touch the group to be written on page (①) p01 to p40 to select. Select the arbitrary memory number (②), and input any comments such as terminal names in the writing area (③)
- Page 69 Writing memory [Combination] [Wire][Front crimp][Rear crimp][Front waterproof] [Rear waterproof] can be combined and managed as a single memory. First, read the contents you want to combine in one memory from [Wire], [Front crimp], and [Rear Crimp], then touch [Combination] on the screen in Figure 1. The screen looks like the one shown on Memory Number the left.
- Page 70 Touch [Cancel] to return to the memory screen and [Execute] to read the memory. The memory function has a search function. Input the title of the memory you want to read in the input area (④) and touch [Search] (⑤). If there is a memory matching the title in the input area, the corresponding page will be displayed and the matching memory will be selected with a blue frame.
-
Page 71: Cha (Option)
13)CHA (Option) C551SSAZ/C555SSAZ/C558SSAZ equipped with the CHA (Crimp height automatic reproduction mechanism) reads not only the crimping pressure waveform data and crimp position but also the crimp height (= the position of the ram bolt) with a CHA encoder and automatically stores the data (value) when writing the [Front crimp] [Rear crimp] memory. -
Page 72: Closed Barrel
14)Closed barrel Turn off the operation panel and attach the closed barrel applicator to the front or rear end crimper. ① Touch the [Machine setting]. ② In the “Crimper 1” and “Crimper 2”, touch the [Closed barrel] of the one side that crimp the closed barrel terminal. - Page 73 Attach the manual handle to the crimper. ⑤ The screen automatically switches to the crimping waveform screen and displays the “Current pressure” at the bottom left of the screen. *This screen is not related to the closed barrel setting *The machine will not be able to make all inputs while the manual handle is being inserted to prevent danger.
-
Page 74: Operation Of The Waterproof Seal Insertion Device (On C555Ssa・ C558Ssa)
15)Operation of the waterproof seal insertion device (On C555SSA・ C558SSA) Before this operation, complete the operation described on P. 32 “Before crimping the terminals…wire strip processing only.” ① Confirm that either [Front Waterproof] or [Rear Waterproof] is selected for C555SSA on P. 24 the [Machine setting screen]. - Page 75 Touch the [Waterproof seal insertion], and the waterproof seal will be displayed on the wire diagram. (The shape of the waterproof seal differs from the actual shape of the waterproof seal.) Waterproof: Settings of the waterproof seal insertion position and sensors. The setting values can be entered directly on the [Waterproof] screen below, but for the actual positioning, set the position by performing “Position adjustment in the step by step mode”...
- Page 76 ② Right and left: The right and left position at the time of insertion. When inserting the wire into the waterproof seal, the center of the guide pipe and the center of the waterproof seal at the front insertion, and the center of the carry chuck and the center of the waterproof seal at the rear end insertion should be set in a straight line.
- Page 77 ⑦ Initial insertion length: This is the length of the first insertion when performing the two-step insertion. Enter a value smaller than the [Insertion length] value for the rear waterproof. Enter the total number to be inserted twice in the [Insertion length] of the rear waterproof. Two-step insertion motion A.
- Page 78 [Rough]: It is determined that the waterproof seal has been inserted in the wire if it is 50% or thicker of the wire outer diameter. ⑩ Seal transfer speed: This is the speed at which the carry chuck moves to the insertion position after grabbing the waterproof seal.
-
Page 79: Position Adjustment In The Step By Step Mode By Operating The Waterproof Unit
16)Position adjustment in the step by step mode by operating the waterproof unit ① Firstly, complete the operation described on P. 32 [Before crimping the terminals…wire strip processing only] and then set the applicators and terminals, complete P. 44 [Position adjustment at each position by step by step mode for crimping]. - Page 80 ⑥ When you touch the keys, the carry chuck moves back and forth. ⑦ Touch the [Chuck close] to close the carry chuck. At this time, visually adjust the position using the keys so that the bottom of the waterproof seal is flush with the side of the carry chuck.
- Page 81 If the position is out of alignment, use the key to adjust. You can enter directly into the ⑨ [Back and forth]. Carry Chuck Carry Chuck Adjust it as close as possible GUIDE PIPE GUIDE PIPE ⑪ When the [Next Step] is touched, the roller feeds the wire out and inserts the wire into the waterproof seal.
- Page 82 Adjust the position so that the center of the waterproof seal is on the center of the red sensor light while stopping on the strip sensor. (The approximate optimal position is automatically set by touching the [Sensor When using the [Seal detection], select the [Fine] [Standard] [Rough] of the [Seal detection] mode at the [waterproof] setting items.
- Page 83 At this time, visually adjust the position by using the buttons so that the bottom of the waterproof seal is flush with the side of the carry chuck. Seal transfer origin Carry Pin adjustment Carry Chuck Adjust the position so that the bottom of the waterproof seal is flush with the side of the carry chuck.
- Page 84 When ㉑ [Next Step] is touched, the rear grip which is grabbing the wire moves forward and inserts the wire into the waterproof seal. When ㉒ [Next Step] is touched, the wire is pulled back by the entered value at the rear end of P.
- Page 85 How to replace the carry pin for the waterproof unit How to remove it ・ Loose the screw G with a knob, the carry pin is released to the bottom. How to attach it ・ Insert the carry pin from the bottom until it reaches the stopper H, tighten screw G with knob at the position where the chamfering part of the carry pin meets the screw.
- Page 86 How to replace the carry chuck How to remove it 1. Lift up while lowering the metal lock on the one touch coupler, and the joint will come off. 2. Loosen the gray thumb screw that holds the triple air tube. 3.
- Page 87 DF-01 (Disk feeder) installation a. Feeder installment ① Insert the [Positioning Fixture] into the pickup hole of the feeder. Positioning Fixture There is a concave on the center. Screw C ② Turn the feeder base lever up. ③ The corner (A) of the feeder and B of the feeder base are placed it closely so that there is no gap and lower the lever.
- Page 88 b. Disk box installment ① Put the disk box on the main base. ② Slide it out until it hits the stopper. ③ Tighten the two fixing levers. Fixing lever Stopper ② Connect the feeder to the disk box. D ⇔ D’ E ⇔ E’ F ⇔ F’ G ⇔ G’ (Pay attention to the tube color. The upper side is green.) ⑤...
-
Page 89: How To Replace Each Part
17)How to replace each part Make sure to turn off the power before proceeding. Figur A. Gray thumbscrew B. Cap screw M3 C. Hollow Screw M3 ROLL UP VOLUME Turn it to the left to open the roller. ① How to replace the guide pipe Loosen the gray thumbscrew A and remove the pipe upward. - Page 90 ④ How to replace the blade To replace the blade, turn on the power, touch the [Machine setting] (P. 24), close the upper and lower blades by touching the (0.45 mm) in the [Blade] section of the ㉓ [Origin adjustment]. Turn off the power on the operation panel and proceed the replacement.
- Page 91 Lower blade: Hold the blade to be replaced by the blade replacement tool, loosen (do not remove) the black cap screw C, and pull out the lower blade in the upper direction. ・ Attaching the blade: Hold the blade by the “blade replacement tool”, and for the upper blade, insert the blade from the bottom up and tighten the black cap screw.
- Page 92 Caution: If the upper and lower blades are not centered and there is a gap between the fixture and blades, they may cause problems such as a difference in the way the front and rear blades enter. ⑤ How to replace M7 Unit Grip ・...
- Page 93 4. Put the spring into the pipe so that the back side of the spring comes to the widened side of the pipe. 5. Fit the pipe into the cap and screw the guide pipe body into it to assemble. 6.
-
Page 94: Major Option Parts List
18)Major option parts list Product Name Order No. Remark Guide pipe φ1 DTGP Type C551-AGP1-0 Guide pipe φ1.25 DTGP Type C551-AGP1.25-0 80 mm Guide pipe φ1.5 DTGP Type C551-AGP1.5-0 Guide pipe φ1.75 DTGP Type C551-AGP1.75-0 DTGP Type DTGP Waterproof Guide pipe φ1.75 C555-AGP1.75-0 Type 65 mm... - Page 95 Product Name Order No. Remark Spare pipe for DTGP φ1 C551-AGP1-1 10 pieces/set Spare pipe for DTGP φ1.25 C551-AGP1.25-1 10 pieces/set Spare pipe for DTGP φ1.5 C551-AGP1.5-1 10 pieces/set 72 mm Spare pipe for DTGP φ1.75 C551-AGP1.75-1 10 pieces/set Spare pipe for DTGP φ2 C551-AGP2-1 10 pieces/set Spare pipe for DTGP φ2.5...
-
Page 96: Guide Pipe Selection Guide
Slide finger assy (Grip) Rough M7-143 Slide finger assy (Grip) Fine M7-144 Standard Slide finger assy (Grip) Urethane M7-145 Slide finger assy (grip) Super fine M7-146 Discharge chuck assy (M8 Unit Chuck) Fine M8A-1 Standard Discharge chuck assy (M8 Unit Chuck) Urethane M8A-2 19)Guide pipe selection guide AVSS... -
Page 97: Wire Core Diameter
20)Wire core diameter Area (sq) Dia. (mm) Area (sq) Dia. (mm) Area (sq) Dia. (mm) 3.31 2.05 0.65 0.91 0.13 0.41 2.62 1.83 0.52 0.81 0.10 0.36 2.08 1.63 0.41 0.72 0.08 0.32 1.65 1.45 0.33 0.64 0.06 0.29 1.31 1.29 0.26 0.57... -
Page 98: Crimp Force Setting Guide
22)Crimp force setting guide The crimp force value will change depending on the strength of the insulation and the wear of the barrel of the applicator, so please use it as an approximate guide. Mfr. of Mfr. of Crimp force Crimp force Wire Terminal name... - Page 99 Mfr. of Mfr. of Crimp force Crimp force Wire Terminal name Wire Terminal name terminal value terminal value Ryosei AVSS 0.5 sq NSF-03 324 kg CAVS 0.5 sq YAZAKI 7114-1170 593 kg Denso AVSS 2.0 sq Union 1662-970170 633 kg AEX 1.25 sq YAZAKI 7114-2020Y 995 kg...
-
Page 100: Daily Inspection And Maintenance
23)Daily inspection and maintenance To prevent the occurrence of defective products beforehand, regular inspection and maintenance are indispensable. Although it depends on use frequency, please refer to the following table for implementation. Daily inspection and maintenance Item Symptom 1 Wear and chipping of the blade ①... - Page 101 Item Symptom 5 The setting of [Sensor Value] in upper There is no error even if the core wire is cut and the right of the [Other] screen should be wire cannot be stripped. within the range of 3500 to 3800. How to check (optional) Check it visually.
- Page 102 Item Symptom 3 Replenishment of grease to the crimper The sliding part (ram) may become overheat and cause failure. How to check Use the manual handle to move the ram up and down to make sure it is not too heavy or check that there is grease on the ram.
-
Page 103: List Of Attachments
24)List of attachments No. Manufacturer Type Type Side JAPAN SOLDERLESS Hand ○ TERMINAL (JST) crimping MOLEX (MOX) ○ Manual, Auto ○ ○ JAM (JAM) TOYO TERMINAL (OTP) Automatic ○ UNION MACHINERY ○ ○ ERCO INTERNATIONAL ○ ○ MATSUSHITA TSUSINN Manual, ○... -
Page 104: Specifications
SPECIFICATIONS MODEL CASTUGNON C551SSA (Z) (Crimp force monitor is equipped as standard.) FUNCTION Strip at both ends, terminal crimping at both ends, side/end feed EXTERNAL Width: 1090 mm × Depth: 780 mm × Height: 1550 mm (Machine DIMENSIONS dimensions) WEIGHT... - Page 105 SPECIFICATIONS MODEL CASTUGNON C555SSA(z), C558SSA(z) Both ends stripping,both ends terminal crimping (side/end feed), C555SSA: FUNCTION Single end seal insertion, C558SSA: Double ends seal insertion EXTERNAL Width: 1090 mm × Depth: 1500 mm × Height: 1550 mm (Machine DIMENSIONS dimensions) WEIGHT C555SSA: 480 kg C558SSA: 510 kg POWER SOURCE...
Need help?
Do you have a question about the CASTUGNON C551SSA and is the answer not in the manual?
Questions and answers