Table of Contents
Advertisement
Quick Links
Advertisement
Table of Contents

Related Manuals for Tornado BD 28/27


Summary of Contents for Tornado BD 28/27
- Page 1 TORNADO INDUSTRIES, LLC 333 CHARLES COURT WEST CHICAGO, ILLINOIS 60185 (630)-818-1300 FAX. (630)-818-1301 WWW.TORNADOVAC.COM Operations & Maintenance Manual For Commercial Use Only MODEL NO. TS560-W28-U 09 2023 ©Tornado Industries, LLC. All rights reserved...
- Page 2 Within 30 days of purchase, to activate product warranty, go to: https://tornadovac.com/services/warranty-registration-form.aspx For warranty information go to www.tornadovac.com...
-
Page 3: Table Of Contents
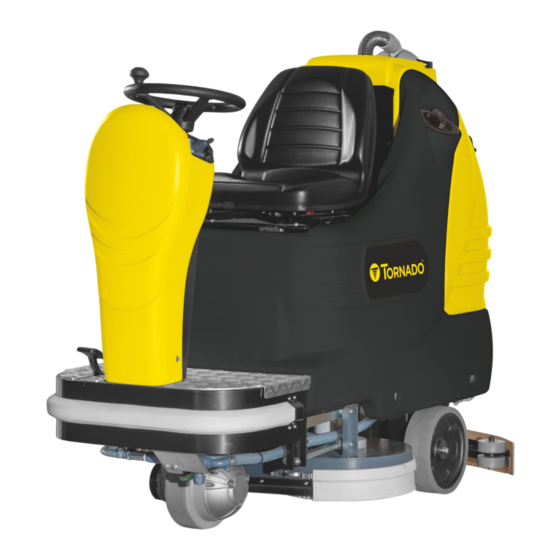
INTRODUCTION Thank you for having chosen our machine. This floor-scrubbing machine is designed for commercial use and is used for industrial and civil cleaning operations on any type of floor or paving. During forward motion, the combined action of the brush and of the detergent solution removes dirt, which is then collected by the rear suction unit, leaving the surface perfectly dry. -
Page 4: General Safety Rules
GENERAL SAFETY RULES When the machine evidences operating anomalies, make sure that these do not derive from lack of routine maintenance. If this is the The rules specified below must be followed carefully to prevent harm case, contact the authorised technical support centre. Before every cleaning and/or maintenance operation, disconnect to the operator and damages to the machine. -
Page 5: Technical Description
TECHNICAL DESCRIPTION Working width ..........................in Squeegee width ..........................in Cleaning capacity up to .........................sq.ft/h 37.673 Brush diameter ..........................in 2x 14 Brush revolutions ........................... rpm Pressure on the brushes ........................lbs Brush motors ............................ W 2x 350 Suction motor ........................... W Suction motor negative pressure .................... -
Page 6: Display And Control Panel Legend
DISPLAY AND CONTROL PANEL LEGEND OFF/ON KEY SWITCH SUCTION MOTOR BUTTON WORK MODE SELECTION/SOLENOID VALVE ON BUTTON • ON/OFF • STANDARD • SILENT MODE • 7. FORWARD/BACK MOTION JOYSTICK • 8. DETERGENT LEVEL BUTTON (3SD ONLY) WASHING MODE SELECTION BUTTON: 9. -
Page 7: Display Reading
DISPLAY READING VIEW UPON SWITCH-ON When the machine is switched on, the display shows the following screen. The next screen will appear as follows: BATTERY SETTING Setting for GEL batteries Hour meter Setting for AGM batteries SOFTWARE RELEASE Display board Setting lead/acid Functions board... -
Page 8: Navigation Controls
NAVIGATION CONTROLS SCROLL UP INCREASE CONFIRM SCROLL DOWN DECREASE GENERAL SETTING DISPLAY TUNE To access the settings menu, use the keypad on the dashboard and After accessing the General Setting menu, it is possible to modify the proceed as follows: display’s colour contrast. -
Page 9: Symbols In The Manual
SYMBOLS IN THE MANUAL Open-book symbol. Indicates to the operator to read the manual before Obligation symbol that obliges the user to wear using the machine. protective glasses. Open-book symbol. For the efficient operation of the incorporated Obligation symbol that obliges the user to wear battery charger (optional), consult the user manual protective gloves. -
Page 10: Before Use
BEFORE USE To install case-type batteries in the compartment, it is necessary to: 1. Flip the seat bed forward and attach the prop (2) in position A. HANDLING OF THE PACKED MACHINE 2. Detach the tool compartment (1) by loosening the two wing nuts The machine is supplied with the packaging configured for its handling securing it to the seat bed. -
Page 11: Battery Charger
connect the battery cables to the relative free terminals. BATTERY CHARGE INDICATOR The battery charge indicator appears on the display with the relevant If the machine mounts 6 V 210 Ah5 tubular batteries, connect them symbol (see “CONTROLS DISPLAY”). as follows: When the last charge segment starts flashing, it means that the battery is almost completely flat;... -
Page 12: Battery Disposal
Risk of fire: do not approach the batteries with open flames. Adjust the squeegee’s inclination by turning the wing nut (2) anti- clockwise to increase the curvature in the central part, or clockwise to increase the curvature at the sides. Adjusting the height BATTERY DISPOSAL Once the squeegee pressure and inclination have been adjusted,... -
Page 13: Mounting The Brushes
MOUNTING THE BRUSHES In order to mount the brushes, the washing base must be in the raised position. Should it not be in this position, proceed as follows: Without the operator on board, turning the key clockwise switches on the display then after 3 seconds all working assemblies are automatically switched off and raised from the floor. -
Page 14: Floor Cleaning
FLOOR CLEANING CONNECTING THE BATTERY CONNECTOR AND SWITCHING THE Always use detergent with retarded foam. To safely avoid foam the MACHINE ON production of foam, before starting work introduce a small amount of Once the batteries have been charged: anti-foam liquid into the recovery tank. Remove the battery charger connector (2) from the battery connector Do not use pure acids. -
Page 15: Selecting The Flow Rate Level - 3S And 3Sd Systems
SELECTING THE FLOW RATE LEVEL – 3S AND 3SD SYSTEMS OZONE SELECTION (OPTIONAL) Moving the level selection joystick (1) allows for varying the H value The machine can produce water with a sufficiently high level of ozone from H1 to H7. to create a disinfectant action on treated surfaces. -
Page 16: Work
WORK Ozone is a gas with a very pungent odour that can be an irritant. A safety device prevents the machine from moving if the operator is not positioned correctly on the seat. Ozone-enriched water is highly oxidising; therefore, in order to protect the machine’s metal parts against oxidation (rust), the entire lower To start the machine: part of the machine should be rinsed with water at least once a week. -
Page 17: Speed Adjustment, Forward And Reverse Motion
adequately regulated. It must be sufficient for uniformly wetting the WORK IN AUTOMATIC MODE Working in automatic mode is useful for simplifying the operator’s task. 1. Check that the machine has been set to automatic mode; if not, press button (1) and the corresponding symbol will appear on the display. -
Page 18: Hooter
HOOTER The machine is equipped with a hooter that can be activated by pressing button (1). PARKING BRAKE The machine is equipped with a parking brake on the traction wheel, which intervenes when the pedal is fully released or when the machine is without batteries. -
Page 20: Stopping The Machine After Cleaning
STOPPING THE MACHINE AFTER CLEANING DAILY MAINTENANCE BREAK WASHING MODE EMPTYING AND CLEANING THE RECOVERY TANK IN BOTH AUTOMATIC AND MANUAL WORK MODE: 1. At the end of the washing 1. Grip the discharge pipe (1) located on the front part of the machine cycle, pressing and holding after having extracted it from button (1) will select the BREAK... -
Page 21: Cleaning And Suction Filter
CLEANING AND SUCTION FILTER 1. Remove the suction cap (1) after turning the levers (2) that secure 2. Remove the filter and the relative protection. 3. Clean all components with a water jet, especially the walls and bottom of the filter. 4. -
Page 22: Bimonthly Maintenance
BIMONTHLY MAINTENANCE OPERATION CHECK INSPECTING THE FRONT SQUEEGEE RUBBER ELEMENT The inspection of the machine’s operating condition is conducted by the authorised technical assistance centre. Check the state of wear of the squeegee rubber element and, if Never leave the batteries flat for long periods of time. necessary, replace it. -
Page 23: The Machine Does Not Clean Properly
SERVICE WARNING The following screen will flash for roughly 20 seconds 500 hours after the machine has been switched on. Subsequently, the standard display will appear and the machine will be ready for work. Contact the authorised technical assistance centre to perform scheduled maintenance. -
Page 24: Scheduled Maintenance
SCHEDULED MAINTENANCE ROUTINE PERIODIC MAINTENANCE TABLE INTERVENTION DAILY PERIODIC CLEANING OF THE RECOVERY TANK • CLEANING OF THE SUCTION FILTER • CLEANING OF THE SOLUTION FILTER • CLEANING OF THE BRUSH • DISMANTLING AND CLEANING OF THE BRUSH • CLEANING OF THE SQUEEGEE •... -
Page 25: Serial Number Plate Key
SERIAL NUMBER PLATE KEY 1. Manufacturer’s name 2. Registered office of the Manufacturer 3. Country of manufacture 4. Disposal regulation 5. CE marking 6. Maximum weight of installable batteries 7. Gross weight of the machine (IEC/EN 60335-2-72 clause 3.114) 8. Installed power 9.
Need help?
Do you have a question about the BD 28/27 and is the answer not in the manual?
Questions and answers