
Related Manuals for Advantech ROM-7720


Summary of Contents for Advantech ROM-7720
- Page 1 User Manual ROM-7720 RISC-based Qseven 2.1 Module with NXP i.MX8 ARM® Cortex™ A72 Processor...
- Page 2 No part of this manual may be reproduced, copied, translated or transmitted in any form or by any means without the prior written permission of Advantech Co., Ltd. Information provided in this manual is intended to be accurate and reliable. How- ever, Advantech Co., Ltd.
- Page 3 Before setting up the system, check that the items listed below are included and in good condition. If any item does not accord with the table, please contact your dealer immediately. 1 ROM-7720 4 Screws for ROM-7720 Optional Accessories Part No. Description 96PSA-A36W12R1 Power Adapter 100-240V 36W 12V...
- Page 4 Description ROM-DB7501 Development carrier board for Qseven 2.0 module For more information please refer to "Advantech Baseboard Check List" and "Evalu- ation Board Reference Schematic". You can download "Advantech Baseboard Check List" and "Evaluation Board Reference Schematic" from http://www2.advantech.com/ Embedded-Boards-Design-in-Services/risc-computing-platforms/default.aspx.
- Page 6 The equipment has been dropped and damaged. The equipment has obvious signs of breakage. DISCLAIMER: This set of instructions is given according to IEC 704-1. Advantech disclaims all responsibility for the accuracy of any statements contained herein. Safety Precaution - Static Electricity Follow these simple precautions to protect yourself from harm and the products from damage.
-
Page 7: Table Of Contents
Replace Kernel &dts……………………………………………….. 38 3.4.6 System Recovery ..................39 Debug Message ..................39 Linux Software AP and Testing on ROM-7720 ........40 3.7.1 “Hello World!” Application and Execution ........40 3.7.2 Watchdog Timer Sample Code............ 41 3.7.3 GPIO Setting................42 3.7.4 RS232 Initial Code ............... - Page 8 Chapter System Recovery ......48 System Recovery ..................48 Chapter Advantech Services ......50 RISC Design-in Services ................ 50 Contact Information................. 54 Technical Support and Assistance............55 ROM-7720 User Manual viii...
-
Page 9: Chapter 1 Product Overview
Chapter Product Overview This chapter briefly introduces the ROM-7720 platform. Sections include: Introduction Specification... -
Page 10: Introduction
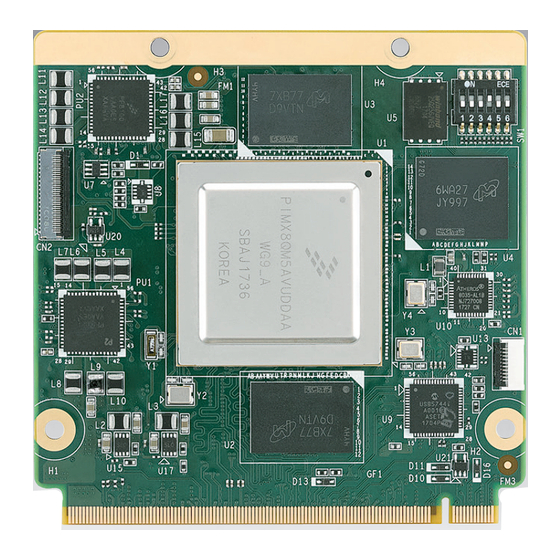
ROM-7720 Qseven 2.1 Module powered by i.MX8 QuadMax Processor, which compose eight cores, including 2 ARM Cortex-A72 cores, 4 Cortex-A53 cores and 2 Cortex-M4F coreinto one single package. ROM-7720 also escalate its graphic performance by dual 32- core GPU subsystems, 4K H.265 capable VPU, and dual failover-ready display controllers. -
Page 11: Product Features
+5 V Operation 0 ~ 60° -40~85 C Environment Operating Humidity 5% ~ 95% relative humidity, non-condensing Physical Dimensions (WxD) 70 x 70 mm Characteristics Camera Input MIPI CSI 1 MIPI-CSI 4 Lane, 1 MIPI-CSI 2 Lane ROM-7720 User Manual... -
Page 12: Mechanical Specifications
Operating temperature: 0 ~ 60° C / -40 ~85° C The operating temperature refers to the environmental temperature for the model. Operating Humidity: 5% ~ 95% relative humidity, non-condensing Storage temperature: -40~85° C Storage Humidity: – Relative humidity: 95% @ 60° C ROM-7720 User Manual... -
Page 13: Chapter 2 H/W Installation
Chapter H/W Installation This chapter gives mechanical and connector information on the ROM-7720 Computer on Module. Sections include: Connector Information Mechanical Drawing... -
Page 14: Board Connectors
External IO Connector Position Description Boot selection switch CONSOLE1 Debug port console SW2 (Boot selection) Jumper Mode Jumper Mode 1-ON 1-OFF SPI-ROM (Default) SD (Reserved for recovery) 2-OFF 2-ON CONSOLE1 (Debug port) Signal Signal +3.3 V UART1_TX UART1_RX ROM-7720 User Manual... - Page 15 HDA/I2S I2S_RX0 HDA_SDO / I2S_SDO HDA/I2S I2S_TX0 THRM# THRM# THRMTRIP# THRMTRIP# USB_P7- / USB2.0/ USB_SSTX0- USB_SSTX0- USB3.0 USB_P7+ / USB2.0/ USB_SSTX0+ USB_SSTX0+ USB3.0 USB_6_7_OC# USB_6_7_OC# USB2.0/ USB_P5- / USB_SSTX2- USB_SSTX2- USB3.0 USB2.0/ USB_P5+ / USB_SSTX2+ USB_SSTX2+ USB3.0 ROM-7720 User Manual...
- Page 16 HDMI_TX0_DATA1_N TMDS_LANE1- DP_LANE2+ / DP/HDMI HDMI_TX0_DATA0_P TMDS_LANE0+ DP_LANE2- / DP/HDMI HDMI_TX0_DATA0_N TMDS_LANE0- DP_LANE0+ / DP/HDMI HDMI_TX0_DATA2_P TMDS_LANE2+ DP_LANE0- / DP/HDMI HDMI_TX0_DATA2_N TMDS_LANE2- HDMI_HPD# HDMI HDMI_TX0_HPD# PCIE_CLK_REF+ PCIE PCIE_CPU_REFCLK100M_P PCIE_CLK_REF- PCIE PCIE_CPU_REFCLK100M_N PCIE3_TX+ PCIE PCIE3_TX- PCIE PCIE2_TX+ PCIE ROM-7720 User Manual...
- Page 17 JTAG_TDO +V5IN +V5IN +V5IN +V5IN +V5IN +V5IN Edge Fingers ROM-7720 Even number V2.1 GBE_MDI2- GBE_MDI2- GBE_MDI2+ GBE_MDI2+ GBE_LAN1000_LINK# GBE_LINK1000# GBE_MDI0- GBE_MDI0- GBE_MDI0+ GBE_MDI0+ GBE_LAN0_ACT# GBE_ACT# CB_PWR_EN SUS_S5# CB_PWR_EN SUS_S3# POWER_BTN# PWRBTN# PMS/GPIO LID_BTN# / GPII0 CB_PG PWGIN ROM-7720 User Manual...
- Page 18 / LVDS_B2- LVDS / eDP LVDS1_CH1_TX2_N LVDS_BLEN LVDS LVDS1_BLEN eDP1_TX3+ / LVDS_B3+ LVDS / eDP LVDS1_CH1_TX3_P eDP1_TX3- / LVDS_B3- LVDS / eDP LVDS1_CH1_TX3_N eDP1_AUX+ / LVDS_B_CLK+ LVDS / eDP LVDS1_CH1_CLK_P eDP1_AUX- / LVDS_B_CLK- LVDS / eDP LVDS1_CH1_CLK_N ROM-7720 User Manual...
- Page 19 PCIE1_RX0_P PCIE1_RX- PCIE PCIE1_RX0_N UART0_CTS# EXCD UART1_CTS# PCIE0_RX+ PCIE PCIE0_RX0_P PCIE0_RX- PCIE PCIE0_RX0_N LPC_AD1 / GPIO1 GPIO1 LPC_AD3 / GPIO3 GPIO3 LPC_FRAME# / GPIO5 GPIO5 LPC_LDRQ# / GPIO7 GPIO7 SPKR / GP_PWM_OUT2 MISC FAN_PWMOUT / FAN_PWMOUT GP_PWM_OUT1 ROM-7720 User Manual...
- Page 20 SPI_CS0# SPI0_CS0# SPI_CS1# SPI0_CS1# MFG_NC4/ MISC JTAG_TRST# JTAG_TRST# VCC_5V_SB +V5SB MFG_NC2/ MISC JTAG_TDI JTAG_TDI MFG_NC3/ MISC JTAG_TMS JTAG_TMS +V5IN +V5IN +V5IN +V5IN +V5IN +V5IN ROM-7720 User Manual...
-
Page 22: Board Block Diagram
Board Block Diagram Below is the block diagram of ROM-7720. Figure 2.1 ROM-7720 Block Diagram ROM-7720 User Manual... -
Page 23: Chapter 3 Software Functionality
Chapter Software Functionality This chapter details the software programs on the ROM-7720 plat- form. -
Page 24: Test Tools
Test Tools All test tools must be verified on the ROM-7720 Evaluation kit. Please prepare the required test fixtures before verifying each specified I/O. If you have any problems with testing, please contact your Advantech contact window for help. 3.1.1... - Page 25 = /dev/video17 fmt = RGBP width = 1920 height = 1080 [ldb] device = /dev/video19 fmt = RGBP width = 800 height = 480 alpha = 0 3. Multi display video: gst‐launch‐1.0 playbin uri=file:////unit_tests/akiyo.mp4 video‐ sink="overlaysink display‐ldb=true display‐ldb1=true" ROM-7720 User Manual...
-
Page 26: Audio Test
I2S_CN1 # dmesg | grep sgtl # cat /proc/asound/cards # amixer get Mic # amixer set Mic 100 # arecord ‐t wav ‐c 1 ‐r 44100 ‐d 5 2.wav # aplay 2.wav ROM-7720 User Manual... -
Page 28: Pci-E Test
3.1.3 PCI-e Test Test it by a WiFi - PCI-e board (Advantech EWM-142) Check wlan0 existing or not # ifconfig wlan0 up # ifconfig # wpa_passphrase "ESSD Testing" adv27927818 > /tmp/wpa.conf #wpa_supplicant ‐BDwext ‐iwlan0 ‐c/tmp/wpa.conf # cat /tmp/wpa.conf # udhcpc ‐b ‐i wlan0... - Page 29 ROM-7720 User Manual...
-
Page 30: Battery Test
# cat /sys/class/power_supply/battery/uevent 3.1.4.2 AC power on, battery connected # cat /sys/class/power_supply/battery/uevent 3.1.4.3 AC power off, battery connected # cat /sys/class/power_supply/battery/uevent 3.1.5 RS-232 Test #stty ‐F /dev/ttymxc1 115200 #stty ‐F /dev/ttymxc1 ‐echo #cat /dev/ttymxc1 & #echo test > /dev/ttymxc1 ROM-7720 User Manual... -
Page 32: I2C Test
Test it by an audio codec module (ROM-ED51) # dmesg | grep sgtl # i2cdetect ‐y 4 # i2cset ‐f ‐y 4 0x0a 0 0xff00 w # i2cget ‐f ‐y 4 0x0a 0 w no module connected # dmesg | grep sgtl ROM-7720 User Manual... -
Page 33: Usb Test
2:0:0:0: [sda] Assuming drive cache: write through sd 2:0:0:0: [sda] No Caching mode page found sd 2:0:0:0: [sda] Assuming drive cache: write through sda: sda1 sd 2:0:0:0: [sda] No Caching mode page found sd 2:0:0:0: [sda] Assuming drive cache: write through ROM-7720 User Manual... - Page 34 # dd if=/dev/urandom of=data bs=1 count=1024 Back up # dd if=/dev/sda of=backup bs=1 count=1024 skip=4096 Write to usb disk # dd if=data of=/dev/sda bs=1 seek=4096 Read and Verify # dd if=/dev/sda of=data1 bs=1 count=1024 skip=4096 # diff data data1 ROM-7720 User Manual...
-
Page 35: Rtc Test
# date 021710452016 && hwclock ‐w && date set one incorrect time, then read time from RTC to verify # date 010100002000 && hwclock ‐r && date restore the RTC time to system time hwclock ‐s && date ROM-7720 User Manual... -
Page 36: Mmc (Emmc/Sd) Test
3.1.9 MMC (eMMC/SD) Test booting from MB EMMC Message from U-Boot # cat /proc/cmdline Boot from eMMC and insert a bootable SD card. The mmcblk1p1 & mmcblk1p2 should be mounting automatically. ROM-7720 User Manual... - Page 37 # dd if=data of=/dev/mtdblock1 bs=1 seek=$((0xD3000)) Read and Verify # dd if=/dev/mtdblock1 of=data1 bs=1 count=1024 skip=$((0xD3000)) # diff data data1 If fail, it shows as below: Binary files data1 and data differ Restore # dd if=backup of=/dev/mtdblock1 bs=1 seek=$((0xD3000)) ROM-7720 User Manual...
-
Page 38: Ethernet Test
3.1.10 Ethernet Test #ifconfig #ping 8.8.8.8 3.1.11 CAN Test Connect device with CAN0 (CN8A) # ip link set can0 up type can bitrate 125000 ROM-7720 User Manual... -
Page 40: Gpio Test
GPIO1, command: echo 171 > ./export export GPIO2, command: echo 174 > ./export export GPIO3, command: echo 175 > ./export export GPIO4, command: echo 176 > ./export export GPIO5, command: echo 57 > ./export export GPIO6, command: ROM-7720 User Manual... - Page 41 For example, Set gpio1 direction input(in) , command: echo in > gpio1/direction a2) get direction, command: cat gpio1/direction Console log: b1) For example, Set gpio1 direction output(out), command: echo out > gpio1/direction b2) get direction, command: cat gpio1/direction Console log: ROM-7720 User Manual...
-
Page 42: Watchdog Test
For example, See gpio1 value 1(high active), command: echo 1 > gpio1/value b2) get value, command: cat gpio1/value Console log: <<<<<<<<<<<<<<<<<<<<<<<<<<<<<<<<<<<<<<<<<<<< Connect jumpers to DIO1 connector by follows jumper setting 3.1.13 Watchdog Test cd unit_tests ./wdt_driver_test.out 10 5 0 ROM-7720 User Manual... -
Page 43: Package Content
Ctrl+C System will reboot after 10 seconds. Package Content We would offer you two different kinds of Linux package for ROM-7720. One is pre- built system image for system recovery another is source code package (BSP). 3.2.1 Source Code Package ROM-7720 source code package (BSP) contains cross compiler, Linux source code, Uboot source code, root file system and some scripts used in OS development. - Page 44 → Storage for all variable files and temporary files created by users, such as log files, the mail queue, the print spooler area, space for temporary storage of files downloaded from the Internet. – → just for sample test. tools ROM-7720 User Manual...
- Page 45 3.2.1.5 scripts Some scripts provided by Advantech will help you configure your system or build images more quickly: – → A script to setup the developing environment quickly. setenv.sh – → A script to configure the u-boot building setup quickly.
-
Page 46: Setting Up A Build Environment
$ sudo apt‐get install uuid‐dev liblzo2‐dev $ sudo tar zxvf~/usr_lib_i386‐linux gnu_for_Building_Android_KK.tar.gz ‐C / Please follow below instruction install JDK: Download "jdk-6u45-linux-x64.bin" manually from Oracle Official Website and put it to directory ~/FILES/ and perform following commands: $ cd /usr/lib $ sudo ~/FILES/jdk‐6u45‐linux‐x64.bin ROM-7720 User Manual... -
Page 47: Conventions
${BOARD_REV} : board revision a1 / a2 / b1 ${MC} : machine code combined with ${IMX6PROC}${BOARD}${BOARD_REV} For example, imx6dlrom5420b1 for ROM‐5420‐Solo B1 imx6dlubc220a1 for UBC‐220‐Dual‐Light A1 imx6qprom7421a1 for ROM‐7421‐Dual/Quad‐Plus A1 imx6qrom3420a1 for ROM‐3420‐Dual/Quad A1 imx6qrom5420a1 for ROM‐5420‐Dual/Quad A1 ROM-7720 User Manual... -
Page 48: Introducing Bsp
The recipes used to build the project come from both the community and Advantech. The Yocto Project layers are downloaded to the sources directory. This sets up the recipes that are used to build the project 3.3.2.1... - Page 49 : to continue an exist build environment 3.3.2.3 Get BSP The following example shows how to download the Advantech Yocto BSP from GitHub. For this example, a directory called adv-release-bsp is created for the project. $ git config --global user.name "Your Name"...
-
Page 50: Build Instructions
The file, fsl-image-qt5-${MC}.sdcard, will be located in directory, ./tmp/deploy/ images/${MC}, while building process finished successfully. 3.3.3.2 To build toolchain installer To create/continue a build environment, perform following command in terminal console: $ bitbake meta‐toolchain‐qt5 The below installer will be located in the directory "./tmp/deploy/sdk". fsl‐imx‐x11‐glibc‐x86_64‐meta‐toolchain‐qt5‐cortexa9hf‐vfp‐neon‐toolchain‐ ROM-7720 User Manual... -
Page 51: Creating Boot-Up On-Board Flash From Pre-Built Image
${KERNEL}‐1.1.0.sh 3.3.3.3 To build u-boot To create/continue a build environment, perform following commands in terminal console: $ bitbake u‐boot‐imx The two files, u-boot_crc.bin & u-boot_crc.bin.crc, will be located in directory, ./tmp/deploy/images/${MC}. 3.3.3.4 To build Linux kernel To create/continue a build environment, perform following commands in terminal con- sole and do menuconfig: $ bitbake linux‐imx ‐c menuconfig to start build... - Page 52 # echo ‐e "d\n2\nn\np\n2\n${P2START}\n\nw\n" | fdisk ‐u /dev/mmcblk0 # umount /dev/mmcblk0p2 # e2fsck ‐f ‐y /dev/mmcblk0p2 # resize2fs /dev/mmcblk0p2 # poweroff ROM-7720 User Manual...
-
Page 54: Customization
SDK has been set up (ref. Setting up SDK, section 3.4.2), perform following command in terminal console: $ source ${TOOLCHAIN}/environment‐setup‐cortexa9hf‐vfp‐neon‐poky‐linux‐gnueabi 3.4.4 Building & updating u-boot manually Assuming he cross compiling environment has been set up. (ref. Setting up cross compiling environment) Copy BSP tarball to Container 3.4.4.1 ROM-7720 User Manual... -
Page 55: Building & Updating Kernel/Modules/Dtb Manually
$ tar zxvf imx6LBV8210_2017-02-20_linux-imx6.tgz 3.4.5.2 Configure linux kernel Config Linux kernel follow by below script: $cd linux-imx6 $make distclean $make imx_v7_adv_defconfig $make menuconfig If you get error during the moment you "make imx_v7_adv_defconfig", you need to install ROM-7720 User Manual... -
Page 56: Replace Kernel &Dts
$ make ‐j4 ${IMX6PROC}‐${BOARD}‐${BOARD_REV}.dtb The device tree blob, ${IMX6PROC}-${BOARD}-${BOARD_REV}.dtb, is located in the directory "./arch/arm/boot/dts/". 3.4.6 Replace kernel & dts Replace kernel copy zImage to SDcard or emmc Replace dtb file copy dtb file to SDcard or emmc ROM-7720 User Manual... -
Page 57: System Recovery
SD card and transfer whole system to on-board flash. Debug Message ROM-7720 can connect to a host PC (Linux or Windows) by using a console cable and debug port adapter. In order to communicate with a host PC, a serial communi- cation program such as HyperTerminal, Tera Term or PuTTY is required. -
Page 58: Linux Software Ap And Testing On Rom-7720
Insert the Linux system SD card to your developing computer. #cp helloworld /media/rootfs/tool (/media/rootfs is the mounted point of your Linux system SD card) Remove this SD card and insert it to ROM-7720, then open serial console. On ROM-7720 platform, type #root (Login) On ROM-7720 platform, type #cd /tool On ROM-7720 platform, type #./helloworld... -
Page 59: Watchdog Timer Sample Code
%d seconds\n", timeout); ioctl(fd, WDIOC_GETTIMEOUT, &timeout); printf("Now reading back ‐‐ The timeout is %d seconds\n", timeout); while (1) { printf("WDT Time out counter:%d\n",count); if ((test !=0) && (test ==count)) { printf("Ping Watchdog (reset wdt)\n"); ioctl(fd, WDIOC_KEEPALIVE, ROM-7720 User Manual... - Page 60 ROM-7720 User Manual...
-
Page 62: Gpio Setting
"gpio‐4"); gpio_request(SABRESD_GPIO5, "gpio‐5"); gpio_request(SABRESD_GPIO6, "gpio‐6"); gpio_request(SABRESD_GPIO7, "gpio‐7"); 3.7.4 RS232 Initial Code The RS232 initial code as below. It shows you how to initial COM ports. int open_port(void) int fd; fd=open("/dev/ttymxc1",O_RDWR|O_NOCTTY|O_NDELAY); if(fd == ‐1){ perror("open error"); return(fd); ROM-7720 User Manual... -
Page 63: Display Output Setting
The margin values can be seen as front porch & back porch. The sync_len means pulse width. The sync value indicates the sync polarity (low or high). struct fb_videomode { const char *name; (optional) u32 refresh; (optional) u32 xres; u32 yres; u32 pixclock; ROM-7720 User Manual... - Page 64 /usr/share/imx_6q_display_config original) [master] device = /dev/video17 ++++++++++++++++++++++++++++++++++ Modify: [hdmi] device = /dev/video17 fmt = RGBP width = 1920 height = 1080 [ldb] device = /dev/video19 fmt = RGBP width = 800 height = 480 alpha = 0 ROM-7720 User Manual...
-
Page 65: Network Setup
Set the IP network mask for this interface. This value defaults to the usual class A, B or C network mask (as derived from the interface IP address), but it can be set to any value. broadcast [addr] ROM-7720 User Manual... -
Page 66: Storage (Emmc/Sd Card)
IFF_BROADCAST flag for the interface. del addr/prefixlen Remove an IPv6 address from an interface. 3.7.7 Storage (eMMC/SD Card) The storages devices are named as follows: Device Name eMMC /dev/mmcblk0 SD card /dev/mmcblk1 Onboard SD card /dev/mmcblk1 Carrier board SD card /dev/mmcblk2 ROM-7720 User Manual... - Page 67 Chapter System Recovery This chapter introduces how to recover Linux operating system if it is damaged accidentally.
-
Page 68: Chapter 4 System Recovery
Connect console cable to debug port (CONSOLE) and open serial console pro- gram on Ubuntu 12.04 LTS, set baudrate to 115200. For detailed console set- ting, please refer to section 3.6. On ROM-7720 platform, type #root (Login) On ROM-7720 platform, type #cd /mk_inand On ROM-7720 platform, type #./mkinand‐linux.sh /dev/mmcblk0 On ROM-7720 platform, type “y “... -
Page 69: Chapter 5 Advantech Services
Chapter Advantech Services This chapter introduces Advantech design in serviceability, technical support and warranty policy for ROM-7720 evaluation kit. -
Page 70: Risc Design-In Services
Comprehensive Document Support Design Assistance Service Advantech provides a check list for engineers to check their schematics and also review service based on customer carrier board schematics. Those services are preventative, and help to catch design errors before they happen. This helps to save a lot of time and cost with regard to development of carrier boards. - Page 72 Advantech has been involved in the industrial computer industry for many years and found that customers usually have the following questions when implementing modular designs.
- Page 73 RISC COM. Design stage When a product moves into the design stage, Advantech will supply a design guide of the carrier ROM-7720 User Manual...
- Page 74 Advantech’s team has years of experience in customer support and HW/SW development knowledge. Consequently, we can support customers with professional advice and information as well as shortening development time and enabling more effective product integration.
-
Page 75: Contact Information
Contact Information Below is the contact information for Advantech customer service Region/Country Contact Information America 1-888-576-9688 Brazil 0800-770-5355 Mexico 01-800-467-2415 Europe (Toll Free) 00800-2426-8080 Singapore & SAP 65-64421000 Malaysia 1800-88-1809 Australia (Toll Free) 1300-308-531 800-810-0345 China (Toll Free) 800-810-8389 Sales@advantech.com.cn... -
Page 76: Technical Support And Assistance
Technical Support and Assistance For more information about this and other Advantech products, please visit our web- site at: http://www.advantech.com/ http://www.advantech.com/ePlatform/ For technical support and service, please visit our support website at: <http://support.advantech.com.tw/support/> Visit the Advantech web site at www.advantech.com/support where you can find the latest information about the product. - Page 77 No part of this publication may be reproduced in any form or by any means, electronic, photocopying, recording or otherwise, without prior written permis- sion of the publisher. All brand and product names are trademarks or registered trademarks of their respective companies. © Advantech Co., Ltd. 2017 ROM-7720 User Manual...
Need help?
Do you have a question about the ROM-7720 and is the answer not in the manual?
Questions and answers