Advertisement
Quick Links
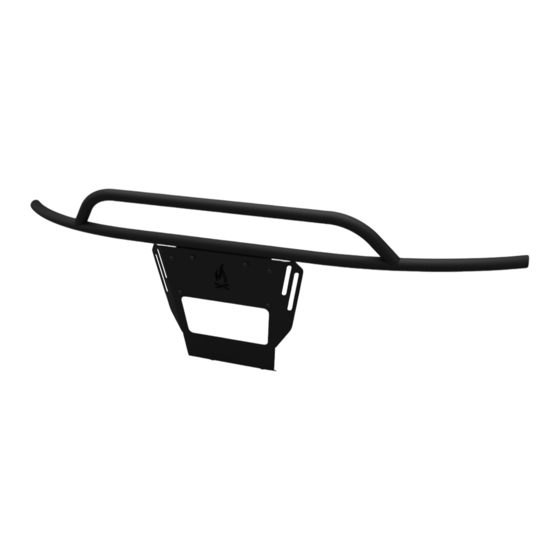
TRANSI T T R AIL NUD GE BA R
TR110 8B
INSTALLATION
GUIDE
F L AT L I N E VA N C O • S U P P O R T @ F L AT L I N EVA N C O . C O M • 8 8 8 - 6 6 7- 5 5 7 6
TOOLS REQUIRED
(NOT INCLUDED)
+
RATCHET
+
1/4" MANDREL
+
13MM SOCKET
+
25/64" DRILL BIT
+
5/32" ALLEN WRENCH
+
PHILLIPS HEAD SCREWDRIVER
+
POWER DRILL
+
RIVET NUT TOOL
INSTALL INFO
TIME TO INSTALL THIS PRODUCT: 30 MINUTES
Additional help is suggested for a few of the install
steps.
BEFORE YOU START
Please inspect the product and packaging upon
delivery to ensure there are no issues and that all
parts and hardware are accounted for.
Contact us ASAP if anything is missing at:
support@flatlinevanco.com
0 1
Advertisement

Summary of Contents for FVC TR1108B
- Page 1 INSTALLATION GUIDE TRANSI T T R AIL NUD GE BA R TR110 8B TOOLS REQUIRED (NOT INCLUDED) RATCHET 1/4” MANDREL 13MM SOCKET 25/64” DRILL BIT 5/32” ALLEN WRENCH PHILLIPS HEAD SCREWDRIVER POWER DRILL RIVET NUT TOOL INSTALL INFO TIME TO INSTALL THIS PRODUCT: 30 MINUTES Additional help is suggested for a few of the install steps.
-
Page 2: Before You Start
BEFORE YOU START All Flatline Van Co products must be properly assembled and secured before attaching to your vehicle. Improper attachment could result in an automobile accident, and could cause serious bodily injury or death to you or to others involved. You are responsible for assembling and securing Flatline Van Co products to your vehicle, checking the mounting points and attachments prior to use, and regularly inspecting the products for wear and or damage. -
Page 3: Package Contents
PACKAGE CONTENTS TRANSIT TRAIL NUDGE BAR FRONT PLATE PLATE SPACER QTY: 1 QTY: 1 QTY: 2 F L AT L I N E VA N C O • S U P P O R T @ F L AT L I N EVA N C O . C O M • 8 8 8 - 6 6 7- 5 5 7 6... - Page 4 HARDWARE M8-1.25 X 40 FLANGED HEX HEAD SCREW M8 OVERSIZED FLAT WASHER 1/4-20 X 0.75 FLANGED BUTTON HEAD HEX DRIVE SCREW HEAD SCREW QTY: 2 QTY: 2 QTY: 8 1/4-20 THK HEAVY DUTY RIVET NUT 3/4” FLAT BLADE DRILL BIT THREADLOCKER QTY: 2 QTY: 1...
- Page 5 RATCHET TOOLS REQUIRED FOR THIS STEP: 13MM SOCKET LOCTITE POWER DRILL STEP | 01 LAYOUT AND INSTALL PREP 1.1 Remove Factory License Plate Cover: The first step is to remove the factory screws and/or pop rivets that hold the license plate cover to your bumper (FIG 1+2). If attached with just Phillips Drive screws, use a Phillips Screwdriver to remove them.
- Page 6 RATCHET TOOLS REQUIRED FOR THIS STEP: 13MM SOCKET LOCTITE STEP | 02 INSTALL NUDGE BAR 2.1 Attaching the Nudge Bar: Gather the Nudge Bar, M8-1.25 x 40 Flanged Hex Head Screws, M8 Flat Washers, and Plate Spacers (FIG 5+6). 2.2 Position the Nudge bar on the Bumper: Hold the hardware in place as you position the Nudge Bar on the bumper.
- Page 7 5/32” ALLEN WRENCH TOOLS REQUIRED FOR THIS STEP: 3/4” FLAT BLADE DRILL BIT POWER DRILL RIVET NUT TOOL 1/4” MANDREL 25/64” DRILL BIT STEP | 03 INSTALL FRONT PLATE 3.1 Dry Fit Front Plate: Loosely attach the Front Plate to the Nudge Bar Front Weldment using two 1/4-20 x 0.75 Flanged Button Head Screws (FIG 9+10).
- Page 8 LOCTITE TOOLS REQUIRED FOR THIS STEP: 5/32” ALLEN WRENCH STEP | 03 INSTALL FRONT PLATE 3.5 Attach Front Plate: Install Front Plate to Nudge Bar weldment and Rivet Nuts using 1/4-20 x 0.75 Button Head Screws and Loctite (FIG 13+14). 3.6 Attach License Plate (if applicable): If you wish to run your license plate on the front, install using the provided 1/4-20 Screws and Loctite (FIG 15+16).
- Page 9 FVC (and see) from you! Head to the products and following along and we will make it right. FVC is product page and click “Leave a company of van and outdoor with your adventures. Tag us Review.”...


Need help?
Do you have a question about the TR1108B and is the answer not in the manual?
Questions and answers