
Related Manuals for FVC TR0106B


Summary of Contents for FVC TR0106B
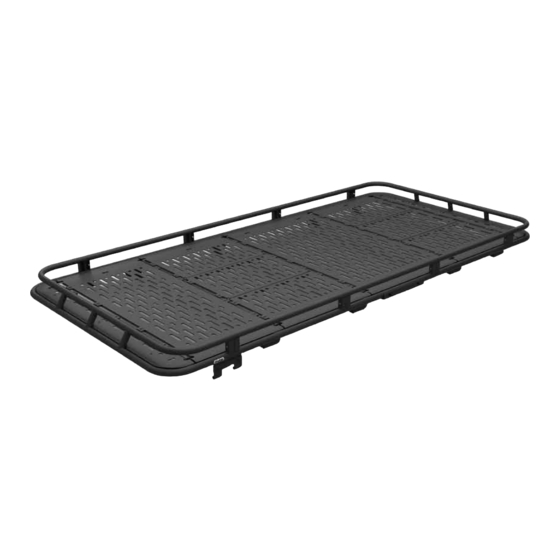
- Page 1 Installation Guide Safari Rack Basket Front 148 MR TR0106B FLATLINE VAN CO • SUPPORT@FLATLINEVANCO.COM • 888-667-5576...
- Page 2 THANK YOU! ARE YOU EXCITED ABOUT YOUR NEW SAFARI RACK? HERE ARE A FEW THINGS TO DO TOOLS BEFORE BEGINNING THE INSTALLATION PROCESS-- • PLEASE INSPECT THE PRODUCT TO ENSURE THERE WAS NO DAMAGE INCURRED DURING SHIPPING. • IF THERE IS DAMAGE TO REPORT, PLEASE CONTACT OUR CUSTOMER SERVICE DEPARTMENT AS SOON AS POSSIBLE.
- Page 3 All Flatline Van Co products must be properly assembled and secured before attaching to your vehicle. Improper attachment could result in an automobile accident, and could cause serious bodily injury or death to you or to others involved. You are responsible for assembling and securing Flatline Van Co products to your vehicle, checking the mounting points and attachments prior to use, and regularly inspecting the products for wear and or damage.
-
Page 4: Package Contents
PACKAGE CONTENTS FRONT BASKET WELDMENT FOOT BRACKET MID ROOF FOOT BRACKET LADDER REAR BASKET WELDMENT SIDE RAIL WELDMENT (34") BRACKET QTY - 2 QTY - 6 QTY - 1 QTY - 1 QTY - 6 QTY - 1 FAN SIDE DECK PANEL MID SECTION DECK PANEL REAR DECK PANEL FAN COVER PANEL... - Page 5 HARDWARE 1/4-20 T-NUT 1/4-20 X 0.75 1/4-20 X 0.75 1/4-20 X 0.5 FLANGED 3/8-16 X 1 SQUARE FLANGED HEX HEAD FLANGED BUTTON M8-1.25 X 30 HEX NECK CARRIAGE BUTTON HEAD HEX SCREW HEAD HEX DRIVE HEAD SCREW BOLT DRIVE SCREW QTY - 44 SCREW QTY - 28...
- Page 6 FOOT BRACKETS Mounting the Foot Brackets is the first step. You will need to first pry o the access covers on the roof of your van to reveal the access holes. Some vans require some clearance to be made in the access holes due to build tolerance from Ford Factory (shown right).
-
Page 7: Side Rail Assembly
SIDE RAIL ASSEMBLY Next you need to put together both Side Rail Assemblies. Three 34” Weldments need to be mated together as shown below. Page 7 shows details views and hardware used. We recommend putting these together on a larger flat table, or spreading out the cardboard from your shipping box. - Page 8 DETAIL A DETAIL B DETAIL D 1/4-20 X 0.75 FLANGED BUTTON HEAD HEX DRIVE SCREW 1/4-20 X 0.75 FLANGED HEX HEAD SCREW 1/4 SCREW FLAT WASHER 1/4-20 NYLON INSERT LOCKNUT FLATLINE VAN CO • SUPPORT@FLATLINEVANCO.COM • 888-667-5576...
- Page 9 MOUNTING SIDE RAILS TO ROOF In this step you’ll be mounting the Side Rail Assemblies to the REAR roof of the van. It is very helpful to have multiple ladders and someone else to help, but this can be done by one person, carefully.
- Page 10 Repeat the same steps for the Basket Front Weldment. Note- The Basket Front Weldment has the FVC Badge on the corner. BACK FRONT FLATLINE VAN CO •...
- Page 11 ATTACHING SUPPORT FEET The Support Feet are necessary on the Transit Mid Roof due to the distance span from the forward most Foot Bracket and the front of the rack. Assemble both the Passenger and Driver Side Support Brackets using the 4 each 3/8-16 x 1 Button Head Hex Drive Screws, 3/8 Screw Flat Washers, and 3/8-16 Nylon Insert Locknuts, leaving the hardware loose enough to slide the two pieces for adjustment, and then mount them to the Safari Rack in the location shown below.
- Page 12 MOUNTING CROSSBARS DETAIL G Once you’ve got both weldment ends tightened; it’s time to start 1/4-20 X 0.75 FLANGED HEX laying down your crossbars. We’ve provided dimensions below to HEAD SCREW make it easy. Make sure you verify the dimension on both ends of the crossbar relative to the Reference Point to ensure they are square.
- Page 13 AWNING MOUNTS This step is only necessary if you are mounting a Fiamma F45 (or similar) awning to your Safari Rack. If you are not mounting an awning, skip this step. You will mount the 3 Awning Brackets to the underside of the Passenger Side of the rack as shown to the right.
- Page 14 LADDER BRACKET Same as the awning brackets; this step is only necessary if you are mounting an FVC Side Ladder to your van. The reference dimension for mounting is shown in the diagram on the previous page. The Ladder Bracket uses the same hardware as the Awning Mounts, and it attaches in the same way.
- Page 15 DECKING PANELS DETAIL J Before moving onto the floor sections; now is the time to center the rack on your van and tighten the it down to the Foot Brackets. Once you finish that; we can proceed to attaching the floor sec- tions.
- Page 16 • REAR DECK PANEL • FAN COVER PANEL BACK • MID SECTION DECK PANEL • FAN SIDE DECK PANEL • MID ROOF MID SECTION DECK PANEL • REAR DECK PANEL (USED FOR FRONT) FRONT FLATLINE VAN CO • SUPPORT@FLATLINEVANCO.COM • 888-667-5576...
- Page 17 COMPLETE! Once you’ve got all of the Deck Panels bolted down, do a once over of all fasteners on the rack to ensure they are tight and secure. Install is now complete, and you’re ready for adventure! FLATLINE VAN CO • SUPPORT@FLATLINEVANCO.COM • 888-667-5576...
- Page 18 CUSTOMER SUPPORT If you are having any issues with your product, please reach out, and we will make it right. FVC is a company of van and outdoor enthusiasts that design and use our own products, so we want you to be as stoked on your new parts as we are! @flatlinevanco...
Need help?
Do you have a question about the TR0106B and is the answer not in the manual?
Questions and answers