Table of Contents
Advertisement
Quick Links
sku:HZ-KFS0102/HZ-KFS0103
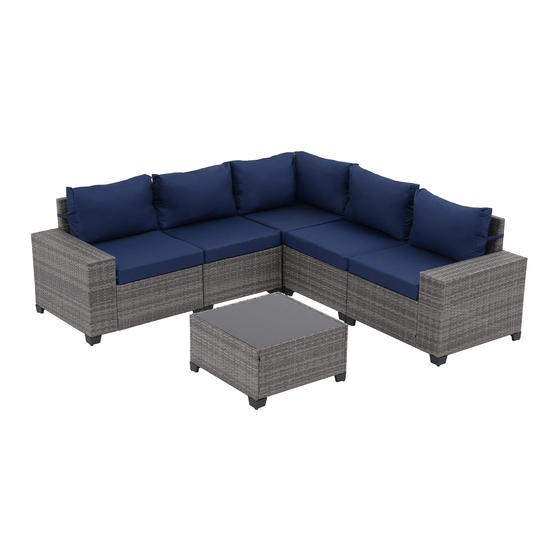
Steel wicker sofa set
1
Thank you for choosing us!
Our goal is to provide high quality outdoor furniture with
outstanding customer service-all at an affordable price.
Please let us know how we are doing!
Problems?
(Missing pieces, wrong pieces...)
We will fix it immediately. Send us an email at
aftersaledirect@gmail.com.
Happy?
Please leave us a review!
You can make others happy too!
Tip: We recommend flattening the boxes to use asa protective work
surface, or setting up your new furniture on a soft floor like a carpet.
Advertisement
Table of Contents

Related Manuals for BED BATH & Beyond HZ-KFS0102


Summary of Contents for BED BATH & Beyond HZ-KFS0102
- Page 1 Steel wicker sofa set Thank you for choosing us! Our goal is to provide high quality outdoor furniture with outstanding customer service-all at an affordable price. Please let us know how we are doing! Problems? (Missing pieces, wrong pieces...) We will fix it immediately.
- Page 2 IMPORTANT, RETAIN FOR FUTURE REFERENCE: READ CAREFULLY. Safety For domestic use only. Don't tighten all the bolts before the product is fully assembled. It would be useful to ask someone to help you assemble the product. Periodic structural checks of this product should be undertaken, do not use if you have any doubts about its Do not stand on the seat.
- Page 3 How to Put on the Cushion Cover 1. Take the cushion covers and inners out of the carton. 2. Fold the inner in half, pushing the Align both far corners, then gently sides together,then begin to slide compress insert while fitting cover the cover onto it.
- Page 4 IMPORTANT Please make a decision which model you want to put modules together,because you have to use different parts to make it either a corner sofa or an armless sofa. : Seat Base(B)+Back Panel(A)+Back Panel(E),can be assembled as the cornersofa,then you can put them together as corner sofa set model (Figure A).
- Page 5 COMPONENT LIST - ARMLESS SOFA X 2 Item Reference Description Qty. Image Back Panel Seat Base Side Panel High L-Shaped Feet Screw Feet M6*45 Head Cap Screw M6*30 Head Cap Screw M6*25 Head Cap Screw Wrench Allen Key Seat Cushion Foam Long Back Cushion...
- Page 6 NOTE: Do NOT tighten any screws fully first until you have tightened all the screws. This may cause the frame to warp. If there is still wobbles or screw holes cannot be aligned, loosen the screws and tighten sequentially. If the Sofa is not stable it could lead to damage to the product. M6*45 Screw ×3 Nut ×3 Washer ×6...
- Page 7 Nut ×1 Washer ×5 M6*45 Screw ×1 M6*30 Screw ×3 NOTE:DO NOT TIGHTEN THE SCREWS COMPLETELY. - 6 -...
- Page 8 M6*25 Screw ×8 M6x25(L) NOTE: IF ANY SCREW HOLES CANNOT BE ALIGNED, LOOSEN ALL THE SCREWS AND GO BACK STEP 1 AND RESTART ASSEMBLY. - 7 -...
- Page 9 - 8 -...
- Page 10 COMPONENT LIST - LEFT CORNER SOFA Item Reference Description Qty. Image Back Panel Seat Base Armrest High L-Shaped Feet Screw Feet M6*45 Head Cap Screw M6*25 Head Cap Screw Wrench Allen Key Seat Cushion Foam Long Back Cushion Washer - 9 -...
- Page 11 NOTE: Do NOT tighten any screws fully first until you have tightened all the screws. This may cause the frame to warp. If there is still wobbles or screw holes cannot be aligned, loosen the screws and tighten sequentially. If the Sofa is not stable it could lead to damage to the product. M6*45 Screw ×3 Nut ×3 Washer ×6...
- Page 12 M6*45 Screw ×4 Nut ×4 Washer ×8 NOTE:DO NOT TIGHTEN THE SCREWS COMPLETELY. - 11 -...
- Page 13 M6*25 Screw ×8 M6x25(L) NOTE: IF ANY SCREW HOLES CANNOT BE ALIGNED, LOOSEN ALL THE SCREWS AND GO BACK STEP 1 AND RESTART ASSEMBLY. - 12 -...
- Page 14 - 13 -...
- Page 15 COMPONENT LIST - RIGHT CORNER SOFA Item Reference Description Qty. Image Back Panel Seat Base Armrest High L-Shaped Feet Screw Feet M6*45 Head Cap Screw M6*25 Head Cap Screw Wrench Allen Key Seat Cushion Foam Long Back Cushion Washer - 14 -...
- Page 16 NOTE: Do NOT tighten any screws fully first until you have tightened all the screws. This may cause the frame to warp. If there is still wobbles or screw holes cannot be aligned, loosen the screws and tighten sequentially. If the Sofa is not stable it could lead to damage to the product. M6*45 Screw ×3 Nut ×3 Washer ×6...
- Page 17 M6*45 Screw ×4 Nut ×4 Washer ×8 NOTE:DO NOT TIGHTEN THE SCREWS COMPLETELY. - 16 -...
- Page 18 M6*25 Screw ×8 M6x25(L) NOTE: IF ANY SCREW HOLES CANNOT BE ALIGNED, LOOSEN ALL THE SCREWS AND GO BACK STEP 1 AND RESTART ASSEMBLY. - 17 -...
- Page 19 - 18 -...
- Page 20 COMPONENT LIST - CORNER SOFA Item Reference Description Qty. Image Back Panel Seat Base Back Panel High L-Shaped Feet Screw Feet M6*45 Head Cap Screw M6*25 Head Cap Screw Wrench Allen Key Seat Cushion Foam Long Back Cushion Short Back Cushion Washer - 19 -...
- Page 21 NOTE: Do NOT tighten any screws fully first until you have tightened all the screws. This may cause the frame to warp. If there is still wobbles or screw holes cannot be aligned, loosen the screws and tighten sequentially. If the Sofa is not stable it could lead to damage to the product. M6*45 Screw ×3 Nut ×3 Washer ×6...
- Page 22 M6*45 Screw ×5 Nut ×5 Washer ×10 NOTE:DO NOT TIGHTEN THE SCREWS COMPLETELY. - 21 -...
- Page 23 M6*25 Screw ×8 M6x25(L) NOTE: IF ANY SCREW HOLES CANNOT BE ALIGNED, LOOSEN ALL THE SCREWS AND GO BACK STEP 1 AND RESTART ASSEMBLY. - 22 -...
- Page 24 - 23 -...
- Page 25 COMPONENT LIST -TABLE Item Reference Description Qty. Image Side Panel Side Panel Table Connector High L-Shaped Feet Screw Feet M6*30 Head Cap Screw M6*25 Head Cap Screw Wrench Allen Key Glass Washer - 24 -...
- Page 26 NOTE: Do NOT tighten any screws fully first until you have tightened all the screws. This may cause the frame to warp. If there is still wobbles or screw holes cannot be aligned, loosen the screws and tighten sequentially. If the Table is not stable it could lead to damage to the product. Washer ×4 M6*30 Screw ×4 NOTE:DO NOT TIGHTEN THE SCREWS COMPLETELY.
- Page 27 Washer ×4 M6*30 Screw ×4 NOTE:DO NOT TIGHTEN THE SCREWS COMPLETELY. - 26 -...
- Page 28 Washer ×4 M6*30 Screw ×4 NOTE:DO NOT TIGHTEN THE SCREWS COMPLETELY. - 27 -...
- Page 29 M6*25 Screw ×8 M6x25(L) NOTE: IF ANY SCREW HOLES CANNOT BE ALIGNED, LOOSEN ALL THE SCREWS AND GO BACK STEP 1 AND RESTART ASSEMBLY. - 28 -...
- Page 30 Glass Top x 1 - 29 -...
- Page 31 Step 1:Tuck the prickly tie out of the seam at the bottom of the sofa.Pull out the prickly tie from the surface of the sofa to spread out and adjust to the right position. - 30 -...
- Page 32 U-Shaped Connector How to Assemble End Cap - 31 -...
- Page 33 Assembly Instructions 45 Inch Gas Fire Pit MODEL NO.: QF-FP05 DANGER: FIRE OR EXPLOSION HAZARD Installation and service must be If you smell gas: performed by a qualified installer, • Shut off gas to the appliance. service agency, or the gas supplier •...
-
Page 34: Table Of Contents
Table of Contents Assembly..………………………………………..…7-10 Table of Contents ............2 Operating Instructions .........11-13 Safety Information............2-4 Warranty.................5 Maintenance............14 Pre-Assembly...……………………...……………………. 5 Care and Cleaning ..........14 Troubleshooting ............15 ..………………...……………………. 6 Package Contents Safety Information Read the instruction before use. This appliance must be installed in accordance with such regulations as are enforced. -
Page 35: Safety Information
Safety Information (continued) WARNING: You must provide propane gas and propane cylinder. Use a standard 20 lb. propane cylinder only. Use this heater only with a propane vapor withdrawal supply system. See Chapter 5 of the Standard for Storage and Handling of Liquefied Petroleum Gas, ANS/NFPA 58. - Page 36 Safety Information (continued) WARNING: Solid fuels shall not be burned in this appliance. The installation must conform with local codes or, in the absence of local codes, ANSIZ223. 1/NFPA54, NFPA58 Natural Gas and Propane Installation Code, CSA B149.1, or Propane Storage and Handling Code, B149.2. This appliace must be isolated from the gas supply piping system by closing its individual manual shutoff valve during any pressure testing of the gas supply piping system at test pressures equal to or less than 1/2 psi (3.5 kPa).
-
Page 37: Warranty
Warranty 1 YEAR LIMITED WARRANTY • We warrant the metal frame and burner to be free of manufacturing defects to the original purchaser for one years. • Proof of purchase (dated register receipt) is required for warranty claims. WHAT IS NOT COVERED It remains the customer’s responsibility for freight and packaging charges to and from our service center. -
Page 38: Package Contents
Package Contents Door Frame Side Panel with Window Back Leg B Back Panel Back Leg C Gas Tank Support Metal Lid Glass Stone Table Top with Burner Side Panel... -
Page 39: Assembly
Assembly Assembling the Legs □ Attach Door Frame (Part A),Back Right Leg (Part B) and Back Left Leg (Part C) to the Tabletop with Burner(Part F) using (4) M6x12mm Bolts(Part AA). NOTE: Do not completely tighten the bolts. Assembling Side Panels with Widow □... - Page 40 Assembly Assembling Side Panels and Back Panel □ Attach Side Panel (Part G) to the Legs (Parts A & C) using (4) M6X30mm bolts (Part BB). □ Attach Back Panel (Part I) to the Legs (Parts B & C) using (4) M6X30mm Bolts (Part BB). NOTE: Do not completely tighten the bolts.
- Page 41 Assembly Assembling the Glass Stone □ Ensure the Glass Stone (Part E) are not placed on the ignition portion of the burner. □ NOTE: Ensure no glass stone is placed on the ignition portion of the burner.Then place the Cover (E) on. NOTE:The cover must be removed when the burner is in operation.Wait until the unit cools before installing the cover.
- Page 42 Assembly Assembling the Cylinder □ Put the cylinder into the Gas Tank Support (Part L), and secure the cylinder by tightening the screw in the gas tank support. Connect the hose and regulator to the cylinder. NOTE: The propane cylinder is sold separately. Use a standard 20 lb.
-
Page 43: Operating Instructions
Children and adults should be alerted to the hazards of high surface temperatures and stay away from the appliance to avoid burns or clothing ignition. The appliance comes with a heat shield, a crucial safety component preventing contact with the fire bowl when adjusting the propane valve. Children should be carefully supervised when they are in the appliance area. - Page 44 Operating (continued) LEAK TESTING OPERATION WARNING: A leak test must be performed annually or if a part of the gas system is replaced. WARNING: Never use an open flame to check for gas leaks. Be certain no sparks or open flames are in the area while you check for leaks.
- Page 45 Operating (continued) LIGHTING CAUTION: Keep the outdoor gas appliance area clear and free from combustible materials, gasoline and other flammable vapors and liquids. CAUTION: Do NOT obstruct the flow of combustion and ventilation air. CAUTION: Check and clean burner/vent tubes for insects and insect nests. A clogged tube can lead to a fire.”...
-
Page 46: Maintenance
• Whenever conducting hose/regulator inspection, pull out the door using the handle on the door panel to gain access. • Keep exterior surface clean. • Use warm soapy water for cleaning. Never use flammable or corrosive cleaning agents. • While washing your unit, be sure to keep the area around the burner dry. If the gas control is exposed to water, do NOT try to use it. It must be replaced. -
Page 47: Troubleshooting
IF YOU HAVE QUESTIONS OR CONCERNS PLEASE CONTACT US VIA EMAIL AT aftersaledirect@gmail.com.
Need help?
Do you have a question about the HZ-KFS0102 and is the answer not in the manual?
Questions and answers
How do we replace the clips HH that hold all the pieces of the couch together six of our clips broke when we tried to install them