Advertisement
Quick Links
Advertisement

Subscribe to Our Youtube Channel
Related Manuals for BED BATH & Beyond MG00006


Summary of Contents for BED BATH & Beyond MG00006
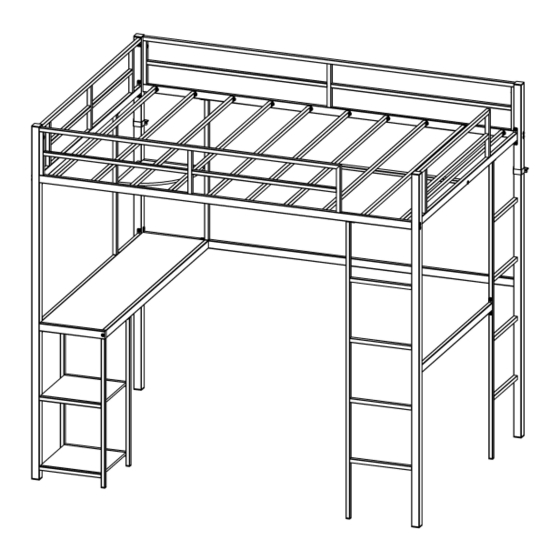
- Page 1 FULL LOFT BED ASSEMBLY INSTRUCTIONS SKU MG00006...
- Page 2 SAFETY WARNINGS AND GENERAL NOTES: 1. Follow the information on the warnings on the bunk bed end structure and on the carton. Do not remove the warning label from the bed. 2. Always use the recommended size mattress on mattress support, or both, to help prevent the likelihood of entrapment or falls.
-
Page 3: Part List
PART LIST 5 -1PC 1 -1PC 2 -1PC 3 -1PC 4 -1PC 6 -1PC... -
Page 4: Hardware List
7 -1PC 10 -1PC 8 -1PC 9 -1PC 12 -1PC 13 -1PC 15 -1PC 11 -1PC 16 -1PC 14 -1PC 17 -10PCS 18 -2PCS 19 -1PC 20 -1PC HARDWARE LIST 6*10 -33pcs 6*30-27pcs 6*60-8pcs 6*40-4pcs 4*10-18pcs 20pcs 4*30-4pcs 4pcs 2pcs 2pcs... - Page 5 Step 1: Using hardware A,B,C,K connect #1, #2 and #12 to semi-finish frame 1. A:6*10-1pCs B:6*30-1pCs C:6*60-4pCs Step 2: Using hardware A,C,D,K connect #5, #7 and #9 attached the frame 1. A:6*10-4pCs D:6*40-1pCs...
- Page 6 Step 3: Using hardware E & L connect #18 to complete finish frame 1 (Frame 1 is the front part of the bed frame). Please put frame 1 on floor to install part 18 more easy 18*2 E:4*10-8pCs Step 4: Using hardware A,B,C,K connect #3, #4, #6 and #14 to complete-finish frame 2(Frame 2 is the back part of the bed frame).
- Page 7 Step 5: Using hardware A,D,K connect Frame 1, Frame 2 and #10, #13, #8. A:6*10-18pCs D:6*40-1pCs Step 6: Using hardware D,K connect #15. D:6*40-2pCs...
- Page 8 Step 7: Put #17 into the reserved groove. middle teeth hole of these 4 slats face downwards and aligned with 4 holes of #15 Step 8: Using hardware B,F,J,K connect with #17. B*10-F*10 B*10-F*10 6*30-24pcs B: F:20pcs...
- Page 9 Step 9: Using hardware E,L connect with #11 and #16. A:6*10-4pCs Step 10: Using hardware E,L connect with #19 and #20. E:4*10-12pCs...
- Page 10 Step 11: Using hardware E& L fix to the wall. Wall H: 4pCs G:4*30-4pCs I: 2pCs COMPLETED LOFT BED NOTE: Tighten all step before using. Thank you.
Need help?
Do you have a question about the MG00006 and is the answer not in the manual?
Questions and answers