Advertisement
Quick Links
Thank you for choosing Rough Country for all your lighting needs.
Please read instructions before beginning installation. Check the kit hardware against the kit contents shown
below. Be sure you have all needed parts and know where they go.
If question exist, please call us @1-800-222-7023. We will be happy to answer any questions concerning the
design, function, and correct use of our products.
Tools Needed:
10mm Socket / Wrench
13mm Socket / Wrench
17mm Socket / Wrench
21mm Socket / Wrench
Supplied Allen Wrenches:
2.5MM
4MM
NOTICE: LED light wiring will be performed referencing instructions included with those applicable kits
1. Remove the ground from the driver side of the vehicle on the driver side as shown using a 10mm wrench. See Photo 1. Re-
tain the stock hardware for reuse.
2. Unplug wiring harness leading to bumper from frame to allow it to be removed.
3. Remove the three bolts on each side using a 21mm wrench. (Driver Side Shown) See Photo 2.
PHOTO 1
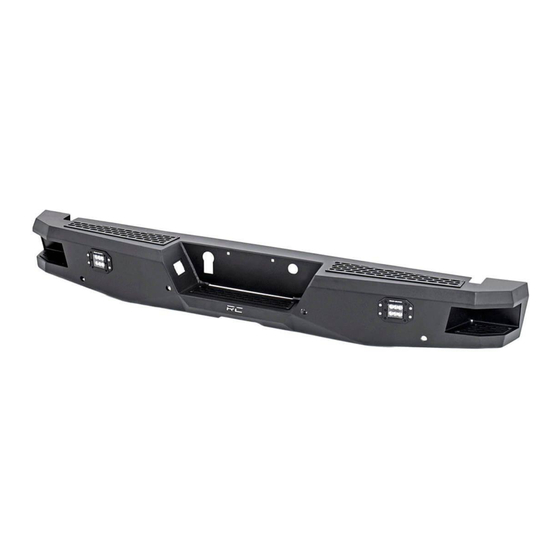
15-UP FORD F150 REAR BUMPER
Rear Bumper
Flag Nuts (2)
Bumper Plugs-To be used if proximity feature not included on vehicle (4)
Bag Containing:
Zip Ties (4)
Allen head Sensor bolts (4)
License Plate inserts (2)
Plastic flag nut retainers (4)
INSTALLATION INSTRUCTIONS
PHOTO 2
Kit Contents
921077100
Advertisement

Subscribe to Our Youtube Channel
Related Manuals for rough country 10771


Summary of Contents for rough country 10771
- Page 1 921077100 15-UP FORD F150 REAR BUMPER Thank you for choosing Rough Country for all your lighting needs. Please read instructions before beginning installation. Check the kit hardware against the kit contents shown below. Be sure you have all needed parts and know where they go.
- Page 2 4. Remove the bumper from the vehicle and lay on a flat surface to prepare for disassembly. See Photo 3. 5. Remove the wiring harness from the trailer connector and all other connections on the bumper. See Photo 4. PHOTO 3 PHOTO 4 6.
- Page 3 9. Remove the two bolts using a 13mm wrench, one each side, to remove the bumper covers. See Photo 9. 10. Remove the 8 bolts (4 each side) using 13mm wrench that secures the hitch assembly to the bumper covers. See Photo 10. PHOTO 9 PHOTO 10 11.
- Page 4 15. Place supplied plastic retainers over thread to hold flag nut in place. See Photo 15. 16. Lay the hitch assembly on the rear bumper as shown. See Photo 16. PHOTO 15 PHOTO 16 17. Install the supplied hardware to secure the hitch assembly to the rear bumper (2 each side) See Photo 17. Slightly tighten using a 17mm wrench.
- Page 5 NOTICE: LED light wiring will be performed referencing instructions included with those applicable kits. By purchasing any item sold by Rough Country, LLC, the buyer expressly warrants that he/she is in compliance with all applica- ble Federal, State, and Local laws and regulations regarding the purchase, ownership, and use of the item. It shall be the buy- ers responsibility to comply with all Federal, State and Local laws governing the sales of any items listed, illustrated or sold.
Need help?
Do you have a question about the 10771 and is the answer not in the manual?
Questions and answers