
Related Manuals for Modern Forms AXIS FR-W1803-52L


Summary of Contents for Modern Forms AXIS FR-W1803-52L
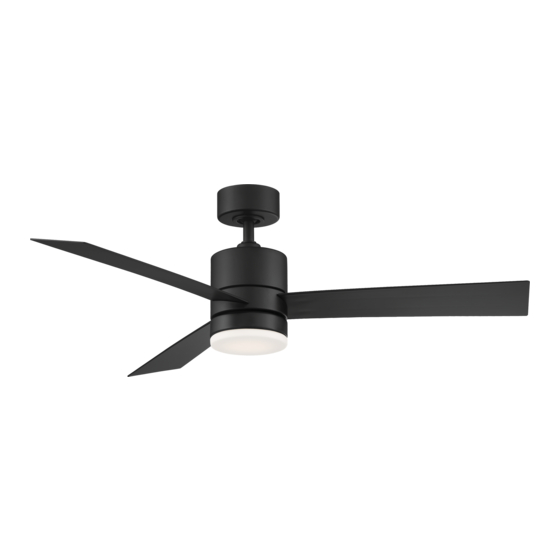
- Page 1 AXI S FR - W1803-52L INSTALLATION INSTRUCTIONS SMART MOTOR works with the modernforms.com Google Assistant...
- Page 2 All Modern Forms Smart Fans are: SMART Durably finished and Rated for Able to coordinate with smart Wet Location-listed to the strictest interior and exterior use devices for voice-activated and ETL/cETL safety regulations thermostat control MOTOR Quiet, reliable, and up to 70%...
-
Page 3: Table Of Contents
Table Of Contents 1. Safety Rules............................... 2. FTC Energy Guide & Specifications......................3. Tools and Materials Required........................4. Package Contents............................5. Mounting Options............................. 6. Hanging the Fan............................7. Making the Electrical Connections......................8. Installing the Wall Control ........................9. Finishing the Installation........................... 10. -
Page 4: Safety Rules
1. Safety Rules For operation, maintenance, and troubleshooting information, visit modernforms.com/help. To reduce the risk of electric shock, ensure electricity has been To avoid personal injury or damage to the fan and other turned off at the circuit breaker or fuse box before beginning. items, be cautious when working around or cleaning the fan. - Page 5 WARNING: To reduce the risk of electric shock, this fan must be installed with the supplied wall control, or controlled from the Modern Forms app or wall panel. WARNING: To reduce the risk of personal injury, do not bend the blade arms, when installing the brackets, balancing the blades or cleaning the fan.
-
Page 6: Ftc Energy Guide & Specifications
2. FTC Energy Guide & Specification FAN SIZE VOLTS STANDARD ELECTRICITY AIR FLOW ENERGY COSTS* FAN EFFICACY (lbs) (lbs) High Speed 5200 CFM $9/yr 157.6 CFM/W Axis 52” 13.36 15.28 Weighted Average 3290 CFM $8/yr 122 CFM/W * Estimated annual energy cost based on $0.12 per kWh and 6.4 hours use per day. 3. -
Page 7: Package Contents
4. Package Contents Unpack your fan and check the contents. You should have the following items: REF. DESCRIPTION PART NO. Blade Set of 3 RPL-F1803-52-BD-** Hanger Assembly RPL-HGR-ASM-** - Mounting Bracket - Downrod Asm. Canopy & Canopy screw cover RPL-CAN-CYL-** Coupling Cover RPL-COU-CVR-** Motor Assembly... -
Page 8: Mounting Options
5. Mounting Options Support Brace Joist CAUTION: To prevent electrical shock, ensure electricity has been turned off at the circuit breaker before beginning. If there isn’t an existing UL/cUL listed outlet box, please refer to the Outlet Box following instructions. Secure the outlet box directly to the building structure. -
Page 9: Hanging The Fan
6. Hanging the Fan REMEMBER to turn off power at the breaker. Follow the steps below to hang your fan properly: Disconnect power at the breaker to the fan location. A licensed electrician must install the fan (FIG. 5). FIG. 5 Remove 1 of 2 screws from the bottom of mounting bracket and save for use in section 9. - Page 10 6. Hanging the Fan (cont.) Cross Pin Take out the set screw located in the hanger ball, lower the Hanger hanger ball and remove the cross pin. Remove the hanger ball Ball Set Screw from the hanger ball/downrod assembly (FIG. 8). Remove the clevis pin and cotter pin, and loosen the two collar Downrod screws from the motor collar (FIG.
- Page 11 6. Hanging the Fan (cont.) Motor Wires Safety Cable Slip the coupling cover, canopy screw cover (painted side face down), and canopy (opened side up) onto the downrod (FIG. 10). Downrod Canopy Coupling cover goes all the way to the bottom. Carefully reinstall the hanger ball onto the downrod, being sure Canopy Screw Cover that the cross pin is in the correct position, the set screw is...
-
Page 12: Making The Electrical Connections
7. Making the Electrical Connections WARNING: To avoid possible electrical shock, be sure electricity is turned off at the main fuse box before wiring. WARNING: Installation of this fan requires that a three-conductor cable (including ground wire) which should run between ceiling and wall outlet box. - Page 13 7. Making the Electrical Connections (cont.) Outlet Box Motor to receiver electrical connections: (FIG. 13) White (neutral) Black (hot) Green (ground) Connect the hanger ball/downrod assembly ground wire, Black (“AC IN L”) mounting bracket ground wire and receiver ground wire White (“AC IN N”) to the ground wire in outlet box.
-
Page 14: Installing The Wall Control
8. Installing the Wall Control Wall control to wall outlet box electrical connections: (FIG. 14) WARNING: Remember to shut the power off at the circuit breaker or fuse box. Connect ground wires - Important for proper control function. Connect the black wire marked “LINE IN” from the control to the black LINE VOLTAGE wire from the outlet box that feeds back to the breaker. - Page 15 8. Installing the Wall Control (cont.) Carefully tuck the wire connections inside the junction box. Secure the wall control with the two wall control mounting screws provided (FIG. 15). Wall Outlet Box Wall Control Attach the wall mounting plate over the wall control and secure with the two wall mounting plate screws provided.
-
Page 16: Finishing The Installation
9. Finishing the Installation Secure all wire connections with supplied wire ties to assist in canopy installation. Outlet box Tuck connections neatly into ceiling outlet box. Slide the canopy up to hanger bracket and place the key hole on Hanger the canopy over the screw on the hanger bracket. -
Page 17: Attaching The Fan Blades
10. Attaching the Fan Blades Insert the blade through the slot in the housing. Align the holes in the blade with the fan motor assembly holes and secure with blade attachment screw with rubber washers (FIG. 17). Repeat this procedure with the remaining blades. Slot Blade Screws with... -
Page 18: Installing The Led Luminaire Module
12. Installing the LED Luminaire Module WARNING: Before starting installation, disconnect the power by turning off the circuit breaker or removing the fuse at fuse box. Turning power off using the fan switch is not sufficient to prevent electric shock. NOTE: If you do not plan to install the luminaire module with your fan at this time, skip to step 5. - Page 19 12. Installing the LED Luminaire Module (cont.) If installing the optional metal light cover, make sure it is securely tightened (FIG. 20). NOTE: Add metal light cover if you do not need lighting function or prefer a different aesthetic (FIG. 20). NOTE: Do not connect the LED connector wires if you are using the metal light cover.
-
Page 20: Wall Control Operating Instructions
13. Wall Control Operating Instructions Restore power to ceiling fan and test wall control as below for proper operation. Pairing the wall control to your fan Your fan is pre-paired at the factory. No pairing is necessary. NOTE: For pairing instructions please skip to the “Pairing” section. Wall Control Button Functions button: Turns the light ON or OFF. - Page 21 13. Wall Control Operating Instructions (cont.) Summer Mode Winter Mode (counter-clockwise): A downward airflow creates (clockwise): An upward airflow moves warm air off the ceiling area a cooling effect (FIG. 21). This allows you to set your air and redistributes the warm air that hovers around the ceiling to the conditioner on a warmer setting without affecting your comfort.
- Page 22 13. Wall Control Operating Instructions (cont.) Pairing Unpairing If you need to re-pair your fan or you want to pair a second wall NOTE: Unpairing must be completed within 3 minutes of turning control: the power on to the fan receiver. Power cycle your fan by turning off the power at the When you re-engage power to the fans you want to unpairing, circuit breaker.
- Page 23 Receiver Button Factory Reset Press the button on the receiver until the receiver beeps (FIG. 24). NOTE: This will remove wall control and Modern Forms app connections. FIG.24 F R - W1 8 03...
-
Page 24: Application
14. Application In addition to the included wall control, you can control your fan through the Modern Forms app. To use this app, download it for free from the App Store or Google Play. Open the app to create your account. You can also log in using your Facebook or Google account. - Page 25 The Modern Forms app will walk you through the main screen and show you how to create schedules, change fan speeds, dim the light, switch between Summer and Winter Modes, invite users, create groups and much more. Please refer to the Modern Forms app instructions for more details.
-
Page 26: Troubleshooting
Assure that there are no more than 12 fans operating on a circuit through an on/off switch or a breaker if utilizing the Modern Forms app (without the wall control in the circuit). Assure that the fan is within range of the Wi-Fi (150 ft) or wall control (30 ft). - Page 27 Problem Solution Fan sounds noisy. Allow a 24-hour “breaking in” period. Most noise associated with a new fan will disappear during this time. Make sure all motor housing screws are securely fastened. Make sure the screws that attach the fan blades to the fan are securely fastened. Make sure the screws securing the LED luminaire module are securely fastened.
-
Page 28: Accessories
Included with each fan 6 Fan speeds Dims light to 1% F-WC Wall control range: Up to 30ft from fan Works in conjunction with Modern Forms Fan receiver (Not included) Coupler AS, BZ, CFI, DW, GB, Connects two downrods XF-I... - Page 29 Product Model Description Finish Downrod AS, CFI, LN, SS, BZ, 12” in downrod XF-12 DW, GB, GH, GW, MB, MW, OB, TT AS, CFI, LN, SS, BZ, 18” in downrod XF-18 DW, GB, GH, GW, MB, MW, OB, TT AS, CFI, LN, SS, BZ, 24”...
- Page 30 Get Smart works with the Google Assistant The Modern Forms app synchronizes seamlessly with smart home devices you already own. To learn more go to modernforms.com/mfappins Free App Download Sync with our exclusive Modern Forms App to control fan speed, use smart features like Adaptive Learning, create groups and reduce energy costs.
- Page 31 Español For instructions in Spanish please visit the link below. Para obtener instrucciones en español, visite el siguiente enlace. www.modernforms.com/fan-instructions-espanol Français For instructions in French please visit the link below. Pour obtenir des instructions en français, veuillez visiter le lien ci-dessous. www.modernforms.com/fan-instructions-francais SCAN AND DOWNLOAD F R - W1 8 03...
- Page 32 F R- W1803 -52L modernforms.com...
Need help?
Do you have a question about the AXIS FR-W1803-52L and is the answer not in the manual?
Questions and answers