
Related Manuals for Signode strapex STB 77


Summary of Contents for Signode strapex STB 77
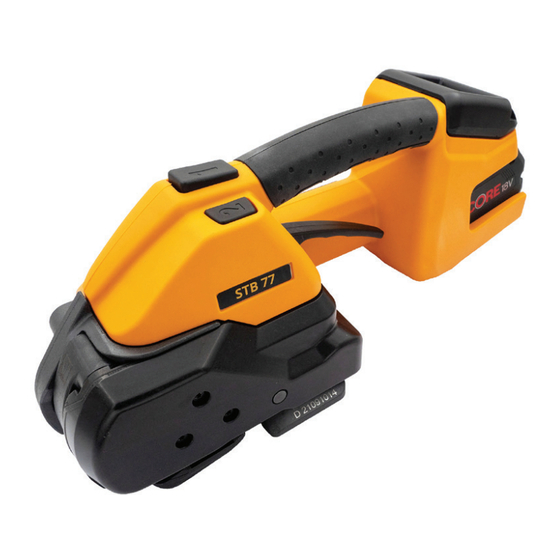
- Page 1 ® BRAND English Operating instructions STB 77 Battery-operated strapping tool for plastic strapping Patent pending www.strapex-stb.com V 04.21_EN...
- Page 2 These operating instructions are part of the product and therefore should be kept for later use or a future owner. Validity: ● STB 77 from Series no D/20111001 Manufacturer Signode Switzerland GmbH Silbernstrasse 14, Postfach 8953 Dietikon 1 SWITZERLAND signode.com 2 of 26 V 04.21_EN STRAPEX STB 77...
-
Page 3: Table Of Contents
Preventive and corrective maintenance Preventive maintenance schedule Cleaning the tool Re-greasing the tool Cleaning/replacing the tension wheel Cleaning/replacing the tooth plate Replacing the knife Tool reset Troubleshooting Technical data EC Declaration of Conformity (copy) 3 of 26 V 04.21_EN STRAPEX STB 77... -
Page 4: General Information
Directive 2012/19/EU of 4 July 2012 on waste electrical and electronic equipment (WEEE II). The legal prescriptions for disposal of all parts must be observed. ► Chargers and batteries should be sorted for environmentally-friendly recycling. ► Observe notes, warnings and instructions of the battery manufacturer. 4 of 26 V 04.21_EN STRAPEX STB 77... -
Page 5: Safety
Loose clothes, jewellery or long hair can be caught in moving parts. g) If devices are provided for the connection of dust extraction and collection facilities, ensure these are connected and properly used. Use of dust collection can reduce dust-related hazards. 5 of 26 V 04.21_EN STRAPEX STB 77... - Page 6 Liquid ejected from the battery may cause irritation or burns. 2.1.6 Service a) Have your power tool serviced by a qualified repair person using only identical replacement parts. This will ensure that the safety of the power tool is maintained. 6 of 26 V 04.21_EN STRAPEX STB 77...
-
Page 7: Use For The Intended Purpose
In operating mode AUTO, also the tensioning or welding button can be pressed again to stop strap tensioning. ● After welding, cut the strap using a suitable tool (strap cutter). 7 of 26 V 04.21_EN STRAPEX STB 77... - Page 8 Do not clean the tool with water or steam. When using the tool outdoors, protect it from rain. Use only original spare parts Using non-original spare parts will void the warranty and any liability. 8 of 26 V 04.21_EN STRAPEX STB 77...
-
Page 9: Description
(Section 5.1). ● Application error: temporary system error, can be rectified by the operator (Section 6.8). ● Tool fault: static system error, rectify error (Section 6.8). If the error cannot be rectified Service department. Battery and charger Charger Battery LED indicator For detailed information, refer to the operating instructions for the battery and the charger. 9 of 26 V 04.21_EN STRAPEX STB 77... -
Page 10: Function
Australia version: ● Battery charger GAL 1880 CV(AUS) Part no 2188.023 Tool kit consisting of: ● Wire brush Part no 1821.901.004 ● Screwdriver Torx T20 Part no 1821.901.010 ● Offset screwdriver Part no 1821.901.007 10 of 26 V 04.21_EN STRAPEX STB 77... -
Page 11: Accessories
Accessories ● Protection plate set Part no 2189.015 ● Protection cover set Part no 2189.011 ● Suspension bow set Part no 2189.017 11 of 26 V 04.21_EN STRAPEX STB 77... -
Page 12: Preparing For Operation And Settings
The charge status is shown in % and by a progress bar (1) – Below 10% minimum charge (battery must be charged) – The information symbols (2) only appear if a corresponding situation is occuring (Section 6.8). 12 of 26 V 04.21_EN STRAPEX STB 77... -
Page 13: Setting The Operating Mode
The welding button (Section 3.1) must then be briefly pressed so that the straps are welded and the upper strap is cut off. Recommended for varying (soft, hard) packaged goods. 13 of 26 V 04.21_EN STRAPEX STB 77... -
Page 14: Setting Strap Tension
– “SOFT” display (3) changes position and is shown in bold. – The displayed tension force is reduced correspondingly. – On the left under the tension force an “S” (4) also appears. 14 of 26 V 04.21_EN STRAPEX STB 77... -
Page 15: Setting Welding Time
The favourite mode (Section 4.7) can be switched on even when the key lock is activated. If the adjustment of the settings is not desired, the favourite level should be set in the same way as the normal level. 15 of 26 V 04.21_EN STRAPEX STB 77... -
Page 16: Select Favorite
To avoid unnecessary battery discharge, the tool switches to energy-saving mode within short time. – The operating panel becomes dark (not Illuminated). ► Pressing the operating panel switches the energy-saving mode off again. After approx. two minutes without operation the tool switches to sleep mode. – The operating panel is switched off (black). ► Actuating the rocker lever switches the sleep mode off again. 16 of 26 V 04.21_EN STRAPEX STB 77... -
Page 17: Operating Instructions
The beginning of the strap should project approx. 5 cm (2”). If the strap is not inserted completely, the strap guide indicator (Section 3.1, item 9) shows a red field. Insert the strap completely. The strap guide indicator is black. ► Remove hands from the straps before tensioning! 17 of 26 V 04.21_EN STRAPEX STB 77... - Page 18 WARNING Multiple welds in the same place are not permitted because this leads to faulty seals! ● Welding without strap tension: Press the tensioning button briefly, then press the weld- ing button (Section 3.1, item 2). 18 of 26 V 04.21_EN STRAPEX STB 77...
-
Page 19: Checking The Seal
► Strapping with poorly welded seals must be performed again. ► Check strap type (Section 7). ► If good welding is not achieved, the tool must be checked by an authorized service center. 19 of 26 V 04.21_EN STRAPEX STB 77... -
Page 20: Setting The Strap Width
► Fit strap guide rear 25 mm (9) (secure counter-sunk screw (10) with Loctite 222). ► Fit side cover (5) (secure cylinder head screws with Loctite 222). Install strap guide rear 25 mm (8). 20 of 26 V 04.21_EN STRAPEX STB 77... -
Page 21: Preventive And Corrective Maintenance
► Refit the side cover (4). Cleaning/replacing the tension wheel Required parts Order number STB 77: Tension wheel (1) (wear part) 1821.047.044 Ball bearing, Ø45/58x7 (2) 1930.180.452 Cylinder screw Torx, M4 (4) 1821.027.063 Wire brush (6) 1821.901.004 21 of 26 V 04.21_EN STRAPEX STB 77... -
Page 22: Cleaning/Replacing The Tooth Plate
► Check tooth plate for worn teeth. If several teeth are worn, replace tooth plate. Fitting ► Fitting is performed in reverse order. Secure counter-sunk screw (1) with Loctite 222. – The tooth plate (2 ) must sit freely movable in the rocker. 22 of 26 V 04.21_EN STRAPEX STB 77... -
Page 23: Replacing The Knife
This requires a little physical effort. ► Lift rocker lever (2). – The welding mechanism should now pivot upwards. If the tool reset could not be carried out success- fully, please contact the Service Centre! 23 of 26 V 04.21_EN STRAPEX STB 77... -
Page 24: Troubleshooting
► Repeat tensioning. pulsating (medium) ● Performance limitation or time Symbols & out. In the case of other error numbers not described here, please contact the the local service center. If the error cannot be rectified by applying the measures described above, please contact the local service center! 24 of 26 V 04.21_EN STRAPEX STB 77... -
Page 25: Technical Data
Polyester (PET) for recommended straps, see next page Strap width adjustable to 25 or 32 mm (1″ or 1 ″) Strap thickness 0.90–1.30 mm (.035″–.051″) * refer to Section 2.4, Vibration and noise exposure 25 of 26 V 04.21_EN STRAPEX STB 77... -
Page 26: Ec Declaration Of Conformity (Copy)
CH-8953 Dietikon, 17.11.2020 R. Siegrist M. Binder Managing Director Director-Head of Global R&D Agent for the publication of technical documentation: Signode Switzerland GmbH, Silbernstrasse 14, 8953 Dietikon 1, Switzerland Manufacturer Signode Switzerland GmbH Silbernstrasse 14, Postfach 8953 Dietikon 1 SWITZERLAND signode.com...
Need help?
Do you have a question about the strapex STB 77 and is the answer not in the manual?
Questions and answers