Table of Contents
Advertisement
Quick Links
Advertisement
Table of Contents

Related Manuals for 3D Systems MPJ 300W


Summary of Contents for 3D Systems MPJ 300W
- Page 1 User Guide Release Date: 3/26/2024 Original Instructions...
-
Page 2: Table Of Contents
9.9 MJP 300W Cleaning Polycarbonate Top Door .......................... 55 9.10 MJP 300W Cleaning Print Platform ............................55 9.11 MJP 300W Cleaning the User Interface ...........................56 9.12 MJP 300W MDM Maintenance ..............................56 9.13 MJP 300W Routine Maintenance ............................. 56 3D Systems, Inc. p/n 33-D313, Rev. A... - Page 3 MJP 300W PARTNER - CUSTOMER SUPPORT ................72 MJP 300W LEGAL NOTICES ......................73 MJP 300W BASIC REGULATIONS ....................75 MJP 300W GLOSSARY ........................76 MJP 300W DECLARATION OF CONFORMITY (DOC) AND DATA LABEL ........77 3D Systems, Inc. p/n 33-D313, Rev. A...
-
Page 4: Mjp 300W Introduction
Wax Jewel Red (PW - Part Wax) ® VisiJet Wax Jewel Ruby (PW - Part Wax) ® Note: The ProJet MJP 300W is a wax printer and thus has no UV lamps installed. ® 3D Systems, Inc. p/n 33-D313, Rev. A... -
Page 5: Mjp 300W Important Safety Information
Do not attempt to access, service, or adjust printer components or perform procedures without reviewing the documentation for user accessible maintenance routines unless specifically trained to do so. • Only certified service personnel that have completed the 3D Systems service training may perform tasks they are authorized and certified to complete. •... - Page 6 Emergency (GHS/SDS) Chemtrec USA (800) 424-9300; Europe +1-703-527-3887 Consult the materials Global Harmonized Standards/Safety Data Sheets (GHS/SDS) for information on specific materials. For further information on this and related topics, consult the 3D Systems - Materials website at https://support.3dsystems.com/s/ article/materials-materials 3D Systems, Inc.
- Page 7 Packaging Inspection The material cartridges are packaged in shipping cartons. Upon receipt of material shipments, inspect cardboard carton exterior for signs of damage and leakage. If leakage is observed, DO NOT open carton, and contact 3D Systems's Technical Support Hotline.
- Page 8 Material Cartridge, place it upright in a MJP 300WCartridge Holder and tighten the vent cap. Recertification Date Always check material "Recertification Date" before use. If the cartridge has reached its Recertification Date, your 3D Systems certified Partners or 3D Systems Technical Support can assist with questions on material requiring recertification.
- Page 9 ® ® ® 3D Systems assumes no liability or responsibility for proper disposal of part material. Proper disposal of part material is the sole responsibility of the user. For proper Isopropyl alcohol (IPA) disposal, please refer to the manufacturers Safety Data Sheet (SDS).
-
Page 10: Mjp 300W Printer Features
Utilizing VisiJet Real Wax materials delivers exceptional casting patterns for rapid metal part production. ZHD - High Speed Mode Save polishing time and precious metals waste by 3D printing best-in-class smooth pure wax casting patterns with new high resolution ZHD printing mode. 3D Systems, Inc. p/n 33-D313, Rev. A... - Page 11 Extreme High Definition (QHD) High Speed Mode Resolution (xyz) 2000 x 1800 x 2900 DPI Build Speed (in/hr) in Z 1 Lane: 0.045 2 Lanes: 0.032 3 Lanes: 0.025 mm/hr 1 Lane: 1.15 2 Lanes: 0.82 3 Lanes: 0.635 3D Systems, Inc. p/n 33-D313, Rev. A...
- Page 12 11.6 x 8.3 x 5.6 inches (294 x 211 x 144mm) Accuracy - per inch of part ±0.004 inch per inch (±0.1016 mm per 25.4 mm) of part dimension dimension typical Layer thickness 25 micron 3D Systems, Inc. p/n 33-D313, Rev. A...
- Page 13 Fast and capable professional wax pattern printer that prints 100% wax patterns with excellent accuracy and surface finish for jewelry and other metal casting applications. Utilizing VisiJet Real Wax materials delivers exceptional casting patterns for rapid metal part production. 3D Systems, Inc. p/n 33-D313, Rev. A...
-
Page 14: At A Glance
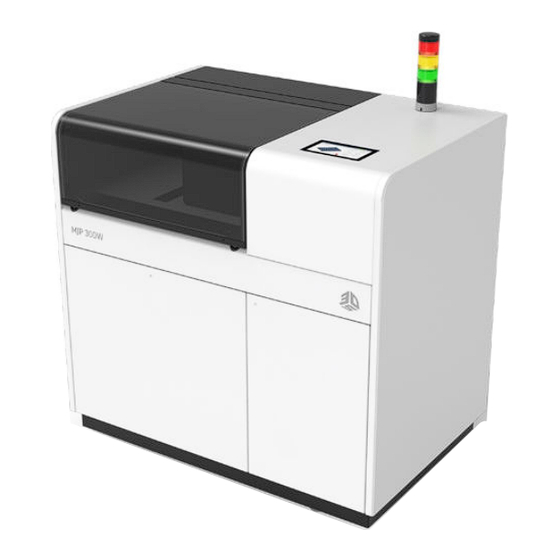
Stack Light: The stack light displays printer status at-a-glance from a distance. The light may be repositioned for more convenient viewing. A list of status indicators is detailed below 3D Systems, Inc. p/n 33-D313, Rev. A... - Page 15 There is a machine • service call is error, usually one needed that is preventing • persistent fault the printer from detected printing. The unit • alarm service needs immediate fault attention. See Printer UI Fault 3D Systems, Inc. p/n 33-D313, Rev. A...
- Page 16 • planarizer access cover open • support material is empty • build material is empty • not enough material is available • HMS waste bag is full • waste drawer open 3D Systems, Inc. p/n 33-D313, Rev. A...
- Page 17 Green Slow Blink PRINTING The printer is • the printer is currently printing. actively printing Green Solid READY No alarms are • the printer is raised. ready to print, no actions are required. 3D Systems, Inc. p/n 33-D313, Rev. A...
- Page 18 This is the only way to power the printer on from a complete shutdown state. Do not use this switch to shutdown printer. Printer should be shutdown through the UI and brought back up by toggling the power switch on the back. (A) 3D Systems, Inc. p/n 33-D313, Rev. A...
- Page 19 The Installation Guide details the procedures required to properly install and set up the MJP 300W3D Printer at the customer's site. Only a 3D Systems Certified Field Service Engineer or a Certified Reseller is allowed to install the 3D printer system. An electronic version of this document is available at the customer support center.
-
Page 20: Mjp 300W Printer Setup
(>60 days). UI will begin to power up. This may take a minute or two for the screen to come on. When the UI is booted up the 3D Systems logo will appear and then the Status screen will appear. - Page 21 310248-00. With each order you will receive 50 bags. 8. Confirm on the UI when the waste bag has been replaced. The Waste Bag routine can also be accessed from the Operator Maintenance window: 3D Systems, Inc. p/n 33-D313, Rev. A...
- Page 22 Note: Do not push down insert fully to bottom of bag as this may cause waste bag to tear 3. Check to make sure the waste bag counter has been reset to 0%. 3D Systems, Inc. p/n 33-D313, Rev. A...
-
Page 23: Mjp 300W Material Cartridge Removal And Installation
1. Open the MDM drawer by pushing in at the recessed dimple. 3. Pull the MDM drawer open. 4. Turn the material cap (B) a 1/2 turn to clockwise to tighten the vent cap. 3D Systems, Inc. p/n 33-D313, Rev. A... - Page 24 To place a material cartridge into the MDM, perform the following steps: 1. Obtain a new material cartridge ensuring that it is the same material as currently installed in the MDM. 3D Systems, Inc. p/n 33-D313, Rev. A...
- Page 25 Note: To install cartridges into the MDM drawer properly ensure that the small cap be installed away from the user. 93-134 thru 137 - cartridge check needed 4. Place cartridge in slot and push down until you hear it click in place. 3D Systems, Inc. p/n 33-D313, Rev. A...
- Page 26 5. Vent each cartridge by loosening the material cap (A) by a 1/2 turn counterclockwise. 6. Close the MDM drawer (B), by pushing in the dimple at the top until it's latched securely. 3D Systems, Inc. p/n 33-D313, Rev. A...
- Page 27 7. Check the material level under the Materials tab (C) on the UI to ensure cartridge is seated properly into MDM and ready to print. Note: Contact certified reseller partner or 3D Systems Customer Support when the UI continues to report an empty cartridge even though the cartridge is non-empty and is seated properly in the MDM. Contact your certified reseller partner first or contact 3D Systems Customer Support, whose contact information can be found in the customer support site.
-
Page 28: Mjp 300W Print Platform Removal And Installation
4. Lift to remove the platform. 5. Install clean print platform. Close top door. If it is placed correctly the platform will automatically lower and clamp the print platform in place. 3D Systems, Inc. p/n 33-D313, Rev. A... - Page 29 Also, confirm that the print platform is free from damage due to any drops or dings. Protruding metal on the platform may come in contact with the printhead and cause severe damage. 3D Systems, Inc. p/n 33-D313, Rev. A...
-
Page 30: Mjp 300W Steps For Printing
2. Inspect platform to ensure it is clean and free from defects. Note: Using a dirty or damaged platform can cause severe damage to printer. Always make sure your platform is clean and free from defects. 3D Systems, Inc. p/n 33-D313, Rev. A... - Page 31 Waste bags can be ordered using part number 310248-00. With each order you will receive 50 bags. 7. Confirm on the printer UI when you have completed replacing the waste bag. 3D Systems, Inc. p/n 33-D313, Rev. A...
- Page 32 Note: Do not push down insert fully to bottom of bag as this may cause waste bag to tear. 10. Check to make sure the waste bag counter has been reset to 0%. 3D Systems, Inc. p/n 33-D313, Rev. A...
- Page 33 1. Select the printer you wish to print your part on. Click on the Printer (1) button at the top. 2. A list of available printers will come up. Click on desired printer (2) on the printer you wish to use and select Next (2b). 3D Systems, Inc. p/n 33-D313, Rev. A...
- Page 34 Selecting Material 1. Select the desired material your part will be printed with. Double Click desired material (3a) and select Next (3b). Selecting Print Mode 3D Systems, Inc. p/n 33-D313, Rev. A...
- Page 35 Selecting Build Style 1. Select the Build Style. The default Build Style is General. You can create other build styles under the Printer Tools / Printer Settings section. Select Build Style option and press APPLY. 3D Systems, Inc. p/n 33-D313, Rev. A...
- Page 36 Note: High Speed Mode may be deselected within a custom made build style. Printing the File 1. In the Print (1) tab select File > Import (2) to import an .stl file. 2. Navigate and select the file you wish to print. Select Open (3). 3D Systems, Inc. p/n 33-D313, Rev. A...
- Page 37 5. A verification box will come up. Check the file name and when you are sure it is the correct file, select Add to Queue (5b). 6. Print Queue will display current parts being printed (6) and where your job is in the queue. 3D Systems, Inc. p/n 33-D313, Rev. A...
- Page 38 1. When job is complete, select "Access Platform" to bring the print platform into position and open the top door to lift and remove the platform, refer to Print Platform Removal in Printer Setup. 2. Refer to the Post Processing Guide for instructions on how to get the best results for your finished part. 3D Systems, Inc. p/n 33-D313, Rev. A...
-
Page 39: Mjp 300W Printer Power Options
3. Select Power Options (2) on the Tools side panel screen. 4. Next, select Printer Shutdown. 5. The next message that pops up is asking to confirm if you want to shutdown the printer. Select SHUT DOWN. 3D Systems, Inc. p/n 33-D313, Rev. A... - Page 40 Note: Unless the printer will be idle for an excessively long time (>60 days) it is not necessary to shut it down. Shutting down the printer will cause longer wait times for warming, because it is warming from a cold state. 3D Systems, Inc. p/n 33-D313, Rev. A...
- Page 41 Note: Whenever the printer is powered down, wait 60 seconds before toggling the power switch back on. 3D Systems, Inc. p/n 33-D313, Rev. A...
-
Page 42: Mjp 300W Material Change Over (Mco)
1. Ensure the printer is warmed up and at the idle stage. 2. Remove the old waste bag from the material drawer, install a new one, and confirm the waste bag replacement in the Printer User Interface (UI) screen. 3D Systems, Inc. p/n 33-D313, Rev. A... - Page 43 HMC at a time. 6. Repeat the HMC two more times. 7. In the printer UI screen, make the secondary Wax Jewel Red bottle active under the "Materials" section. 3D Systems, Inc. p/n 33-D313, Rev. A...
- Page 44 8. Once the second bottle is active, perform three more HMC purges in the UI screen as done previously. 9. When the final HMC purge has completed, remove and install a new waste bag, then start print jobs as normal. 3D Systems, Inc. p/n 33-D313, Rev. A...
-
Page 45: Mjp 300W Maintenance
Access to this filter is from the front of the machine on the right hand side. Open door, loosen the thumb screw on the door containing the filter, remove the filter, insert new filter, close door, tighten thumb screw. 3D Systems, Inc. p/n 33-D313, Rev. A... - Page 46 Note: This is a customer replaceable item. Particulate Filter with Handle - P/N 310259-00. Photo below illustrates a filter that needs to be changed. Photo below illustrates a filter that is clean and new. 3D Systems, Inc. p/n 33-D313, Rev. A...
-
Page 47: Mjp 300W Cleaning Filter Screen
There is a filter screen that is placed above the particulate filter to add extra filtering protection for the filter. This screen will need to be checked or cleaned weekly. 1. Open the Filter Door. 3D Systems, Inc. p/n 33-D313, Rev. A... - Page 48 2. Wearing Nitrile gloves, slowly pull filter screen out from VOC. 3D Systems, Inc. p/n 33-D313, Rev. A...
- Page 49 Screen may then be wiped clean using a paper towel with water. 4. Reinstall the filter screen with the three line markings faced upwards. 5. Close Filter Door. 3D Systems, Inc. p/n 33-D313, Rev. A...
-
Page 50: Mjp 300W Inspecting And Cleaning Planarizer Ducts
3. Open planarizer cover to access the planarizer cover to access the planarizer assembly and ducts. 4. Take a foam swab with some Isopropyl alcohol on it and wipe in and around the ducts, taking care to remove all excess material. 3D Systems, Inc. p/n 33-D313, Rev. A... -
Page 51: Mjp 300W Inspect Planarizer Blade
The planarizer blade will need to be inspected periodically and wiped off. Excess material can build up over time. 1. In the UI click on Tools > Diagnostics > Inspect Planarizer Wiper Blade 3D Systems, Inc. p/n 33-D313, Rev. A... -
Page 52: Mjp 300W Clean Print Carriage Optical Home Sensor
Clean Print Carriage Optical Home Sensor Pixie Dust Removal from Opto Sensors Over time pixie dust will accumulate on the Opto sensors and will need to be cleaned off. Follow this procedure for cleaning the Opto sensors. 3D Systems, Inc. p/n 33-D313, Rev. A... - Page 53 4. Push y-carriage to move flag away from sensor in order to clean inside of the sensor. 5. Take a foam swab with isopropyl alcohol on it and gently wipe around the Opto sensors removing all the pixie dust from them. 3D Systems, Inc. p/n 33-D313, Rev. A...
-
Page 54: Mjp 300W Confirm Jets
1. Purge the printhead by selecting Tools > Diagnostics > Head Maintenance Cycle (1) through the UI. 2. Next select Test Jets (2). If not platform is in the printer, you will be prompted to Access the Platform and install and confirm a clean platform. 3D Systems, Inc. p/n 33-D313, Rev. A... - Page 55 5. Once the routine finishes, access the print platform to evaluate the printed image against the Jet Check Evaluation Criteria on the next page. 6. If the image is acceptable (Pass), the printer is ready to start a build. 3D Systems, Inc. p/n 33-D313, Rev. A...
- Page 56 If both the part and support material pass, proceed to the second evaluation. Evaluation Criterion 2 of 3: Are there 5 lines between the gaps in the same row of part or support material? 3D Systems, Inc. p/n 33-D313, Rev. A...
- Page 57 Evaluation Criterion 3 of 3: Are there at least 2 lines between a gap in a row above or below? When performing this evaluation, only compare rows of part material to other rows of part material and only compare rows of support material to other rows of support material. 3D Systems, Inc. p/n 33-D313, Rev. A...
-
Page 58: Mjp 300W Cleaning Exterior Surfaces
9.8 MJP 300W Cleaning Exterior Surfaces Do not remove any outer panels when cleaning the printer. Panels must only be removed by qualified 3D Systems Technical Support Representatives. Remove dust from outer surfaces of printer by wiping with a clean, dry, lint-free cloth. -
Page 59: Mjp 300W Cleaning The User Interface
Items to clean • Beauty plate • Inside and outside of Planarizer cover • Outside of printer WARNING: DO NOT CLEAN THE UNDERSIDE OF THE PRINTHEAD (JET STACK). DOING SO WILL CAUSE SEVERE DAMAGE. 3D Systems, Inc. p/n 33-D313, Rev. A... -
Page 60: Mjp 300W Troubleshooting
X Scaling Factor = (XCAD - XPART) / XPART x 100 (answer will be a percentage) Y Scaling Factor = (YCAD - YPART) / YPART x 100 (answer will be a percentage) Example: X measurement of CAD model = 3.000" Y measurement of CAD model = 5.000" 3D Systems, Inc. p/n 33-D313, Rev. A... - Page 61 Enter standard Shrink Compensation Values for the material or entire print job. 1. Open 3D SPRINT Client Software and select Print > Printer ™ 2. Select the Style Set Tab within the printer configuration 3. Select the Add Button. 3D Systems, Inc. p/n 33-D313, Rev. A...
- Page 62 6. Now the printer is defaulted to the new set of shrink compensation values. The bottom right corner information window is providing the new maximum printable size for XYZ accordingly per shrink compensation. You can now load jobs and print to the printer using these Shrink Compensation values. 3D Systems, Inc. p/n 33-D313, Rev. A...
- Page 63 2. Select the printer (use cursor to show printer information) you wish to print the job with and then click Next. 3. Select material for the job, click Next. 4. Select Print Mode, and then click Next Button. 3D Systems, Inc. p/n 33-D313, Rev. A...
-
Page 64: Mjp 300W Printer Status And Fault Code Recovery
Printer-clearable faults, where the printer is automatically attempting recovery • Service required faults, which can only be resolved by a certified partner Check the Printer Status envelope for current printer conditions. Codes listed below describe user-clearable and printer-clearable faults: 3D Systems, Inc. p/n 33-D313, Rev. A... - Page 65 2. The printer may go through several Error states and reboot in its recovery process. 3. If it is not able to ultimately recover, it will reboot into a Diagnostics mode for the user to call service. 3D Systems, Inc. p/n 33-D313, Rev. A...
- Page 66 12" from the wall. Sensor may be dirty Clean Print Carriage Optical home 92-157 Y Axis Motor Cannot Home sensor. See Cleaning and Maintenance 94-207 Clean Print Carriage and Optical section for cleaning sensors. Home Sensor 3D Systems, Inc. p/n 33-D313, Rev. A...
-
Page 67: Mjp 300W Non-Fault Code Recovery
10. The UI should be ready and communicating with the printer in 2 to 3 minutes. If this does not happen please contact your local service provider User Interface 3D Systems, Inc. p/n 33-D313, Rev. A... - Page 68 Select the desired material material types, for which only with which to continue. You one type may be installed at a will be prompted to remove time the non selected cartridge from the printer 3D Systems, Inc. p/n 33-D313, Rev. A...
- Page 69 "Print 4. If you were not prompted with a message that a new platform has material on it" platform was installed, contact your local service provider. Other 3D Systems, Inc. p/n 33-D313, Rev. A...
-
Page 70: Mjp 300W Part Quality Issue Recovery
Troubleshooting Steps Power cycle the printer, if the UI doesn't come up Contact a Certified Partner for service. 10.4 MJP 300W Part Quality Issue Recovery PROBLEM DESCRIPTION TROUBLESHOOTING STEPS Missing Material: 3D Systems, Inc. p/n 33-D313, Rev. A... - Page 71 2. If the problem persists, contact your Extra material described as "flames" or certified partner for service. "spurs" of material. 3D Systems, Inc. p/n 33-D313, Rev. A...
- Page 72 Thin features printed in Wax Jewel Red Freckling artifacts should not impact may show a "freckling" pattern if the casting surface quality. part has been sitting for an extended period of time >2 months. Part Distortion: 3D Systems, Inc. p/n 33-D313, Rev. A...
- Page 73 1. Run the Shrinkage Compensation size desired. Procedure to determine the Shrinkage Compensation values. See Shrink Compensation section of the User Manual for assistance. 2. Input new values into 3DSPRINT and reprint the part. Other: 3D Systems, Inc. p/n 33-D313, Rev. A...
- Page 74 Upon resuming the print job, the planarizer contact may cause the verification wall to fall over onto the print job. 3D Systems, Inc. p/n 33-D313, Rev. A...
-
Page 75: Mjp 300W Partner - Customer Support
International: +1 803-326-3930 General MJP 300W service procedures must be performed only by a 3D Systems-certified service technician unless this guide explicitly states otherwise. If your 3D printer system needs service, contact 3D Systems Technical Support at the following numbers: •... -
Page 76: Mjp 300W Legal Notices
Copyright 3D Systems, Inc. All rights reserved. Subject to change without notice. This document is copyrighted and contains proprietary information that is the property of 3D Systems, Inc. No copies of the document may be sold or given to any person or other entity. - Page 77 Portions of this software (JPEG) is Copyright (C) 1991-1998, Thomas G. Lane. All Rights Reserved except as specified below. Portions of this software (Chilkat) Copyright 2000-2017 Chilkat Software, Inc. All rights reserved. © Portions of this software (OpenDHCP) Copyright 2007 Free Software Foundations, Inc. © 3D Systems, Inc. p/n 33-D313, Rev. A...
-
Page 78: Mjp 300W Basic Regulations
Changes or modifications to this equipment not approved by 3D Systems can void the authority of the user to operate this equipment. -
Page 79: Mjp 300W Glossary
.3dprint File - Files that have been created and saved by the client software 3D SPRINT. 3D SPRINT - The client software used to create parts and send them to the printer. 3D Systems, Inc. p/n 33-D313, Rev. A... -
Page 80: Mjp 300W Declaration Of Conformity (Doc) And Data Label
MJP 300W DECLARATION OF CONFORMITY (DOC) AND DATA LABEL EC Declaration of Conformity (DoC) MJP 300 Series CE DoC (CD-000023-ENG_E).pdf Data Label 311083_00-MJP_300W_Data_Plate 3D Systems, Inc. p/n 33-D313, Rev. A... - Page 81 3D Systems, Inc. 333 Three D Systems Circle Rock Hill, SC 29730 www.3dsystems.com Register Statement 2024 by 3D Systems, Inc. All rights reserved. Specifications subject to © change without notice. 3D Systems and the 3D Systems logo are registered trademarks of 3D Systems, Inc.
Need help?
Do you have a question about the MPJ 300W and is the answer not in the manual?
Questions and answers