
Related Manuals for Xerox D50


Summary of Contents for Xerox D50
- Page 1 05-1042-000 JUNE 2024 Xerox ® Scanner Scanner User Guide for Microsoft Windows and Mac OS X ® ® ®...
- Page 2 ©2024 Xerox Corporation. All rights reserved. Xerox is a trademark of Xerox Corporation in ® the United States and/or other countries and is used under license from Xerox Corporation. Visioneer is an authorized trademark licensee of Xerox . Visioneer is a trademark of ®...
- Page 3 Restricted Rights Legend Use, duplication, or disclosure is subject to restrictions as set forth in contract subdivision (c)(1)(ii) of the Rights in Technical Data and Computer Software Clause 52.227-FAR14. Material scanned by this product may be protected by governmental laws and other regulations, such as copyright laws.
-
Page 4: Table Of Contents
Environmental Health and Safety Contacts..................... 1-4 2-Welcome ................................... 2-1 What’s in the Box................................2-1 System Requirements..............................2-1 Documentation ................................2-2 Xerox D50 Scanner Features ..........................2-2 ® 3-Assemble the Scanner..............................3-1 Unpacking the Xerox D50 Scanner........................3-1 ® Connect the Power Cord............................3-2 Connect the USB Cable.............................. - Page 5 Troubleshooting................................. 6-14 Error Light Troubleshooting Codes........................ 6-16 Uninstalling Your Scanner ............................. 6-17 Windows..................................6-17 Mac....................................6-18 Xerox ® D50 Scanner Specifications ........................6-19 Xerox ® D50 Scanner Parts List..........................6-20 7-Appendix A: Regulatory Information ........................7-1 Basic Regulations................................7-1 ......................7-1 United States (FCC Regulations) Great Britain ................................
-
Page 6: 1-Safety
Please read the following instructions carefully before operating the machine and refer to them as needed to ensure the continued safe operation of your machine. Your Xerox D50 Scanner and supplies have been designed and tested to meet strict safety ® requirements. These include safety agency evaluation and certification, and compliance with electromagnetic regulations and established environmental standards. -
Page 7: Electrical Information
Plug the power cable directly into a correctly grounded electrical outlet. If you are not sure whether or not an outlet is correctly grounded, consult an electrician. Do not use an adapter to connect any Xerox ® equipment to an electrical outlet that lacks a ground connection terminal. -
Page 8: Disconnect Device
® Safety Xerox D50 Scanner an earthed electrical outlet. This is a safety feature. If you are unable to insert the plug into the outlet, contact your electrician to replace the outlet. D I S C O N N E C T D E V I C E The power cable is the disconnect device for this equipment. -
Page 9: Environmental Health And Safety Contacts
D50 Scanner Safety Environmental Health and Safety Contacts Contact Information For more information on Environment, Health, and Safety in relation to this Xerox product and ® supplies, please contact the following customer help lines: North America & Europe (Phone): 1-800-ASK-XEROX North America &... -
Page 10: 2-Welcome
Welcome Your new Xerox D50 Scanner can quickly scan stacks of documents with the Automatic ® Document Feeder (ADF), or single pages on the Flatbed glass. What’s in the Box Before proceeding, check the contents of the box. If items are missing or damaged, contact the dealer where you purchased the scanner. -
Page 11: Documentation
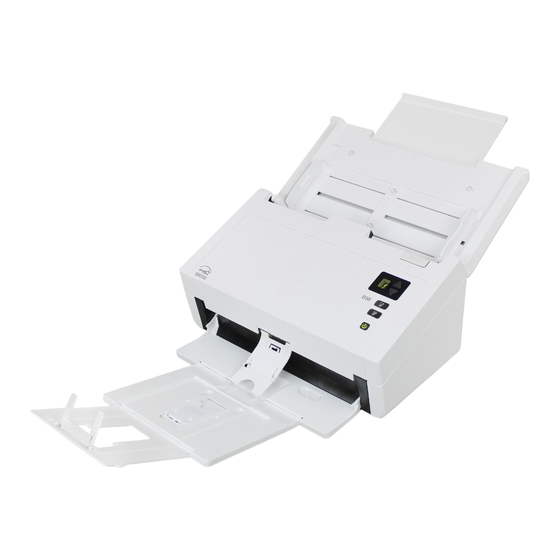
Make sure you print the correct page size for the paper in your printer. Also, make sure the application you are using is not set to automatically scale the page to fit on the paper in your printer. Xerox D50 Scanner Features ® User Guide... - Page 12 ® Welcome Xerox D50 Scanner Input Tray—Holds the documents in the Automatic Document Feeder for scanning. – Extension—Pull out to support various document lengths. – Paper Guide Switch—Push up to allow the paper guides to adjust wider for dot matrix printer paper.
- Page 13 ® Xerox D50 Scanner Welcome User Guide...
-
Page 14: 3-Assemble The Scanner
Assemble the Scanner Unpacking the Xerox D50 Scanner ® Remove the scanner from its protective foam and plastic bag. Remove any shipping tape from the scanner as indicated in the following illustration(s). Lift the input tray up from the scanner. Pull the output tray down from the scanner body. -
Page 15: Connect The Power Cord
® Xerox D50 Scanner Assemble the Scanner Slide the release switch in the output tray if you want it to lay flat on the desk. Connect the Power Cord Note: Only use the power supply (DA-48M24 made by APD) included with your scanner. -
Page 16: Safety Lock
® Assemble the Scanner Xerox D50 Scanner Safety Lock Your scanner may have a slot for installing a Kensington style safety lock. This slot can be ® identified by the lock icon. It is to the left of the USB port on the scanner. When following the instructions in this document, make sure you connect the USB cable into the USB port which is identified by the USB symbol. - Page 17 ® Xerox D50 Scanner Assemble the Scanner User Guide...
-
Page 18: 4-Installation
Installation Windows Please make sure of the following before you begin installation: If you are prompted to reboot during installation, please select No. Finish installing the rest • of the software, then close all open windows and reboot your computer. •... - Page 19 ® Xerox D50 Scanner Installation Click OK. Select your scanner from the list. Click Proceed. The Select Language window opens. Click the drop-down menu arrow and select the language to use. Click OK. User Guide...
- Page 20 ® Installation Xerox D50 Scanner Make sure the boxes for Scanner Driver and Visioneer OneTouch are selected, as well as any other applications you want to install. The software will have to first be downloaded by clicking Download. The total size of the download is shown at the bottom.
-
Page 21: Mac
® Xerox D50 Scanner Installation 12. On the License Agreement windows, read the license agreements. If you accept the terms, select I Agree. If you click I do not agree, the installation will terminate. 13. Once all of the software has been installed, Click Exit. - Page 22 ® Installation Xerox D50 Scanner Double-click the VisioneerUpdate disc icon. Click OK. Select your scanner from the list. Click Proceed. The Select Language window opens. Click the drop-down menu arrow and select the language to use. Click OK. User Guide...
- Page 23 ® Xerox D50 Scanner Installation 10. Make sure the boxes for Scanner Driver and Visioneer Scan Utility are selected, as well as any other applications you want to install. Visioneer Scan Utility — This utility uses the scanner’s TWAIN interface for scanning. You can select a destination folder on your computer and save the image as any one of several popular image file formats (BMP, JPG, GIF, TIF, Multi-Page TIF, PDF, Multi-Page PDF).
- Page 24 ® Installation Xerox D50 Scanner 13. Click Continue. 14. On the License Agreement window, read the license agreement and click Continue. 15. If you accept the terms, select Agree and continue with the installation. If you choose not to accept the license agreement, close the installation window. The scanner driver will not be installed.
- Page 25 ® Xerox D50 Scanner Installation 16. Depending on your system configuration, you may be prompted to choose a location for the installation. We recommend that you select the main disc drive and click Install. 17. If you are prompted for a password, input the name and password for a user that has permission to install software on your computer.
-
Page 26: Installing Additional Applications
® Installation Xerox D50 Scanner Installing Additional Applications Once all of the software has been installed, click on Install software. If a version of the software is already installed on the system, the option will be greyed out. However, if there is a newer version available, it will be possible to download and install. -
Page 27: Register Your Scanner
® Xerox D50 Scanner Installation Click on View scanner documentation to access the scanner user guide and scanning guides for OneTouch and TWAIN. Click the links of the guides you want to view. Click on the User guide menu button to return to the main user guide window, then select the other documentation section to view the user guides. - Page 28 ® Installation Xerox D50 Scanner Fill in the registration form, all required fields have an asterisk (*). A valid email address is required for registration. You will be asked to enter the serial number for the scanner, it is located on the back or underside of the scanner.
- Page 29 ® Xerox D50 Scanner Installation 4-12 User Guide...
-
Page 30: 5-Loading Documents To Scan
Loading Documents to Scan Always remove any staples or paper clips from documents before inserting them into the scanner. Staples and paper clips can jam the feed mechanism and scratch the internal components. Also remove any labels, stickers, or Post-It™ notes that may come off during the scanning process and get stuck in the scanner. -
Page 31: Documents To Avoid Scanning
® Xerox D50 Scanner Loading Documents to Scan Documents to Avoid Scanning The documents in this list can be scanned, but please note that scanning documents of this type will reduce the life of the scanner. Maintenance will be required more often and replaceable parts will wear faster. -
Page 32: Scanning From The Automatic Document Feeder (Adf)
® Loading Documents to Scan Xerox D50 Scanner Scanning from the Automatic Document Feeder (ADF) S C A N N I N G R E G U L A R D O C U M E N T S Make sure the paper guide switch is in the correct position for scanning regular documents, as indicated in the following illustration. -
Page 33: Scanning Dot Matrix Printer Paper
S C A N N I N G D O T M AT R I X P R I N T E R PA P E R With the Xerox D50 Scanner you can scan dot matrix printer paper without removing the ®... -
Page 34: Scanning Interfaces
® Loading Documents to Scan Xerox D50 Scanner Load the documents face down with their tops into the Automatic Document Feeder. You can now scan the documents using the scanner buttons, OneTouch, or one of the other scanning interfaces. Scanning Interfaces W I N D O W S Scanner Control Panel—When you press the San button, the scanner starts scanning using... -
Page 35: Mac
® Xerox D50 Scanner Loading Documents to Scan Please see the OneTouch Scanning Guide on www.xeroxscanners.com for instructions.You can also click the Help button in the OneTouch Properties window to open the instructions in an Internet browser. TWAIN and WIA Interface—this option uses your scanner’s TWAIN interface to scan. - Page 36 ® Loading Documents to Scan Xerox D50 Scanner • TWAIN Interface — TWAIN is a widely recognized standard that computers use to receive images from scanners and digital cameras. The TWAIN scanning interface can be accessed from any TWAIN scanning application you have installed on the computer.
- Page 37 ® Xerox D50 Scanner Loading Documents to Scan User Guide...
-
Page 38: 6-Maintenance
Maintenance This section contains information about maintenance, troubleshooting, uninstalling, scanner specifications, and spare parts. Safety Precautions When servicing the scanner you should take the following precautions to ensure your safety and prevent damage to the scanner. Do These • Wear protective gloves when cleaning the scanner with Isopropyl rubbing alcohol. Rubbing alcohol may irritate sensitive skin. -
Page 39: Windows
® Xerox D50 Scanner Maintenance W I N D O W S To open the scanner hardware properties page: • Windows 7 or later—from the Windows Control Panel, open Hardware and Sound and then Devices and Printers. Right-click on the scanner and then select Scan properties from the list. -
Page 40: Mac
® Maintenance Xerox D50 Scanner Driver Settings The options in this panel are for configuring how the TWAIN interface will behave in some www.xeroxscanners.com scenarios. Please see the TWAIN Scanning Guide on for instructions. M A C The Visioneer Scan Utility In addition to the scanner’s interface, you can customize the scanner settings using the Visioneer... -
Page 41: Adjusting The Paper Guides
® Xerox D50 Scanner Maintenance And the Settings panel provides sleep and power off configuration settings. Image count — set the number of images to scan before ending the scan job. When the • image count is set to Infinite, it will scan all the pages in the input tray. This number can be adjusted using the slider or by entering a value in the text box. -
Page 42: Clearing Paper Jams
® Maintenance Xerox D50 Scanner To reset the paper guides: Rotate the end of the paper guide and align the tab with the channel in the scanner. Gently press on the paper guide to lock the paper guide in the scanner. -
Page 43: Cleaning The Scanner
® Xerox D50 Scanner Maintenance Remove the jammed page from the scanner. To reduce the number of paper jams, smooth and straighten the paper before scanning, adjust the guides to the paper size, and insert the paper evenly into the ADF. -
Page 44: Replacing The Reverse (Separation) Roller
® Maintenance Xerox D50 Scanner Wipe clean the rollers and glass in the underside of the ADF door. Rotate the rollers to clean the entire surface. Using a clean, dry cotton swab, brush away any dust on the double feed detection sensors. - Page 45 ® Xerox D50 Scanner Maintenance Open the scanner. Locate the roller cover in the ADF door. Pinch the sides of the roller cover and pull it down to access the roller. Carefully angle the roller up and out of the scanner.
- Page 46 ® Maintenance Xerox D50 Scanner Slide the new roller onto the bar. Make sure the struts on the bar line up to the slots in the end of the roller. Scanner Part number 85-0325-### and higher Scanner Part number 85-0339-### and higher Insert the round end of the roller into the slot in the scanner.
-
Page 47: Replacing The Adf (Feed) Roller
® Xerox D50 Scanner Maintenance 11. Close the scanner when you’re finished. Replacing the ADF (Feed) Roller The roller will wear out and is designed to be a user-replaceable part. A worn roller can cause documents to feed in skewed at an angle, or multiple pages to feed at the same time. Before replacing the roller you should clean it as excessive dust on the roller will make it appear worn and smooth. - Page 48 For the D50 (Scanner Part number 85-0339-### and higher) only, rotate the belt upwards. The lower roller is held in place with a lock tab that rotates to lock and unlock it. To unlock the tab, rotate it until the small lock flange is completely free.
- Page 49 ® Xerox D50 Scanner Maintenance Scanner Part number 85-0325-### and higher Scanner Part number 85-0339-### and higher Take the new roller out of its packaging. Clean any dust off the roller before installing it. Insert the left end of the new roller assembly into the hole in the roller channel. Angle the roller module into the roller channel.
- Page 50 Xerox D50 Scanner 10. For the D50 (Scanner Part number 85-0339-### and higher) only, rotate the belt back down into place. The cover will not close if the belt is in the wrong position. 11. Lift the roller cover and carefully push it closed to lock it in place. Make sure everything is aligned properly and the cover is fully closed.
-
Page 51: Troubleshooting
Did you select another image source in the scanning software? If you use multiple • imaging devices with your computer, such as a camera, all-in-one printer, or another scanner, you may have selected another source for images. Make sure Xerox ® D50 Scanner is selected as the scanner. - Page 52 ® ® still on your computer. They are interfering with the installation and OneTouch options, and you need to remove those other drivers and re-install your Xerox scanner. Please see the ® documentation that you received with the other scanner for the steps to remove its driver programs.
-
Page 53: Error Light Troubleshooting Codes
® Xerox D50 Scanner Maintenance Problem: If the USB cable is disconnected during a scan, the scanner does not reconnect when the USB cable is plugged back in. Unplug the power cable from the scanner, and then plug it back in. -
Page 54: Uninstalling Your Scanner
An internal part in the scanner Turn off the power to your scanner, re-boot your computer, Other may have malfunctioned then turn it back on. If the problem persists, contact Xerox Codes Technical Support. Uninstalling Your Scanner Please leave the scanner’s USB cable plugged into the computer while uninstalling the scanner driver. -
Page 55: Mac
® Xerox D50 Scanner Maintenance Click the Change/Remove or Uninstall button. Click Yes when asked to confirm that you want to remove the driver. When the driver uninstallation is complete the progress window will automatically close. Turn off the scanner and unplug the USB cable. -
Page 56: Xerox ® D50 Scanner Specifications
® Maintenance Xerox D50 Scanner After deleting your files, empty the Trash contents, and restart your system. Xerox D50 Scanner Specifications ® Scanner Specifications Document Requirements Minimum Item Size 2 x 2 inches (51 x 51 mm) Maximum Item Size 8.5 x 118 inches (216 x 2997 mm) up to 300 dpi... -
Page 57: Xerox ® D50 Scanner Parts List
OneTouch ® – Visioneer Acuity Module • Mac: ® – Visioneer Scan Utility Xerox D50 Scanner Parts List ® Part Name Part Number ADF Roller Scanner Part number 85- 0325-### and higher: • 65-2457-000 Scanner Part number 85- 0339-### and higher: •... - Page 58 ® Maintenance Xerox D50 Scanner Part Name Part Number Reverse (Separation) Scanner Part number 85- Roller 0325-### and higher: • 65-2459-000 Scanner Part number 85- 0339-### and higher: • 65-2611-000 USB Cable 35-0118-000 AC Power Cord 35-0103-000 (US) 35-0104-000 (EUR)
- Page 59 ® Xerox D50 Scanner Maintenance 6-22 User Guide...
-
Page 60: 7-Appendix A: Regulatory Information
WARNING! In order to allow this equipment to operate in close proximity to Industrial, Scientific and Medical (ISM) equipment, the external radiation from ISM equipment may have to be limited or special mitigation measures taken. Changes and modifications to this equipment not specifically approved by Xerox may void the ®... -
Page 61: European Union
This machine is certified as Class 1 LED product. This means that this machine does not produce hazardous laser radiation. A full declaration of conformity, defining the relevant directives and referenced standards, can be obtained from your Xerox Limited representative or by contacting: Environment, Health and Safety Xerox (NL) -
Page 62: Canada
® Appendix A: Regulatory Information Xerox D50 Scanner Bonds and Obligations of certain agencies of the government, such as FHA, etc. Bonds. (U.S. Savings Bonds may be photographed only for publicity purposes in connection with the campaign for the sale of such bonds.) Internal Revenue Stamps. -
Page 63: Other Countries
® Xerox D50 Scanner Appendix A: Regulatory Information Obligations or securities of a government or bank. Exchequer bill paper or revenue paper. The public seal of Canada or of a province, or the seal of a public body or authority in Canada, or of a court of law. -
Page 64: 8-Appendix B: Compliance Information
ENERGY STAR for the USA Energy Program Compliance The Xerox D50 Scanner is ENERGY STAR qualified under the ENERGY STAR Program ® Requirements for Imaging Equipment. User Guide... - Page 65 Xerox D50 Scanner is preset at the factory. Your machine will be delivered with the timer for ® switching to Power Save Mode from the last scan set at 15 minutes.
Need help?
Do you have a question about the D50 and is the answer not in the manual?
Questions and answers