
Related Manuals for Xerox D35wn


Summary of Contents for Xerox D35wn
- Page 1 05-0995-000 SEPTEMBER 2023 Xerox D35wn ® Scanner Scanner User Guide for Mac OS X ®...
- Page 2 © 2023 Xerox Corporation. All rights reserved. Xerox is a trademark of Xerox Corporation ® in the United States and/or other countries. Visioneer is a trademark licensee of Xerox ® BR39573 Content © 2023 Visioneer, Inc. All rights reserved. The Visioneer brand name and OneTouch logo ®...
-
Page 3: Table Of Contents
What’s in the Box................................. 2-1 System Requirements..............................2-1 Documentation ................................2-2 Xerox ® D35wn Scanner ............................2-2 3-Scanner Setup................................. 3-1 Connect the Scanner Power Supply ........................3-1 4-Wired and Wireless Network Connection ......................4-1 Connect with USB Cable ............................4-1 Connecting to the Network using an Ethernet LAN Cable (Wired)............ - Page 4 Resetting the Scanner to Factory Default ..................10-11 Network Status on the LCD ........................10-11 Scanner Status Message Table .......................10-11 Troubleshooting..............................10-14 Uninstalling Your Scanner ..........................10-16 Xerox D35wn Scanner Specifications ......................10-16 ® Xerox D35wn Scanner Parts List........................10-18 ® 11-Appendix A: Regulatory Information ......................11-1 Basic Regulations..............................
- Page 5 United States..............................11-2 Canada................................. 11-4 Other Countries ..............................11-4 12-Appendix B: Compliance Information ......................12-1 Product Recycling & Disposal..........................12-1 USA & Canada ..............................12-1 European Union ............................... 12-1 ENERGY STAR for the USA ........................... 12-1...
- Page 6 ® Xerox D35wn Scanner User Guide...
-
Page 7: 1-Safety
Please read the following instructions carefully before operating the machine and refer to them as needed to ensure the continued safe operation of your machine. Your Xerox D35wn Scanner and supplies have been designed and tested to meet strict safety ® requirements. These include safety agency evaluation and certification, and compliance with electromagnetic regulations and established environmental standards. -
Page 8: Electrical Information
Plug the power cable directly into a correctly grounded electrical outlet. If you are not sure whether or not an outlet is correctly grounded, consult an electrician. Do not use an adapter to connect any Xerox ® D35wn Scanner to an electrical outlet that lacks a ground connection terminal. -
Page 9: Disconnect Device
® Safety Xerox D35wn Scanner an earthed electrical outlet. This is a safety feature. If you are unable to insert the plug into the outlet, contact your electrician to replace the outlet. D I S C O N N E C T D E V I C E The power cable is the disconnect device for this equipment. -
Page 10: Environmental Health And Safety Contacts
D35wn Scanner Safety Environmental Health and Safety Contacts Contact Information For more information on Environment, Health, and Safety in relation to this Xerox ® D35wn Scanner and supplies, please contact the following customer help lines: North America & Europe (Phone): 1-800-ASK-XEROX North America &... -
Page 11: 2-Welcome
Welcome Your new Xerox D35wn Scanner can be quickly configured to scan stacks of single-sided or ® double-sided pages as electronic images on your computer. These images can be scanned using either the Visioneer Scan Utility (See TWAIN Scanning Guide, under "Documentation") or Apple’s Image Capture Application (ICA). -
Page 12: Documentation
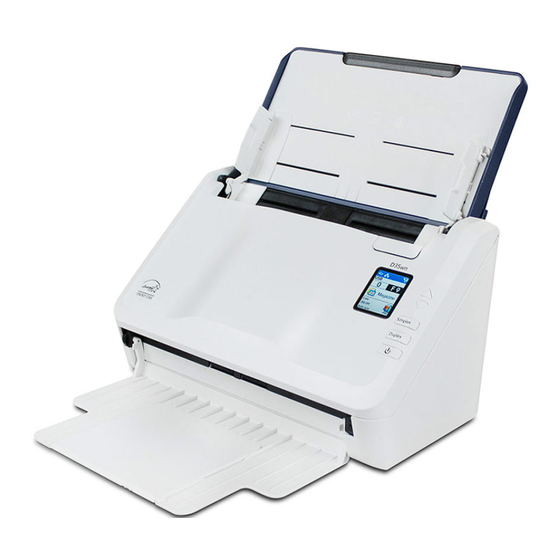
® Xerox D35wn Scanner Welcome – 1 to 3 GB for each additional application • The recommended settings for your monitor are: – Color quality of 16-bit or 32-bit – Resolution set to at least 800 x 600 pixels Documentation The following printed documentation is provided in the box: •... - Page 13 ® Welcome Xerox D35wn Scanner Input tray—Holds the documents in the Automatic Document Feeder for scanning. – Extension—Pull out to support various document lengths. – Paper Guides—Slide to adjust to document width. Exit tray—Where the documents are exited out of the scanner. Flip up an exit stopper to keep documents in the exit tray.
- Page 14 ® Xerox D35wn Scanner Welcome User Guide...
-
Page 15: 3-Scanner Setup
Scanner Setup Remove the scanner from the shipping box, verify all parts listed on page 2-1 are in the box. We recommend that you keep the original packing materials in case you need them later. Remove any shipping tape from the scanner as indicated in the following illustration(s). The illustrations are for example purposes only. - Page 16 ® Xerox D35wn Scanner Scanner Setup Plug the power supply into the power port on the scanner and into a wall outlet. User Guide...
-
Page 17: 4-Wired And Wireless Network Connection
Wired and Wireless Network Connection If the scanner is connected to the network, then it can be available to use wirelessly with your © mobile apps, or with any Visioneer VAST Network compliant application. Connect with USB Cable Connect one end of the USB cable to an available port on your computer. Connect the other end to the port marked on the back of the device. - Page 18 ® Xerox D35wn Scanner Wired and Wireless Network Connection Hold the Simplex and Duplex buttons for more than two seconds to access the LCD scanner menu. Use the up and down arrows to navigate to the Wi-Fi Hotspot option. Press the Duplex button to turn on the Wi-Fi Hotspot (if you press the Duplex button again, it will turn off the Wi-Fi Hotspot).
-
Page 19: Connecting The Scanner To The Wireless Network
® Wired and Wireless Network Connection Xerox D35wn Scanner Using any Wi-Fi enabled device, find the scanner's Hotspot SSID in the list of networks, select it to connect. You may have to enter password when prompted. The scanner is now available for use with the device you have just connected. -
Page 20: Connecting To The Wireless Network Using Wps
® Xerox D35wn Scanner Wired and Wireless Network Connection To access complete information of the web interface, click on the Login button and enter the default: Login Name: admin Password: admin. From the scanner’s web manager menu, select Network, then select Wireless. - Page 21 ® Wired and Wireless Network Connection Xerox D35wn Scanner Use the up and down arrows to navigate to the WPS option. Press the Duplex button to activate WPS. (Pressing again will toggle off.) At this point, you have completed your task, and can press Simplex to navigate up the menu.
- Page 22 ® Xerox D35wn Scanner Wired and Wireless Network Connection User Guide...
-
Page 23: Software Installation And Scanner Connection
Installation Software Installation and Scanner Connection Start your computer and make sure that no other applications are running. Turn on the scanner power. www.visioneer.com/macinstall Go to Launch the installer once the download is complete. Double-click the VisioneerUpdate disc icon. User Guide... - Page 24 ® Xerox D35wn Scanner Installation Plug the USB cable into the USB port on the scanner then into a USB port on the computer. Click OK. Select your scanner from the list. 9. Click Proceed. 10. The Select Language window opens. Click the drop-down menu arrow and select the language to use.
-
Page 25: Installing The Scanner Driver
® Installation Xerox D35wn Scanner Note: If a version of the software is already installed on the system, the option will be grayed out. However, if there is a newer version available online, it will be possible to download and install. - Page 26 D35wn Scanner Installation On the Xerox License Agreement window, read the license agreement. Click Continue. If you accept the terms, select Agree and continue with the installation. If you choose not to accept the license agreement, close the installation window. The scanner driver will not be installed.
-
Page 27: Install The Visioneer Scan Utility
® Installation Xerox D35wn Scanner If you are prompted for a password, input the name and password for a user that has permission to install software on your computer. Click Close on the installation complete window. You can now connect the scanner to your computer. -
Page 28: View The User Guides
® Xerox D35wn Scanner Installation Once all software has been downloaded, click Install now. Follow the instructions on the screen to install each of the additional applications. View the User Guides From the Main menu and click on View user guides. -
Page 29: Register Your Scanner
Press Enter on your computer’s keyboard or click the option on screen to go to the web address. When the Xerox D35wn Scanner web page loads click on Register Your Product. ® Fill in the registration form, all required fields have an asterisk (*). - Page 30 ® Xerox D35wn Scanner Installation User Guide...
-
Page 31: 6-Mobile Device Installation
Mobile Device Installation Download the iOS or Android mobile scanning app to use a mobile device with this scanner to scan and share documents. Per your device, go to Google Play Store, or Apple App Store. Search for “Visioneer Mobile Capture” Install the application. - Page 32 ® Xerox D35wn Scanner Mobile Device Installation User Guide...
-
Page 33: 7-The Scanner's Lcd
® The Scanner’s LCD Xerox D35wn Scanner The Scanner’s LCD The scanner’s LCD displays scanning information. It also allows you to access a menu to enable LAN, view scanner information, put the scanner in “clean mode” and quickly download the Visioneer Mobile Capture mobile app (iOS and Android) and quickly register your scanner for use ©... -
Page 34: Accessing The Scanner Lcd Menu
® Xerox D35wn Scanner The Scanner’s LCD For more information on network connectivity, see "Wired and Wireless Network Connection". A C C E S S I N G T H E S C A N N E R LC D M E N U Hold the Simplex and Duplex buttons for more than two seconds to access the LCD scanner menu. - Page 35 ® The Scanner’s LCD Xerox D35wn Scanner Scanner LCD Menu Options Information Scanner Displays the following: • Model Name: This is the current scanner model. • FW Version: This is the version of the currently installed firmware on the scanner.
- Page 36 ® Xerox D35wn Scanner The Scanner’s LCD Scanner LCD Menu Options Clean Mode Used to rotate the rollers during cleaning. See "Cleaning the ADF Rollers". Factory Default WARNING! Pressing the Duplex button on this option will reset all "The scanner settings to factory default, including those set on Scanner’s Web...
-
Page 37: 8-Loading Documents To Scan
Loading Documents to Scan Always remove any staples or paper clips from documents before inserting them into the scanner. Staples and paper clips can jam the feed mechanism and scratch the internal components. Also remove any labels, stickers, or Post-It™ notes that may come off during the scanning process and get stuck in the scanner. -
Page 38: Documents To Avoid Scanning
® Xerox D35wn Scanner Loading Documents to Scan Documents to Avoid Scanning The documents in this list can be scanned, but please note that scanning documents of this type will reduce the life of the scanner. Maintenance will be required more often and replaceable parts will wear faster. -
Page 39: Scanning From The Automatic Document Feeder (Adf)
Loading Documents to Scan Xerox D35wn Scanner Scanning from the Automatic Document Feeder (ADF) P R E PA R I N G D O C U M E N T S FO R S C A N N I N G •... -
Page 40: Scanning Interfaces
® Xerox D35wn Scanner Loading Documents to Scan Scanning Interfaces Every scanning application will access the scanner using a different method. Please refer to the application’s user guide for instructions on using the application and accessing the scanner. TWAIN Interface—TWAIN is a widely recognized standard that computers use to receive •... -
Page 41: 9-The Scanner's Web Interface
The Scanner’s Web Interface Accessing the Scanner’s Web Interface To access the scanner’s web interface, you will first need to locate the scanner’s IP address. Finding the Scanner’s IP Address Hold the Simplex and Duplex buttons for more than two seconds to access the LCD scanner menu. -
Page 42: Information
® Xerox D35wn Scanner The Scanner’s Web Interface Information Item Description Scanner Model Name Displays the scanner model name. Host Name Displays the scanner’s host name. Serial Number Displays the scanner’s serial number. Firmware Displays the currently installed firmware version. -
Page 43: Local
® The Scanner’s Web Interface Xerox D35wn Scanner LO C A L © This is the scanner’s name displayed on the Visioneer VAST Network application. Changing the scanner’s display name: © From the menu go to the Visioneer VAST Network tab. -
Page 44: Advanced Security
® Xerox D35wn Scanner The Scanner’s Web Interface Click Add. Enter the scanner description as indicated in "Local". © https://vast.visioneer.com/ Enter the Visioneer VAST Network URL: or any other cloud service link you wish to connect to. Click Register. To confirm the registration, you must login to the cloud service. Click Login. - Page 45 ® The Scanner’s Web Interface Xerox D35wn Scanner Enter a signature name, this is how it will be displayed in the Digital Signature window. Select a PKS #12 file from your PC. Enter the password that was used in packaging the digital signature into PKCS12 file.
- Page 46 ® Xerox D35wn Scanner The Scanner’s Web Interface Password Encryption Name This is the password encryption’s name as set. This is used to protect a file. When © someone receives the file sent from Visioneer VAST Network , they will need the User Password to view this file or the Owner Password to edit this file.
- Page 47 ® The Scanner’s Web Interface Xerox D35wn Scanner Then from its sub menu, go to the Advanced Security tab. Go to the Password Encryption tab. Click on the password encryption you wish to remove. It will be highlighted. Click Delete.
-
Page 48: Device Management
® Xerox D35wn Scanner The Scanner’s Web Interface Deleting a public key encryption profile Note: This cannot be undone. © From the menu go to the Visioneer VAST Network tab. Then from its sub menu, go to the Advanced Security tab. -
Page 49: Wired
® The Scanner’s Web Interface Xerox D35wn Scanner W I R E D Overview of the scanner’s current wired network (LAN) settings. By default, Obtain an IP address automatically is set to On. To customize these settings (advanced), select Off from the drop-down menu. All disabled fields will be enabled. -
Page 50: Wireless
® Xerox D35wn Scanner The Scanner’s Web Interface MAC & IP Filtering The devices contain a static host-based firewall that prevents unauthorized network access based on IP address Mac address. Filtering rules can be set by the Administrator using the Web Interface. - Page 51 ® The Scanner’s Web Interface Xerox D35wn Scanner Note: When the device is in sleep mode, its Wi-Fi is likewise in sleep mode, and the Wireless tab will be unavailable. Select a wireless network. Enter the network password, if requested. A prompt will appear to confirm your connection to the network.
-
Page 52: Firmware Update
® Xerox D35wn Scanner The Scanner’s Web Interface Supported Authentication Types Security mode Encryption Type Key Index WPA-PSK TKIP, AES, TKIPAES WPA2-PSK TKIP, AES, TKIPAES Firmware Update To update the product’s firmware: Click Browse to find the firmware file on your computer. - Page 53 ® The Scanner’s Web Interface Xerox D35wn Scanner Password = admin – Go to the Device Management tab. In the Admin Profile section, use the Login Name and Password text boxes to enter your new credentials. User Guide 9-13...
- Page 54 ® Xerox D35wn Scanner The Scanner’s Web Interface 9-14 User Guide...
-
Page 55: 10-Scanner Options, Maintenance And Troubleshooting
Scanner Options, Maintenance and Troubleshooting This section contains information on hardware options available for your scanner, maintenance instructions, troubleshooting, uninstalling, scanner specifications, and spare parts. Safety Precautions When servicing the scanner you should take the following precautions to ensure your safety and prevent damage to the scanner. -
Page 56: The Visioneer Scan Utility
® Xerox D35wn Scanner Scanner Options, Maintenance and Troubleshooting T H E V I S I O N E E R S C A N U T I L I T Y In addition to the scanner’s interface, you can customize the scanner settings using the Visioneer Scan Utility, explained in the TWAIN Scanning Guide. -
Page 57: Clearing Paper Jams
® Scanner Options, Maintenance and Troubleshooting Xerox D35wn Scanner • Show progress window — select this option to display the progress window of the document(s) during scanning. • Show status messages — select this option to show warning messages on-screen when the scanner rollers or pads have reached the end of their lifespan. -
Page 58: Cleaning The Inside Of The Scanner
® Xerox D35wn Scanner Scanner Options, Maintenance and Troubleshooting C L E A N I N G T H E I N S I D E O F T H E S C A N N E R Cleaning the inside of the scanner helps to keep your scanner operating at optimum performance. -
Page 59: Cleaning The Scanner Glass And Background Plates
® Scanner Options, Maintenance and Troubleshooting Xerox D35wn Scanner Pull on the scanner cover release and lift the lid to open the scanner. Hold the Simplex and Duplex buttons for more than two seconds to access the LCD scanner menu. -
Page 60: Cleaning The Paper Sensors
® Xerox D35wn Scanner Scanner Options, Maintenance and Troubleshooting Pull on the scanner cover release and lift the lid to open the scanner. The following illustration shows the location of the glass in the scanner. Use a soft cloth to wipe clean the glass. You can use a roller cleaning paper to clean the glass plates if there is any sticky residue on the surface. -
Page 61: Cleaning The Adf Sensors
Scanner Options, Maintenance and Troubleshooting Xerox D35wn Scanner C L E A N I N G T H E A D F S E N S O R S Pull on the scanner cover release and lift the lid to open the scanner. -
Page 62: Replacing The Feed Roller
® Xerox D35wn Scanner Scanner Options, Maintenance and Troubleshooting WARNING! Keep all replaceable parts out of the reach of children. These parts are small and pose a choking hazard. Turn off the scanner power then unplug the power supply from the scanner. Pull the cover release handle and open the scanner. - Page 63 Scanner Options, Maintenance and Troubleshooting Xerox D35wn Scanner Pull down the paper feed roller cover, using the tab indicated in the illustration below, and gently pull it towards you holding both sides of the cover door, to access the roller.
-
Page 64: Replacing The Friction Roller
® Xerox D35wn Scanner Scanner Options, Maintenance and Troubleshooting R E P L A C I N G T H E F R I C T I O N R O L L E R Pull on the scanner cover release and lift the lid to open the scanner. -
Page 65: Resetting The Scanner To Factory Default
® Scanner Options, Maintenance and Troubleshooting Xerox D35wn Scanner Note: Do not discard the bar. Take the new roller out of its packaging. Slide the friction roller on the bar. Insert the friction roller left side first until it’s properly inserted in the slot. - Page 66 ® Xerox D35wn Scanner Scanner Options, Maintenance and Troubleshooting Error Image Cause Resolution ADF Paper Jam 1 Open the scanner, remove the pages, then close the scanner. Please see "Clearing Paper Jams" for complete instructions. Paper has jammed while being fed through the scanner.
- Page 67 ® Scanner Options, Maintenance and Troubleshooting Xerox D35wn Scanner Cause Error Image Resolution Misfeed Remove the paper from input tray. Fan the documents. Failed to pick Load the document with its edges slightly paper. touching the paper guides. Rescan. There are no connected...
-
Page 68: Troubleshooting
• imaging devices with your computer, such as a camera, all-in-one printer, or another scanner, ® you may have selected another source for images. Make sure Xerox D35wn Scanner is selected as the scanner. Problem: The scanned images are of poor quality. What do I do? There are various reasons why the scanned image is of poor quality. - Page 69 Xerox ® D35wn Scanner. You can remove these programs from the Windows Control Panel. Please refer to the user manual provided with your other scanner hardware for instructions about removing the driver and software for that unit.
-
Page 70: Uninstalling Your Scanner
Applications folder. If no longer needed, then you can optionally delete it. After deleting your files, empty the Trash contents, and restart your system. ® Xerox D35wn Scanner Specifications Scanner Specifications Document Requirements Minimum Item Size 2.9 x 2.0 inches (74 x 52 mm) Maximum Item Size 8.5 x 14.0 inches (216 x 356 mm) - Page 71 ® Scanner Options, Maintenance and Troubleshooting Xerox D35wn Scanner Scanner Specifications General Specifications Optical Resolution 600 dpi Supported Resolutions 100, 150, 200, 300, 400, 500, 600 dpi Interpolated Resolutions 75 and 1200 dpi Output Bit Depth 24-bit color, 8-bit grayscale, 1-bit bitonal (black & white)
-
Page 72: Xerox ® D35Wn Scanner Parts List
(11, 12, 13, 14) Systems Scanner Drivers TWAIN, ICA Bundled Software ® Visioneer Scan Utility ® Xerox D35wn Scanner Parts List Part Name Part Number Cleaning and 96-X333-000 Maintenance Kit • Feed (ADF) Roller 65-3212-000 • Friction Roller 65-3213-000 USB Cable... -
Page 73: 11-Appendix A: Regulatory Information
Industrial, Scientific and Medical (ISM) equipment, the external radiation from ISM equipment may have to be limited or special mitigation measures taken. ® Changes and modifications to this equipment not specifically approved by Xerox may void the user’s authority to operate this equipment. -
Page 74: Turkey (Rohs Regulation)
This machine is certified as Class 1 LED product. This means that this machine does not produce hazardous laser radiation. A full declaration of conformity, defining the relevant directives and referenced standards, can be obtained from your Xerox Limited representative or by contacting: Environment, Health and Safety Xerox (NL) - Page 75 ® Appendix A: Regulatory Information Xerox D35wn Scanner Obligations or Securities of the United States Government, such as: Certificates of Indebtedness National Bank Currency Coupons from Bonds Federal Reserve Bank Notes Silver Certificates Gold Certificates United States Bonds Treasury Notes...
-
Page 76: Canada
® Xerox D35wn Scanner Appendix A: Regulatory Information The above list is not all inclusive, and no liability is assumed for its completeness or accuracy. In case of doubt, consult your attorney. C A N A DA Parliament, by statute, has forbidden the reproduction of the following subjects under certain circumstances. -
Page 77: 12-Appendix B: Compliance Information
ENERGY STAR for the USA ® The Xerox D35wn Scanner is ENERGY STAR qualified under the ENERGY STAR Program Requirements for Imaging Equipment. User Guide 12-1... - Page 78 ® Xerox D35wn Scanner Appendix B: Compliance Information The ENERGY STAR and ENERGY STAR MARK are registered United States trademarks. The ENERGY STAR Imaging Equipment Program is a team effort between U.S., European Union and Japanese governments and the office equipment industry to promote energy-efficient copiers, printers, fax, multifunction machine, personal computers, and monitors.
Need help?
Do you have a question about the D35wn and is the answer not in the manual?
Questions and answers