
Related Manuals for LF Utilitech SFSR3-400CPT


Summary of Contents for LF Utilitech SFSR3-400CPT
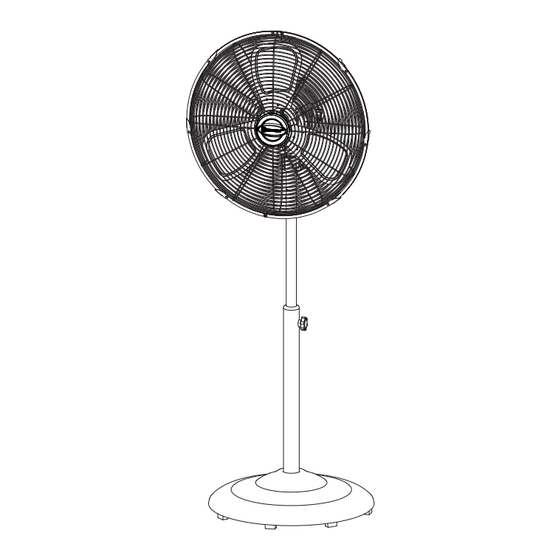
- Page 1 ITEM #1158600 16 IN. OSCILLATING STAND FAN MODEL # SFSR3-400CPT Français p. 8 Français p. Español p. 15 Español p. ATTACH YOUR RECEIPT HERE Serial Number Purchase Date PH19489...
-
Page 2: Package Contents
PACKAGE CONTENTS Front grille Blade Rear grille Motor Pole Base... -
Page 3: Safety Information
SAFETY INFORMATION 1. Read and save these instructions. Do not operate fan unless you have read these instructions. 2. Unplug the fan before moving it or performing maintenance. Do not touch the fan when your hands are wet. 3. Those who are not qualified electricians should not disassemble, repair or rebuild the fan. 4. - Page 4 ASSEMBLY INSTRUCTIONS 1. Assemble the standing pole (A), basd (B) and 2. Loosen height adapter (D). Adjust upper pole weight (C) together by using screw (AA) and (E) to the desired height and then fix it by washer (BB). screw (D). 3.
- Page 5 ASSEMBLY INSTRUCTIONS 5. Insert the fan blade (K) into the motor shaft 6. Place the front grille (M) against the rear grille (L) and tighten them by screw (EE). (H) and push them together by the clip (N). 7. Fasten all the clips (N). Lock the front grille (M) and rear grille (H) by using screw (FF), washer (GG) and nut (HH).
- Page 6 OPERATING INSTRUCTIONS Place the fan on a safe, flat surface where it can not fall or be pulled by the cord. Adjust the desired speed by turning the knob at the back of fan (A1). Stop Medium High The fan comes with an additional oscillation function. Turn the oscillation function on by pushing the oscillation button down (A2) To change the angle of the fan, loosen the angle adjuster, and then tilt the protective screen up or down and finally retighten the angle adjuster (A3)
-
Page 7: Year Limited Warranty
2-YEAR LIMITED WARRANTY The manufacturer warrants this product to be free from manufacturing defects in the material and workmanship under normal use for a period of two years after the date of purchase by the original purchaser.This warranty does not cover transit damages. This warranty does not apply to damages from accident, misuse, alteration of any kind to the fan or where the connected voltage is more than above the nameplate voltage. - Page 8 MODÈLE #SFSR3-400CPT JOIGNEZ VOTRE REÇU ICI Utilitech et le motif UT® sont des marques de commerce déposées de LF, LLC. Tous droits réservés. Numéro de série Date d’achat Des questions, des problèmes, des pièces manquantes? Avant de retourner l’article au détaillant, appelez notre service à...
-
Page 9: Contenu De L'emballage
CONTENU DE L’EMBALLAGE PIÈCE DESCRIPTION QUANTITÉ Grille avant Pale Grille arrière Moteur Tige Pied... -
Page 10: Consignes De Sécurité
CONSIGNES DE SÉCURITÉ AVERTISSEMENT 1. Veuillez lire et conserver ces instructions. Assurez-vous d’avoir bien lu ces instructions avant de faire fonctionner le ventilateur. 2. Débranchez le ventilateur avant de le déplacer ou d’en effectuer l’entretien. Ne touchez pas au ventilateur lorsque vos mains sont mouillées. 3. -
Page 11: Instructions Pour L'assemblage
INSTRUCTIONS POUR L’ASSEMBLAGE 1. Fixez la tige (A) au pied (B), puis fixez le pied 2. Desserrez la vis de réglage de la hauteur (D). (B) au poids (C) à l’aide de vis (AA) et de Réglez la tige supérieure (E) à la hauteur rondelles (BB). - Page 12 INSTRUCTIONS POUR L’ASSEMBLAGE 5. Insérez la pale du ventilateur (K) sur la tige du 6. Placez la grille avant (M) contre la grille arrière moteur (L), puis fixez-la à l’aide d’une vis (EE). (H), puis fixez-les ensemble à l’aide de l’attache (N).
-
Page 13: Entretien
MODE D’EMPLOI Placez le ventilateur sur une surface plane et sécuritaire de manière à ce qu’il ne puisse pas se renverser ou être tiré par le cordon d’alimentation. Réglez la vitesse désirée en tournant le bouton situé à l’arrière du ventilateur (A1). Arrêt Faible Moyenne... -
Page 14: Garantie Limitée De 2 Ans
GARANTIE LIMITÉE DE 2 ANS Le fabricant garantit que l’article ne présentera aucun défaut de matériaux ou de fabrication dans des conditions normales d’utilisation pour une période de deux ans à compter de la date d’achat initiale. Cette garantie ne couvre pas les dommages occasionnés pendant le transport, ni les dommages causés par un accident, un usage inapproprié, une modification quelconque ou une tension supérieure à... - Page 15 CON PEDESTAL DE 40,64 CM MODELO #SFSR3-400CPT Utilitech & UT Design® es una marca registrada de ADJUNTE SU RECIBO AQUÍ LF, LLC. Todos los derechos reservados Número de serie Fecha de compra ¿Preguntas, problemas, piezas faltantes? Antes de volver a la tienda, llame a nuestro Departamento de Servicio al Cliente al 1-866-994-4148, de lunes a domingo de 8 a.m.
-
Page 16: Contenido Del Paquete
CONTENIDO DEL PAQUETE PIEZA DESCRIPCIÓN CANTIDAD Rejilla frontal Aspa Rejilla posterior Rejilla posterior Varilla Base... -
Page 17: Información De Seguridad
INFORMACIÓN DE SEGURIDAD ADVERTENCIA 1. Lea y guarde estas instrucciones. No haga funcionar el ventilador a menos que haya leído estas instrucciones. 2. Desenchufe el ventilador antes de moverlo o realizarle mantenimiento. No toque el ventilador con las manos húmedas. 3. -
Page 18: Instrucciones De Ensamblaje
INSTRUCCIONES DE ENSAMBLAJE 1. Ensamble la varilla de soporte (A), la base (B) 2. Suelte el adaptador de altura (D). Ajuste la y el peso (C) juntos con el tornillo (AA) y la varilla superior (E) a la altura deseada y fije arandela (BB). - Page 19 INSTRUCCIONES DE ENSAMBLAJE 5. Inserte el aspa del ventilador (K) en el eje del 6. Coloque la rejilla frontal (M) contra la rejilla motor (L) y apriételos con el tornillo (EE). posterior (H) y empújelas con el sujetador (N). 7.Apriete todos los sujetadores (N). Bloquee la rejilla frontal (M) y la rejilla posterior (H) con el tornillo (FF), la arandela (GG) y la tuerca (HH).
-
Page 20: Instrucciones De Funcionamiento
INSTRUCCIONES DE FUNCIONAMIENTO Coloque el ventilador en una superficie segura y plana, donde no se caiga ni lo pase a llevar el cable. Gire la perilla en la parte posterior del ventilador (A1) para ajustar la velocidad deseada. Tope Bajo Medio Alto El ventilador cuenta con una función de oscilación adicional. -
Page 21: Garantía Limitada De 2 Años
GARANTÍA LIMITADA DE 2 AÑOS El fabricante garantiza que este producto no presentará defectos en el material ni en la mano de obra en condiciones de uso normal durante un período de dos años después de la fecha de compra por el comprador original.
Need help?
Do you have a question about the Utilitech SFSR3-400CPT and is the answer not in the manual?
Questions and answers