Advertisement
Quick Links
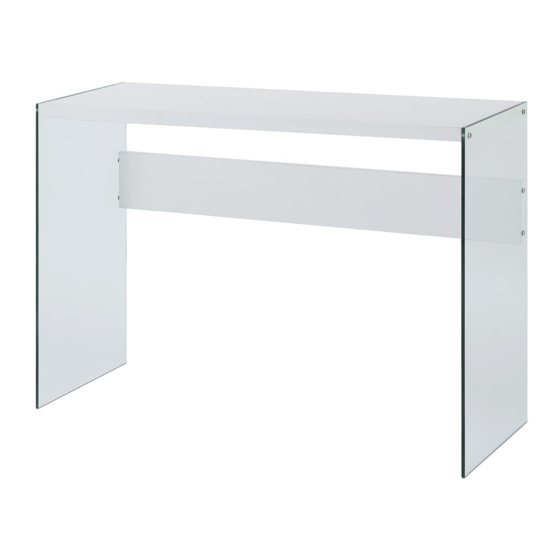
SOHO CONSOLE TABLE
SCAN QR CODE FOR
E-MANUAL, IF DESIRED
ASSEMBLY INSTRUCTIONS
We have designed our furniture with you , the customer in mind . Our clear , easy to follow ,
step by step instructions will guide you through the project from start to finish .
Feel confident that this will be a fun and rewarding project . The final product will be a quality
piece of furniture that will go together smoothly and give years of enjoyment .
Please do not return to the store
STOP
Broken or missing parts?
Need help with assembly?
Our Illinois based customer service team is ready to help with any problems or questions you may have.
Please give us a call (Toll Free) at 1-800-468-6447, or email us at parts@convenience-concepts.com.
Normal hours of Operation: M-F* 8am-4pm CST.
*Excludes Holidays
This product's warranty is only valid through authorized dealers.
131562
Advertisement

Related Manuals for convenience concepts SOHO 131562


Summary of Contents for convenience concepts SOHO 131562
- Page 1 SOHO CONSOLE TABLE 131562 SCAN QR CODE FOR E-MANUAL, IF DESIRED ASSEMBLY INSTRUCTIONS We have designed our furniture with you , the customer in mind . Our clear , easy to follow , step by step instructions will guide you through the project from start to finish . Feel confident that this will be a fun and rewarding project .
- Page 2 Hardware List ( 1pcs ) ( 1pcs ) (1pcs ) Cable tie Eyelet screw Bracket (8pcs ) (8pcs ) locking nut Screw and washer ( 1pcs ) ( 1pcs ) Anchor Small Screw Panel List Top panel (1PC) Side panel (2PCS) Back panel (1PC)...
- Page 3 Step 1 *Assemble unit on soft surface. 1. Insert locking nuts into top panel 2. Connect the side panels to top panel using screws and washers This surface upward *Note. Make sure threads of lock nuts face bolt holes. Holes in the bottom of the panel Step 2 1.
- Page 4 Step 3 Page 4 of 4...
Need help?
Do you have a question about the SOHO 131562 and is the answer not in the manual?
Questions and answers