Advertisement
Quick Links
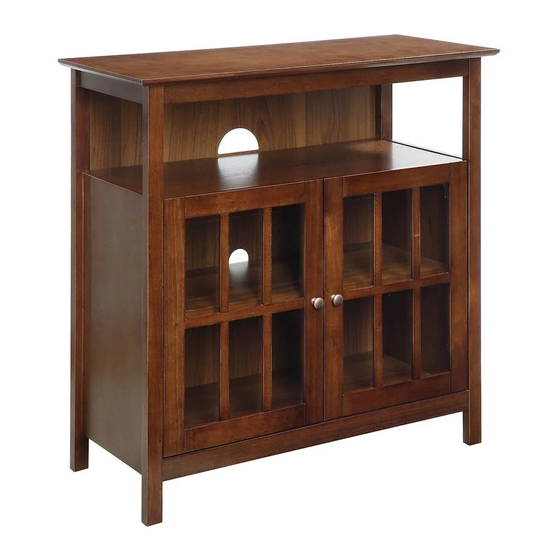
BIG SUR HIGH BOY TV STAND
Item No. 806607 0
806607 0CH
42" Maximum Flat Panel Television
100 lb. Maximum Capacity
Please do not return to the store
. Broken or Missing Parts?
. Need help with Assembly?
If you have any questions just call 1-800-468-6447 or email us at
parts@convenience-concepts.com
CC0031
Advertisement

Related Manuals for convenience concepts BIG SUR HIGH BOY


Summary of Contents for convenience concepts BIG SUR HIGH BOY
- Page 1 BIG SUR HIGH BOY TV STAND Item No. 806607 0 806607 0CH 42" Maximum Flat Panel Television 100 lb. Maximum Capacity Please do not return to the store . Broken or Missing Parts? . Need help with Assembly? If you have any questions just call 1-800-468-6447 or email us at parts@convenience-concepts.com...
-
Page 2: Hardware List
HARDWARE LIST PARTS LIST CODE NAME FIGURE Q'TY CODE NAME FIGURE Q'TY WOOD DOWEL 14PCS TOP PANEL (Φ8X30mmL) CAM LOCK LEFT SIDE 14PCS (Φ15*9mmL) PANEL CAM BOLT RIGHT SIDE 14PCS (Φ6.5*35mmL) PANEL SMALL SCREW FRONT 24PCS (Φ7*14mmL) CROSSBAR MEDIUM SCREW 16PCS MIDDLE PANEL (Φ7*16mmL) - Page 3 A x 5 HARDWARE STEP 1 B x 5 NEEDED C x 5 1.) Assemble unit laying on its side, on a soft surface. 2.) Attach Bottom Panel ( 6 ) and Middle Panel ( 5 ) to Right Side Panel ( 3 ) using Wood Dowels ( A ), Cam Bolts ( C ), and Cam Locks ( B ) as shown.
- Page 4 A x 4 STEP 3 HARDWARE B x 4 NEEDED C x 4 1.) Place unit upright and attach Top Panel ( 1 ) using Wood Dowels ( A ), Cam Bolts ( C ), and Cam Locks ( B ) as shown. STEP 4 E x 8 HARDWARE...
- Page 5 STEP 5 E x 8 HARDWARE G x 2 NEEDED H x 2 1.) Attach Doors ( 7 ) to unit using Medium Screws ( E ). 2.) Attach Knobs ( G ) to Doors using Knob Screws ( H ). **After Final Assembly, Adjust Hinge Screws for Better Alignment ** STEP 6...
- Page 6 STEP 8 I x 4 HARDWARE NEEDED 1.) Insert Shelf Supports ( I ) into desired position holes in side panels. 2.) On a slight angle, carefully slide Adjustable Shelf ( 8 ) into unit and on top of Shelf Supports ( I ).
Need help?
Do you have a question about the BIG SUR HIGH BOY and is the answer not in the manual?
Questions and answers