Advertisement
Quick Links
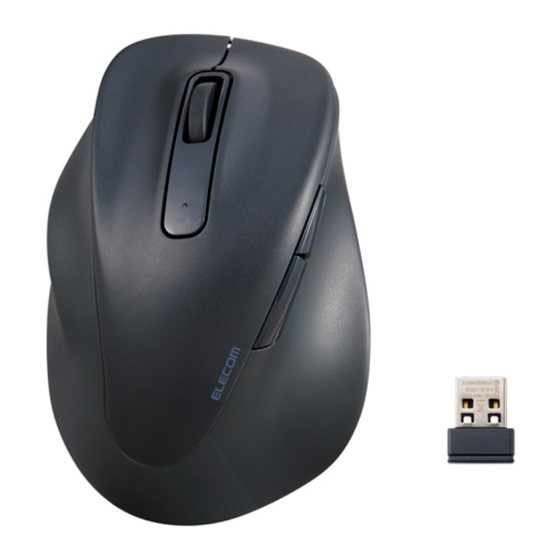
Wireless Mouse
M-XGS31DBSK series (S size)
M-XGM31DBSK series (M size)
M-XGL31DBSK series (L size)
M-XGXL31DBSK series (XL size)
User Manual
Compliant model: M-XGS31DBS, M-XGM31DBS, M-XGL31DBS, M-XGXL31DBS, E02A
Precautions
This manual describes the important precautions you should take for safe operation of this
product.
Advertisement

Related Manuals for Elecom M-XGS31DBSK Series


Summary of Contents for Elecom M-XGS31DBSK Series
- Page 1 Wireless Mouse M-XGS31DBSK series (S size) M-XGM31DBSK series (M size) M-XGL31DBSK series (L size) M-XGXL31DBSK series (XL size) User Manual Compliant model: M-XGS31DBS, M-XGM31DBS, M-XGL31DBS, M-XGXL31DBS, E02A Precautions This manual describes the important precautions you should take for safe operation of this...
-
Page 2: Meaning Of Symbols
Observe these precautions carefully to avoid personal injury, damage, fire, and other problems. Meaning of symbols WARNING Failure to observe precautions carries the possibility of serious personal injury or death due to fire, electric shock, or other causes. CAUTION Failure to observe precautions may result in personal injury due to electric shock or other causes, and may damage other equipment. - Page 3 Malfunctions are not covered under warranty. Do not put this product in fire. Breakage may cause fire or injury. Please do not remove or connect the receiver unit with wet hands. In addition, do not modify or forcibly bend the product. It can cause a fire or electric shock.
-
Page 4: Cleaning The Product
Please use either an AA alkaline battery, an AA manganese battery or an AA nickel- metal hydride rechargeable battery. Remove the battery when you are not using this product for long periods of time. This may cause leakage or malfunction. Cleaning the Product If the body of this product becomes dirty, wipe with a soft, dry cloth. -
Page 5: How To Use
Civil Aeronautics Act. Turn off the power of the wireless mouse before boarding and do not use after boarding. * ELECOM is not liable for any accidents or any indirect or consequential damage incurred due to the failure of this product. -
Page 6: Name And Function Of Each Part
Items included in this package The following are included in this package. Verify the package to ensure all items are accounted for prior to using this product. While every effort has been made to ensure proper packaging, in the event that any shortage or damage is discovered, please contact the retailer where the product was purchased. - Page 7 Perform the “Back” function on the Web browser. ⑤ “Forward” button Perform the “Forward” function on the Web browser. You will need to install the “ELECOM Mouse Assistant Mac version” from our website to use the “Back” and “Forward” button on Mac. Please refer to “Install ELECOM Mouse Assistant”.
-
Page 8: Receiver Unit
⑦ Optical sensor The LED will light up blue when the battery is inserted into the mouse. This sensor will detect mouse movements when you move the mouse. * Please note that looking directly into the sensor light may hurt your eyes. ⑧... -
Page 9: Turn The Power On
Windows® Turn the power ON 1) Remove the battery cover. 2) Remove the battery insulating tab. 3) Put the battery cover back on. 4) Remove the receiver unit. - Page 10 5) Slide the power switch on the underside of the product to the ON position. The LED will light up white for a period of time. * When the battery level is running low, the LED will blink white for a period of time. Power-saving mode When the mouse is left untouched for a fixed period of time while the power is ON, it automatically shifts to power-saving mode.
- Page 11 Ensure that the battery is inserted with the positive (+) and negative (-) terminals oriented correctly. 4) Put the battery cover back on. Connect to a PC 1) Start up your PC. Please wait until your PC has started up and can be operated. 2) Insert the receiver unit into the PC's USB-A port.
- Page 12 3) The driver will be automatically installed, and you will then be able to use the mouse. You can now use the mouse. By downloading and installing the "ELECOM Mouse Assistant" from our company website, functions such as button assignment function and presentation mode can be used. Please proceed to “Install ELECOM Mouse...
- Page 13 3) Click the “Primary mouse button” dropdown menu, then click “Right”. Once you click "Right", the left and right mouse buttons will be swapped. When “Left” is selected When “Right” is selected Left click Left click...
- Page 14 ■For Windows 10 1) Open “Mouse” properties. From the Start menu, click the Settings icon, select “Devices”, then “Mouse”. 2) Click the “Select your primary button” dropdown menu, then click “Right”. Once you click "Right", the left and right mouse buttons will be swapped. When “Left”...
- Page 15 Change the mouse pointer speed Adjust the mouse pointer movement speed on your PC if the mouse pointer moves too fast or too slow. ■ For Windows 11 1) Click on “Start” on the bottom of the screen and click on “Settings”. The “Settings”...
- Page 16 ■ For Windows 10 1) Open “Mouse” properties. From the Start menu, click the Settings icon, select “Devices” → “Mouse”, then click “Additional mouse options” under “Related settings”. 2) Select the “Pointer Options” tab. 3) Adjust the “Select a pointer speed” slider bar to adjust the mouse pointer movement speed.
- Page 17 Change the number of lines scrolled in one wheel turn ■ For Windows 11 1) Click on “Start” on the bottom of the screen and click on “Settings”. The “Settings” page will appear. 2) Click on “Bluetooth & devices” and then “Mouse”.
- Page 18 3) Adjust the “Lines to scroll at a time” slider bar to adjust the number of lines per scroll. ■ For Windows 10 1) Open “Mouse” properties. From the Start menu, click the Settings icon, select “Devices” → “Mouse”, then click “Additional mouse options”...
- Page 19 Turn the power ON 1) Remove the battery cover. 2) Remove the battery insulating tab.
- Page 20 3) Put the battery cover back on. 4) Remove the receiver unit. 5) Slide the power switch on the underside of the product to the ON position. The LED will light up white for a period of time. * When the battery level is running low, the LED will blink white for a period of time. Power-saving mode When the mouse is left untouched for a fixed period of time while the power is ON, it automatically shifts to power-saving mode.
- Page 21 1) Remove the battery cover. 2) Remove the battery. 3) Insert the battery according to the instructions on the battery compartment. Ensure that the battery is inserted with the positive (+) and negative (-) terminals oriented correctly. 4) Put the battery cover back on. Connect to a PC 1) Start up your PC.
- Page 22 Please wait until your PC has started up and can be operated. 2) Insert the receiver unit into the PC's USB-A port. You may use any USB-A port. For terminals that do not have a USB-A port, such as a MacBook, use the USB Type- hub.
- Page 23 3) The driver will be automatically installed, and you will then be able to use the mouse. You can now use the mouse. By downloading and installing the "ELECOM Mouse Assistant" from our company website, functions such as button assignment function and presentation mode can be used. Please proceed to “Install ELECOM Mouse...
- Page 24 Once you click "Click Left Side", the left and right mouse buttons will be swapped. When “Click Right Side” When “Click Left Side” is selected is selected Left click Left click Change the mouse pointer speed Adjust the mouse pointer movement speed on your PC if the mouse pointer moves too fast or too slow.
- Page 25 2) Adjust the “Tracking speed” slider to adjust the speed of the mouse pointer. Unchecking “Natural scrolling” will cause the scroll direction to be reversed. ChromeOS Turn the power ON 1) Remove the battery cover.
- Page 26 2) Remove the battery insulating tab. 3) Put the battery cover back on. 4) Remove the receiver unit. 5) Slide the power switch on the underside of the product to the ON position.
- Page 27 The LED will light up white for a period of time. * When the battery level is running low, the LED will blink white for a period of time. Power-saving mode When the mouse is left untouched for a fixed period of time while the power is ON, it automatically shifts to power-saving mode.
- Page 28 Ensure that the battery is inserted with the positive (+) and negative (-) terminals oriented correctly. 4) Put the battery cover back on. Connect to a PC 1) Start up your PC. Please wait until your PC has started up and can be operated. 2) Insert the receiver unit into the PC's USB-A port.
- Page 29 Ensure that the connector is correctly oriented to the port. If there is strong resistance when inserting, check the shape and orientation of the connector. Forcibly inserting the connector may damage the connector, and there is a risk of injury. Do not touch the terminal portion of the USB connector.
- Page 30 3) Click on “Mouse and touchpad” under “Device”. 4) Click the "Swap primary mouse button" dropdown menu, then click "Right button".
- Page 31 Once you click the "Right button", the left and right mouse buttons will be swapped. When “Left button” is When “Right button” is selected selected Left click Left click Change the mouse pointer speed Adjust the mouse pointer movement speed on your PC if the mouse pointer moves too fast or too slow.
- Page 32 3) Click on “Mouse and touchpad” under “Device”. 4) Adjust the “Mouse speed” slider to adjust the speed of the mouse pointer.
-
Page 33: Specifications
ELECOM Mouse Assistant must be installed. “ELECOM Mouse Assistant” is a software that allows you to use the mouse more effectively. Using ELECOM Mouse Assistant, users can set the functions they want to the unique buttons and use them to perform the operations they want. - Page 34 When used on magnetic surfaces such as metal desks: 3 m/10 ft, When used on non-magnetic surfaces such as wooden desks: 10 m/33 ft * These values were obtained in ELECOM's test environment and are not guaranteed. Read method BlueLED...
-
Page 35: Troubleshooting
M-XGL31DBS series: L size M-XGXL31DBS series: XL size Weight (main unit) M-XGS31DBS series: approximately 82 g / 2.9 oz M-XGM31DBS series: approximately 91 g / 3.2 oz M-XGL31DBS series: approximately 100 g / 3.5 oz M-XGXL31DBS series: approximately 110 g / 3.9 oz * excluding battery Weight (receiver unit) Approximately 2 g / 0.1 oz... - Page 36 When using any alcohol-based products, please check that it is appropriate for the specific purpose and that it is used properly. Please note that in the event that damage or abnormal operation to the product is caused by the cleaning process, the customer will be fully responsible for the cost of repair.
- Page 37 * These values were obtained in ELECOM's test environment and are not guaranteed. The 2.4 GHz band signal may be shorter depending on the environment you use it in. ④ Please reboot the PC. The mouse may become unstable depending on the PC. Please restart the PC.
- Page 38 ⑦ Check the energy saver settings on the connected device. (When using Windows® PC) On Windows, in order to reduce power consumption depending on the PC, the power of the USB-connected product is set to turn off automatically. You can change the settings in the following ways: For Windows 11 1) Click the “Start”...
- Page 39 3) Click ”Windows Tools”. The ”Windows Tools” screen will appears.
- Page 40 4) Double-click ”Control Panel”. 5) Click ”System and Security”.
- Page 41 6) Click ”Power Options”. 7) Click "Change plan settings" to the right of the item selected in "Power Plan". 8) On the ”Edit Plan Settings” screen, click “Change advanced power settings”.
- Page 42 9) On the ”Power Options” screen, click the ”+” mark in ”USB settings” from the list, and then click the ”+” mark in ”USB Selective Suspend Settings”. 10) In the drop box next to ”Settings”, select ”Disable”. If you are using a laptop, there are two items instead of “Settings”: “On battery” and “Plugged in”.
- Page 43 11) Click "OK" to confirm the settings. 12) Click the “X” (close) in the upper right corner to close “Edit Plan Settings”. For Windows 10 1) Right-click the Start button at the bottom left of the screen, click “Power Options”, and then click “Additional power settings”...
- Page 44 4) On the “Power Options” screen, click the “+” mark in “USB settings” from the list, and then click the “+” mark in “USB Selective Suspend Settings”. 5) In the drop box next to “Settings”, select “Disable”. If you are using a laptop, there are two items instead of “Settings”: “On battery” and “Plugged in”.
- Page 45 6) Click “OK” to confirm the settings. 7) Click the “X” (close) in the upper right corner to close “Edit Plan Settings”. Compliance status Model/모델명: M-XGXL31DBS, E02A www.elecom.co.jp/global/certification/ China / 中国 Korea / 대한민국 Singapore Taiwan / 台灣 Vietnam / Việt Nam...
-
Page 46: Intellectual Property Rights
Specifications and external appearance of this product may be changed without prior notice for the purpose of product improvement. ELECOM is not responsible for any damages to, or failure of other devices caused by using this product. The images are for illustration purposes only and may differ from your actual product. - Page 47 Las especificaciones y la apariencia externa de este producto pueden modificarse sin previo aviso con el fin de mejorar el producto. ELECOM no se hace responsable de los daños o fallos de otros dispositivos causados por el uso de este producto.
- Page 48 As especificações e aparência externa deste produto podem ser alteradas sem aviso prévio para fins de melhoria do produto. A ELECOM não é responsável por quaisquer danos ou falhas de outros dispositivos causados pelo uso deste produto. As imagens são apenas para fins ilustrativos e podem diferir do produto real.
- Page 49 일본 외 다른 국가에서 구입하는 고객은 문의 사항이 있는 경우 제품 구입 국가의 대리점에 연락하 십시오. ‘ELECOM CO., LTD.(일본)’는 일본 이외의 국가에서 구입 또는 사용 문의에 대한 고객 지원을 제공하지 않습니다. 또한 일본어 이외의 외국어는 지원되지 않습니다. 제품의 교환은 ELECOM 보증...
Need help?
Do you have a question about the M-XGS31DBSK Series and is the answer not in the manual?
Questions and answers