Table of Contents
Advertisement
Available languages
Available languages
MULTI-USE STEAM CLEANER
Instruction manual
Manuel d'utilisation
Manual de instrucciones
Bedienungsanleitung
Manuale di istruzioni
NETTOYEUR VAPEUR MULTIUSAGE
LIMPIADOR DE VAPOR MULTIUSOS
MEHRZWECK-DAMPFREINIGER
PULITORE A VAPORE MULTIUSO
Copyright © 2024 Dupray USA LLC. All rights reserved.
Neat Plus™ Help Center
• Centre d'aide • Centro de ayuda
• Hilfezentrum • Centro assistenza
page 2
page 16
página 30
Seite 44
pagina 58
Advertisement
Table of Contents

Subscribe to Our Youtube Channel
Related Manuals for Dupray neat


Summary of Contents for Dupray neat
- Page 1 16 Manual de instrucciones página 30 Bedienungsanleitung Seite 44 Manuale di istruzioni pagina 58 Neat Plus™ Help Center • Centre d'aide • Centro de ayuda • Hilfezentrum • Centro assistenza Copyright © 2024 Dupray USA LLC. All rights reserved.
-
Page 2: Important Safety Instructions
To reduce risk of burns, electrocution, fire, or injury to persons: 1. Use Neat Plus™ steam cleaner only for its intended purpose as indicated in this manual. 2. Before plugging power cord into electrical outlet, be sure that all electrical information the label conforms with your power supply. - Page 3 12. When filling the water tank, only water should be used – other cleaning agents could dam- age unit or cause injury. Distilled or de-mineralized water is highly recommended, in order to minimize potential build-up of mineral deposits. Do not fill with more than 60 oz. (1800 ml) of water.
-
Page 4: Important Warning
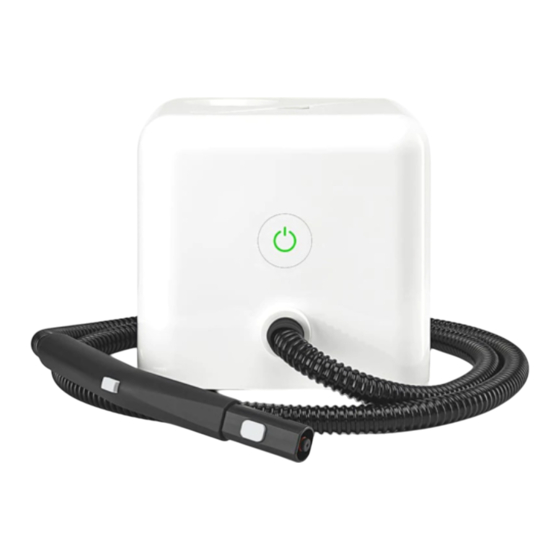
DO NOT use anything else than clean water inside the product. In no event is Dupray liable for incidental or consequential damages to anyone, of any nature whatsoever. Some states/provinces do not permit the exclusion or limitation of incidental or consequential damages, so the above may not apply to you. - Page 5 DESCRIPTION 1. Power button 6. Steam hose 2. Status indicator 7. Steam trigger lock 3. Retractable handle 8. Electrical cord 4. Steam trigger 9. Cord wrap 5. Accessory release button 10. Water tank cap...
- Page 6 ACCESSORIES 11. Extension tubes (2) 17. Nylon brushes (5) 12. Steam lance 18. Brass brush 13. Microfiber pads (3) 19. Microfiber cloth 14. Floor tool 20. Microfiber bonnet 15. Triangular tool 16. Window tool...
-
Page 7: Filling With Water
FILLING WITH WATER Remove the water tank cap Pour water in the steam cleaner until it’s full. Max: 60 oz. (1800 ml) Never put anything else than clean water in the water tank. Tips: • Using demineralized water prevents mineral build up and prolongs the life of the unit. - Page 8 Once filled with water, connect the electrical cord to your power supply then press the power button located at front of your Neat Plus™. The status indicator will light up. ORANGE Indicates the unit is getting ready. LIGHT approximately 90-120 Neat Plus™...
- Page 9 HOW TO ATTACH THE ACCESSORIES click Insert the male part into the female part. When properly attached the accessory release button should have clicked into the other piece’s inserts. TO DETACH Press in the accessory release button and hold it down. Pull the two pieces appart.
- Page 10 STEAM LANCE Use the lance to clean surfaces that are difficult to reach. You can use the lance with or without the brushes and use the microfiber cloth to wipe off moisture. USE IT WITH A BRUSH Ideal for delicate surfaces like: ovens showers stove tops...
- Page 11 USE THE FLOOR TOOL WITH A MICROFIBER PAD Lay one microfiber pad on a flat surface, with fastener strips facing upward. Align the floor tool with the pad. Make sure the floor tool is oriented with the pad, and centered as best as possible. Press the tool firmly down onto the pad.
-
Page 12: Window Tool
AVOID USING ON: unsealed hardwood unglazed ceramic Care should also be taken when steaming sealed hardwood floors, as prolonged exposure to steam in a single spot may cause damage and discoloration. To avoid this, keep the floor tool in constant motion on these surfaces. Steam may remove the sheen from some floors that have been treated with wax. - Page 13 STORAGE To prevent leaks, do not store sideways or upside down. Always keep the unit upright. DANGER: Never use anything else then clean water in the steam cleaner. Household descaling products, bleach or cleaning chemicals can cause harmful fumes or important damages to the product, resulting in potential damages, injuries, and/or death.
-
Page 14: Troubleshooting
TROUBLESHOOTING PROBLEM POSSIBLE CAUSE SOLUTION Unit is not plugged in. Plug the power cord into an Unit fails to heat up. The status indi- electrical outlet. does not illuminate when cator power button is pressed. Household circuit breaker / ground Reset circuit breaker / ground fault fault interrupter has tripped or interrupter, or replace fuse. -
Page 15: Limited Warranty
• It is understood that certain parts of the equipment are not covered by the Dupray warranty due to the fact they require replacement after multiple use. Such parts include,but are not limited to, buttons, hoses, seals, etc. These parts will eventuallyrequire replacement at the Client’s cost. -
Page 16: Importantes Mesures De Sécurité
AVERTISSEMENT Pour réduire les risques de brûlures, d’électrocutions, d’incendies ou de blessures : 1. Utilisez le nettoyeur vapeur Neat Plus™ seulement pour les opérations indiquées dans ce manuel. 2. Avant de brancher le cordon d’alimentation dans une prise électrique, assurez-vous que toutes les informations électriques de la plaque signalétique sont en conformité... - Page 17 10. L’appareil est destiné à être utilisé uniquement avec les accessoires recommandés du nettoyeur vapeur Neat Plus™. L’utilisation d’autres accessoires peut entrainer des blessures ou endommager l’appareil. 11. Si l’indicateur de fonctionnement ne s’illumine pas lorsque l’interrupteur est appuyé alors que le cordon d’alimentation est branché, l’appareil ne fonctionne pas correctement.
- Page 18 NE PAS utiliser autre chose que de l'eau propre à l'intérieur du produit. En aucun cas Dupray ne pourra être tenue responsable des dommages accessoires ou indirects, de quelque nature que ce soit, causés à quiconque. Certains États et provinces n’autorisent pas l’exclusion ou la restriction des dommages accessoires ou...
- Page 19 DESCRIPTION 1. Interrupteur principal 6. Tuyau vapeur 2. Indicateur de fonctionnement 7. Verrou de la vapeur 3. Poignée rétractable 8. Cordon d’alimentation 4. Bouton de relâche 9. Enrouleur du cordon de la vapeur d’alimentation 5. Bouton de verrouillage 10. Bouchon du réservoir d’accessoires d'eau...
- Page 20 ACCESSOIRES 11. Tubes d’extension (2) 17. Brosses de nylon (5) 12. Lance 18. Brosse de laiton 13. Coussinets de microfibre (3) 19. Linge de microfibre 14. Outil à planchers 20. Bonnet de microfibre 15. Outil triangulaire 16. Outil à fenêtres...
-
Page 21: Remplir Avec De L'eau
REMPLIR AVEC DE L’EAU Retirez le bouchon du réservoir d'eau Versez de l’eau dans le nettoyeur vapeur jusqu’à ce qu’elle soit pleine. Max: 60 oz. (1800 ml) Ne jamais mettre autre chose que de l’eau propre dans le réservoir d’eau. Conseils: •... - Page 22 COMMENT UTILISER VOTRE NETTOYEUR VAPEUR NEAT PLUS™ Déroulez complètement le cordon d’alimentation avant l’utilisation. Une fois rempli avec de l’eau, connectez le cordon d’alimentation et appuyez sur l’interrupteur principal situé à l’avant de l’appareil. L’indicateur de fonctionnement s’illuminera. Indique que l'unité est en mode chauffage.
- Page 23 COMMENT ASSEMBLER LES ACCESSOIRES « clic » Insérez la partie mâle dans la partie femelle. Lorsque assemblé correctement, le bouton de verrouillage devrait s’enclencher dans l’autre pièce. POUR DÉSASSEMBLER Appuyez sur le bouton de vérouillage et tenez-le enfoncé. Tirez pour séparer les pièces. Risques de brûlures: Ne pas toucher les pièces métalliques, les brosses, accessoires, coussinets ou la vapeur ou essayer de connecter un accessoire durant...
- Page 24 LANCE Utilizez la lance sur les surfaces difficiles à atteindre. Vous pouvez utiliser la lance avec ou sans brosse. Utilisez un linge de microfibre pour essuyer la condensation. UTILISEZ AVEC UNE BROSSE Idéales pour les surfaces délicates : fours douches ronds de poêles bains BROSSES DE NYLON...
- Page 25 UTILISER L’OUTIL À PLANCHERS AVEC UN COUSSINET DE MICROFIBRE Placez le coussinet sur une surface plane, les bandes de fixation vers le haut. Alignez l’outil à planchers au centre du coussinet Appuyez fermement sur le coussinet avec l’outil pour que les bandes de fixation y adhèrent correctement.
- Page 26 ÉVITEZ D’UTILISER SUR : bois franc non scellé céramique non émaillée Soyez prudent lorsque vous nettoyez du bois franc scellé, une exposition prolongée à la vapeur à un même endroit peut déformer et décolorer la surface. Gardez toujours l’outil à planchers en mouvement. La vapeur risque de retirer le brillant de certaines surfaces cirées ou polies.
- Page 27 STOCKAGE Pour éviter les fuites, ne rangez pas sur le côté ou à l'envers. Gardez toujours l'appareil à la verticale. DANGER: DANGER : Ne jamais utiliser autre chose que de l’eau propre dans le réservoir. Les produits désincrustants domestiques, l'eau de javel ou les produits nettoyants peuvent causer des émmanations nocives et/ou des dommages importants au produit, entraînant d'éventuels dommages, lésions et/ou mort.
-
Page 28: Dépannage
DÉPANNAGE PROBLÈMES CAUSES POSSIBLES SOLUTIONS L’appareil n’est pas branché. Branchez le cordon d’alimentation L’ appareil ne chauffe pas. L’indi- sur une prise électrique. n’est cateur de fonctionnment pas illuminé lorsque l’interrupteur Le disjoncteur de la maison / Réinitialisez le disjoncteur de la principal est enfoncé. -
Page 29: Garantie Limitée
à la lettre les instructions ou le manuel d’utilisation fourni par Dupray et qu’il découvre un défaut au niveau des matériaux de sa fabrication et qu’il avertit Dupray par écrit durant la période de garantie, Dupray aura l’option de déployer des efforts commerciaux raisonnables afin de réparer ou remplacer la partie (ou... -
Page 30: Instrucciones De Seguridad Importantes
ADVERTENCIA Para reducir el riesgo de quemaduras, electrocución, incendio o lesiones a personas: se el limpiador de vapor Neat Plus™ solo para el fin previsto, tal como se indica en este 1. U manual. 2. Antes de enchufar el cable de alimentación a la toma eléctrica, asegúrese de que toda la información eléctrica que aparece en la etiqueta sea consistente con la fuente de alimenta-... - Page 31 10. La unidad solo debe usarse con los accesorios recomendados para el limpiador de vapor Neat Plus™. El uso de otros tipos de accesorios puede causar daños a la unidad o lesiones. 11. Si el indicador de estado no se ilumina cuando se presiona el botón de encendido mientras el cable de alimentación está...
- Page 32 NO utilice nada más que agua limpia dentro del producto. En ningún caso Dupray es responsable por daños incidentales o consecuentes a ninguna persona, de ninguna naturaleza. Algunos estados / provincias no permiten la exclusión o limitación de daños incidentales o consecuentes, por lo que lo anterior puede no aplicarse a usted.
- Page 33 DESCRIPCIÓN 1. Botón de encendido 6. Manguera de vapor 2. Indicador de estado 7. Bloqueo del disparador de vapor 3. Mango retráctil 8. Cable eléctrico 4. Disparador de vapor 9. Enrollador de cable 5. Botón de liberación del accesorio 10. Tapa del tanque de agua...
- Page 34 ACCESORIOS 11. Tubos de extensión (2) 16. Herramienta de ventana 12. Lanceta de vapor 17. Cepillos de nailon (5) 13. Almohadillas 18. Cepillo de latón de microfibra (3) 19. Paño de microfibra 14. Herramienta rectangular 20. Capucha de microfibra para pisos 15.
- Page 35 RECARGA CON AGUA Desatornille y quite la tapa Vierta agua en el limpiador de vapor hasta que esté lleno. Máx: 60 oz (1800 ml) Nunca ponga ningún líquido que no sea agua limpia en el limpiador de vapor. Consejos: • El uso de agua desmineralizada evita la acumulación de minerales y prolonga la vida útil de la unidad.
- Page 36 Neat Plus™. El indicador de estado se encenderá. Indica que el limpiador a vapor se está NARANJA calentando. aproximadamente 90- Neat Plus ™ necesita 120 segundos para alcanzar la temperatura correcta. Neat plus ™ es listo para usar. VERDE...
- Page 37 CÓMO UNIR LOS ACCESORIOS “clic” Inserte la parte macho en la parte hembra. Cuando se conecta correctamente, el botón de liberación del accesorio debería hacer un sonido de “clic” al insertarlo en la otra pieza. DESCONECTAR Mantenga presionado el botón de liberación del accesorio Tire de las dos piezas en sentido contrario para separarlas.
- Page 38 LANCETA DE VAPOR Use la lanceta para limpiar superficies que son difíciles de alcanzar. Puede usar la lanceta con o sin los cepillos y usar el paño de microfibra para limpiar la humedad. USARLA CON UN CEPILLO Ideal para superficies delicadas como las siguientes: hornos refrigeradores...
- Page 39 USAR LA HERRAMIENTA RECTANGULAR PARA PISOS CON UNA ALMOHADILLA DE MICROFIBRA Coloque una almohadilla de microfibra sobre una superficie plana, con las tiras de sujeción hacia arriba. Alinee la herramienta rectangular para pisos con la almohadilla. Asegúrese de que la herramienta rectangular para pisos esté orientada con la almohadilla y centrada lo mejor posible.
- Page 40 EVITE USARLAS EN LAS SIGUIENTES SUPERFICIES: madera dura sin sellar cerámica sin esmaltar También se debe tener cuidado al limpiar con vapor pisos de madera dura sellada, ya que la exposición prolongada al vapor en un solo lugar puede causar daños y decoloración.
- Page 41 ALMACENAMIENTO Para evitar fugas, no lo guarde de lado ni boca abajo. Mantenga siempre la unidad en posición vertical. PELIGRO: Nunca use nada más que agua limpia en la caldera. Los productos desincrustantes domésticos, la lejía o los productos químicos de limpieza pueden causar importantes daños al producto, resultando en posibles daños, lesiones y/o muerte.
-
Page 42: Solución De Problemas
SOLUCIÓN DE PROBLEMAS PROBLEMA CAUSA POSIBLE SOLUCIÓN La unidad no está enchufada. Enchufe el cable de alimentación a La unidad no se calienta. El indi- una toma de corriente. cador de estado no se ilumina cuando se presiona el botón de El cortacircuitos del hogar o inte- Restablezca el cortacircuitos o el encendido... -
Page 43: Garantía Limitada
Producto bajo uso normal y en estricta conformidad con las instrucciones y/o el manual de operaciones proporcionado por Dupray, y descubre cualquier defecto en material o mano de obra y notifica a Dupray por escrito durante el período de garantía, Dupray hará... -
Page 44: Wichtige Sicherheitshinweise
Vorkehrungen zur Vermeidung von Verbrennungen, Tod durch Stromschlag, Brand oder Verletzungen: 1. Verwenden Sie den Neat Plus™ Dampfreiniger ausschließlich zu dem in dieser Anleitung angegebenen Verwendungszweck. 2. Überprüfen Sie vor dem Einstecken des Netzkabels in die Steckdose, ob alle elektrischen Angaben auf dem Etikett Ihrer Stromversorgung entsprechen. - Page 45 9. Gebrauchen Sie das Gerät nicht in Bereichen, in denen Aerosol-Produkte oder Sauerstoff eingesetzt werden. 10. Das Gerät sollte nur mit empfohlenen Neat Plus™ Dampfreiniger-Zubehörteilen gebraucht werden. Der Gebrauch anderer Zubehörteile kann zu einer Beschädigung des Geräts oder zu Verletzungen führen.
- Page 46 Bedienungsanleitung beschrieben. Verwenden Sie im Inneren des Produkts NICHTS anderes als sauberes Wasser. In keinem Fall haftet Dupray für Neben- oder Folgeschäden jeglicher Art. In einigen Bundesstaaten / Provinzen ist der Ausschluss oder die Beschränkung von Neben- oder Folgeschäden nicht zulässig. Daher gilt das oben Gesagte möglicherweise nicht für Sie.
- Page 47 BESCHREIBUNG 1. Ein/Aus-Knopf 6. Dampfschlauch 2. Statusanzeige 7. Dampfauslöserverriegelung 3. Versenkbarer Griff 8. Netzkabel 4. Dampfauslöser 9. Kabelaufwickler 5. Zubehörknopf 10. Wassertankdeckel...
- Page 48 ZUBEHÖR 11. Verlängerungsrohre (2) 17. Nylonbürsten (5) 12. Dampflanze 18. Messingbürste 13. Mikrofaserpolster (3) 19. Mikrofasertuch 14. Bodenzubehörteil 20. Mikrofaserhaube 15. Dreieckiges Zubehörteil 16. Fensterzubehörteil...
- Page 49 NACHFÜLLEN DES WASSERS Entfernen Sie die Kappe des Dampfreinigers Gießen Sie Wasser in den Dampfreiniger, bis er voll ist Max: 60 oz. (1800 ml) Füllen Sie nur sauberes Wasser in den Wassertank. Tipps: • Mit entmineralisiertem Wasser vermeiden Sie Mineralablagerungen und verlängern die Lebensdauer des Geräts.
- Page 50 Vorderseite des Neat Plus™. Die Statusanzeige leuchtet auf. ORANGEFARBENES Zeigt an, dass der Dampfreiniger aufheizt. LICHT Der Neat plus ™ benötigt ungefähr 90-120 Sekunden, um die richtige Temperatur zu erreichen. GRÜNES Dass Neat plus ™ ist einsatzbereit. LICHT...
- Page 51 ANSCHLIEẞEN VON ZUBEHÖRTEILEN Klick Stecken Sie das männliche Teil in das weibliche Teil. Bei korrektem Anschließen rastet der Zubehörknopf in die entsprechende Öffnung am Zubehörteil ein. LÖSEN Drücken Sie den Zubehörknopf und halten Sie ihn gedrückt. Ziehen Sie die beiden Teile auseinander. Der Kontakt mit heißen Metallteilen, heißem Wasser, Bürsten, Zubehörteilen, Polstern, Spitzen oder Dampf kann zu Verbrennungen führen.
- Page 52 DAMPFLANZE Verwenden Sie die Lanze zur Reinigung von schwer erreichbaren Oberflächen. Sie können die Lanze mit oder ohne Bürsten verwenden. Wischen Sie Feuchtigkeit mit dem Mikrofasertuch VERWENDUNG MIT BÜRSTE Ideal geeignet für empfindliche Oberflächen wie: Backöfen Kühlschränke Herdplatten Duschen NYLONBÜRSTEN Fliesen und Badewannen (Schwarz)
- Page 53 VERWENDUNG DES BODENZUBEHÖRTEILS MIT MIKROFASERPOLSTER Legen Sie ein Mikrofaserpolster auf eine flache Oberfläche, sodass die Befestigungsstreifen nach oben zeigen. Halten Sie das Bodenzubehörteil über das Polster. Halten Sie es so mittig wie möglich über das Polster. Drücken Sie das Zubehörteil fest auf das Polster. Die Befestigungsstreifen haften an den Halterungen auf der Unterseite des Zubehörteils.
- Page 54 NICHT VERWENDEN FÜR: Unversiegeltes Hartholz Unglasierte Keramik Gehen Sie auch bei der Dampfreinigung von versiegelten Hartholzböden vorsichtig vor, da eine längere Einwirkung von Dampf an einer Stelle zu Schäden und Verfärbungen führen kann. Halten Sie das Bodenzubehörteil auf diesen Oberflächen daher immer in Bewegung.
- Page 55 LAGERUNG Um ein Auslaufen zu verhindern, lagern Sie es nicht seitlich oder verkehrt herum. Halten Sie das Gerät immer aufrecht. GEFAHR: Verwenden Sie niemals etwas anderes als sauberes Wasser im Boiler. Haushaltsentkalker oder Reinigungschemikalien können erhebliche Schäden am Boiler verursachen, was zu möglichen Schäden, Verletzungen und/oder Tod führen kann.
-
Page 56: Fehlerbehebung
FEHLERBEHEBUNG PROBLEM MÖGLICHE URSACHE LÖSUNG Das Gerät ist nicht eingesteckt. Stecken Sie das Netzkabel in die Das Gerät heizt nicht auf. Die Statusan- Steckdose. zeige leuchtet nicht, obwohl der Ein/Aus-Knopf Der Stromkreisunterbrecher/FI- Setzen Sie den Stromkreisunterbre- gedrückt ist. Schutzschalter wurde ausgelöst oder cher/FI-Schutzschalter zurück oder eine Sicherung ist durchgebrannt. -
Page 57: Beschränkte Garantie
Garantiezeitraums schriftlich davon in Kenntnis setzen und Dupray wird handelsübliche Anstrengungen unternehmen, um den Teil des Produktes zu reparieren oder zu ersetzen, der nach Dupray Mängel in Material oder Verarbei- tung aufweist, oder den Kaufpreis des Produktes zu ersetzen oder das Produkt oder einen Teil des Produktes zu ersetzen. -
Page 58: Istruzioni Importanti Per La Sicurezza
AVVERTENZA Per ridurre il rischio di ustioni, elettrocuzione, incendio o lesioni alle persone: 1. Utilizzare il pulitore a vapore Neat Plus™ solo per lo scopo previsto, indicato in questo manuale. 2. Prima di collegare il cavo di alimentazione alla presa elettrica, assicurarsi che tutte le infor- mazioni elettriche presenti sull’etichetta siano conformi all’alimentatore utilizzato. - Page 59 9. Non utilizzare l’unità in caso di utilizzo di prodotti a base di aerosol o di somministrazione di ossigeno. 10. L’unità è destinata all’uso esclusivo con gli accessori per la pulizia a vapore Neat Plus™ consigliati. L’uso di altri tipi di accessori può causare danni all’unità o lesioni.
-
Page 60: Avvertenza Importante
NON utilizzare altro che acqua pulita all'interno del prodotto. In nessun caso Dupray è responsabile per danni accidentali o consequenziali a chiunque, di qualsiasi natura. Alcuni stati / province non consentono l’esclusione o la limitazione di danni accidentali o consequenziali, pertanto quanto sopra potrebbe non essere applicabile. - Page 61 DESCRIZIONE 1. Pulsante di accensione 6. Tubo del vapore 2. Indicatore di stato 7. Blocco del grilletto del vapore 3. Impugnatura retrattile 8. Cavo elettrico 4. Grilletto del vapore 9. Avvolgibile del cavo 5. Pulsante di rilascio dell’acces- sorio 10. Tappo del serbatoio dell'acqua...
- Page 62 ACCESSORI 11. Tubi estensibili (2) 17. Spazzole in nylon (5) 12. Lancia vapore 18. Spazzola in ottone 13. Cuscinetti in microfibra (3) 19. Panno in microfibra 14. Accessorio per pavimenti 20. Cuffia in microfibra 15. Accessorio triangolare 16. Accessorio per finestre...
-
Page 63: Riempimento Con Acqua
RIEMPIMENTO CON ACQUA Rimuovere il tappo del serbatoio dell'acqua. Versare l'acqua nel pulitore a vapore fino a riempirlo. Max: 1800 ml Non mettere mai nient’altro che acqua pulita nel serbatoio dell’acqua. Suggerimenti: • L’utilizzo di acqua demineralizzata previene la formazione di calcare e prolunga la vita dell’unità. Rimettere saldamente il tappo INDICATORE DI ACQUA BASSA Il tuo pulitore a vapore può... - Page 64 Neat Plus™. Indica che il pulitore a vapore si sta riscaldando. Indica che la caldaia sta generando vapore. LUCE ARANCIONE Neat plus ™ ha bisogno di circa 90-120 secondi per raggiungere la temperatura corretta. LUCE Neat plus ™ pronto all’uso.
- Page 65 COME COLLEGARE GLI ACCESSORI clic Inserire la parte maschio nella parte femmina. Se gli accessori si collegano correttamente, il pulsante di rilascio dell’accessorio dovrebbe fare un clic. PER SCOLLEGARE Tenere premuto il pulsante di rilascio dell’accessorio Separare i due pezzi. Possono verificarsi ustioni a causa del contatto con parti metalliche calde, acqua calda, spazzole, accessori, punte dei cuscinetti o vapore.
- Page 66 LANCIA VAPORE Utilizzare la lancia per pulire le superfici difficili da raggiungere. È possibile utilizzare la lancia con o senza le spazzole e utilizzare il panno in microfibra per rimuovere l’umidità. UTILIZZARE LA LANCIA CON UNA SPAZZOLA Ideale per superfici delicate come: forni docce piani cottura...
- Page 67 UTILIZZARE L’ACCESSORIO PER PAVIMENTI CON UN CUSCINETTO IN MICROFIBRA Disporre un cuscinetto in microfibra su una superficie piana, con le strisce di fissaggio rivolte verso l’alto. Allineare l’accessorio per pavimenti al cuscinetto. Accertarsi che l’accessorio per pavimenti sia orientato con il cuscinetto e centrato al meglio possibile. Premere forte l’accessorio sul cuscinetto.
- Page 68 EVITARE DI USARE SU: legno duro non sigillato ceramica non smaltata Prestare attenzione anche durante la vaporizzazione su pavimenti in legno sigillati, in quanto l’esposizione prolungata al vapore di un singolo punto può causare danni e scolorimento. Per evitarlo, tenere l’accessorio per pavimenti in movimento costante su queste superfici.
- Page 69 MAGAZZINAGGIO Per evitare perdite, non conservare lateralmente o capovolto. Mantenere sempre l'unità in posizione verticale. PERICOLO: Non utilizzare altro che acqua pulita nella caldaia. I prodotti decalcificanti domestici, la candeggina o i prodotti chimici per la pulizia possono causare gravi danni danni al prodotto, con conseguenti potenziali danni, lesioni e/o morte.
-
Page 70: Risoluzione Dei Problemi
RISOLUZIONE DEI PROBLEMI PROBLEMA CAUSA POSSIBILE SOLUZIONE L’unità non è collegata. Inserire il cavo di alimentazione L’unità non si riscalda. L’indicatore nella presa elettrica. di stato non si illumina quando il pulsante di accensione viene Ripristinare il salvavita/l’interrut- Il salvavita domestico o l’interrut- premuto. -
Page 71: Garanzia Limitata
Per un periodo di dodici (12) mesi dopo l’acquisto del Prodotto (il «Periodo di garanzia»), se il Cliente ha utilizzato il Prodot- to in condizioni d’uso normale e in stretta conformità con le istruzioni e/o il manuale operativo fornito da Dupray e scopre eventuali difetti di materiale o di lavorazione e ne informa Dupray per iscritto durante il periodo di garanzia, Dupray farà... - Page 72 Questions ? We’re here to help. Des questions ? Nous pouvons vous aider. ¿Tiene preguntas? Estamos aquí para ayudarlo. Fragen? Wir stehen Ihnen zur Verfügung. Domande ? Siamo qui per aiutare. 1-800-881-8482 +44 3330 112660 01-800-733-4117 dupray.com MANDUP030-EN-FR-ES-DE-IT...
Need help?
Do you have a question about the neat and is the answer not in the manual?
Questions and answers