Henny Penny HEC-103 Technical Manual
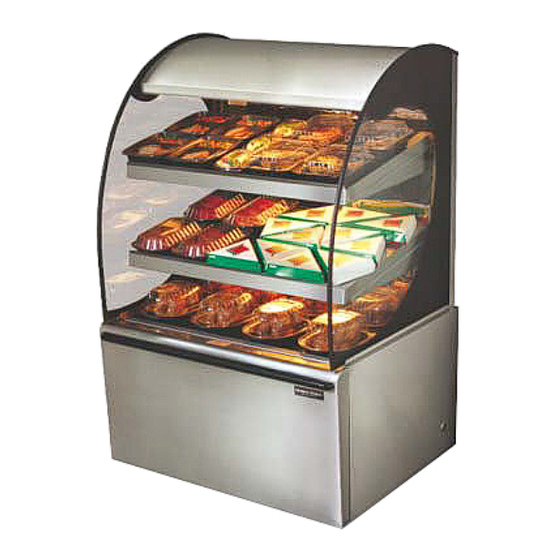
Heated express cabinet
Hide thumbs
Also See for HEC-103:
- Specification sheet (2 pages) ,
- User manual (5 pages) ,
- Operator's manual (21 pages)

Related Manuals for Henny Penny HEC-103


Summary of Contents for Henny Penny HEC-103
- Page 1 Henny Penny Cabinet Heated Express Model HEC-103 Model HEC-104 Model HEC-123 Model HEC-124 TECHNICAL MANUAL...
- Page 3 During this time, any frypot that fails due to manufacturing or workmanship issues will be replaced at no charge for parts, labor, or freight. Henny Penny will either install a new frypot at no cost or provide a new or reconditioned replacement fryer at no cost.
-
Page 4: Table Of Contents
Model HEC-103/104/123/124 TABLE OF CONTENTS Section Page Section 1. TROUBLESHOOTING 1-1. Introduction ......................Safety ........................1-3. Troubleshooting ..................... 1-4. Error Codes and Warnings ..................Section 2. MAINTENANCE 2-1. Introduction ......................2-2. Maintenance Hints ....................2-3. Lamp Socket Replacement ................... 2-4. -
Page 5: Troubleshooting
Model HEC-103/104/123/124 SECTION 1. TROUBLESHOOTING 1-1. INTRODUCTION This section provides troubleshooting information in the form of and easy to read table. If a problem occurs during the first operation of a new unit, recheck the Installation Section of the Operator’s Manual. - Page 6 Model HEC-103/104/123/124 1-3. TROUBLESHOOTING (Continued) PROBLEM CAUSE CORRECTION With power switch in • Open circuit • Check to see that unit is POWER position, unit plugged in is completely inoperative (no power) • Check breaker or fuse at supply box •...
-
Page 7: Error Codes And Warnings
Model HEC-103/104/123/124 1-3. TROUBLESHOOTING (Continued) PROBLEM CAUSE CORRECTION No base heat • Faulty base heat relay • Check and replace if necessary • Faulty base heater • Check and replace if necessary • Unit not preheated • Preheat unit before loading product •... -
Page 8: Introduction
Model HEC-103/104/123/124 SECTION 2. MAINTENANCE 2-1. INTRODUCTION This section provides procedures for the checkout and re- placement of the various parts used within the heated mer- chandiser. Before replacing any parts, refer to the Trouble- shooting Section. It will aid you in determining the cause of the malfunction. - Page 9 Model HEC-103/104/123/124 2-3. LAMP SOCKET REPLACEMENT Twist bulb and remove from shelf. (Continued) Using a 5/16” socket for the rear, and 3/8” socket for the front, remove all acorn nuts from the lamp reflector. Figure 3. Figure 3 Pull reflector apart and using 1/4” socket remove nuts securing the faulty socket.
- Page 10 Model HEC-103/104/123/124 2-3. LAMP SOCKET REPLACEMENT (Continued) Canopy Lamp Socket Remove the screws securing the fluorescent bulb guards on both ends of the bulb, and remove guards. Figure 6. Twist bulb and remove from canopy. Figure 6 Remove screws securing both ends of the canopy lamp reflector, and allow reflector to drop down.
-
Page 11: Ballast Replacement
Model HEC-103/104/123/124 2-4. BALLAST REPLACEMENT To avoid electrical shock or property damage, move the POWER switch to OFF and disconnect main circuit breaker, or unplug cord at wall receptacle. Carefully pry out on the front cover of the unit, unsnap- ping the plastic fasteners, and remove front cover. -
Page 12: Base Heaters
Figure 1 Figure 1. The ohm ratings should be: HEC-103 - 208V - Cold - 39 ohms HEC-103 - 240V - Cold - 52 ohms HEC-104 - 208V - Cold - 49 ohms... -
Page 13: Relays
Model HEC-103/104/123/124 2-6. TRANSFORMERS (Continued) Label and disconnect the wires from the transformer terminals, and using a multimeter, or ohm meter, check ohm rating. Figure 1. The ohm ratings should be: Secondary: 1 ohm Primary: 234 ohms - 208V 200 ohms - 240V... - Page 14 Model HEC-103/104/123/124 2-7. RELAYS (Continued) To avoid electrical shock, make connections before applying power, take reading, and remove power before removing meter leads. The follow- ing checks are performed with the wall circuit breaker closed and the main power switch in the ON position.
-
Page 15: Fuse And Fuse Holder Replacement
Model HEC-103/104/123/124 2-8. FUSE AND FUSE HOLDER REPLACEMENT To avoid electrical shock or property damage, move the POWER switch to OFF and disconnect main circuit breaker, or unplug cord at wall receptacle. Fuse Replacement: Carefully pry out on the front cover of the unit, unsnap- ping the plastic fasteners, and remove front cover. -
Page 16: Power Switch Replacement
Model HEC-103/104/123/124 2-9. POWER SWITCH REPLACEMENT To avoid electrical shock or property damage, move the POWER switch to OFF and disconnect main circuit breaker, or unplug cord at wall receptacle. Remove the screws securing the fluorescent bulb guards on both ends of the bulb, and remove guards. Figure 1. -
Page 17: Contactor Replacement
Model HEC-103/104/123/124 2-10. CONTACTOR REPLACEMENT To avoid electrical shock or property damage, move the POWER switch to OFF and disconnect main circuit breaker, or unplug cord at wall receptacle. Carefully pry out on the front cover of the unit, unsnap- ping the plastic fasteners, and remove front cover. - Page 18 Model HEC-103/104/123/124 2-11. PC BOARD REPLACEMENT (Continued) Remove connectors to the PC board. Figure 1. Using a 5/16 in. socket, remove teh nuts securing the Figure 1 PC board to the panel. Figure 2. Install new PC board in reverse order.
-
Page 19: Heated Shelf Replacement
Model HEC-103/104/123/124 2-12. HEATED SHELF REPLACEMENT The heated shelves must be replaced if heaters inside the shelves are faulty. See steps below on replacing shelves. To avoid electrical shock or property damage, move the POWER switch to OFF and disconnect main circuit breaker, or unplug cord at wall receptacle. - Page 20 Model HEC-103/104/123/124 66660 2-13...
- Page 21 Model HEC-103/104/123/124 SN: HC0603015 & BELOW 2-14...
- Page 22 Model HEC-103/104/123/124 SN: HC0603016 & ABOVE 2-15...
- Page 23 Model HEC-103/104/123/124 SN: HC0603015 & BELOW 2-16...
- Page 24 Model HEC-103/104/123/124 SN: HC0603016 & ABOVE 2-17...
- Page 25 Model HEC-103/104/123/124 66661 2-18...
- Page 26 Model HEC-103/104/123/124 SN: HC0603015 & BELOW 2-19...
- Page 27 Model HEC-103/104/123/124 SN: HC0603016 & ABOVE 2-20...
- Page 28 Model HEC-103/104/123/124 66845 2-21...
- Page 29 Model HEC-103/104/123/124 SN: HC0708011 & BELOW 1007 2-22...
- Page 30 Model HEC-103/104/123/124 SN: HC0708012 & ABOVE 2-23 1007...
- Page 31 Model HEC-103/104/123/124 66830 2-24...
- Page 32 Model HEC-103/104/123/124 66060 2-25...
- Page 33 Model HEC-103/104/123/124 SN: HC0603013 & BELOW 2-26...
- Page 34 Model HEC-103/104/123/124 SN: HC0603014 & ABOVE 2-27...
- Page 35 Model HEC-103/104/123/124 SN: HC0603013 & BELOW 2-28...
- Page 36 Model HEC-103/104/123/124 SN: HC0603014 & ABOVE 2029...
- Page 37 Model HEC-103/104/123/124 66812 2-30...
- Page 38 Model HEC-103/104/123/124 SN: HC0708011 & BELOW 2-31 1007...
- Page 39 Model HEC-103/104/123/124 SN: HC0708012 & ABOVE 1007 2-32...
- Page 40 Model HEC-103/104/123/124 68628 2-33...
- Page 41 Model HEC-103/104/123/124 SN: HC0603019 & BELOW 2-34...
- Page 42 Model HEC-103/104/123/124 SN: HC0603020 & ABOVE 2-35...
- Page 43 Model HEC-103/104/123/124 2-36...
- Page 44 Model HEC-103/104/123/124 SN: HC0708011 & BELOW 2-37 1007...
- Page 45 Model HEC-103/104/123/124 SN: HC0708012 & ABOVE 2-38...
- Page 46 Model HEC-103/104/123/124 69196 2-39...
-
Page 47: Parts Information
This section identifies and lists the replaceable parts of the Henny Penny merchandiser. 3-2. GENUINE PARTS Use only genuine Henny Penny parts in your cabinet. Using a part of lesser quality or substitute design may result in cabinet damage or personal injury. - Page 48 3 or 4 65495 Cap- HEC-103/123 - Top 65497 Cap- HEC-104/124 - Top 66344 Panel - HEC-103 - Four Shelf Removable 66019 Panel - HEC-104 - Four Shelf Removable 66361 Panel - HEC-103 - Three Shelf Removable 66021 Panel - HEC-104 - Three Shelf Removable...
- Page 49 67697-015 ASSY-FRONT REMOVABLE PANEL - HEC-103/123 DUTCH 67697-016 ASSY-FRONT REMOVABLE PANEL - HEC-103/123 SWEDISH 69795-003 ENGLISH ASSY-FRONT REMOVABLE PANEL - HEC-103(specify color) Item Part No. Description Language 67693-001 ASSY - SHELF - BLACK W/LABEL HOLDER - 208V - HEC104/124 ENGLISH...
- Page 50 Model HEC-103/104/123/124 Item Part No. Description Language 67693-017 ASSY - SHELF - BLACK W/LABEL HOLDER - 208V - HEC103/123 ENGLISH 67693-018 ASSY - SHELF - BLACK W/LABEL HOLDER - 208V - HEC103/123 FRENCH 67693-019 ASSY - SHELF - BLACK W/LABEL HOLDER - 208V - HEC103/123...
- Page 51 Panel - LH Rear - HEC-10X 68556 Panel - LH Rear - HEC-12X 65530 Panel - RH Side 66432 Panel - Lower Rear - HEC-103/123 65659 Panel - Lower Rear - HEC-104/124 66086 Assy - 1PH-20A-12Ga - Power Cord 66128...
- Page 52 Item Part Quantity No. No. Description √ √ √ √ √ 1 66659-001 Heater - HEC-103/123 - 1100W-208V - Well √ √ √ √ √ 1 66659-002 Heater - HEC-103/123 - 1100W-240V - Well √ √ √ √ √ 1 65566-001 Heater - HEC-104/124 - 825W-208V - Well √...
- Page 53 √ √ √ √ √ 3 EF02-105 Fuse - 15 Amp - CE 66411 Panel - HEC-103 Lower - Removable 66020 Panel - HEC-104 Lower - Removable √ √ √ √ √ recommended parts Fuse, Fuse Holder and Breaker SN Chart PART # MODELS EF02-006 &...
- Page 54 Model HEC-103/104/123/124 Item Part Quantity Description √ √ √ √ √ 1 66095 Control - HEC Duty Cycle √ √ √ √ √ 2 71036 Ballast - Fluorescent Light - 120 - 277V 4 or 5 4 or 5 √ √ √ √ √ 2...
- Page 55 Model HEC-103/104/123/124 Item Part Quantity Description √ √ √ √ √ 1 72277 Power switch 66063 Decal - Power Switch 66106 Retainer - Ceiling Lamp 8 or 10 8 or 10 √ √ √ √ √ 4 BL01-026 Light - Fourescent - F14T5 4 or 5 √...
Need help?
Do you have a question about the HEC-103 and is the answer not in the manual?
Questions and answers