Table of Contents
Advertisement
Quick Links
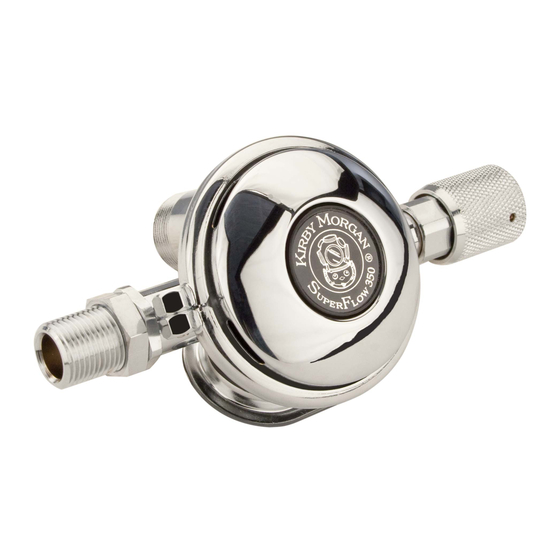
SuperFlow® 350 Regulator
SF350-1
1.1 SuperFlow
& Exhaust System Post Dive
Cleaning & Sanitizing
SF350-1
1.1.1 Post Dive Disassembly
SF350-3
SF350-3
SF350-4
SuperFlow
SF350-4
SF350-4
Information
SF350-4
Regulator Test for Correct
Adjustment, Fully Assembled
SF350-5
350 Regulator Body Interior
SF350-6
1.2.4 SuperFlow
Regulator Bias Adjustment
Servicing, Demand Regulator
on the Helmet
SF350-8
SuperFlow
Adjustment System
1.1 SuperFlow
350 Regulator
®
& Exhaust System Post Dive
Cleaning & Sanitizing
Purpose
This procedure should be performed at comple-
tion of diving operations and/or whenever the
helmet is to be used by another diver.
Tools required:
• 1/4 inch Flat Blade Attachment on Torque
Screwdriver
• Small Phillips Screwdriver
• Clean Wiping Rag
• Nylon Tooth Brush
© MMXXIV Kirby Morgan Dive Systems, Inc. All rights reserved. Document # 240701032
SuperFlow
350 Regulator
®
Contents
350 Regulator
®
350
®
®
®
®
350 Demand
®
®
SuperFlow® 350 Regulator & Exhaust System Post Dive Cleaning & Sanitizing
SF350-8
SF350-8
1.3.1 SuperFlow
Regulator Removal from
Helmet or Mask
SF350-9
SF350-10
350 Demand Regulator Parts
SF350-12
SF350-13
SF350-13
1.7 Reassembly of the
SuperFlow
Regulator
SF350-19
1.7.1 Tuning the SuperFlow
Regulator
SF350-21
1.7.2 SuperFlow
Steady Flows When Pressured
Up: Special Tools Used (No
P/N 525-620 KMDSI Tool Kit)
SF350-23
1.7.3 SuperFlow
• Spray Bottle with Mild Dish Soap Solution
• Spray Bottle with Antiseptic Cleaner
1.1.1 Post Dive Disassembly
1. Remove the demand regulator clamp by remov-
ing the clamp screw. Lift off the regulator cover
and diaphragm.
350 Demand
®
350 Regulator
®
®
350
®
350 Demand
®
350
®
350 Regulator
®
350 Regulator
®
SF350-1
Advertisement
Table of Contents

Subscribe to Our Youtube Channel
Related Manuals for Kirby Morgan SuperFlow 350


Summary of Contents for Kirby Morgan SuperFlow 350
-
Page 1: Table Of Contents
Tools required: • 1/4 inch Flat Blade Attachment on Torque Screwdriver • Small Phillips Screwdriver • Clean Wiping Rag • Nylon Tooth Brush SF350-1 © MMXXIV Kirby Morgan Dive Systems, Inc. All rights reserved. Document # 240701032... - Page 2 5. Using a small Phillips screwdriver, carefully remove the two clamps, screws & nuts then pull the whiskers away from the water dump body. SF350-2 © MMXXIV Kirby Morgan Dive Systems, Inc. All rights reserved. Document # 240701032...
-
Page 3: Sanitizing
See "1.7 General Cleaning & Inspection Proce- parting line on the bottom of the wings is lined SF350-3 © MMXXIV Kirby Morgan Dive Systems, Inc. All rights reserved. Document # 240701032... -
Page 4: Superflow Regulator
This will prolong the life of both easier if these tools are used. The above five tools the inlet valve, seat, and bias springs. SF350-4 © MMXXIV Kirby Morgan Dive Systems, Inc. All rights reserved. Document # 240701032... -
Page 5: Inspection Of Superflow
Make sure the metal parts are clean and dry. Do not lubricate the diaphragm. Tighten the clamp screw to the recommended torque, using a torque screwdriver. See "Torque Specs" module. SF350-5 © MMXXIV Kirby Morgan Dive Systems, Inc. All rights reserved. Document # 240701032... - Page 6 ® ADJUSTMENT SHAFT SPACER PISTON RETAINING PIN REGULATOR BODY SPACER LOCK NUT INLET VALVE COVER DIAPHRAGM INLET NIPPLE WASHER CLAMP ROLLER LEVER EXHAUST FLANGE EXHAUST VALVE SF350-6 © MMXXIV Kirby Morgan Dive Systems, Inc. All rights reserved. Document # 240701032...
- Page 7 Check for damaged threads. Replace the adjustment shaft NOTE and O-ring if any damage is found. Screw the regulator adjustment 7. Replace washer. knob out for removal. SF350-7 © MMXXIV Kirby Morgan Dive Systems, Inc. All rights reserved. Document # 240701032...
-
Page 8: Reassembly Of The 350 Regulator
6. Thread the packing nut onto the regulator body and tighten with the 3/4" torque wrench. See "Torque Specs" module. Turn the knob all the way SF350-8 © MMXXIV Kirby Morgan Dive Systems, Inc. All rights reserved. Document # 240701032... -
Page 9: Superflow Disassembly
1/4" hole drilled through it to support the knob. Position the knob so the retaining pin is over the • 3/32 inch Punch hole. The adjustment knob can be held against • 7/8 inch Open-end Wrench SF350-9 © MMXXIV Kirby Morgan Dive Systems, Inc. All rights reserved. Document # 240701032... -
Page 10: Inspection Of Superflow
LOCK NUT VALVE SEAT O-RING INLET NIPPLE SPACER ROLLER LEVER REGULATOR BODY WASHER JAM NUT SuperFlow 350 regulator body with roller lever assembly and inlet valve. ® SF350-10 © MMXXIV Kirby Morgan Dive Systems, Inc. All rights reserved. Document # 240701032... - Page 11 ADJUSTMENT KNOB Adjustment end of the SuperFlow 350 regulator. ® RETAINING PIN PACKING NUT O-RING WASHER SHAFT SPACER SPRING SET PISTON REGULATOR BODY SF350-11 © MMXXIV Kirby Morgan Dive Systems, Inc. All rights reserved. Document # 240701032...
-
Page 12: Cleaning Superflow Regulator Parts
Hold the dia- is required. phragm to a bright white light, while aggressively pulling and stretching to reveal damage, deterio- ration, or holes. SF350-12 © MMXXIV Kirby Morgan Dive Systems, Inc. All rights reserved. Document # 240701032... -
Page 13: Cleaning Instructions
• 1 3/8 inch Socket or Regulator Mount Nut, P/N 525-625 (in Tool Kit included with Helmet) • Christo-Lube or equivalent oxygen compatible ® lubricant • Torque Screwdriver with 1/4 inch Flat Blade At- tachment SF350-13 © MMXXIV Kirby Morgan Dive Systems, Inc. All rights reserved. Document # 240701032... -
Page 14: Exhaust Valve Replacement
SF350-14 © MMXXIV Kirby Morgan Dive Systems, Inc. All rights reserved. Document # 240701032... - Page 15 SF350-15 © MMXXIV Kirby Morgan Dive Systems, Inc. All rights reserved. Document # 240701032...
- Page 16 13. Install the retaining pin by tapping it in with a exhaust to the regulator with a tie wrap and small hammer until it is flush with the outer sur- tighten. face of the knob. SF350-16 © MMXXIV Kirby Morgan Dive Systems, Inc. All rights reserved. Document # 240701032...
- Page 17 5/ 1 6" behind the mold line on the main body). You can also make marks on the whiskers with a felt tip pen. SF350-17 © MMXXIV Kirby Morgan Dive Systems, Inc. All rights reserved. Document # 240701032...
- Page 18 Insert the regulator into the pod. Carefully tighten the tie wrap, making sure it is completely in the groove. Trim the tie wrap as close as possible. Check for good fit. SF350-18 © MMXXIV Kirby Morgan Dive Systems, Inc. All rights reserved. Document # 240701032...
- Page 19 Using a torque wrench 2. Screw the adjustment knob (clockwise) all the and an 7/8" open end wrench hold the large nut way in, towards the regulator body. SF350-19 © MMXXIV Kirby Morgan Dive Systems, Inc. All rights reserved. Document # 240701032...
- Page 20 7. Put the diaphragm and cover in place, depress- ing the cover tightly to simulate a properly tight- ened clamp. Test the response of the purge button. SF350-20 © MMXXIV Kirby Morgan Dive Systems, Inc. All rights reserved. Document # 240701032...
- Page 21 3. Pressurize the regulator to between 120-150 p.s.i.g. (8.5-10 bar). 4. If the regulator is not free flowing, slowly back out on the adjustment knob until a slight free SF350-21 © MMXXIV Kirby Morgan Dive Systems, Inc. All rights reserved. Document # 240701032...
- Page 22 If the lock nut is loosened more than ⅛ turn the lever will not have enough travel for proper flow rates. Press the cover over the diaphragm. SF350-22 © MMXXIV Kirby Morgan Dive Systems, Inc. All rights reserved. Document # 240701032...
- Page 23 If the exhaust valve is high and not sealing, lightly press in on the metal cross, bending the metal in SF350-23 © MMXXIV Kirby Morgan Dive Systems, Inc. All rights reserved. Document # 240701032...
Need help?
Do you have a question about the SuperFlow 350 and is the answer not in the manual?
Questions and answers