Advertisement
Quick Links
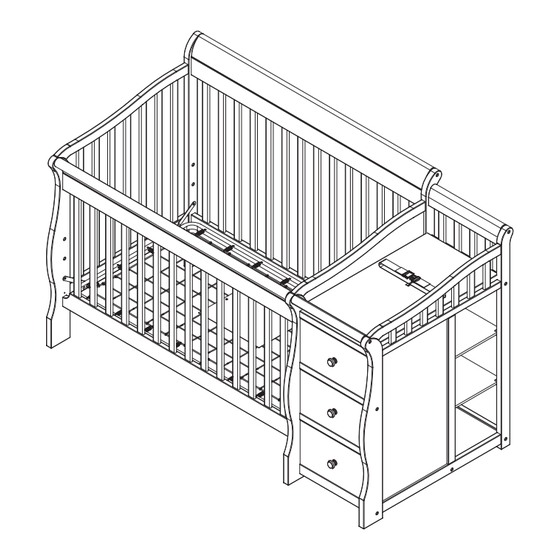
Crib N Changer
Lit de bébé et Table à Langer
Cuna y cambiador
Consumer Care:
www.DeltaChildren.com
Delta Children's Products
114 West 26th Street
New York, NY 10001
Tele.212-645-9033
This product is not intended for institutional or commercial use.
Ce produit ne pas destine a un usage institutionnel ou commercial.
Este producto no esta hecho para uso institucional o comercial.
When contacting Delta Consumer Care please reference the above information. Before contacting Delta Consumer Care
please ensure that the information above matches the information found on the label on the product, please reference the
information found on the product when contacting Delta Consumer Care.
Lorsque vous contactez le Service client de Delta, veuillez faire référence aux informations ci-dessus. Avant de contacter le
Service client de Delta, veuillez vous assurer que les informations ci-dessus correspondent aux informations indiquées sur
l'étiquette qui se trouve sur le produit; veuillez faire référence aux informations indiquées sur le produit lorsque vous contactez
le Service client de Delta.
Al contactar al servicio al cliente de Delta, entregue la información anteriormente mencionada. Antes de contactar al servicio
de atención al cliente de Delta, asegúrese de que la información anteriormente mencionada calza con la que aparece en la
etiqueta en el producto; al contactar al centro de atención al cliente de Delta, mencione la información que aparece en el
producto.
To register your product for important safety alerts and updates to your product please visit www.DeltaChildren.com and click
on Product Registration.
Pour enregistrer votre produit afin de recevoir des alertes de sécurité et des mises à jour importantes relatives à votre
produit, veuillez visiter le site www.DeltaChildren.com, puis cliquer sur Enregistrement de produits.
Para registrar su producto a fin de recibir importantes alertas y actualizaciones de seguridad, visite www.DeltaChildren.com y
haga clic en Registro de Productos (Product Registration).
AUGUST 11, 2017, 27895, R0
Conforms to
ASTM F1169 Full Size
Crib & F1821 & F2388
Safety Standards
Need Help?
Please visit www.DeltaChildren.com/assembly-videos to
watch our easy and effective assembly videos
Besoin d'aide?
Veuillez visiter www.DeltaChildren.com/assembly-videos
pour regarder nos vidéos faciles et efficaces concernant
l'assemblage
Necesita ayuda?
Por favor, visite www.DeltaChildren.com/assembly-videos
para que vea nuestros videos que muestran como ensamblar
de una manera efectiva y fácil.
Read all instructions before assembly and use.
KEEP INSTRUCTIONS FOR FUTURE USE.
ADULT ASSEMBLY REQUIRED
Due to the presence of small parts during assembly, keep out of
reach of children until assembly is complete.
Lisez toutes les instructions avant l'assemblage et
l'utilisation. CONSERVEZ LES INSTRUCTIONS
POUR UN USAGE ULTERIEUR.
L'ASSEMBLAGE DOIT ETRE FAIT
PAR UN ADULTE
A cause de la presence de petites pieces, pendant l'assemblage gardez
hors de portee des enfants jusqu'a ce que celui-ci soit termine.
Lea todas las instrucciones antes de ensamblar
y usar. MANTENGA LAS INSTRUCCIONES
PARA SU USO FUTURO.
DEBE SER ENSAMBLADO POR
UN ADULTO
Debido a la presencia de piezas pequeñas durante el ensamblaje,
mantenga fuera del alcance de los niños hasta que complete el
ensamblaje.
Style #:
Lot:
Date:
___________
___________
___________
©2017 DELTA ENTERPRISE CORP.
A
REV
Advertisement

Related Manuals for Delta Childrens Products Crib N Changer


Summary of Contents for Delta Childrens Products Crib N Changer
- Page 1 ASTM F1169 Full Size Lisez toutes les instructions avant l’assemblage et Crib & F1821 & F2388 Safety Standards l’utilisation. CONSERVEZ LES INSTRUCTIONS Crib N Changer POUR UN USAGE ULTERIEUR. Lit de bébé et Table à Langer L’ASSEMBLAGE DOIT ETRE FAIT Cuna y cambiador PAR UN ADULTE A cause de la presence de petites pieces, pendant l’assemblage gardez...
- Page 2 SAFE SLEEP TIPS The safest place for your baby to sleep is in a JPMA Certified crib. Adult beds are not safe for babies: NEVER co-sleep Pillows and Blankets have caused infants to suffocate, NEVER use in a crib. Read all warnings and follow all instructions. Missing or broken parts, any questions? CALL Delta Children Consumer Care NEVER place the crib near a window or any...
- Page 3 CONSEILS POUR FAIRE DORMIR VOTRE BÉBÉ EN TOUTE SÉCURITÉ L’endroit le plus sûr pour faire dormir votre bébé, c’est dans un Lit de Bébé approuvé par JPMA. Les lits d’adultes ne sont pas un lieu sûr pour les bébés: NE dormez JAMAIS ensemble. Des oreillers et couvertures ont parfois été...
- Page 4 CONSEJOS PA UN SUEÑO SEGURO El lugar más seguro para que su bebé duerma es una cuna con certificación JPMA. Las camas para adultos no son seguras para los bebés: JAMÁS duerma con ellos. Las almohadas y frazadas han provocado asfixia en menores;...
- Page 5 FURNITURE SAFETY TIPS Serious or fatal crushing injuries can occur from furniture tip-over. DO NOT set TV’s or other heavy objects on the top of bedroom or nursery furniture. ALWAYS use provided tipover restraints. NEVER allow children to climb or hang on drawers, doors,or shelves.
- Page 6 CONSEILS DE SÉCURITÉ RELATIFS AUX MEUBLES. Le renversement du meuble peut entraîner des blessures graves ou mortelles. NE déposez PAS de postes de télévision ou d’autres objets lourds sur des meubles de chambre à coucher ou de chambre d’enfants. Utilisez TOUJOURS les dispositifs de non-renversement fournis.
- Page 7 CONSEJOS DE SEGURIDAD SOBRE MUEBLES. Pueden producirse lesiones graves o mortales por aplastamiento al volcarse muebles NO posicione televisores u otros objetos pesados sobre la cama o muebles para infantes. Utilice SIEMPRE las retenciones contra volcamiento incluidas NUNCA permita que los niños trepen sobre cajones, puertas o baldas de estantería ni que se cuelguen de ellos.
- Page 8 PARTS: MAKE SURE THAT ALL PRE-ASSEMBLED PARTS ARE TIGHT PIÈCES : VÉRIFIEZ QUE TOUTES LES PIÈCES PRÉ-MONTÉES SONT BIEN SERRÉES. PIEZAS: ASEGÚRESE DE QUE TODAS LAS PIEZAS PRE-ENSAMBLADAS ESTÁN BIEN APRETADAS. C. Changer Front Top Rail x 1 Traverse supérieure avant de la table à langer x 1 Barandilla frontal superior del cambiador x 1 27881 D.
- Page 9 PARTS: MAKE SURE THAT ALL PRE-ASSEMBLED PARTS ARE TIGHT PIÈCES : VÉRIFIEZ QUE TOUTES LES PIÈCES PRÉ-MONTÉES SONT BIEN SERRÉES. PIEZAS: ASEGÚRESE DE QUE TODAS LAS PIEZAS PRE-ENSAMBLADAS ESTÁN BIEN APRETADAS. H. Changer Surface Rail x 1 NN. Changer Pad x 1 Barrière de la surface de la table à...
- Page 10 PARTS: MAKE SURE THAT ALL PRE-ASSEMBLED PARTS ARE TIGHT PIÈCES : VÉRIFIEZ QUE TOUTES LES PIÈCES PRÉ-MONTÉES SONT BIEN SERRÉES. PIEZAS: ASEGÚRESE DE QUE TODAS LAS PIEZAS PRE-ENSAMBLADAS ESTÁN BIEN APRETADAS. X. Crib Back Top Rail x 1 U. Crib Front Top Rail x 1 Barrière supérieure arrière du lit de bébé...
- Page 11 Parts: Hardware kits part#27894 Pièces: L'ensemble de quincaillerie - pièce n°27894 WW. Shelf Clip x 8 Piezas: El kit de herramientas - Pieza #27894 Support d’Tablette x 8 Clavija del estante x 8 5680 FF. M6 x 80 mm Bolt x 2 Boulon M6 x 80 mm x 2 Perno M6 x 80mm x 2 5473...
- Page 12 Section 1: Changing Table Assembly, Step 1 Section 1 : Montage de la table à langer, Étape 1 Sección 1: Armado del cambiador, Paso 1 Parts and tools required to complete step Pièces et outils nécessaires au montage Piezas y herramientas necesarias para completar este paso D.
- Page 13 Attach (1) Changer Back Top Rail (Part D), (1) Changer Bottom Back Rail (Part E), (1) Changer Bottom Front Rail (Part F), (1) Changer Bottom Center Rail (Part G) and (1) Changer Front Upper Middle Rail (Part J) to the Common Side (Part A) using (3) Φ4x30 mm Metal Pins (Part LL), (1) M6 x 35 mm Bolt (Part JJ), (5) M6 x 40 mm Bolts (Part HH) and (1) Crescent Washer (Part UU).
- Page 14 Section 1: Changing Table Assembly, Step 2 Section 1 : Montage de la table à langer, Étape 2 Sección 1: Armado del cambiador, Paso 2 Parts and tools required to complete step Pièces et outils nécessaires au montage Piezas y herramientas necesarias para completar este paso H.
- Page 15 Apoye el Lado en común (Pieza A) sobre su lado y fije (1) Barandilla frontal superior del cambiador (Pieza C) al lado en común (Pieza A) utilizando (1) pasador metálico Φ4x30 mm (Pieza LL), (1) pernos M6x40 mm (Pieza HH) y (1) Arandela de media luna (Pieza UU). Apriete todos los pernos utilizando la Llave Allen M4.
- Page 16 Section 1: Changing Table Assembly, Step 3 Section 1 : Montage de la table à langer, Étape 3 Sección 1: Armado del cambiador, Paso 3 Parts and tools required to complete step Pièces et outils nécessaires au montage Piezas y herramientas necesarias para completar este paso N.
- Page 17 BOTTOM INFÉRIEURE INFERIOR...
- Page 18 Section 1: Changing Table Assembly, Step 4 Section 1 : Montage de la table à langer, Étape 4 Sección 1: Armado del cambiador, Paso 4 Parts and tools required to complete step Pièces et outils nécessaires au montage Piezas y herramientas necesarias para completar este paso JJ.
- Page 20 Section 2: Crib Assembly, Step 1 Section 2 : Montage du lit de bébé, Étape 1 Sección 2: Montaje de la cuna, Paso 1 Parts and tools required to complete step Pièces et outils nécessaires au montage Piezas y herramientas necesarias para completar este paso M4 Allen Wrench (included) Clé...
- Page 22 Section 2: Crib Assembly, Step 2 Section 2 : Montage du lit de bébé, Étape 2 Sección 2: Montaje de la cuna, Paso 2 Parts and tools required to complete step Pièces et outils nécessaires au montage Piezas y herramientas necesarias para completar este paso V.
- Page 23 Both ends Deux extrémités Ambos extremos...
- Page 24 Section 2: Crib Assembly, Step 3 Section 2 : Montage du lit de bébé, Étape 3 Sección 2: Montaje de la cuna, Paso 3 Parts and tools required to complete step Pièces et outils nécessaires au montage Piezas y herramientas necesarias para completar este paso From Section 2: Step 2 À...
- Page 26 Section 2: Crib Assembly, Step 4 Section 2 : Montage du lit de bébé, Étape 4 Sección 2: Montaje de la cuna, Paso 4 Parts and tools required to complete step Pièces et outils nécessaires au montage Piezas y herramientas necesarias para completar este paso M4 Allen Wrench (included) Clé...
- Page 27 WARNING: Fall Hazard: When child is able to pull to a standing position, set mattress to lowest position and remove bumper pads, large toys and other objects. AVERTISSEMENT: Danger de chute: lorsque l'enfant est capable de se tenir debout, placer le matelas en position la plus basse et retirer les tours de lit, les gros jouets et les autres objets qui pourraient l'aider à...
- Page 28 Section 2: Crib Assembly, Step 5 Section 2 : Montage du lit de bébé, Étape 5 Sección 2: Montaje de la cuna, Paso 5 Parts and tools required to complete step Pièces et outils nécessaires au montage Piezas y herramientas necesarias para completar este paso M4 Allen Wrench (included) Clé...
- Page 30 Section 2: Crib Assembly, Step 6 Section 2 : Montage du lit de bébé, Étape 6 Sección 2: Montaje de la cuna, Paso 6 Parts and tools required to complete step Pièces et outils nécessaires au montage Piezas y herramientas necesarias para completar este paso M4 Allen Wrench (included) Clé...
- Page 31 CHECK TO ENSURE THAT ALL BOLTS ARE TIGHT. VÉRIFIEZ QUE TOUS LES BOULONS SONT BIEN SERRÉS. VERIFIQUE QUE TODOS LOS PERNOS ESTÉN APRETADOS.
- Page 32 Section 3: Drawer Assembly, Step 1 Section 3 : Montage des tiroirs, Étape 1 Sección 3: Armado de la gaveta, Paso 1 Parts and tools required to complete step Pièces et outils nécessaires au montage Piezas y herramientas necesarias para completar este paso QQ.
- Page 33 Section 3: Drawer Assembly, Step 2 Section 3 : Montage des tiroirs, Étape 2 Sección 3: Armado de la gaveta, Paso 2 Parts and tools required to complete step Pièces et outils nécessaires au montage Piezas y herramientas necesarias para completar este paso EE.
- Page 34 Section 3: Drawer Assembly, Step 3 Section 3 : Montage des tiroirs, Étape 3 Sección 3: Armado de la gaveta, Paso 3 Parts and tools required to complete step Pièces et outils nécessaires au montage Piezas y herramientas necesarias para completar este paso SS.
- Page 35 Section 3: Drawer Assembly, Step 4 Section 3 : Montage des tiroirs, Étape 4 Sección 3: Armado de la gaveta, Paso 4 Parts and tools required to complete step Pièces et outils nécessaires au montage Piezas y herramientas necesarias para completar este paso Phillips Screwdriver (Not Provided) PP1.Knob Bolt x 3 PP2.
- Page 36 Section 3: Drawer Assembly, Step 5 Section 3 : Montage des tiroirs, Étape 5 Sección 3: Armado de la gaveta, Paso 5 Parts and tools required to complete step Pièces et outils nécessaires au montage Piezas y herramientas necesarias para completar este paso From Section 3: Step 4 À...
- Page 38 Section 4: Changer Middle Shelf Assembly, Step 1 Section 4: Montage d’Tablette centrale de la table à langer, Étape 1 Sección 4: Montaje del Estante intermedia del Cambiador, Paso 1 Parts and tools required to complete step Pièces et outils nécessaires au montage Piezas y herramientas necesarias para completar este paso Phillips Screwdriver (Not Provided) Tournevis’Phillips’(Non Prévu)
- Page 40 Section 5: Changing Pad attachment and use, Step 1 Section 5: Fixation et utilisation du matelas à langer, Étape 1 Sección 5: Fijación y uso Almohadilla para mudar, Paso 1 Parts and tools required to complete step Pièces et outils nécessaires au montage Piezas y herramientas necesarias para completar este paso M4 Allen Wrench (included) Clé...
- Page 41 TO FASTEN STRAP - PUSH BUCKLE SIDE TOGETHER BE To release, press both tabs and pull apart. SURE BUCKLE IS FULLY FASTENED TO SECURE CHILD Pour ouvrir, appuyer sur les deux languettes et retirez SAFELY. les deux boucles. Pour boucler la sangle – insérez les boucles l’une dans l’autre. Para soltar, presione ambas lengüetas y jale.
- Page 42 ASTM F1169 Full Size Lisez toutes les instructions avant l’assemblage et Crib & F1821 & F2388 Safety Standards Crib N Changer l’utilisation. CONSERVEZ LES INSTRUCTIONS POUR UN USAGE ULTERIEUR. Lit de bébé et Table à Langer L’ASSEMBLAGE DOIT ETRE FAIT...
- Page 43 Section 6: How to adjust the Mattress Support Section 6 : Méthode d’ajustement du support du matelas Sección 6: Cómo ajustar el Soporte del Colchón Parts and tools required to complete step Pièces et outils nécessaires au montage Piezas y herramientas necesarias para completar este paso M4 Allen Wrench (Supplied) clé...
- Page 44 CAUTION: ANY MATTRESS USED IN THIS CRIB SHALL BE AT LEAST 27 1/4 BY 51 5/8 IN. WITH A THICKNESS NOT EXCEEDING 6 IN. WARNING: *Infants can suffocate on soft bedding. Never add a pillow or comforter. Never place additional padding under an infant.
- Page 45 ATTENTION: LE MATELAS UTILISÉ AVEC CE LIT D’ENFANT DOIT AVOIR UNE TAILLE MINIMALE DE 69CM PAR 131 CM, ET SON ÉPAISSEUR NE DOIT PAS DÉPASSER 15 CM AVERTISSEMENT: *Les nourrissons peuvent suffoquer sur une literie molle. Ne jamais utiliser d’oreiller ou de couette. Ne jamais placer de rembourrage supplémentaire sous un bébé.
- Page 46 ATENCIÓN: CUALQUIER COLCHÓN QUE SE UTILICE EN ESTA CUNA DEBE TENER AL MENOS 69CM POR 131CM CON UN ESPESOR QUE NO EXCEDA LAS 15CM. ADVERTENCIA: *Niños pequeños y bebés pueden ahogarse en una cama blanda. Nunca añada una almohada ni un edredón. Nunca coloque almohadillado adicional debajo de un bebé.
- Page 47 TODDLER BED WARNING INFANTS HAVE DIED IN TODDLER BEDS FROM ENTRAPMENT. Openings in and between toddler bed parts can entrap head and neck of a small child. NEVER use toddler bed with children younger than 15 months. ALWAYS follow assembly instructions. The maximum user weight is 50lbs (22.7kg) WARNING STRANGULATION HAZARD...
- Page 48 AVERTISSEMENT DES ENFANTS SONT MORTS DANS DES LITS POUR ENFANTS POUR CAUSE DE PIÉGEAGE. Un petit enfant peut coincer sa tête et son cou dans les ouvertures situées dans et entre les parties du lit pour enfant. N’utilisez JAMAIS le lit pour enfant pour des enfants de moins de 15 mois. Suivez TOUJOURS les instructions de montage.
- Page 49 ADVERTENCIA HAN FALLECIDO BEBÉS Y NIÑOS EN CAMAS DE NIÑOS PEQUEÑOS AL QUE- DARSE ATRAPADOS. La cabeza y el cuello de los niños pequeños pueden quedar atrapados en aberturas de alguna parte de la cama de niños o entre componentes de la misma. NUNCA utilice la cama de niños para niños de menos de 15 meses.
- Page 50 WARNING: Changing Table WARNING FALL HAZARD - to prevent death or serious injury, always keep child within arm’s reach. Read all instructions before use of the changing table. KEEP THESE INSTRUCTIONS IN A SAFE PLACE FOR FUTURE USE. Inspect the changing table periodically. Do not use the changing table if it is damaged or broken.
- Page 51 Step 1 Section 7: Toddler Bed Conversion, Étape 1 Section 7 : Conversion en lit d’enfant, Paso 1 Sección 7: Conversión en cama de bebé, Parts and tools required to complete step Pièces et outils nécessaires au montage Piezas y herramientas necesarias para completar este paso M4 Allen Wrench (included) Clé...
- Page 52 Step 2 Section 7: Toddler Bed Conversion, Étape 2 Section 7 : Conversion en lit d’enfant, Paso 2 Sección 7: Conversión en cama de bebé, Parts and tools required to complete step Pièces et outils nécessaires au montage Piezas y herramientas necesarias para completar este paso From Section 7: Step 1 À...
- Page 53 Both ends Deux extrémités Ambos extremos...
- Page 54 Step 3 Section 7: Toddler Bed Conversion, Étape 3 Section 7 : Conversion en lit d’enfant, Paso 3 Sección 7: Conversión en cama de bebé, WARNING: SEE PAGE 47 FOR TODDLER BED WARNINGS AVERTISSEMENT: VOIR PAGE 48 POUR AVERTISSEMENT LIT JEUNE ENFANT ADVERTENCIA: VEA LA PÁGINA 49 PARA CONOCER LAS...
- Page 55 A toddler bed guardrail is available for this crib. Please see your crib retailer, visit www.DeltaChildren.com or contact Delta Consumer Care for more information. This crib uses Style # 0096 Guardrail. Une barrière de sécurité pour lit d'appoint existe pour cette couchette. Veuillez consulter votre détaillant ou le site web www.DeltaChildren.com ou communiquer avec le service à...
- Page 56 Step 1 Section 8: Full Size Bed Conversion, Étape 1 Section 8 : Conversion en Grand lit, Paso 1 Sección 8: Conversión en Cama tamaño normal, Parts and tools required to complete step Pièces et outils nécessaires au montage Piezas y herramientas necesarias para completar este paso M4 Allen Wrench (included) Clé...
- Page 58 Step 2 Section 8: Full Size Bed Conversion, Étape 2 Section 8 : Conversion en Grand lit, Paso 2 Sección 8: Conversión en Cama tamaño normal, Parts and tools required to complete step Pièces et outils nécessaires au montage Piezas y herramientas necesarias para completar este paso KK.
-
Page 60: Warranty
Consumer Care: www.DeltaChildren.com Delta Children’s Products 114 West 26th Street New York, NY 10001 Tele.212-645-9033 Warranty: This Delta product is warranted to be free from defects for a period of 1 year from the date of purchase under normal use. This warranty extends only to the original retail purchaser and is valid only when supplied with proof of purchase, or if received as a gift, when the registration is on file with Delta.
Need help?
Do you have a question about the Crib N Changer and is the answer not in the manual?
Questions and answers