Advertisement
Quick Links
Read all instructions before assembly
and use. KEEP INSTRUCTIONS
FOR FUTURE USE.
ADULT ASSEMBLY
REQUIRED
Due to the presence of small parts during assembly,
keep out of reach of children until assembly is complete.
Simmons Juvenile Furniture
A Division Of Delta Children's Products Corp.
114 West 26th Street
New York, NY 10001
1-800-218-2741
Assembly Instructions for your Crib 'N' More
Directives de Montage pour votre Lit de Bébé Crib 'N' More
Instrucciones de Ensamble de su Cuna Crib 'N' More
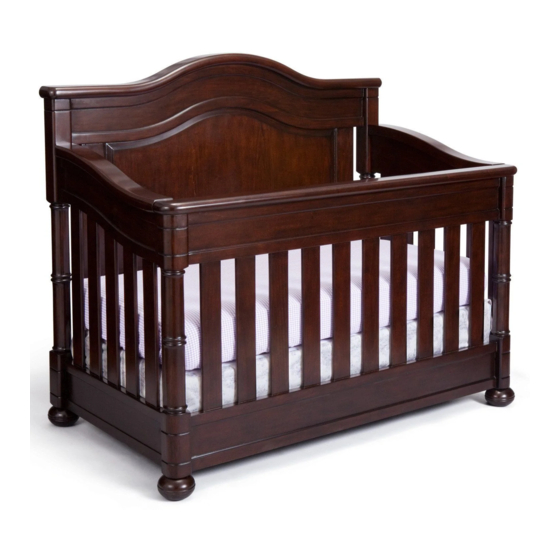
Note: The style of your item may vary from what is pictured in
the instruction sheet.
Remarque : Le modèle de votre article peut être différent de
celui qui est illustré dans le feuillet d'instructions.
Note: El estilo de su artículo puede variar de la ilustración en la
hoja de instrucciones.
Lisez toutes les instructions avant l'assemblage et
l'utilisation. CONSERVEZ LES INSTRUCTIONS
POUR RÉFÉRENCE ULTÉRIEURE.
L'ASSEMBLAGE DOIT ETRE FAIT
PAR UN ADULTE
A cause de la présence de petites piéces, pendant l'assemblage gardez
hors de portée des enfants jusqu'à ce que celui-ci soit terminé.
Distributed in Canada by
Distribué au Canada près
Delta Children's Products
Care of/Soins de:
501 Franklin Boulevard
Cambridge, Ontario N1R8G9
Canada
212-645-9033
When contacting Consumer Care please reference the below information. Before contacting Consumer Care please ensure that the
information below matches the information found on the label on the Back Rail, please reference the information found on the
product when contacting Consumer Care.
Lorsque vous contactez le Service client, veuillez faire référence aux informations ci-dessus. Avant de contacter le Service client,
veuillez vous assurer que les informations ci-dessous correspondent aux informations indiquées sur l'étiquette qui se trouve sur
Panneau Arrière; veuillez faire référence aux informations indiquées sur le produit lorsque vous contactez le Service client.
Al contactar al servicio al cliente, entregue la información anteriormente mencionada. Antes de contactar al servicio de atención al
cliente, asegúrese de que la información abajo calza con la que aparece en la etiqueta en Barandilla Posterior; al contactar al
centro de atención al cliente, mencione la información que aparece en el producto.
To register your product for important safety alerts and updates to your product please visit
www.SimmonsRegistration.com
Pour enregistrer votre produit afin de recevoir des alertes de sécurité et des mises à jour importantes
relatives à votre produit, veuillez visiter le site www.SimmonsRegistration.com
Para registrar su producto a fin de recibir importantes alertas y actualizaciones de seguridad, visite
www.SimmonsRegistration.com
©2015 Simmons Juvenile Furniture, A Division of Delta Children's Products Corp.
Lea todas las instrucciones antes de
ensamblar y usar. MANTENGA LAS
INSTRUCCIONES PARA SU USO FUTURO.
POR UN ADULTO
Debido a la presencia de piezas pequeñas durante el ensamblaje,
mantenga fuera del alcance de los niños hasta que complete el
ensamblaje.
Need Help?
Please visit www.SimmonsKids.com/assembly-videos to watch our
easy and effective assembly videos
Besoin d'aide?
Veuillez visiter www.SimmonsKids.com/assembly-videos pour
regarder nos vidéos faciles et efficaces concernant l'assemblage
Necesita ayuda?
Por favor, visite www.SimmonsKids.com/assembly-videos para que
vea nuestros videos que muestran como ensamblar de una manera
efectiva y fácil.
Style #:
___________
Lot:
___________
Date:
___________
DEBE SER ENSAMBLADO
A
Conforms to
ASTM F1169 & F1821
Safety Standards
REV
305180-23853-R1, July 30, 2015
Advertisement

Related Manuals for Delta Childrens Products Simmons Crib 'N' More


Summary of Contents for Delta Childrens Products Simmons Crib 'N' More
- Page 1 Read all instructions before assembly Lisez toutes les instructions avant l’assemblage et Lea todas las instrucciones antes de and use. KEEP INSTRUCTIONS l’utilisation. CONSERVEZ LES INSTRUCTIONS ensamblar y usar. MANTENGA LAS FOR FUTURE USE. POUR RÉFÉRENCE ULTÉRIEURE. INSTRUCCIONES PARA SU USO FUTURO. ADULT ASSEMBLY L’ASSEMBLAGE DOIT ETRE FAIT DEBE SER ENSAMBLADO...
- Page 8 Note: during the assembly process whenever using screws or bolts, check each by placing the screw/bolt on the diagram of the item which is drawn actual size and design. Be sure to use the proper size and shape specified in the instructions. Remarque: au cours du procédé...
- Page 9 THIS PAGE LISTS THE PARTS THAT ARE REQUIRED TO ASSEMBLE YOUR CRIB. PLEASE CONTACT CUSTOMER SERVICE AT 1-800-218-2741 BEFORE STARTING ASSEMBLY IF ANY PARTS ARE MISSING OR DAMAGED. CETTE PAGE ÉNUMÈRE LES PIÈCES QUI SONT EXIGÉES POUR ASSEMBLER VOTRE HUCHE. SERVICE À LA CLIENTÈLE DE CONTACT À 1-800-218-2741 AVANT LA MISE EN MARCHE DE L'ASSEMBLÉE SI DES PIÈCES SONT ABSENTES OU ENDOMMAGÉES ESTA PÁGINA ENUMERA LAS PIEZAS QUE SE REQUIEREN PARA MONTAR SU PESEBRE.
- Page 10 Crib Hardware Hardware kit is Part #23854-988 for color 226. Matériel de Lit de Bébé L'ensemble de quincaillerie correspond à la pièce n°23854-988 pour la couleur 226. Pernos de la Cuna El kit de herramientas es la Pieza #23854-988 para el color 226 Note: Fasteners are shown full size Remarque: Les dispositifs de fixation sont Montrés en taille réelle...
- Page 11 STEP #1 STEP #1 ÉTAPE N°1 Insert (2) Bun Feet (Part K) into threaded PASO #1 inserts on Back Rail (Part B) and Hand Tighten. DO NOT use tools. K. - (2) Bun Foot Pied en oignon Pata trasera B. - (1) Back Rail ÉTAPE No1 (1) Montant arrière (1) Riel Trasero...
- Page 12 STEP #2 STEP #2 M4 Hex Wrench (Provided) Loosely attach the Front Feet (Parts G and J) M4 Clé À Six Pans (Fournie) ÉTAPE N°2 M4 Llave Hexagonal (se Incluye) to the Front Rail (Part A) using (2) 3mm x PASO #2 32mm Metal Pins (Part MM) and (2) M6 x 85 mm Bolts (Part PP) LOOSELY tighten with M4...
- Page 13 STEP #3 STEP #3 The following tools and parts are required: Attach (2) Stabilizer Bars (Part E) to Left Crib Side (Part Outils et pièces nécessaires: M4 Hex Wrench (Provided) Se necesitan las siguientes herramientas y piezas: M4 Clé À Six Pans (Fournie) ÉTAPE N°3 1) Insert Dowels (Part KK) into the Ends of the Stabilizer M4 Llave Hexagonal (se Incluye)
- Page 14 STEP #4 Note: Fasteners are shown full size STEP #4 The following tools and parts are required: Remarque: Les dispositifs de fixation sont 1) Attach the Mattress Support (Part L) to the Assembly from Step 3. ÉTAPE N°4 Outils et pièces nécessaires: Montrés en taille réelle Ensure the Mattress Support Adjustment arms are on the outside of the Se necesitan las siguientes herramientas y piezas:...
- Page 15 STEP # 5 STEP #5 ÉTAPE N°5 Attach the Back Rail Assembly from Step 1 to From Step 4 PASO #5 the Assembly from Step 4 using (6) M6 x 90mm de l'étape 4 del paso 4 Bolts (Part FF) and (2) 8mm Dowels (Part KK). Note: Fasteners are shown Tighten with M4 Hex Wrench.
- Page 16 The following tools and parts are required: Note: Fasteners are shown full size STEP #6 Outils et pièces nécessaires: Remarque: Les dispositifs de Se necesitan las siguientes herramientas y piezas: fixation sont Montrés en taille réelle ÉTAPE N°6 Nota: Los pernos se muestran en tamaño real PASO #6 M4 Hex Wrench (Provided)
- Page 21 Day Bed STEP #1 DAY BED ASSEMBLY OPTION INSTRUCTIONS 1. Remove Front Rail Assembly from Crib Step 2 by removing the (6) M6 x 35mm LIT DU JOUR OPTIONS DES INSTRUCTIONS DU MONTAGE Bolts (Part AA). LAS INSTRUCCIONES PARA LA ASSEMBLACIÓN DE LA CAMA DÍA 2.
- Page 22 Day Bed STEP #2 STEP #2 The following tools and parts are required: Outils et pièces nécessaires: 1. Determine if the optional Toddler Bed M4 Hex Wrench (Provided) ÉTAPE N°2 Guard Rail (purchased separately, see Se necesitan las siguientes herramientas y piezas: M4 Clé...
- Page 23 TODDLER BED OPTION NOTE: THIS CRIB N’ MORE CAN CONVERT INTO A TODDLER BED WITH OPTION LIT D’ENFANT THE PURCHASE OF SIMMONS ITEM NUMBER #180124 TODDLER GUARD RAIL - SEE RETAIL STORE FOR MORE INFORMATION. OPCIÓN DE LA CAMA DEL NIÑO NOTA : CE LIT DE BÉBÉ...
- Page 24 Full Size Bed The following tools and parts are required: Note: Fasteners are shown full size Remarque: Les dispositifs de fixation sont Grand Lit Outils et pièces nécessaires: Montrés en taille réelle Cama Tamaño Normal Se necesitan las siguientes herramientas y piezas: Nota: Los pernos se muestran en tamaño real M4 Hex Wrench (Provided) M4 Clé...
Need help?
Do you have a question about the Simmons Crib 'N' More and is the answer not in the manual?
Questions and answers