Denon AVR-391 Owner's Manual
Owners manual - english
Hide thumbs
Also See for AVR-391:
- Manual de usuario (56 pages) ,
- Product sheet (2 pages) ,
- Service manual (111 pages)
Table of Contents
Advertisement
AV SURROUND RECEIVER
AVR-391
Owner's Manual
Manuel de l'Utilisateur
Manual del usuario
Manual do Proprietário
Version simplifi ée
Simple
Versión sencilla
version
Versão simples
v
3
Version basique
Basic
Versión básica
version
Versão básica
v
11
Version avancée
Advanced
Versión avanzada
version
Versão avançada
v
24
"Part names and functions"
Information
(vpage 39)
Informations
v
38
"Nomenclature et fonctions"
(vpage 39)
Información
"Nombres y funciones de las
piezas" (vpágina 39)
Informações
"Designação das peças e funções"
(vpágina 39)
Advertisement
Table of Contents

Related Manuals for Denon AVR-391


Summary of Contents for Denon AVR-391
-
Page 1: Manual Del Usuario
Versão avançada Owner’s Manual Manuel de l’Utilisateur Manual del usuario Manual do Proprietário “Part names and functions” Information (vpage 39) Informations “Nomenclature et fonctions“ (vpage 39) Información “Nombres y funciones de las piezas“ (vpágina 39) Informações “Designação das peças e funções“ (vpágina 39) -
Page 2: Important Safety Instructions
Class B digital device, pursuant to Part 15 of the FCC Rules. These electric shock to persons. third prong are provided for your safety. If the provided plug does not fi t into limits are designed to provide reasonable protection against harmful your outlet, consult an electrician for replacement of the obsolete outlet. -
Page 3: Cautions On Installation
PORTUGUÊS ENGLISH FRANCAIS ESPAÑOL n CAUTIONS ON INSTALLATION NOTES ON USE / OBSERVATIONS RELATIVES A L’UTILISATION / NOTAS SOBRE EL USO / PRÉCAUTIONS D’INSTALLATION NOTAS SOBRE A UTILIZAÇÃO EMPLAZAMIENTO DE LA INSTALACIÓN PRECAUÇÕES DE INSTALAÇÃO WARNINGS AVERTISSEMENTS ADVERTENCIAS AVISOS • Avoid high temperatures. -
Page 4: Table Of Contents
ENGLISH Getting started Thank you for purchasing this DENON product. To ensure proper operation, please read these owner’s manual carefully before using the product. After reading them, be sure to keep them for future reference. Contents Accessories Advanced version ·······························································24 Getting started ··············································································1... -
Page 5: Features
This unit can output 3D video signals input from a Blu-ray Disc If this happens, let the unit sit for an hour or two with the power player to a TV that supports a 3D system. turned off and wait until there is little difference in temperature before using the unit. -
Page 6: Simple Version (Simple Setup Guide)
Standard settings have been made for the speaker as default. For optimum surround playback, adjustment of the distance of speakers and sound level of each channel, using the test tone, are required, depending on the environment for speakers to be used. - Page 7 2 – 3 ft / 60 – 90 cm GViewed from the sideH The “Simple version” describes the installation, connection and setup methods for 5.1-channel speakers. See page 25 for the installation and connection for speakers other than 5.1-channel speakers.
-
Page 8: Blu-Ray Disc Player And Tv
• Do not plug in the power cord until all connections have been completed. • Do not bundle power cords together with connection cables. Doing so can result in humming or noise. The “Simple version” describes the installation, connection and setup methods for 5.1-channel speakers. -
Page 9: Turn On Power
The menu is displayed on the display of this unit. Speaker Setup Power on Press ENTER Use ui to select the menu to be set or operated, and then press ENTER Use o p to select a detailed setting, and then press ENTER RETURN •... - Page 10 (Surround Back) back speakers. The menu is displayed on the display of this unit. detailed setting. • Large : Use a large speaker that can adequately play back low Items to be set are shown below. frequencies. Front Set the front speaker size.
- Page 11 ENTER then press ENTER to select distance. to select a detailed setting. FL / FR / C / SW / SL / SR / SBLz / SBRz Select the speaker. Bass Setting Distance Mode :• – zWhen the “Speaker Confi g.” – “S.B(Pre)”...
-
Page 12: Channel Level
Dolby Pro Logic g, Dolby Pro Logic gx, or DTS • If set to “LFE+Main”, this setting can be made FL / C / FR / SR / SBRz / SBLz / SL / SW / 120Hz / 150Hz / 200Hz / 250Hz : Set the NEO:6. - Page 13 Set the listening mode according to the During power standby, a minimal amount of power is consumed. To playback contents (cinema, music, etc.) totally cut off the power, remove the power cord from the power or according to your liking (vpage 21 outlet.
-
Page 14: Basic Version
Here, we explain the connections and basic operation methods for this unit. F Connections vpage 12 F Playback (Basic operation) vpage 17 F Selecting a listening mode (Surround mode) vpage 21 n Refer to the pages indicated below for information on connecting and playing back the various media and external devices. Connection Playback Audio and video vpage 12, 13... -
Page 15: Connections
• If a device that does not support HDCP is connected, video and audio are not output correctly. Read • When this unit is connected to other devices with HDMI cables, connect this unit and TV also with an the owner’s manual of your television or player for more information. -
Page 16: Connecting A Tv
DVI signals, allowing connection to a device equipped with a DVI-D connector. NOTE To listen to TV audio through this device, use the optical digital connection. • No sound is output when connected to a device equipped with a DVI-D connector. Make separate audio connections. NOTE •... -
Page 17: Connecting A Blu-Ray Disc Player / Dvd Player
NOTE NOTE If the DVD VIDEO input connector is to be used, be sure to connect the MONITOR output connector of the If the SAT/CBL VIDEO input connector is to be used, be sure to connect the MONITOR output connector unit and the VIDEO input connector of the TV, using a video cable. -
Page 18: Connecting A Digital Camcorder
• You can enjoy video and audio from a digital camcorder. If a portable player is connected via the PORTABLE IN jack of the unit, music from the portable player can • For instructions on HDMI connections, see “Connecting an HDMI-compatible device” (vpage 12). -
Page 19: Connecting A Control Dock For Ipod
• Connect the FM antenna or AM loop antenna supplied with the unit to enjoy listening to radio broadcasts. on an iPod. • After connecting the antenna and receiving a broadcast signal (vpage 20 “Listening to FM/AM broadcasts”), fi x the antenna with tape • For a control dock for iPod, use ASD-11R, ASD-3N, ASD-3W, ASD-51N and in a position where the noise level becomes minimal. -
Page 20: Playback (Basic Operation)
POWER ON TUNER DOCK SAT/CBL • The sound is reduced to the level set at “Mute Level” (vpage 33). MUTE • To cancel, press again. Muting can also be canceled by power to the unit. ) to be played GAME V.AUX... -
Page 21: Playing An Ipod
• Note that DENON will accept no responsibility whatsoever for any Playable problems arising with the data on an iPod when using this unit in • If “Browse mode” is selected in step 4, the following screen is Photo fi le fi... - Page 22 Remote mode Operation buttons Function MENU Amp menu This unit can play back on a TV screen photos and data stored on an uio p Cursor operation iPod equipped with a slide show or video function. ENTER Enter...
-
Page 23: Tuning In Radio Stations
Preset memory registration Default Settings Channel (1 – 8) • If the desired station cannot be tuned in with auto tuning, tune it in 87.5 / 89.1 / 98.1 / 107.9 / 90.1 / 90.1 / 90.1 / manually. A1 – A8 90.1 MHz... -
Page 24: Selecting A Listening Mode (Surround Mode)
Select this mode if no surround back speaker is to be used. • Some listening modes cannot be selected, depending on the audio format or number of channels of the input • “PLg Cinema”, “PLg Music”, “PLg Game” or signal. For details, see “Types of input signals, and corresponding surround modes” (vpage 46). - Page 25 The menu returns to normal display. MULTI CH IN 7.1 MULTI CH IN 7.1 z1 This is displayed when the input signal is “DTS-ES Matrix 6.1” and this unit’s “AFDM” n Surround playback of multi-channel sources (vpage 35) setting is “ON”.
-
Page 26: Multi Channel Stereo Playback
Stereo playback This mode is for enjoying stereo sound from all speakers. This is the mode for playing in stereo. The tone can be adjusted. • Sound is output from the front left and right speakers and subwoofer. Playing the source (vpage 17 •... -
Page 27: Advanced Version
ENGLISH Advanced version Advanced version Here, we explain functions and operations that let you make better use of this unit. F Speaker installation/connection (Other than 5.1-channel) vpage 25 F Playback (Advanced operation) vpage 27 F How to make detailed settings vpage 29... -
Page 28: Speaker Installation/Connection (Other Than 5.1-Channel)
ENGLISH Speaker installation/connection (Other than 5.1-channel) Here we describe the installation and connection methods for speakers other than 5.1-channel speakers. The speaker setting method is the same as “Simple version (Simple setup guide)” (vpage 3). For the installation, connection and setup methods for 5.1-channel speakers, see “Simple version (Simple setup guide)” (vpage 3). -
Page 29: Connect
• For the method of connecting the TV, see page 5. 7.1-channel (Surround back speaker) connection 2.1-channel/2-channel connection • A power amplifi er (sold separately) is required for this connection. Power amplifi er 2-channel connection For 2-channel playback, disconnect the subwoofers. -
Page 30: Playback (Advanced Operation)
Use o p to adjust the volume. (o : front, p: rear) • In the case of a subwoofer, pressing o when it is at “–12 dB” will change the setting to “OFF”. • If no button is operated for about 5 seconds, the display is returned to the normal display. - Page 31 QUICK SELECT 1 –40 dB QUICK SELECT 2 SAT/CBL –40 dB • If no button is operated for about 5 seconds, the display is returned QUICK SELECT 3 DOCK –40 dB to the normal display. After registering, the display is returned to the normal display.
-
Page 32: How To Make Detailed Settings
Set distance from listening position to speakers. Once these items are set, there is no need to Channel Level Set the volume of the test tone to be the same when it is output from each set them again unless the speaker layout or speaker. -
Page 33: Examples Of Front Display
The number of the current selected setting menu is displayed. w Use to move to the item you want to set. • – is displayed at the sides of item whose setting can be changed. Use to change to the desired setting. Front •Large–... -
Page 34: Input Setup
The menu returns to normal display. Items that can be set with the “Input Setup” procedure NOTE If all “Digital” assignment of the TV source are set to “None”, TV source cannot be selected with the input Input Assign (vpage 31) source selection. -
Page 35: Auto Preset
If an input source is “TU”, the setting is fi xed to “Digital”. process. RETURN MENU • If the input source is set to “BD”, “TV” or “Game”, it cannot be set to • Press to return to the setting menu without “Auto TUNER “Analog”. -
Page 36: Option Setup
• This function corrects the playback level of the selected input source’s audio input. Volume Control Default settings are underlined. • Make this setting if there are differences in the input volume levels between the different sources. Sets the volume setting. Setting details –12dB –... -
Page 37: Other Setup
Surround Parameter Default settings are underlined. OFF : Turns the display off. Adjust surround sound parameters. It may not be possible to set this item depending on the input signal. Buttons on the main unit can be used for operations. - Page 38 DOLBY D + PLgx C mode. optimum surround mode the “Mode” (vpage 8) is “LFE+Main”. • To play in the DOLBY DIGITAL EX mode, set “AFDM” to “OFF” and automatically. “Surround Parameter” – “SB CH OUT” to “MTRX ON”.
- Page 39 ENGLISH Adjusting the sound fi eld effects • If no button is operated for about 5 seconds, the display is returned to the normal display. After registering, the display is returned to the normal display. Tone NIGHT MODE RESTORER Default settings are underlined.
-
Page 40: Information
ENGLISH Information Information on the main unit’s various settings (Status) and on input signals (Audio Input Signal) is shown on the display. STATUS The information displayed changes each time you press The information is displayed for several seconds before the display returns to its original condition. -
Page 41: Information
ENGLISH Information Information Here, we list various information related to this unit. Please refer to this information as needed. F Part names and functions vpage 39 F Other information vpage 43 F Troubleshooting vpage 49 F Specifi cations vpage 51 F Index vpage 52... -
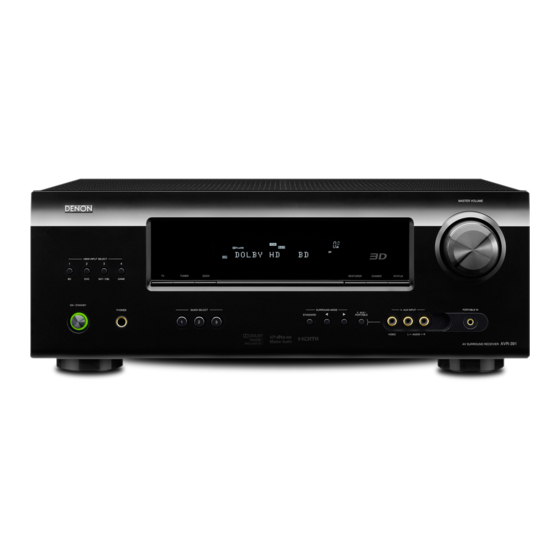
Page 42: Part Names And Functions
ENGLISH Part names and functions Front panel Display For buttons not explained here, see the page indicated in parentheses ( ). Q6 Q7 Q8 Decoder indicators Surround back indicator These light when the respective decoders are This lights when audio signals are being output operating. -
Page 43: Rear Panel
NOTE Speaker terminals ······························································· (5, 26) Digital audio connectors ··················································· (13, 14) Do not touch the inner pins of the connectors on the rear panel. Electrostatic discharge may cause permanent damage to the unit. DOCK CONTROL jack ······························································ (16) HDMI connectors ····································································· (12) S-VIDEO connector ·································································... -
Page 44: Remote Control Unit
ENGLISH Remote control unit For buttons not explained here, see the page indicated in parentheses ( ). Power buttons (POWER ON / OFF) ··································· (6, 10) QUICK SELECT buttons ·························································· (28) Input source select buttons ········································ (17, 18, 20) AUDIO DELAY button ····························································· (36) Sleep timer button (SLEEP) ····················································... -
Page 45: Inserting The Batteries
• Do not keep the battery in a place exposed to direct sunlight or in places with extremely high temperatures, such as near a heater. • If the battery fl uid should leak, carefully wipe the fl uid off the inside of the battery compartment and insert new batteries. -
Page 46: Other Information
& pending. DTS and the Symbol are registered trademarks, & DTS-HD, DTS-HD Master Audio, and the DTS logos are trademarks of DTS, Inc. Product includes software. © DTS, Inc. All Rights Reserved. HDMI, the HDMI Logo and High- Defi... -
Page 47: Surround
ENGLISH Surround This unit is equipped with a digital signal processing circuit that lets you play program sources in the surround mode to achieve the same sense of presence as in a movie theater. Surround modes and surround parameters This table shows the speakers that can be used in each surround mode and the surround parameters adjustable in each surround mode. - Page 48 Only when “Mode” is set to “LFE+Main” (vpage 8), sound is output from the subwoofer. This item can be selected when a Dolby Digital or DTS or DVD-Audio signal is played. This item can be set when the input signal is analog, PCM 48 kHz or 44.1 kHz.
- Page 49 Types of input signals, and corresponding surround modes This table shows the input signal that can be played in each surround mode. Check the audio signal of the input source then select the surround mode. Symbols in the table F This indicates the default surround mode.
- Page 50 MULTI CH IN + PLgx MUSIC F D (7.1) MULTI CH IN 7.1 DIRECT DIRECT DSP SIMULATION MULTI CH STEREO VIRTUAL STEREO STEREO z If “Speaker Confi g.“ – “S.B(Pre)“ (vpage 7) is set to “None”, this surround mode cannot be selected.
-
Page 51: Explanation Of Terms
5 channels to achieve an excellent surround effect. rates (max. 5.1 channels, 24 to 256 kbps). be connected to a TV or amplifi er. Video signal and This technology allows expression of more number of colors than the conventional 8 bits and can... -
Page 52: Troubleshooting
3. Are the other components operating properly? Speaker impedance If this unit does not operate properly, check the items listed in the table below. Should the problem persist, This is an AC resistance value, indicated in Ω there may be a malfunction. - Page 53 • Batteries are worn out. Replace with new batteries. subwoofers, depending on the input signal or selected surround operated with the • Operate the remote control unit within a distance of about 23 ft / mode. remote control unit. 7 m from this unit and at an angle of within 30°.
-
Page 54: Resetting The Microprocessor
S/N (IHF-A): MONO 70 dB STEREO 67 dB If in step 3 the display does not fl ash at intervals of about 1 second, start over from step 1. Total harmonic Distortion (at 1 kHz): MONO 0.7 % STEREO 1.0 %... - Page 55 Setup Lock ························································· 34 Accessories ·························································· 1 Mute Level ························································· 33 Distance ······························································· 8 Shuffl e ································································ 33 Adobe RGB color / Adobe YCC601 color ··········· 48 Dolby Sleep timer ························································· 28 AFDM ································································· 35 Dolby Digital··············································· 22, 48 Source Level ······················································ 33 AM loop antenna ················································...
- Page 56 D&M Holdings Inc. Printed in China 5411 10484 105D...