
Related Manuals for Homematic IP HmIPW-DRBL4


Summary of Contents for Homematic IP HmIPW-DRBL4
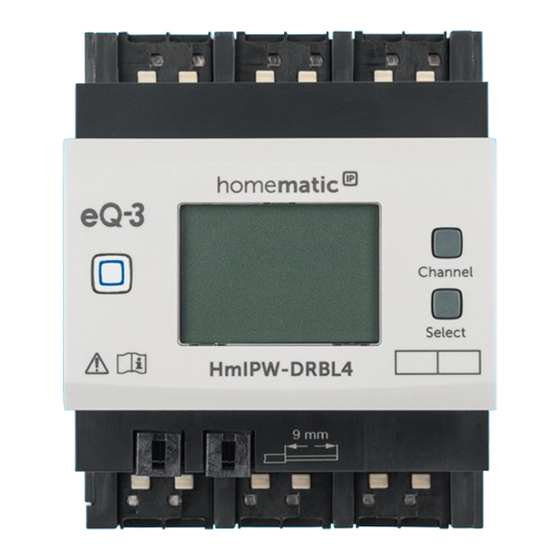
- Page 1 Wired Jalousieaktor – 4-fach Wired Blind Actuator – 4 channels HmIPW-DRBL4 Installations- und Bedienungsanleitung Installation and operating manual...
-
Page 2: Table Of Contents
Installations- und Bedienungsanleitung Inhaltsverzeichnis Lieferumfang ....................3 Hinweise zur Anleitung ................3 Gefahrenhinweise ..................3 Homematic IP – Smart wohnen, einfach komfortabel......5 Funktion und Geräteübersicht ..............5 Inbetriebnahme .....................6 Installationshinweise ..................6 Auswahl der Spannungsversorgung ..............7 Montage und Installation .................. 7 Anlernen ....................... 9 6.4.1 Anlernen an die Zentrale CCU3 ............9 6.4.2... -
Page 3: Lieferumfang
Lieferumfang Lieferumfang Aus Sicherheits- und Zulassungs- gründen (CE) ist das eigenmächti- 1x Wired Jalousieaktor – 4-fach ge Umbauen und/oder Verändern 1x Bus-Verbindungskabel des Geräts nicht gestattet. 1x Bus-Blindstopfen Das Gerät ist nicht zum Freischal- 1x Bedienungsanleitung ten geeignet. Verwenden Sie das Gerät nicht, 2 Hinweise zur Anleitung wenn es von außen erkennbare Lesen Sie diese Anleitung sorgfältig,... - Page 4 Gefahrenhinweise Vor Einbau und Anschluss des räts ist ausschließlich am 230 V/50 Hz-Wechselspannungsnetz zuläs- Geräts freischalten und span- nungsführende Teile in der Umge- sig. Arbeiten am 230-V-Netz dürfen bung abdecken. nur von einer Elektrofachkraft (nach VDE 0100) erfolgen. Dabei Verwenden Sie nur Jalousien bzw. sind die geltenden Unfallverhü- Rollläden mit Endlagenschalter tungsvorschriften zu beachten.
-
Page 5: Homematic Ip - Smart Wohnen, Einfach Komfortabel
HHmematiccIIP – mart wHhnenn, einfach HmfHrtaael Bei Einsatz in einer Sicherheitsan- kisenantriebe über angelernte Taster, Funk-Fernbedienungen oder über die wendung ist das Gerät/System in kostenlose Homematic IP Smartpho- Verbindung mit einer USV (unter- ne-App. Über angeschlossene konven- brechungsfreie Stromversorgung) tionelle Taster oder Schalter ist zudem zu betreiben, um einen möglichen eine direkte Bedienung möglich. -
Page 6: Inbetriebnahme
Inaetrieanahme Hinweis! Installation nur durch Displayübersicht (s. Abbildung 1): Personen mit einschlägigen elekt- Symbol Bedeutung rotechnischen Kenntnissen und Kanal eingeschaltet Erfahrungen!* Kanal ausgeschaltet Durch eine unsachgemäße Installation Daten werden vom Bus gefährden Sie empfangen • Ihr eigenes Leben; Daten werden vom Bus •... -
Page 7: Auswahl Der Spannungsversorgung
Inaetrieanahme bedingungen (klassische Nullung, • Schalten Sie den Stromkreisvertei- Schutzerdung, erforderliche Zu- ler frei und decken ggf. spannungs- satzmaßnahmen etc.). führende Teile ab (s. Sicherheitsre- geln). Beachten Sie bei der Installation die Gefahrenhinweise gemäß s. „3 Gefahrenhinweise“ auf Seite Beachten Sie die auf dem Gerät angegebene Abisolierlänge der anzuschließenden Leiter. - Page 8 Inaetrieanahme gungshebel oben auf den Klem- men zu drücken. Die Netzklemmen dürfen nur zum Anschluss der Netzspannung an das Gerät bzw. zum Anschluss von Verbrauchern an das Gerät ver- wendet werden. Das Weiterver- binden (Durchschleifen) von Lei- tern über die Netzklemmen des Geräts zu anderen Geräten ist nicht erlaubt! Abbildung 4...
-
Page 9: Anlernen
Inaetrieanahme • Setzen Sie die Abdeckung des zieren kann, muss er zunächst angelernt werden. Stromkreisverteilers wieder auf. Sie haben die Möglichkeit, den Jalousie- • Schalten Sie die Haussicherung aktor für eine lokale Konfiguration per wieder ein, um den Anlernmodus PC an die Zentrale CCU3 anzulernen. des Geräts zu aktivieren (s. -
Page 10: Anlernen An Die Homematic Ip Cloud Per Wired Access Point
Inaetrieanahme • Um den Anlernmodus zu aktivie- • Nach kurzer Zeit erscheint das neu ren, klicken Sie im nächsten Fens- angelernte Gerät im Posteingang ter auf „HmIP Gerät anlernen“. Die Ihrer Softwareoberfläche. Zentrale wird für 60 Sekunden in den Anlernmodus versetzt. Ein Neu angelernte Geräte und die zuge- Infofeld zeigt die aktuell noch ver- hörigen Kanäle stehen erst dann für... -
Page 11: Bedienung
Bedienung tung ist der Anlernmodus des Ja- den) Homematic IP Access Point an. Anschließend gehen Sie wie oben be- lousieaktors für 3 Minuten aktiv. schrieben vor, um den Jalousieaktor anzulernen. Sie können den Anlernmodus manuell für weitere 3 Minuten Bedienung starten, indem Sie die Systemtaste (A) kurz drücken (s. -
Page 12: Fehlerbehebung
Fehleraeheaung Der ausgewählte Kanal wird durch Blinken des Symbols gekennzeichnet. Die aktuelle Höhe ( ) und die aktuelle Lamellenstellung ( ) des ausgewählten Kanals werden abwechselnd im LC- Display angezeigt. Nach Einschalten des Jalousieak- tors befinden sich die Jalousien/ Rollläden/Markisen in einer unbe- kannten Position, so dass die ak- Abbildung 11 tuelle Höhe und Lamellenstellung... -
Page 13: Fehlercodes Und Blinkfolgen
Wiederherstellung der Wer seinstellungen Fehlercodes und Blinkfolgen Blinkcode/ LCD Anzeige Bedeutung Lösung Geben Sie die letzten vier Kurzes Ziffern der Geräte-Serien- oranges Blinken Anlernmodus aktiv nummer zur Bestätigung (s. „6.4 Anlernen“ auf (alle 10 s) Seite 9). Achten Sie auf die Anzeige in Ihrer App oder wenden 6x langes rotes Blinken Gerät defekt... -
Page 14: Wartung Und Reinigung
Wartung und Reinigung 11 EntsHrgung Entsorgungshinweis Dieses Zeichen bedeutet, dass das Gerät nicht mit dem Hausmüll, der Restmülltonne oder der gelben Tonne bzw. dem gelben Sack entsorgt werden darf. Sie sind verpflichtet, zum Schutz der Gesundheit und der Umwelt das Produkt und alle im Lieferumfang enthaltenen Abbildung 13 Elektronikteile zur ordnungsgemäßen... -
Page 15: Technische Daten
Technische Daten 12 Technische Daten Geräte-Kurzbezeichnung: HmIPW-DRBL4 Versorgungsspannung: 24 VDC, +-5 %, SELV Stromaufnahme: 100 mA max./2,5 mA typ. Leistungsaufnahme Ruhebetrieb: 60 mW Lastart: Motorlast Relais: Wechsler, µ-Kontakt Schaltspannung: 230 V~ Strombelastbarkeit (Kanal): 2,2 A Verlustleistung des Geräts für Wärmeberechnungen: max. - Page 16 Installation and operating manual Taale Hf cHntents Package contents..................17 Information about this manual ..............17 Hazard information ..................17 Homematic IP – Smart living, simply comfortable.......19 Function and device overview ..............19 Start-up ......................20 Installation instructions ...................20 Selecting the supply voltage ................21 Mounting and installation ................
-
Page 17: Package Contents
IPac age cHntents IPac age cHntents For safety and licensing reasons (CE), unauthorized change and/or Wired Blind Actuator – modification of the device is not 4 channels permitted. 1x Bus connection cable The device is not a toy; do not 1x Bus blind plug allow children to play with it. - Page 18 Hazard infHrmatiHn disconnect the mains voltage (trip EN60898-1 (tripping characteris- the miniature circuit-breaker). tic B or C, max. 10 A rated current, Non-compliance with the installa- min. 6 kA interrupting rating, tion instructions can cause fire or energy limiting class 3). introduce other hazards.
-
Page 19: Homematic Ip - Smart Living, Simply Comfortable
HHmematiccIIP – mart livingn, simply cHmfHrtaale 4 HHmematiccIIP – mart F Bus connection 2 G Connecting terminals for phase livingn, simply cHmfHrtaale conductor This device is part of the Homematic IP H Connecting terminals for switched smart home system and works with the phase conductor for moving the Homematic IP protocol. -
Page 20: Start-Up
tart-up Contact an electrical installer! Symbol Meaning Slat position of blind at se- *Specialist knowledge required for lected channel installation: Percent value (switched on, The following specialist knowledge is if the height or slats positi- particularly important during installati- on is displayed) Temperature indication •... -
Page 21: Selecting The Supply Voltage
tart-up • Place the blind actuator onto the rigid cable flexible cable DIN rail. Make sure that you can [mm²] without ferrule [mm²] read the letters on the device and 0,75 - 2,50 0,75 - 2,50 display and that the connecting terminals of channel 1 and 2 are at the top. -
Page 22: Pairing
tart-up ding terminal ( ) (H) (see figure 4). The bus connections (E) and (F) are switched in parallel. However, • Connect the switched phase con- the incoming or outgoing bus ductor to move down the motor for cable can be connected to any of the selected channel to the corres- the two connections. -
Page 23: Connecting To The Homematic Ip Central Control Unit Ccu3
tart-up Wired devices within your system. ton on the right-hand side of the For further information, please screen. refer to the operating manual of the Wired Access Point. To integrate the blind actuator into your system and enable it to communicate with other Homematic IP Wired devices, you must pair it first. -
Page 24: Connecting To The Homematic Ip Cloud Via Wired Access Point
tart-up nected to the Homematic IP cloud. To do this, please proceed as follows: • Open the Homematic IP app on your smartphone. • Connect the Homematic IP Wired Access Point via the smartphone app to the Homematic IP cloud, as described in the corresponding user manual •... -
Page 25: Operation
OperatiHn If you are already using Homematic IP devices in your smart home system or if you want to combine your Homematic IP Wired devices with wireless Homematic IP components, you can also connect the Homematic IP Wired devices to an (installed) Access Point. Therefore, connect the Homematic IP Wired Figure 10 Access Point to the (installed) -
Page 26: Troubleshooting
Technische Daten Figure 11 8 TrHualeshHHting Error codes and flashing sequences Flashing code / Meaning Solution LC display Please enter the last four numbers of the device Short orange flashing Pairing mode active serial number to confirm (every 10 s) (see „6.4 Pairing“... -
Page 27: Adjustment Of The Slats Not Possible
RestHre factHry settings Adjustment of the slats not possible If it is not possible to control the slats of a blind or if they do not move when activated, this may be due to the drive motors. In this case the delay before the motor starts is too long. -
Page 28: Disposal
DispHsal 11 DispHsal Instructions for disposal This symbol means that the device must not be disposed of as household waste, general waste, or in a yellow bin or a yellow sack. For the protection of health and the envi- ronment, you must take the product and all electronic parts included in the scope of delivery to a municipal collection point for old electrical and electronic equip-... -
Page 29: Technical Specifications
Technical specificatiHns 12 Technical specificatiHns Device short description: HmIPW-DRBL4 Supply voltage: 24 VDC, +-5 %, SELV Current consumption: 100 mA max./2.5 mA (typically) Standby power consumption: 60 mW Load type: motor load Relay: changeover contact, µ contact Switching voltage: 230 V~ Current carrying capacity (channel): 2.2 A... - Page 30 Kostenloser Download der Homematic IP App! Free download of the Homematic IP app! Bevollmächtigter des Herstellers: Manufacturer’s authorised representative: eQ-3 AG Maiburger Straße 29 26789 Leer / GERMANY www.eQ-3.de...
Need help?
Do you have a question about the HmIPW-DRBL4 and is the answer not in the manual?
Questions and answers