Air Lift 1000 Installation Manual
Hide thumbs
Also See for 1000:
- Installation manual ,
- Installation instructions manual (10 pages) ,
- Manual (7 pages)
Table of Contents
Advertisement
Quick Links
Kits 60763,
™
60774, 60783,
60797, 60798,
60897
INSTALLATION GUIDE
For maximum effectiveness and safety,
please read these instructions completely
before proceeding with installation.
Failure to read these instructions can result in an
incorrect installation.
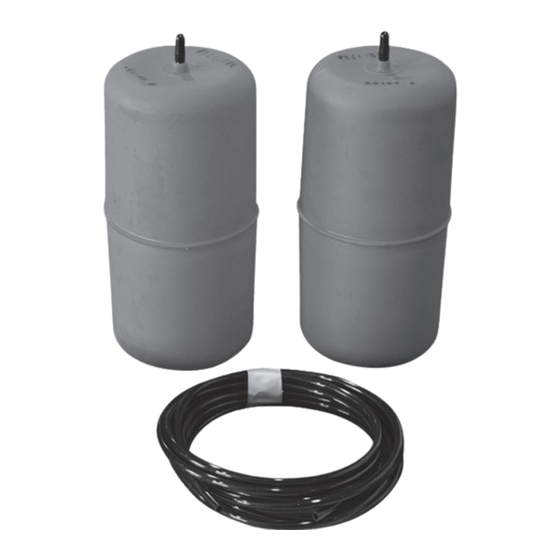
Cover
illustration
may not depict
actual kit.
Advertisement
Table of Contents

Related Manuals for Air Lift 1000


Summary of Contents for Air Lift 1000
- Page 1 Kits 60763, ™ 60774, 60783, 60797, 60798, 60897 Cover illustration may not depict actual kit. INSTALLATION GUIDE For maximum effectiveness and safety, please read these instructions completely before proceeding with installation. Failure to read these instructions can result in an incorrect installation.
-
Page 3: Table Of Contents
Air Lift 1000 TABLE OF CONTENTS Introduction . . . . . . . . . . . . . . . . . . . . . . . . . . . . . . . . . . . . . . . 2 Important Safety Notice . -
Page 4: Introduction
Air Lift Company reserves the right to make changes and improvements to its products and publications at any time. Contact Air Lift Company at (800) 248-0892 or visit us online at www.airliftcompany.com for the latest version of this manual. -
Page 5: Hardware And Tools Lists
5/16” Flat washer ........2 21236 Barbed tee ..........1 21455 Valve ............2 Missing or damaged parts? Call Air Lift customer STOP! service at (800) 248-0892 for a replacement part. Installing the Air Lift 1000 System IMPORTANT NOTE This kit fits many different vehicles. Please consult the following listings for the appropriate installation section for your particular vehicle. -
Page 6: Section B Installation
Air Lift 1000 4. Remove the plastic cap from the barbed stem on the end of the air spring and exhaust all the air from the air spring by rolling it up towards the barbed stem. Replace the cap so that the air spring holds its flat shape. -
Page 7: Section C Installation
Air Lift 1000 4. Insert the air spring into the coil with the stem down (fig. 7). 5. If removed, place the upper spring insulator on top of the coil spring. Index it so that the notch fits on the end of the spring. -
Page 8: Installing The Air Line
Air Lift 1000 INSTALLING THE AIR LINE Tee air line installation is recommended unless weight in the vehicle varies from one side to the other and unequal pressures are needed to level the load. Dual air lines are used in this case. -
Page 9: Dual Air Line Routing
Air Lift 1000 9. Drill a 5/16” hole for the inflation valve and mount as shown (fig. 12). The rubber washer serves as an outside weather seal. 10. Slide the air line clamp over the air line. Push the air line onto the fitting covering all barbs. -
Page 10: Checking For Leaks
DO NOT CUT OFF THE AIR LINE COMPLETELY AS THIS WILL USUALLY NICK THE CAUTION BARB AND RENDER THE FITTING USELESS. 2. If the preceding steps have not resolved the problem, call Air Lift customer service at (800) 248-0892. MN-133... -
Page 11: Before Operating
Air Lift 1000 Before Operating INSTALLATION CHECKLIST (To be completed by installer) Clearance test — Inflate the air springs to 30 PSI and ensure there is at least 1/2” clearance around each bellow, away from anything that might rub against them. Be sure to check the tire, brake drum, frame, shock absorbers and brake cables. -
Page 12: Product Use, Maintenance And Servicing
4. Look for a kink or fold in the air line. Reroute as needed. If the preceding steps do not solve the problem, it is possibly caused by a failed air spring — either a factory defect or an operating problem. Please call Air Lift at (800) 248-0892 for assistance. MN-133... -
Page 13: Frequently Asked Questions
No. Adding air springs will not change the weight ratings (GAWR, GCWR and/or GVWR) of a vehicle. Exceeding the GVWR is dangerous and voids the Air Lift warranty. Q . Is it necessary to keep air in the air springs at all times and how much pressure... -
Page 14: Guidelines For Adding Air
Air Lift 1000 GUIDELINES FOR ADDING AIR 1. Start with the vehicle level or slightly above. 2. When in doubt, always add air. 3. If the front of the vehicle dives while braking, increase the pressure in the front air bags, if equipped. -
Page 15: Choosing The Right On-Board Air Compressor System
— from inside or outside of the vehicle . • For convenient, on-the-go control of your air springs, add an Air Lift on-board air compressor system. • Air Lift on-board air compressor systems eliminate the search for gas stations that have a working compressor, saving you time, energy and money. -
Page 16: Limited Warranty And Return Policy
Air Lift Company’s maximum liability shall not in any case exceed the purchase price paid by you for the Air Lift product. Please note that some states do not allow the exclusion or limitation of incidental or consequential damages, so the above limitation or exclusion may not apply to you. -
Page 17: Replacement Information
Air Lift 1000 Replacement Information If you need replacement parts, contact the local dealer or call Air Lift customer service at (800) 248-0892. Most parts are immediately available and can be shipped the same day. Contact Air Lift Company customer service at (800) 248-0892, first if: •... -
Page 18: Template
Air Lift 1000 Template MN-133... - Page 20 Thank you for purchasing Air Lift products — the professional installer’s choice! Air Lift Company • 2727 Snow Road • Lansing, MI 48917 or PO Box 80167 • Lansing, MI 48908-0167 Toll Free (800) 248-0892 • Local (517) 322-2144 • Fax (517) 322-0240 • www.airliftcompany.com...
Need help?
Do you have a question about the 1000 and is the answer not in the manual?
Questions and answers