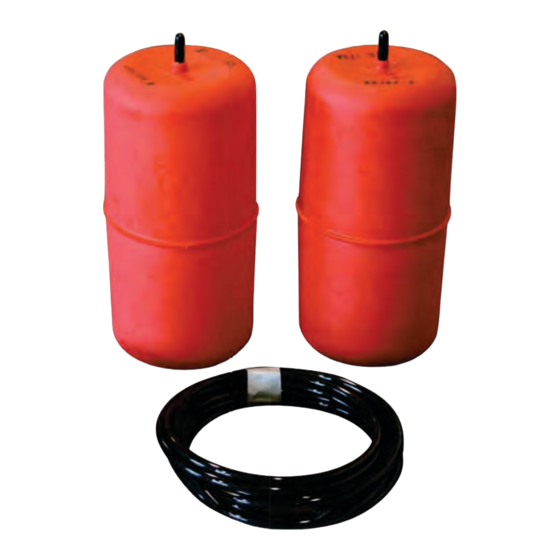
Air Lift 1000 Installation Manual
Dodge caravan & grand caravan, chrysler town & country, volkswagon routan
Hide thumbs
Also See for 1000:
- Installation manual ,
- Installation instructions manual (10 pages) ,
- Manual (7 pages)
Table of Contents
Advertisement
Quick Links
Kit 60814
Dodge Caravan & Grand
Caravan, Chrysler Town
& Country, Volkswagon
Routan
Cover illustration
Cover illustration
may not depict
may not depict
actual kit.
actual kit.
InstallatIon GuIdE
For maximum effectiveness and safety,
please read these instructions completely
before proceeding with installation.
Failure to read these instructions can result in an
incorrect installation.
Advertisement
Table of Contents

Summary of Contents for Air Lift 1000
- Page 1 Kit 60814 Dodge Caravan & Grand Caravan, Chrysler Town & Country, Volkswagon Routan Cover illustration Cover illustration may not depict may not depict actual kit. actual kit. InstallatIon GuIdE For maximum effectiveness and safety, please read these instructions completely before proceeding with installation. Failure to read these instructions can result in an incorrect installation.
-
Page 2: Important Safety Notice
Introduction The purpose of this publication is to assist with the installation, maintenance and troubleshooting of the Air Lift 1000 air spring kit. It is important to read and understand the entire installation guide before beginning installation or performing any maintenance, service or repair. The information here includes a hardware list, tools list, step-by-step installation information, maintenance guidelines and operating tips. - Page 3 Valve ............4 33107 Heat shield kit ..........1 Installing the air lift 1000 system PREPARING THE VEHICLE 1. Jack up the rear of the vehicle or raise on a hoist. Support the frame with safety stands so that the wheels hang (fig. 1).
- Page 4 1000 3. The coil spring will have to be removed to prep the vehicle for the air spring. Mark the coil spring, upper spring damper and upper spring seat with a marker so that the assembly can be put back in the same orientation (fig. 3).
-
Page 5: Installing The Air Spring
1000 7. It will also be necessary to enlarge the upper spring seat hole. Drill the existing hole out with a 1/2” drill bit (fig. 6). Upper spring seat Drill existing hole with a 1/2” drill bit. fig. 6 8. -
Page 6: Installing The Air Line
1000 INSTALLING THE AIR LINE A tee air line installation is recommended. If the weight in the vehicle varies from one side to the other and unequal pressures are needed to level the load or compensate for axle torque transfer in racing applications, use dual air lines (see page 8). - Page 7 1000 7. Push the remaining air line over the last fitting on the tee and route it along the frame to the desired inflation valve location. Attach the air line with plastic straps or wire. 8. Select a location for the inflation valve in the gas cap well, the trunk, rear bumper, fender flange or behind the license plate, insuring that the valve will be protected and accessible with an air hose (fig.
-
Page 8: Dual Air Line Routing
1000 DUAL AIR LINE ROUTING TO PREVENT AIR LINE FROM MELTING, KEEP IT AT LEAST 8” FROM ExHAUST CAUTION SYSTEM. 1. Select a location for the inflation valves in the rocker panel flange, or rear bumper, assuring that each valve will be protected and accessible with an air hose. -
Page 9: Operating Tips
1000 Maintenance and servicing Minimum Air Pressure Maximum Air Pressure 5 PSI 35 PSI FAILURE TO MAINTAIN CORRECT MINIMUM PRESSURE (OR PRESSURE PROPORTIONAL TO LOAD), BOTTOMING OUT, OVER-ExTENSION OR RUBBING AGAINST ANOTHER COMPONENT WILL VOID THE WARRANTY. MAINTENANCE GUIDELINES By following these steps, vehicle owners will obtain the longest life and best results from their air springs. -
Page 10: Frequently Asked Questions
No. Adding air springs will not change the weight ratings (GAWR, GCWR and/or GVWR) of a vehicle. Exceeding the GWVR is dangerous and voids the Air Lift warranty. Q. Is it necessary to keep air in the air springs at all times and how much pressure will they need? The minimum air pressure should be maintained at all times. -
Page 11: Guidelines For Adding Air
1000 GUIDELINES FOR ADDING AIR 1. Start with the vehicle level or slightly above. 2. When in doubt, always add air. 3. For motorhomes, start with 50-100 PSI in the rear because it can be safely assumed that it is heavily loaded.


Need help?
Do you have a question about the 1000 and is the answer not in the manual?
Questions and answers