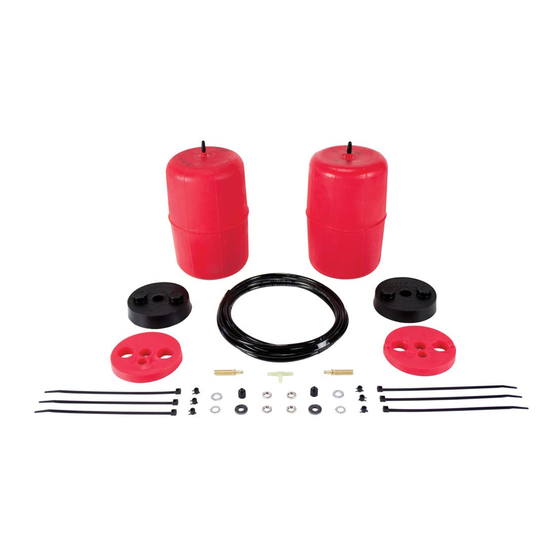
Air Lift 1000 Instructions Manual
Shock relocation kit
Hide thumbs
Also See for 1000:
- Installation manual ,
- Installation instructions manual (10 pages) ,
- Manual (7 pages)
Advertisement
SHOCK RELOCATION KIT P/N 31510
FRONT-88-Newer Chevy/GMC 1 Ton Dually Lowered
1. AIR LIFT STRONGLY RECOMMENDS THAT THIS KIT BE PROFESSIONALLY INSTALLED BY A CERTIFIED
WELDER.
2. Prior to welding, the battery cables should be disconnected at the battery, Thoroughly clean the area to be
used as the ground connection as well as the area to be welded.
3. Before welding the brackets, inspect the area to be welded for electrical wiring, brake lines, fuel lines, proximity
to fuel tank, and/or any other components that should not be exposed to excessive heat. These items must be
removed, re-positioned, and/or properly shielded.
4. After the welding is completed and the area is cool to the touch, carefully re-position and inspect all wiring, fuel
lines, brake lines, etc. for any possible damage.
5. Some sort of corrosion protection should be applied to the welded area.
Top Shock Mount
1" Hole In Frame
Springs
5/8" Hole
Lower Control Arm
Figure 1
WASHERS
RUBBER
NUT
BUSHING
MOUNTING
(SHOCK)
PIN
Figure 1A
* IMPORTANT *
WELDING PRECAUTIONS
1.
2.
3.
4.
5.
6.
7.
BRACKET
0R
FRAME
8 .
WASHERS
9.
NUT TORQUE
TO 50 FT. LBS
BY
Jack up front end of vehicle. Support frame with jack
stands and let the suspension drop down.
Remove stock shocks.
Locate 1" hole that is in outer frame rail (hole is
stamped from factory). Clean area of all grease and
dirt for a proper welding surface (Figure 1).
If necessary, trim fender panel for adequate clearance
of the shock mount.
With the shock mount in place, weld both the horizontal
and vertical edges. This should be done by a qualified
welder.
Assemble upper shock pin (5/8" mounting stud) into
shock mount (Figure 1A).
Cut out template and hold on lower control arm to
locate the hole location for bottom pin.
Center punch and then drill 5/8" hole in lower control
arm. Bolt in lower shock pin.
Insert the large diameter end of the tall spacer supplied
in kit through the hole in bottom spring seat and hold in
top of the spring, insert large 1/2 thick spacer between
coils under tall spacer (Figure 2).
bolt and large washer up through both spacers. Using
small washer and 3/8" nut, install on carriage bolt and
hand tighten the spacers together as one assembly,
this will hold them together and make it easier to install
into the upper spring seat (Figure 3).
MN-295
(01511)
NPR1641
Insert the carriage
Advertisement
Table of Contents

Summary of Contents for Air Lift 1000
- Page 1 FRONT-88-Newer Chevy/GMC 1 Ton Dually Lowered * IMPORTANT * WELDING PRECAUTIONS 1. AIR LIFT STRONGLY RECOMMENDS THAT THIS KIT BE PROFESSIONALLY INSTALLED BY A CERTIFIED WELDER. 2. Prior to welding, the battery cables should be disconnected at the battery, Thoroughly clean the area to be used as the ground connection as well as the area to be welded.
- Page 2 Guide the assembly through upper shock bolt hole and attach with large washer (with 3/8” hole) and 3/8” nut. Hand tighten only at this time (Figure 3). Remove black cap and squeeze air out of cylinder and fold into a hot dog bun shape. Put black cap on to retain deflated shape.
- Page 3 Push the remaining air line over the last fitting on tee and route along frame to desired inflation valve location. Attach with plastic straps or wire. Drill a 5/16” hole for inflation valve and mount as in illustration. Rubber washer is for outside weather seal (Figure 6).
-
Page 4: Maintenance Tips
Always maintain at least 10 p.s.i. air pressure to prevent chafing or coil pinch. If you develop an air leak in the system, use a soapy/water solution to check all air line connections and the valve core before removing cylinder. Thank you for purchasing Air Lift Products AIR LIFT COMPANY P.O. BOX 80167... -
Page 5: Product Use Information
No. Adding air springs will not change the weight ratings (GAWR, GCWR and/or GVWR) of a vehicle. Exceeding the GVWR is dangerous and voids the Air Lift warranty. Q. Is it necessary to keep air in the air springs at all time and how much pressure will they need? The minimum air pressure should be maintained at all times. -
Page 6: Guidelines For Adding Air
fi g. 4 Unlevel Level Poor stability Rev. 4/5/07 Thank you for purchasing Air Lift products! For technical support, please call (800) 248-0892. Air Lift Company • P.O. Box 80167, MI 48908-0167 • (517) 322-2144 • Fax: (517) 322-0240 • www.airliftcompany.com...


Need help?
Do you have a question about the 1000 and is the answer not in the manual?
Questions and answers