VeriFone e355 Installation Manual
Hide thumbs
Also See for e355:
- User and best practices manual (78 pages) ,
- User manual (60 pages) ,
- Installation manual (40 pages)

Related Manuals for VeriFone e355


Summary of Contents for VeriFone e355
- Page 1 Installation Guide Verifone Part Number: DOC087-063-EN-C Revision C01 www.verifone.com...
- Page 2 The information contained in this document is subject to change without notice. Although Verifone has attempted to ensure the accuracy of the contents of this document, Verifone shall not be liable for technical or editorial errors or omissions contained herein. Verifone and the Verifone logo are registered trademarks of Verifone.
-
Page 3: Table Of Contents
Examining e355 Device Features ........ - Page 4 Charging the e355 ........
-
Page 5: Audience
Troubleshooting Guidelines- Provides guidance for addressing issues that may arise during device installation. Related Documentation To learn more about the e355, refer to the following documents associated with the Verifone Part Number (VPNs). e355 Certifications and Regulations Sheet VPN DOC087-061-EN... - Page 6 Frame Type A IP2 Quick Installation Guide VPN DOC087-076-EN e355 Smart Charger Certifications and Regulations Sheet VPN DOC087-101-EN e355 Smart Charger Quick Installation Guide (IPO6 Frame Cradle -NAA) VPN DOC087-102-EN e355 Smart Charger Quick Installation Guide (IPO6 Frame Cradle -WWA) VPN DOC087-103-EN...
-
Page 7: Conventions
The lightning symbol is used as a For safety, do not string cables or warning when bodily injury might cords across a walkway. occur. © VeriFone, Inc. All rights reserved. - Page 8 1. Device Overview This chapter provides a brief description of the e355. The e355 connects with various tablet devices for the next generation of PAYware Mobile enterprise. It supports the use of the Bluetooth SPP (Serial Port Profile) standard to connect between the e355 and the tablet.
-
Page 9: Features And Benefits
• The e355 size is easily able to be dropped in most pockets. An optional hands-free holster is available that fits the server’s or clerk’s belt so that the e355 can be quickly removed and easily handed to the customer. -
Page 10: Contactless Capability
(SingleCl), SoftSAMs, and side-by-side application architecture. • Large tap zone (above the keypad) that encompasses the PIN pad optimizes user experience. • Contactless version accepts EMV in addition to magnetic stripe contactless payments as well as PIN-based transactions. © VeriFone, Inc. All rights reserved. -
Page 11: Usage Guidelines
Installation Guide e355 2. Device Setup This section outlines the setup procedures for the e355, covering the following segments: • Usage Guidelines • Unpacking the Shipping Carton • Examining e355 Device Features • Installing/Replacing an MSAM Card • Manually Starting and Resetting the e355 •... -
Page 12: Personal Security Considerations
PIN entry. • Hand the e355 directly to the cardholder for PIN entry. • Encourage the cardholder to hold the e355 close to avoid others from seeing the information entered. Electrical • Avoid using this product during electrical storms. -
Page 13: Examining E355 Device Features
Remove the clear protective film from the unit. Do not use a unit that has been damaged or tampered with. The e355 comes equipped with tamper-evident labels. If a label or component appears damaged or if the device appears to have been opened, please notify the shipping company and your Verifone representative or service provider immediately. -
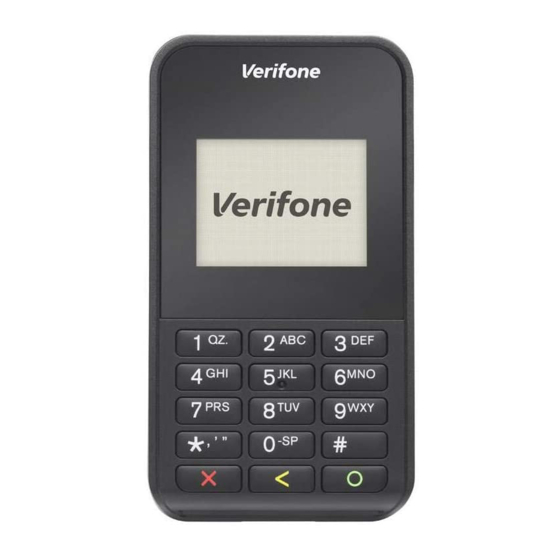
Page 14: Front View
• A Micro-USB port located on the right side for data connection and power charging. You can also use this to connect the e355 to a computer using a standard USB to Micro-USB cable (VPN CBL000-049-01-A). (See Connecting the e355 to a Power Source or a Host Computer). -
Page 15: Back View
The back panel includes the following features: Figure: 3 e355 Device Features DOCKING CONNECTOR MSAM COMPARTMENT (Back View) BATTERY COMPARTMENT COVER BARCODE BUTTON • A Battery Compartment Cover. Remove the cover to access the removable battery and the MSAM compartment. © VeriFone, Inc. All rights reserved. -
Page 16: Installing/Replacing An Msam Card
(See Using the Barcode Reader). • A Docking Connector at the bottom of the device to connect to the e355 Frame and Smart Charger. Installing/ When you first receive your e355, you may need to install an MSAM card or you may need to replace an old card. - Page 17 Installation Guide e355 To install/replace Unplug any cables or chargers from the e355. MSAM Remove the screw from the battery cover. Figure: 4 Removing the Battery Cover Slide the cover outwards, away from the device. Remove the battery by gently pulling the plastic tab to access the MSAM compartment.
-
Page 18: Manually Starting And Resetting The E355
Figure: 6 Returning the Battery Cover Manually To turn on the e355, press and hold the Enter key for at least five seconds. The Reset button is located between the right Barcode Button and Power Starting and LED Indicator. Resetting the e355 The Reset button resets the device to its initialized state. - Page 19 Plug the Verifone-certified wall-mount charger into a wall outlet or powered e355 to a Wall- surge protector. mount Charger Insert the Micro-USB cable into the port located on the side of the e355. Figure: 7 Connecting the e355 to a Wall-mount...
-
Page 20: Color Behavior
Red, 1Hz rate, 50% duty cycle (Battery low condition: battery voltage <3.7V) Orange, 1Hz rate, 50% duty cycle Orange, on continuously Green, on continuously LEDs are turned OFF when charging the e355 on a gang charger © VeriFone, Inc. All rights reserved. -
Page 21: Using The Smart Card Reader
Premature card removal invalidates the transaction. Using the Use the magnetic stripe reader to perform credit and debit card transactions. Magnetic Stripe Reader To conduct a Position the card with the magnetic stripe facing backward. credit/debit card transaction © VeriFone, Inc. All rights reserved. -
Page 22: Using The Ctls Reader
Stripe Card Swipe the card through the magnetic card reader. Using the CTLS The e355 supports contactless credit or debit card transactions. To perform a contactless transaction, gently tap the card or hold the card against the Reader surface of the contactless antenna, located above the keypad and LCD with a CTLS symbol. -
Page 23: Using The Barcode Reader
Use of controls or adjustments or performance of procedures other than those specified herein may result in hazardous radiation exposure. Using the The e355 Frame Type A allows you to use the payment application installed on your Apple device together with your e355 terminal. e355 Frame... - Page 24 Figure: 13 Loosening Screw to Unlock Release Button Insert the e355 device until it locks in place. TIP: Pull and hold the release button downwards for easy insertion. Figure: 14 Inserting e355 Terminal Tighten the retaining screw at the front to lock the release button and prevent the terminal from ejecting.
- Page 25 Follow these steps to install a tablet into the frame. To attach the tablet, the top part of the e355 Frame should be removed. Loosen the retaining screw. The retaining screw is captive, which means that it cannot be fully removed from the slot.
-
Page 26: Frame Type A For Ipod Touch 6
Return the top casing and then tighten the retaining screw. Do not leave any gap when tightening the screw to help better secure the e355 and to avoid damaging the frame. See... - Page 27 Figure: 19 Inserting e355 Terminal Extend the front part to match the screw holes then insert and tighten the screw to secure the e355 terminal. The figure below shows which screw to use. Figure: 20 Securing the e355 Terminal © VeriFone, Inc. All rights reserved.
- Page 28 Screw Insert a paper clip or a similar tool in the hole located on the side of the frame just below the Power LED indicator and then slide the e355 terminal upwards. Figure: 22 Inserting a Paper Clip to...
- Page 29 Figure: 24 Removing the Top Casing Align the port at the bottom of the iPod touch 6 with the Lightning connector on the frame then, gently but firmly push the device down until it sits firmly. © VeriFone, Inc. All rights reserved.
-
Page 30: Charging The E355
Return the top casing and then insert the screw at the back to secure the frame. Figure: 25 Returning the Top Casing Charging the The e355 and the Apple device installed on the Type A Frame can be e355 charged either sequentially or simultaneously depending on which USB port is used. Sequential... -
Page 31: Simultaneous Charging
(iPad 2/iPad mini) To simultaneously charge the e355 and iPod touch 6 device, plug the other end of the USB cable to a wall-mount charger or the USB port on a computer and connect it to the USB port located on the right side. -
Page 32: Using The Gang Charger And Smart Charger
Using the Gang Charger and Smart Charger also allows you to Gang Charger simultaneously charge an e355 terminal and your Apple device. and Smart Charger Gang Charger Use the Gang Charger to charge your e355 terminal and iPad mini/iPad 2 device. Figure: 29 Using the Gang Charger Smart Charger Use the Smart Charger to charge your e355 terminal and iPod touch 6 device. - Page 33 Charger Using Multiple Smart Chargers You can connect up to three e355 Smart Chargers in a daisy chain pattern. The figure below shows how to connect multiple Smart Chargers to a Network or PC. Each Smart Charger in the chain needs to be connected a to separate power source.
- Page 34 Installation Guide e355 Figure: 32 Choosing Between a PC or Network Connection © VeriFone, Inc. All rights reserved.
-
Page 35: Power
This chapter provides details on the power requirements, dimensions, and additional specifications of the e355 device. Power • Charging via Micro-USB to computer system or Verifone-certified power adapter: 5 V DC, 2 A Temperature • -5°C to 40°C (23°F to 104°F) -
Page 36: General Care
Verifone authorized service provider for maintenance or replacement. Cleaning & Verifone devices should only be gently cleaned to remove dirt, residue, or debris using a lightly water-damped, clean microfiber cloth. One or two Sanitizing drops of pH-neutral, non-scrubbing soap may be used. -
Page 37: Cleaning Instructions
Installation Guide Cleaning Turn off your device. Instructions Disconnect it from the power source. Clean it following the instructions and guidelines as mentioned above. Once completely dry, reconnect to power up. © VeriFone, Inc. All rights reserved. -
Page 38: Returning A Device For Service
Il est conseillé aux clients en dehors des États-Unis de contacter leur Verifone local représentant pour obtenir de l'aide concernant l'entretien, le retour ou le remplacement des appareils Et accessoires. Get the following information from the printed labels on the back of each e355 device to be returned: •... - Page 39 • Reference the model and part number in the Note box. Each e355 returned to Verifone requires a distinct MRA number to be issued. Even if you are returning multiple terminals of the same model, ensure that a separate MRA number is issued for each unit.
-
Page 40: Accessories
Installation Guide e355 6. Accessories Verifone provides a range of accessories and documentation for the e355. When placing orders, it is essential to reference the specific part numbers. Here are the available channels for ordering: Verifone online store: • Verifone - Contact us •... - Page 41 Utilizing services from unauthorized parties may potentially void any existing warranty. All units require the use of a power supply. Only use a Verifone-supplied power pack. Using an incorrectly rated power supply may damage the unit or cause it to malfunction. Ensure that the power supply used to power the unit matches...
-
Page 42: Device Does Not Start/Does Not Display Correct Readable Information
Verify all the cable connections including the proper insertion of the power Correct cable connector. Readable • If the problem persists, reach out to your local Verifone representative for Information assistance. Blank Display When the device display is blank: •... - Page 43 As commerce experts, we are here for you and your business. With our payment devices, our systems & solutions and our support. Everywhere. Anytime. So that your customers feel enabled, recognized and well taken care of, even beyond their expectations. Verifone. Creating omni-commerce solutions that simply shape powerful customer experiences.
Need help?
Do you have a question about the e355 and is the answer not in the manual?
Questions and answers