Table of Contents
Advertisement
Quick Links
Advertisement
Table of Contents

Subscribe to Our Youtube Channel
Related Manuals for Stairville Outdoor Stage PAR 12x4W Quad


Summary of Contents for Stairville Outdoor Stage PAR 12x4W Quad
- Page 1 Outdoor Stage PAR 12×4W Quad LED PAR...
- Page 2 Thomann GmbH Hans-Thomann-Straße 1 96138 Burgebrach Germany Telephone: +49 (0) 9546 9223-0 Internet: www.thomann.de 05.06.2024, ID: 387902 (V9)
-
Page 3: Table Of Contents
Table of contents Table of contents General information..........................6 1.1 Symbols and signal words....................... 6 Safety instructions............................. 9 Features............................... 13 Installation..............................15 Starting up..............................21 Connections and controls........................23 Operating..............................26 7.1 “Auto Run Mode” operating mode.................... 26 7.2 Operating mode “Manual”......................27 7.3 Operating mode “Static Colour”.................... - Page 4 Table of contents Protecting the environment......................44 Outdoor Stage PAR 12×4W Quad LED PAR...
- Page 5 Outdoor Stage PAR 12×4W Quad LED PAR...
-
Page 6: General Information
General information General information This document contains important instructions for the safe operation of the product. Read and follow the safety instructions and all other instructions. Keep the document for future refer‐ ence. Make sure that it is available to all those using the product. If you sell the product to another user, be sure that they also receive this document. - Page 7 General information Signal word Meaning DANGER! This combination of symbol and signal word indicates an immediate dangerous situation that will result in death or serious injury if it is not avoided. WARNING! This combination of symbol and signal word indicates a pos‐ sible dangerous situation that can result in death or serious injury if it is not avoided.
- Page 8 General information Warning signs Type of danger Warning – suspended load. Warning – danger zone. Outdoor Stage PAR 12×4W Quad LED PAR...
-
Page 9: Safety Instructions
Safety instructions Safety instructions Intended use This device is intended for use as an electronic lighting effect by means of LED technology. The device is designed for professional use only and is not suitable for use in households. Use the device only as described in this user manual. - Page 10 Safety instructions DANGER! Danger to life due to electric current! A short circuit could lead to a fire hazard and risk of death. Do not modify the mains cable or the plug! In case of isolation damage, disconnect immediately the power supply and arrange repair. If in doubt, seek advice from a qualified electrician. DANGER! Danger to life due to electric current! Within the device there are areas where high voltages may be present.
- Page 11 Safety instructions NOTICE! Risk of fire due to covered vents and neighbouring heat sources! If the vents of the device are covered or the device is operated in the immediate vicinity of other heat sources, the device can over‐ heat and burst into flames. Never cover the device or the vents. Do not install the device in the immediate vicinity of other heat sources.
- Page 12 Safety instructions NOTICE! Risk of fire by exceeding the maximum current! The device can supply power to other devices of identical design and connected in series. If too many devices are connected, the maximum permitted power consumption can be exceeded, which can cause the device to overheat and burst into flames. Only con‐ nect devices of identical design to the device.
-
Page 13: Features
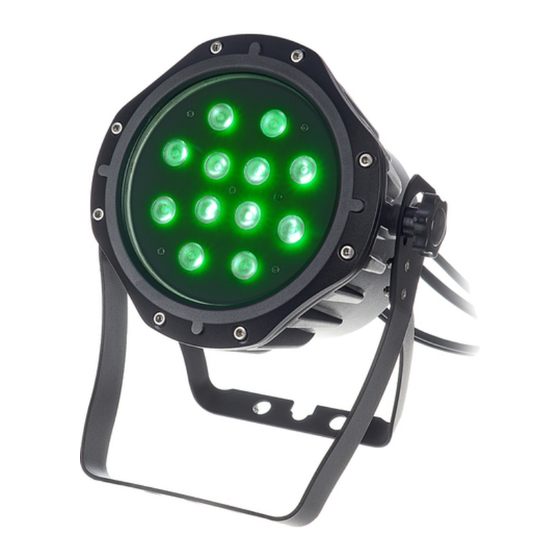
Features Features Due to its sturdy and weather-proof housing made of die-cast aluminium, the Outdoor Stage PAR is specially designed for outdoor use. With its very bright quad-colour LEDs, it is particularly suitable for professional lighting tasks. LED configuration: 12 quad-colour LEDs Control via DMX (3 different modes), via buttons and display on the device, and via infrared remote control (not included) Pre-programmed automatic shows... - Page 14 Features Information about protection Equipment with protection class IP65 are dust-tight and completely protected against contact class IP65 (first code number). They are also protected against splash water from any angle (second code digit). That is why this equipment can also be used outdoors. Event technology equipment is generally only designed for temporary use however (event lighting) and not for permanent use outdoors.
-
Page 15: Installation
Installation Installation Unpack and check carefully there is no transportation damage before using the unit. Keep the equipment packaging. To fully protect the product against vibration, dust and moisture during transportation or storage use the original packaging or your own packaging material suitable for transport or storage, respectively. - Page 16 Installation NOTICE! Risk of overheating due to bad ventilation! If the device is badly ventilated, the device can overheat. Do not operate the unit at ambient temperatures outside the specified tempera‐ ture range (see chapter "Technical data" of the user manual). Always ensure sufficient ventilation at the operating location.
- Page 17 Installation NOTICE! Data transfer errors due to improper wiring! If the DMX connections are wired incorrectly, this can cause errors during the data transfer. Do not connect the DMX input and output to audio devices, e.g. mixers or ampli‐ fiers. Use special DMX cables for the wiring instead of normal microphone cables.
- Page 18 Installation The safety cable must be attached to the safety eyelet. Please note that this device must not be connected to a dimmer. Outdoor Stage PAR 12×4W Quad LED PAR...
- Page 19 Installation Inserting the battery into the Push the lock of the battery holder towards the centre of the housing and pull out the battery remote control holder like a drawer. Insert the batteries. The battery is correct if the positive pole points to the housing base of the remote control.
- Page 20 Installation Connecting the DMX IP65 con‐ nectors ö Proceed as follows to connect the DMX-IP65 connectors: Insert the plug completely and straight into the coupling. Make sure that the flexible sealing ring has complete contact. Turn the union nut straight onto the thread of the coupling. Hand-tighten the union nut. Outdoor Stage PAR 12×4W Quad LED PAR...
-
Page 21: Starting Up
Starting up Starting up Create all connections while the device is off. Use the shortest possible high-quality cables for all connections. Take care when running the cables to prevent tripping hazards. Connections in DMX mode Connect the DMX input of the device to the DMX output of a DMX controller or another DMX device. - Page 22 Starting up Connections in ‘Master / When you configure a group of devices in ‘Master / Slave’ mode, the first unit will control the Slave‘ mode others. This feature is especially useful to start a show without much programming. Connect the DMX output of the master unit to the DMX input of the first slave unit.
-
Page 23: Connections And Controls
Connections and controls Connections and controls & ö Outdoor Stage PAR 12×4W Quad LED PAR... - Page 24 Connections and controls 1 Two-piece bracket for hanging or installation and for securing the safety cable 2 Infrared receiver for optionally available remote control 3 Locking screw for the two-piece bracket 4 LEDs 5 Safety cable eyelet 6 [Power Out] | Mains cable for the power supply of a connected device. 7 [DMX OUT] | DMX output cable 8 Pressure equalisation element 9 Control buttons...
- Page 25 Connections and controls Infrared remote control Since the universal remote control can be used for several device types, some buttons may not (item no. 354223, be assigned and therefore have no function. optionally available) 1 [AUTO] | Activates “Automatic” mode. ö...
-
Page 26: Operating
Operating Operating Connect the device to the mains to start operation. After a few seconds, the display indicates that a reset is in progress. The device is now operational. Press [Mode] to activate the main menu and select an operating mode. Use [Setup] to select further options. -
Page 27: Operating Mode "Manual
Operating 7.2 Operating mode “Manual” This operating mode can only be activated if the device is operating in stand alone mode or as master in a master-slave combination. This setting is only relevant if the device is not con‐ trolled via DMX. Press [Mode], use [Up] and [Down] to select the ‘Pro’... - Page 28 Operating Settings for programme 01 If you have selected programme 01, you can use [Setup] to access the settings. Now use [Up] and [Down] to select one of 15 static colour settings for all LEDs, see the following table. Colour Display Cyan ‘00’...
- Page 29 Operating Colour Display Amber ‘13’ ‘14’ Blackout ‘15’ Settings for programmes If you have selected one of programmes 02 … 07 you can adjust the following settings: 02 … 07 After selecting the programme, press [Setup] again and adjust the programme speed with [Up] and [Down] in a range from ‘SP.01’...
-
Page 30: Operating Mode "Static Colour
Operating 7.3 Operating mode “Static Colour” This setting is only relevant if the device is operating in stand-alone mode and is not controlled via DMX. In this mode you can select a fixed colour for continuous operation and to set the flashing frequency for all LEDs. -
Page 31: Dmx" Mode
Operating 7.4 “DMX” mode This setting is only relevant if the device is controlled via a DMX controller. Press [Mode], use [Up] and [Down] to select the ‘DMX’ menu option and confirm with [Setup]. Use [Up] and [Down] to assign a DMX address between ‘d.001’ … ‘d.512’ to the device and confirm with [Setup]. - Page 32 Operating 7.4.1 Functions in 4-channel DMX mode Channel Value Function 0…255 Red intensity (0% to 100%) 0…255 Green intensity (0% to 100%) 0…255 Blue intensity (0% to 100%) 0…255 White intensity (0% to 100%) 7.4.2 Functions in 6-channel DMX mode Channel Value Function...
- Page 33 Operating 7.4.3 Functions in 8-channel DMX mode Channel Value Function 0 … 255 Dimmer (0% to 100%) 0 … 255 Red intensity (0% to 100%) if channel 6 = 0 … 35 0 … 255 Green intensity (0% to 100%) if channel 6 = 0 … 35 0 …...
- Page 34 Operating Channel Value Function Colour selection, if channel 6 = 36 … 71 Speed, if channel 6 = 72 … 255 0 … 16 Blackout 17 … 33 Cyan 34 … 50 Purple 51 … 67 Pink 68 … 84 Orange 85 …...
-
Page 35: Slave" Mode
Operating Channel Value Function 238 … 254 Amber 0 … 255 Programme speed 19 … 255 Strobe effect 7.5 “Slave” mode This setting is only relevant when the device is a slave in a master/slave configuration and is not operated via DMX. To enable the operating mode, press [Mode] repeatedly until the dis‐ play shows ‘SLAv’... - Page 36 Operating “Automatic” mode Press [AUTO]. Playback of programmes ‘Pr02’ to ‘Pr07’ starts automatically. “Pre-programmed automatic Press [PRG]. Use [+] and [–] to select a value between ‘Pr01’ and ‘Pr07’ . show” mode In “Pre-programmed automatic show” mode, you can activate a strobe effect. To do so, press [STROBE] and then use [+] and [–] to select a value between ‘FS00’...
- Page 37 Operating Resetting to factory defaults To return the device to its default settings, press [OFF] and then [9], [8], and [7] one after the other. Outdoor Stage PAR 12×4W Quad LED PAR...
-
Page 38: Technical Specifications
Technical specifications Technical specifications Light source 12 × quad IR RGBW LED, 4 W Optical properties Beam angle 25° Control IR remote control (optional) Number of DMX channels 4, 6, 8 Input connections Power supply Power cable with IP65 screw connector 246 mm 200 mm... - Page 39 Technical specifications Remote control battery Lithium-ion button cell CR2025, 3 V International Protection Rating IP65 Mounting options Hanging, standing Dimensions (W × H × D) 246 mm × 300 mm × 200 mm Weight 3.5 kg Ambient conditions Temperature range 0 °C…40 °C Relative humidity 20%…80% (non-condensing)
-
Page 40: Plug And Connection Assignments
Plug and connection assignments Plug and connection assignments Introduction This chapter will help you select the right cables and plugs to connect your valuable equip‐ ment so that a perfect light experience is guaranteed. Please take our tips, because especially in ‘Sound & Light’ caution is indicated: Even if a plug fits into a socket, the result of an incorrect connection may be a destroyed DMX controller, a short circuit or ‘just’... -
Page 41: Troubleshooting
Troubleshooting Troubleshooting NOTICE! Data transfer errors due to improper wiring! If the DMX connections are wired incorrectly, this can cause errors during the data transfer. Do not connect the DMX input and output to audio devices, e.g. mixers or ampli‐ fiers. - Page 42 Troubleshooting Symptom Remedy The device does not work, no Check the mains connection and the fuse. light No response to the DMX Con‐ 1. Check the DMX connectors and cables for proper con‐ troller nection. 2. Check the address settings and the DMX polarity. 3.
-
Page 43: Cleaning
Cleaning Cleaning Optical lenses Clean the optical lenses, that are accessible from the outside, regularly in order to optimize the light output. The frequency of cleaning depends on the operating environment: wet, smoky or particularly dirty surroundings can cause more accumulation of dirt on the optics of the device. - Page 44 Protecting the environment Protecting the environment Disposal of the packing material Environmentally friendly materials have been chosen for the packaging. These materials can be sent for normal recycling. Ensure that plastic bags, packaging, etc. are disposed of in the proper manner. Do not dispose of these materials with your normal household waste, but make sure that they are collected for recycling.
- Page 45 Protecting the environment Disposal of your old device This product is subject to the European Waste Electrical and Electronic Equipment Directive (WEEE) as amended. Do not dispose of your old device with your normal household waste; instead, deliver it for controlled disposal by an approved waste disposal firm or through your local waste facility.
- Page 46 Notes Outdoor Stage PAR 12×4W Quad LED PAR...
- Page 48 Musikhaus Thomann · Hans-Thomann-Straße 1 · 96138 Burgebrach · Germany · www.thomann.de...
Need help?
Do you have a question about the Outdoor Stage PAR 12x4W Quad and is the answer not in the manual?
Questions and answers