Advertisement
Quick Links
x2
2mm Drill bit
Pressure Treated Timber
Your building has been pressure treated.
Pressure treating is a chemical process which helps to protect wood against adverse weather which could
lead to rot or insect damage.
The most common chemicals used to pressure treat wood are Alkaline Copper Quaternary (ACQ),
Copper Azole (CA), and Micronized Copper Quaternary (MCQ).
Safety: Always wear gloves, eye protection and a dust mask when handling wood. Due to chemicals in
pressure treated wood, never burn its sawdust or scraps; instead dispose in a land ll.
REGISTER FOR YOUR
ANTI-ROT
GUARANTEE TODAY
PLEASE SCAN HERE:
Advertisement

Related Manuals for Mercia Garden Products 03PTMBPN0409STP-V2


Summary of Contents for Mercia Garden Products 03PTMBPN0409STP-V2
- Page 1 2mm Drill bit Pressure Treated Timber Your building has been pressure treated. Pressure treating is a chemical process which helps to protect wood against adverse weather which could lead to rot or insect damage. The most common chemicals used to pressure treat wood are Alkaline Copper Quaternary (ACQ), Copper Azole (CA), and Micronized Copper Quaternary (MCQ).
-
Page 2: Any Questions
PLEASE SCAN HERE: ANY QUESTIONS? Scan code contact us via our customer portal. - Page 3 ACCESSING VIDEO GUIDES... ACCESSING VIDEO GUIDES... 3. Scan QR code... Some steps within this set of instructions come with an added video guide for your convenience. These can be accessed via the QR code and used to aid you in constructing that step.
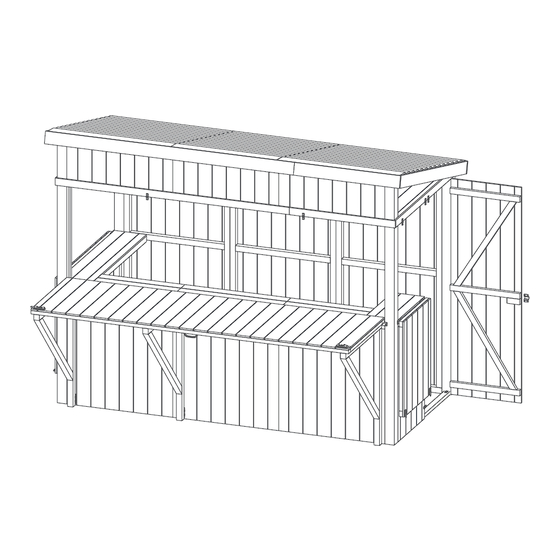
- Page 4 Shutter with Support Legs Shutters only Before assembly please make sure you have a suitable base ready to erect your building Closed Shutters Dimensions: Closed Shutters Dimensions: Width = 2803mm Width = 2803mm Depth = 1414mm Depth = 1414mm Height = 2140mm Height = 2140mm MADE IN GREAT BRITAIN Open Shutters Dimensions:...
- Page 5 Contents: End View Panel Support Framing - 44x44x910mm QTY 3 F4444-910mm End View Panel Support Framing - 44x44x994mm QTY 3 F4444-G-1034mm Corner Brace QTY 2 Butt Hinge QTY 6 PI-07-0012 PI-07-0066 Pull Handle QTY 1 T-Hinge QTY 12 PI-07-0033 PI-07-0021 Front Shutter QTY 2 Right Shutter QTY 1 Left Shutter QTY 1...
- Page 6 Step 1 Shutter with Support Legs IMPORTANT: Pre-drill before xing screws. IMPORTANT: Pre-drill before xing screws. Parts Needed - No. 13 (Main Building) QTY 1 Step 2A No. 14 (Main Building) QTY 2 No. 24 (Main Building) QTY 1 Parts Needed - No. 3 QTY 1 No.
- Page 7 Step 3 Step 5 IMPORTANT: Pre-drill before xing screws. IMPORTANT: Pre-drill before xing screws. Parts Needed - No. 18 QTY 2 Parts Needed - No. 1 QTY 2 No. 7 QTY 2 Fix the Small tower bolts (No. 18) to the top of the Left shutter using 4x30mm screws per Locate the Shutter blocks (No.
- Page 8 Step 7 Shutter with Support Legs IMPORTANT: Pre-drill before xing screws. IMPORTANT: Pre-drill before xing screws. Parts Needed - No. 5 QTY 2 Step 6A Parts Needed - No. 1 QTY 2 Locate the Window beading strips (No. 5) to the inside of the front Post, ensuring it No.
- Page 9 Step 9 Shutter with Support Legs IMPORTANT: Pre-drill before xing screws. IMPORTANT: Pre-drill before xing screws. Parts Needed - No. 2 QTY 1 Step 10A No. 7 QTY 1 Parts Needed - No. 2 QTY 1 No. 17 QTY 2 Locate the Shutter block (No.
- Page 10 Step 11 Step 13 IMPORTANT: Pre-drill before xing screws. IMPORTANT: Pre-drill before xing screws. Parts Needed - No. 18 QTY 2 Parts Needed - No. 4 QTY 1 PLEASE SCAN HERE: No. 17 QTY 3 Fix the Small tower bolts (No. 18) to the Fix the Tee Hinges (No.
-
Page 11: Left Side
Step 15 Step 17 IMPORTANT: Pre-drill before xing screws. IMPORTANT: Pre-drill before xing screws. Parts Needed - No. 14 QTY 2 Parts Needed - No. 13 QTY 1 No. 15 QTY 1 No. 14 QTY 4 Fix the Pad Bolt (No. 15) to the door Locate the Turn buttons (No. - Page 12 Step 18 Step 20 IMPORTANT: Pre-drill before xing screws. IMPORTANT: Pre-drill before xing screws. Parts Needed - No. 9 QTY 3 Parts Needed - No. 16 QTY 6 No. 10 QTY 3 No. 11 QTY 3 Locate the Panel Support framing to the front of the building, ensuring the Lay out the Panel support framing framing lines up with the edge of the...
- Page 13 Step 21 Shutters only Once constructed, apply a waterproo ng treatment to your garden building as soon as possible. This will help to protect your building from water ingress. See page 14 for a full guide and instructions. Apply treatment. Shutter with Support Legs Want to share your experience with us? Leave us a review on Feefo, TrustPilot or Google.
- Page 14 PLEASE SCAN HERE: ANY QUESTIONS? Scan code contact us via our customer portal.
- Page 17 REGISTER FOR YOUR PLEASE SCAN HERE: ANTI-ROT GUARANTEE TODAY...
Need help?
Do you have a question about the 03PTMBPN0409STP-V2 and is the answer not in the manual?
Questions and answers