Advertisement
Quick Links
Advertisement

Related Manuals for Mercia Garden Products 03PTMBPN0406STP-V1


Summary of Contents for Mercia Garden Products 03PTMBPN0406STP-V1
- Page 1 MADE IN GREAT BRITAIN 2mm Drill bit Water proof Preservative...
- Page 2 ANY QUESTIONS? Scan the QR code to contact us via our customer portal.
- Page 3 ACCESSING VIDEO GUIDES... ACCESSING VIDEO GUIDES... 3. Scan QR code... Some steps within this set of instructions come with an added video guide for your convenience. These can be accessed via the QR code and used to aid you in constructing that step.
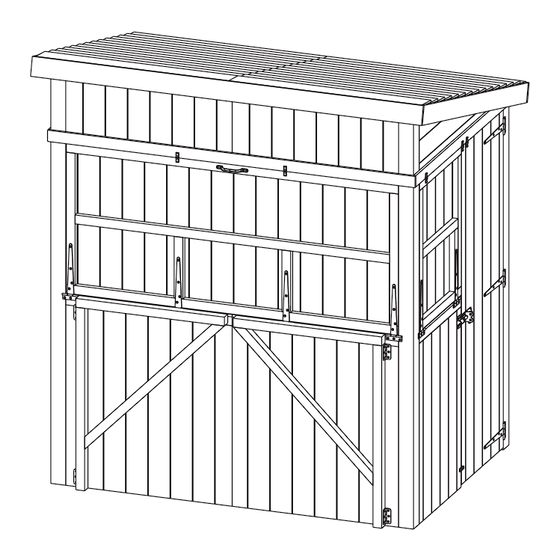
- Page 4 Shutter with Support Legs Shutters only Closed Shutters Dimensions: Closed Shutters Dimensions: Width = 1966mm Width = 1966mm Depth = 1434mm Depth = 1434mm Height = 2140mm Height = 2140mm Open Shutters Dimensions: Open Shutters Dimensions: Width = 1966mm Width = 1966mm Depth = 2106mm Depth = 1434mm Height = 2140mm...
-
Page 5: Missing Parts
Contents: End View Tip: Labelling your parts, using a pencil and masking tape, Panel Support Framing - 44x44x910mm QTY 2 F4444-910mm may help you to identify them easier when you need them. End View Panel Support Framing - 44x44x994mm QTY 2 F4444-G-1034mm Corner Brace QTY 2 Butt Hinge QTY 4... - Page 6 Shutter with Support Legs IMPORTANT: Pre-drill before xing screws. Before assembly, please make sure you have a suitable PLEASE SCAN HERE: Step 2A base ready to install your building onto. Parts Needed - No. 3 QTY 1 No. 17 QTY 2 Step 1 Locate the Left Shutter (No.
- Page 7 Step 3 Shutter with Support Legs IMPORTANT: Pre-drill before xing screws. IMPORTANT: Pre-drill before xing screws. PLEASE SCAN HERE: Parts Needed - No. 18 QTY 2 Step 5A Fix the Small tower bolts (No. 18) to the top Parts Needed - No. 4 QTY 1 of the Left shutter using 4x30mm screws No.
- Page 8 Step 6 Step 8 IMPORTANT: Pre-drill before xing screws. IMPORTANT: Pre-drill before xing screws. Parts Needed - No. 5 QTY 2 Parts Needed - No. 2 QTY 1 No. 7 QTY 1 Locate the Window beading strips (No. 5) to the inside of the front Post, ensuring it Locate the Shutter blocks (No.
- Page 9 Step 10 Shutter with Support Legs IMPORTANT: Pre-drill before xing screws. IMPORTANT: Pre-drill before xing screws. Step 9A Parts Needed - No. 18 QTY 2 PLEASE SCAN HERE: Parts Needed - No. 2 QTY 1 Fix the Small tower bolts (No. 18) to the No.
-
Page 10: Left Side
Step 12 Step 14 IMPORTANT: Pre-drill before xing screws. IMPORTANT: Pre-drill before xing screws. Parts Needed - No. 1 QTY 1 PLEASE SCAN HERE: Parts Needed - No. 14 QTY 2 No. 17 QTY 3 No. 15 QTY 1 Fix the T-Hinges (No. 17) to the Fix the Pad Bolt (No. - Page 11 Step 16 Step 17 IMPORTANT: Pre-drill before xing screws. IMPORTANT: Pre-drill before xing screws. Parts Needed - No. 13 QTY 1 Parts Needed - No. 9 QTY 2 No.14 QTY 4 No. 10 QTY 2 No. 11 QTY 2 Locate the Turn buttons (No. 14) to the front of the building above the front Lay out the Panel support framing shutter,...
- Page 12 Step 19 Step 20 IMPORTANT: Pre-drill before xing screws. Shutters only Parts Needed - No. 16 QTY 4 Once constructed, apply a waterproo ng Locate the Panel Support framing to the treatment to your garden building as soon front of the building, ensuring the framing as possible.
- Page 13 ANY QUESTIONS? Scan code contact us via our customer portal.
Need help?
Do you have a question about the 03PTMBPN0406STP-V1 and is the answer not in the manual?
Questions and answers