
Subscribe to Our Youtube Channel
Related Manuals for Kozyard Doris


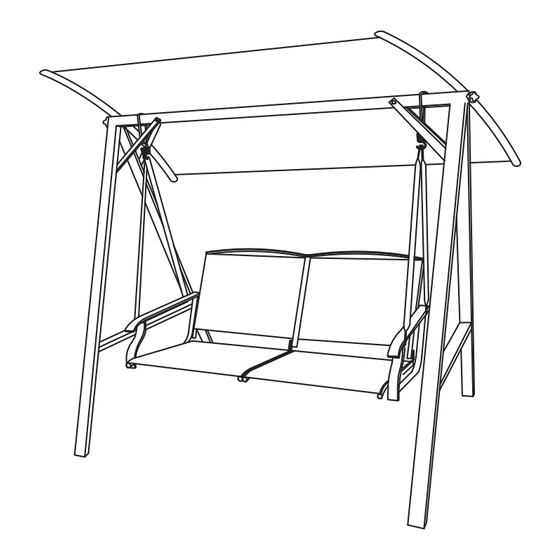
Summary of Contents for Kozyard Doris
- Page 1 Doris 2-Seat Swing Chair Assembly Manual Kozyard LLC Products www.kozyard.com © Copyright 2016 - 2023 Kozyard LLC. | All Rights Reserved. Version:20231006...
-
Page 2: Care And Warranty
Avoid using bleach, acid, or any other solvents on either the fabric or frame components. • For a comprehensive warranty policy, please visit www.kozyard.com. Be aware that warranty terms can change without prior notification. • For the best performance and safety of your chair, inspect and tighten all bolts... -
Page 3: Part List
PART LIST CROSS BAR TOP BAR ARMREST LEG TUBE SEAT SIDE BRACE SPRING HOOK HANGING TUBE CANOPY BOLT (M6*35) BOLT (M6*40) BOLT (M6*45) JX16 BOLT (M6*82) BOLT (M6*55) ROOF SCREW PX14 WASHER NUT CAP SPACER BOLT CAP QX28 RX14 TX28 ALLEN KEY WRENCH... - Page 4 Step 1: • Align the two holes at one end of the Top Bar (C) with the two holes at the top of the Leg Tube (A) and the two holes at the top of the Leg Tube (A) on the other side.
- Page 5 Step 3: Connect Side Brace (G) to Leg Tube (A) using Bolt (J), Washer (Q) and Nut (P). Repeat this step on the other side of the frame as shown in diagram. Step 4: Adjust the angle of the two legs. Place a Cross Bar (B) between the two leg tubes at one end of the frame, aligning the bolt holes.
- Page 6 Step 5: Align the holes on the Armrest (D) with the holes on the side of the Seat (F). Insert Bolt (L) from outside through the hole on the Armrest (D), Washer (Q), Spacer (S) and the hole on the side of the Seat (F).
- Page 7 Step 7: Attach the Hanging Tube (E) to the Armrest (D) with Bolt (N), Washer(Q) and Nut (P). Repeat this step at each connection as shown in diagram. Step 8: Attach the Spring Hook (H) to the end of Hanging Tube (E) and attach the Spring Hook (H) to the leg structure previously assembled in step 4.
- Page 8 Step 9: Attach the Canopy (I) to the Top Bar (C) with the Roof Screw (O) as shown in diagram. The assembly of the product is now complete. Step 10: Securely tighten all bolts and cover all Nut Caps (R) and Bolt Caps (T) before use on level, solid ground.
- Page 9 866-355-0018 Kozyard LLC Copyright 2016 - 2023 Kozyard LLC. | All Rights Reserved. ©...
Need help?
Do you have a question about the Doris and is the answer not in the manual?
Questions and answers