
Related Manuals for BDI CORRIDOR SV 7128


Summary of Contents for BDI CORRIDOR SV 7128
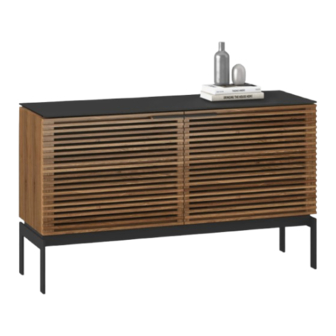
- Page 1 CORRIDOR® SV 7128 2 BAY CONSOLE INSTRUCTION MANUAL LET’S GET STARTED. DESIGN MATTHEW WEATHERLY...
- Page 3 Congratulations on the purchase of your Corrid or SV Console 7128 from BDI. Your cabinet has been designed to provide a lifetime of enjoyment. This manual will provide you with assembly instructions and other helpful information that will ensure that you get the most out of your cabinet.
- Page 4 HARDWARE AND COMPONENTS Unpack and identify the parts listed below. The assembly workspace should be a non-marring surface such as carpet. For missing hardware pieces, please contact BDI Customer Service at customerservice@bdiusa.com. Do not use power tools for assembly of this product.
-
Page 5: Step 2. Attach The Base
STEP 1. BUILD THE BASE ASSEMBLY Attach the 2 (A3) Leg Frames to (A2) Sub-Frame with 8 (H1) Screws using (T2) Hex Wrench. Make sure the red arrow on the (A2) Sub-Frame faces the same direction as the direction of the (A3) Leg Frames. PART/DESCRIPTION T2-HEX WRENCH H1-SCREW... - Page 6 2 PERSON TASK ASSEMBLY STEP 3. INSTALL DOOR PULLS With help from another person, carefully PART/DESCRIPTION position the (A1) Cabinet upright and install (H5) Door Pulls using (H3) Screws and (T1) Phillips Screwdriver. Adhere (H4) Rubber T1-SCREWDRIVER Bumpers about 1 inch (25mm) from edges of the cabinet as shown below.
- Page 7 STEP 4. PLACE GLASS TOP ASSEMBLY Place (C5) Glass Top on top of (A1) Cabinet. Position glass flush with cabinet front doors. NEED ASSISTANCE? customerservice@bdiusa.com BDIUSA.COM | 7...
-
Page 8: Fine Tuning
FINE TUNING LEVEL CABINET Levelers are integrated into each leg assembly and are accessed at the bottom of each cabinet leg. If your floor is uneven, you may extend one or more levelers to attain a level, stable cabinet placement. Turning the leveler clockwise will extend the leveler; turning it counter-clockwise will retract it. - Page 9 ADJUST DOOR HINGES (IF NEEDED) FINE TUNING The doors on your cabinet should be evenly PART/DESCRIPTION spaced and the doors should open and close freely without rubbing against the door frame. T1-PHILLIPS SCREWDRIVER If the cabinet’s doors appear out of alignment, this condition can be corrected with minor adjustment to the European hinges on each door.
-
Page 10: Care And Maintenance
While BDI’s stained wood finishes are stable in tone & appearance, all finishes are subject to some degree of discoloration with prolonged exposure to direct sunlight. Please take care to avoid positioning your BDI cabinet in any area with extensive direct sunlight. -
Page 11: Warranty
Select chairs carry coverage for five (5) years from the date of the product delivery, based on an 8-hour daily use pattern. BDI reserves the right to refine or update its warranty from time to time. See the complete and latest warranty document at www.bdiusa.com/warranty. - Page 12 These distinctive product configu ations are protected by US and international patents, trade dress, and/or copyright laws. Corridor & BDI are trademarks of Becker Designed, Inc. All rights reserved. ©2020, BDI | V.08.24.2020 Made in China.
Need help?
Do you have a question about the CORRIDOR SV 7128 and is the answer not in the manual?
Questions and answers