Table of Contents
Advertisement
Quick Links
WEEE Warning Message
Symbol for Separate Collection in European Countries
This symbol indicates that this product is to be collected
separately.
The following apply only to users in European countries:
This product is designated for separate collection at an
appropriate collection point. Do not dispose of as
household waste.
For more information, contact the retailer or the local
authorities in charge of waste management.
FCC STATEMENT
This device complies with Part 15 of the FCC Rules. Operation is subject to the
following two conditions:
(1).
This device may not cause harmful interference, and
(2).
This device must accept any interference received, including interference that
may cause undesired operation.
Note:
This equipment has been tested and found to comply with the limits for Class B digital
devices, pursuant to Part 15 of the FCC rules. These limits are designed to provide
reasonable protection against harmful interference in a residential installation. This
equipment generates uses and can radiate radio frequency energy and, if not installed
and used in accordance with the instructions, may cause harmful interference to radio
communications.
However, there is no guarantee that interference will not occur in a particular
installation. If this equipment does cause harmful interference to radio or television
reception, which can be determined by turning the equipment off and on, the user is
encouraged to try to correct the interference by one or more of the following
measures:
Reorient or relocate the receiving antenna
Increase the separation between the equipment and receiver
Connect the equipment into an outlet on a circuit different from that to which the
receiver is connected
-1-
English
Advertisement
Table of Contents

Subscribe to Our Youtube Channel
Related Manuals for Genius P850


Summary of Contents for Genius P850
- Page 1 Note: This equipment has been tested and found to comply with the limits for Class B digital devices, pursuant to Part 15 of the FCC rules. These limits are designed to provide reasonable protection against harmful interference in a residential installation. This...
- Page 2 English Use of shielded cable is required to comply with Class B limits in Subpart B of Part 15 of the FCC rules. Do not make any changes or modifications to the equipment unless otherwise specified in the manual. If such changes or modifications should be made, you could be required to stop operation of the equipment.
- Page 3 If the internal fluid has entered your eyes, consult a physician to receive treatment. A camera is a precision instrument. Do not drop it, strike it or use excessive force when handling the camera. This might cause damage to the camera.
- Page 4 The digital camera may feel warm when being used continuously or for an extended period of time. This is normal and not a malfunction. If you will not be using the batteries for an extended period of time, remove them from the camera to prevent leakage or corrosion.
-
Page 5: Table Of Contents
N AND _______________________________ 16 OWER AVING UNCTION __________________________________ 17 HANGING THE Switching between REC mode and PLAYBACK mode ________ 17 Selecting the REC mode _______________________________ 17 Selecting the ASM mode _______________________________ 18 _____________________________________ 19 SING THE ENUS REC menu __________________________________________ 19... - Page 6 English Using the Flash ______________________________________ 24 Using the Macro _____________________________________ 25 Using the Self-timer & Burst ____________________________ 25 Using the Aperture Priority _____________________________ 26 Using the Shutter Priority ______________________________ 26 Using the Manual Exposure ____________________________ 26 _______________________________ 27 ECORDING OVIE...
- Page 7 AMERA TO A PC ________________________ 41 ONNECTING THE AMERA TO A Using the Card Reader ________________________________ 41 Connecting the Camera to a Computer with the USB Cable____ 42 ) __________________ 42 OSSIBLE NUMBER OF SHOTS STILL IMAGE TROUBLESHOOTING ___________________________________________________ 43...
-
Page 8: Introduction
Anti-Shaking High ISO value up to 3200 SD memory card can support up to 8 GB Package contents Carefully unpack your kit box and ensure that you have the following items. Digital Camera CD driver includes: Pesto! Mr. Photo Quick Time Adobe Reader Multi-Language User’s Manual... -
Page 9: Getting To Know Your Camera
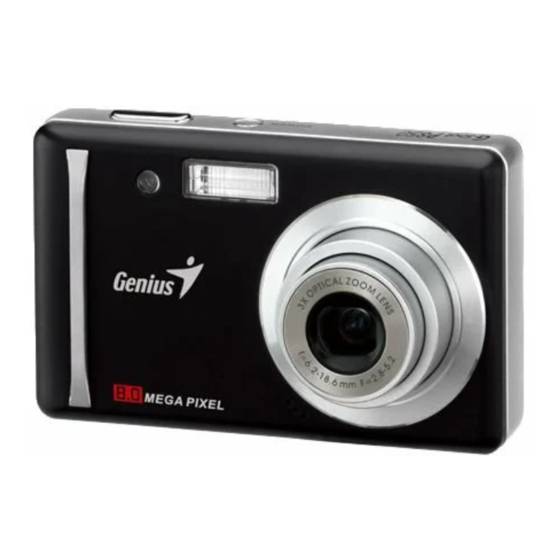
English GETTING TO KNOW YOUR CAMERA Front View 1. AF Lamp / Self-timer Lamp 2. Flash 3. Lens 4. Microphone Rear View 5. Operation Lamp 6. Zoom Button Thumbnail Playback Zoom 7. Playback Button 8. Menu Button 9. Mode Button 10. -
Page 10: Top View
English Top View 15. Shutter Button 16. Power Button Right View 17. Strap Ring 18. USB/AV Terminal Bottom View 19. Speaker 20. Tripod Socket 21. Battery Cover -10-... -
Page 11: Inserting The Battery
English Inserting the Battery The camera is powered by a rechargeable lithium-ion battery (Li-Ion 820 mAh). 1. Open the battery cover. Slide the battery cover in the direction indicated by the arrow. 2. Insert the battery. Install the battery with the terminal facing inside the camera. -
Page 12: Charging The Battery Pack
1. Place the battery pack in the charger with the label facing up. Connect the AC adaptor to the charger, and then plug it into a power outlet. The charger lamp lights red and battery charging begins. When charging is completed, the lamp becomes green. -
Page 13: Setting The Display Language / Date & Time
Apply the setting. After adjusting the settings, press the SET or the MENU button to apply the setting. NOTE If the battery is removed for longer than 48 hours, the Date and Time will need to be re-set. -13-... -
Page 14: Lcd Monitor Information
English LCD Monitor Information REC Mode Recording mode 13 White balance Flash 14 Shutter speed Macro 15 Shake warning Self-timer / Burst 16 Aperture value Zoom indicator 17 Face tracking Shots remaining 18 Exposure Battery 19 Focus area Storage media... -
Page 15: Playback Mode
Playback mode Recording info Protect Histogram Voice memo Captured date & time File number / Total Voice memo control Battery DPOF Storage media Resolution NOTE Some information may not display correctly if you display images captured by another camera model. -15-... -
Page 16: Getting Started
English GETTING STARTED Turning the Power On and Off 1. Press the POWER button ( ) to turn on the camera in the REC mode. The power turns on, the lens extends and the LED lights in green. Press the PLAYBACK button ( ) to turn on the camera in the PLAYBACK mode. -
Page 17: Changing The Mode
2. Launch the mode palette. Press the MODE button ( ) to show the scene mode palette. 3. Select a mode. Use the four-way control to select a desired mode and press the SET button to confirm the setting. Display... -
Page 18: Selecting The Asm Mode
Capture the effects of candle light. Candlelight Use to take portrait pictures when the background is darker. Night Portrait Enhance the skin tone so that the facial skin appears Soft Skin smooth. Soft Flowing Can take pictures with effects as smooth as silk. -
Page 19: Using The Menus
English Using the Menus When a menu is displayed, the four-way control and the SET button are used to make the desired settings. REC menu 1. Turn the power on, and set the camera to the REC mode 2. Open the REC menu. -
Page 20: Rec Menu List (Movie)
/ ` / Setup menu 1. Turn the power on, and set the camera to the REC or PLAYBACK mode. 2. Press the MENU button ( ) to open the REC or PLAYBACK menu. The menu displays depends on whether you are in the REC mode or the PLAY- BACK mode. - Page 21 S.Image Sets a recorded image as the start-up image. To erase all data stored in the memory card if you are using a card, or all data stored in the internal memory if there is no card inserted. A “BUSY...PLEASE WAIT” message displays and the memory Format card is starting to format.
-
Page 22: Basic Recording
English Basic Recording Recording Still Images 1. Press the Power button on, and set the camera to the REC mode. 2. Compose the subject on the monitor. Aim the focus area ( ) to the subject that you want to take. -
Page 23: Quality Values
Using the Zoom Function Your camera has a combination of optical and digital zoom functions that allows you to zoom in on far away subjects or zoom out for a wide angle shot. The optical zoom is achieved by mechanically adjusting the lens of the camera. -
Page 24: Using The Flash
English Using the Flash The flash is not only for taking pictures when there is insufficient light, but also when the subject is in shade or in backlight conditions. Press the flash button to cycle your camera through the various flash modes. The flash will not activate when continuous shooting or movie recording. -
Page 25: Using The Macro
10 sec.: The shutter release will be delay for 10 seconds. Double: Record two images in a shot after pressing the shutter release button 10 to 12 seconds. Burst: Keep pressing the shutter button fully to take continuous shooting. Release the shutter button to stop shooting. -
Page 26: Using The Aperture Priority
English 4. Press the shutter button to take a picture. NOTE When using the self-timer function, be sure to use a tripod or place the digital camera on a level, stable surface. Using the Aperture Priority In this mode, you can set an aperture value to match the brightness. -
Page 27: Recording Movie Clips
1. Turn the power on, and set the camera to Movie mode. 2. Compose the subject on the monitor. Aim the focus area ( ) to the subject that you want to take. The LCD monitor displays the available recording time ( ). -
Page 28: Youtube Mode
Recording automatically stops when the file reaches 100 MB. NOTE Using VLC software to play videos on a MAC system may lead to display issues. We recommend using the QT player for video playback. To record a YouTube movie, select from the Movie Size function. -
Page 29: Recording A Voice Memo
English Recording a Voice Memo You can add a voice memo to the still images after you record it. 1. Turn the power on, and set the camera to the PLAYBACK mode. 2. Press to select a still image that you want to add a voice memo. -
Page 30: Other Recording Functions
For more accurate adjustment or when the light source cannot be specified. NOTE Point the camera at a white piece of paper or similar object under the lighting conditions for which you want to set the white balance, and then press the Shutter button. -
Page 31: Setting The Iso
Sets the auto exposure bracketing (AEB) to shoot three continuous images, each with a different exposure setting: correctly exposed, underexposed, or overexposed. Setting the Highlight Make the subject stand out from its surroundings. The subject will be in focus in three different ranges: NOTE The Photo Frame and Face Tracking cannot be used using the Highlight. -
Page 32: Setting The Sharpness
The image becomes greenish. Blue The image becomes bluish. Setting Date Stamp The Date Stamp function can be used to add a date to your pictures as you take them. Option Description Do not add the recorded date and time to printed images. -
Page 33: Setting Face Tracking
After initializing face tracking function, the lens will lock the main character in the picture and follow the movements. Also use the auto digital zoom technology to retract and extract the zoom lens that allows you to become the focus of the lens. NOTE Pressing the shutter halfway showing the green AF area means the focus is complete. -
Page 34: Playback
Press the shutter to capture the still image from the movie clip while it had paused. Magnifying and Trimming Still Images 1. Turn the power on, and set the camera to the PLAYBACK mode. -
Page 35: Viewing In Thumbnail
English Press the SET button ( ) again to trim the selected image and save it as a new one. Viewing in Thumbnail 1. Turn the power on, and set the camera to the PLAYBACK mode. 2. Press the zoom button [W], and a thumbnail screen is displayed. -
Page 36: Deleting Files
Use the four-way control to select the image. Press the SET button to toggle the on and off. Repeat this step until all images that you want to delete are displayed with an icon 5. Delete images. Press the MENU button, then select [Yes] and press the SET button. All selected images will be deleted. -
Page 37: Deleting All Files
You can open the menu in full screen or in thumbnail. 3. Press to select [Lock all], and then press the SET button. To unlock all files, select [Unlock all] in this step, then press the SET button. 4. Press the SET button to protect all images. -37-... -
Page 38: Protecting Multiple Files
5. Protect images. Press the MENU button, then select [Yes] and press the SET button. All selected images will be protected. To cancel protect, press the MENU button in this step. -
Page 39: Changing The Image With Effects
5. Only a large size image can be resize to a smaller one. Changing the Image with Effects You may use Red Eye Removal remove the red eye caused by the flash from the original photo. Or use color filters to save as a new image. -
Page 40: Setting The Dpof
Press SCN button to set the date stamp of current image. Press SCN button again to turn off date stamp. Repeat steps 4~6 to other images to print. 7. After you finished all image settings, press the SET or MENU button to apply it. -40-... -
Page 41: Making Connections
Connecting the camera to a computer using the supplied USB cable. Using the Card Reader 1. Eject the memory card from the camera and insert it in a card reader that is connected to a computer. 2. Open [My Computer] or [Windows Explorer] and double-click the removable drive icon that represents the memory card. -
Page 42: Connecting The Camera To A Computer With The Usb Cable
3070 1554 2408 3509 1554 2456 3612 2362 3612 4549 1364 1040 1535 1204 1754 1228 1806 1180 1806 2274 512M Remark: You can take more than 9999 shots, but this is the maximum number the camera can show. -42-... -
Page 43: Troubleshooting
The subject was beyond Turn the Macro mode on it the subject is the range within which within 15 cm or 40 cm. the camera can focus. Do not use Macro mode when shooting distant subjects. -
Page 44: Specifictions
Fireworks / Snow /Sports / Party / Candlelight / Night Portrait / Soft Skin / Soft Flowing Water / Food / Building / Text / Auction Sensitivity Auto / ISO 50 / ISO 100 / ISO 200 / ISO 400 / ISO 800 / ISO 1600/ISO 3200 White Balance...
Need help?
Do you have a question about the P850 and is the answer not in the manual?
Questions and answers