Table of Contents
Advertisement
Quick Links
Advertisement
Table of Contents

Related Manuals for GCC Technologies Mercury III


Summary of Contents for GCC Technologies Mercury III
- Page 1 Mercury III Maintenance Manual V1.0 Maintenance Manual Mercury III...
-
Page 2: Table Of Contents
Chapter 3 – Electrical System ........................22 3.1 Mercry III Power system ........................22 3.2 Mercury III Electrial Diagram ......................23 3.3 Definition of Pin (Mainboard) ......................24 3.4 Upgrade process from 5272 main board to 5272 V2 main board ..........26 3.4 A comparison table for GCC laser power supplies ................. - Page 3 Mercury III Maintenance Manual V1.0 5.2 How does the laser beam travel to the working area ? ..............39 Chapter 6 - Software ............................41 6.1 How to upgrade firmware ........................41 6.2. How to set the proper USB mode on GCC Laser Machine and printer port setting of windows system ? ................................
-
Page 4: Chapter 1:Overview
Mercury III Maintenance Manual V1.0 Chapter 1:Overview 1.1 Introduction This manual is prepared for distributors to maintain or repair JF240-UV Printer. Briefly, Chapter 1 is the introduction of contents, safety and operating enviroment Chapter 2, we have diagrams to show the part number for every part in different... -
Page 5: Safety Measures
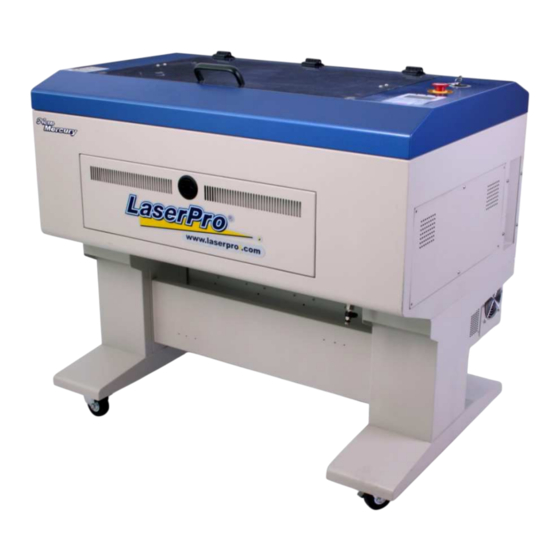
Mercury III Maintenance Manual V1.0 1.2.2 Product Label This label is located at the right-back side of machine. All the product information such as Serial Number, Model Numbers, Laser Power and Electric power can be found here. Before requiring any further tech support, always provide the service person with the information on this label. -
Page 6: Operating Environment
Mercury III Maintenance Manual V1.0 NOTE Each LaserPro laser machine is shipped with a single pair of safety goggles. If additional safety goggles are required, please contact GCC directly or an authorized GCC distributor. If you wish to purchase one on your own, please make sure the safety goggles... - Page 7 Mercury III Maintenance Manual V1.0 • Select a location in which there is a short, direct path to the fume exhaust system. • Set the LaserPro Mercury Series on a floor surface that is completely even. • Make sure your smoke or fire detection system in the immediate area is functioning.
-
Page 8: Chapter 2:Mechanical System
Mercury III Maintenance Manual V1.0 Chapter 2:Mechanical System Top Cover... - Page 9 Mercury III Maintenance Manual V1.0 Top Cover – Parts List Item no. Parts no. Description Q'ty 228039950G Glass Windows 26500165G Window Handle. 22000045G Magnet MC-12 24400130G Top Cylinder Bracket 244054660G Top Cover 26500166G Window Hinge. 25200308G 90° dish flat head machine screw M6*16...
-
Page 10: Mid Section
Mercury III Maintenance Manual V1.0 Mid Section... - Page 11 Little Fan Bracket 22200006G Fan (AD0824HB-A70GL(T) LF)/(JF0825B2H-R) 25200465G Pan head machine screw M4*35L 290105920G Mainboard Assembly with 5272 V2 firmware for Mercury III 290093770G Mainboard Assembly with 5272 V1 firmware for Mercury III 25200115G Truss head machine screw(M3*6L SUS). 25700015G...
- Page 12 Mercury III Maintenance Manual V1.0 Item no. Parts no. Description Q'ty 22801022G Z-axis table screw 24100367G Z axis pulley cover 22800922G Z axis top stopper 20700023G Bearing 608ZZ 22800270G Z axis lower bearing base 25200214G Socket head set screw.(M4*12L) 25200192G Socket head set screw.(M4*8L sus+coating)
-
Page 13: Laser Tube And Power Supply
Mercury III Maintenance Manual V1.0 III. Laser tube and power supply... - Page 14 Mercury III Maintenance Manual V1.0 Laser tube and power supply – Parts List Item no. Parts no. Description Q'ty 25200214G Socket head set screw.(M4*12L) 22801877G Laser main base 29005983G Synrad 12W Laser Tube 29005984G Synrad 25W Laser Tube 22900048G Synrad V30 Laser Tube...
-
Page 15: Axis Assembly
Mercury III Maintenance Manual V1.0 IV. X Axis Assembly... - Page 16 Mercury III Maintenance Manual V1.0 X Axis Assembly – Parts List Item no. Parts no. Description Q'ty 22800614G X axis left Base 22800652G X-Axis idle Pulley Bracket. 22800616G Awheel Bracket(Front) 22800617G Awheel Bracket (Rear) 22800632G Screw 4*5 22800151G Bracket 26000016G Flat washer(d4.5xD9.5xt0.8)
- Page 17 Mercury III Maintenance Manual V1.0 Item no. Parts no. Description Q'ty 22800641G X Rail 22800615G X axis Right Base 22800141G X shaft Bracket 20700027G Bearing. LF-1360ZZ/F686ZZ (SUS) 22800619G X middle shaft 22802697G NEW X Axis Pulley (P54-2GT) 25200101G Socket head set screw.(M3*6L)SUS+CO 22800066G Space.
-
Page 18: Y Axis Assembly
Mercury III Maintenance Manual V1.0 Y Axis Assembly Y Axis Assembly spare parts Item no. Parts no. Description Q'ty 24400134G Y transmission bearing holder 24100079G Pulley (big) 22800157G gear fasten ring 20700027G Bearing. LF-1360ZZ/F686ZZ (SUS) 24100078G Pulley (small) 24400522G X pulley cover... - Page 19 Mercury III Maintenance Manual V1.0 Item no. Parts no. Description Q'ty 25200138G Socket head set screw.(M3*10L sus+coating) 25200192G Socket head set screw.(M4*8L sus+coating) 22800144G Y Rail 29000255G Y-axis detector 25200115G Truss head machine screw(M3*6L SUS). 25200192G Socket head set screw.(M4*8L sus+coating)
-
Page 20: Pen Carriage
Mercury III Maintenance Manual V1.0 VI. Pen Carriage... - Page 21 Mercury III Maintenance Manual V1.0 Pen Carriage – Parts List Item no. Parts no. Description Q'ty 22800273G Lens carriage chassis 26500240G pipe connector (M-5HLH-6) 26500252G plastic screw 22800645G Carriage PCB. 25200149G Socket head set screw.(M3*12L) 23300298G Hand Knobs(CRKB.M3-6L) 23300385G X tube chain. (07.10.018-23L-060.10.12)
-
Page 22: Chapter 3 - Electrical System
Mercury III Maintenance Manual V1.0 Chapter 3 – Electrical System 3.1 Mercry III Power system... -
Page 23: Mercury Iii Electrial Diagram
Mercury III Maintenance Manual V1.0 3.2 Mercury III Electrial Diagram... -
Page 24: Definition Of Pin (Mainboard)
Mercury III Maintenance Manual V1.0 3.3 Definition of Pin (Mainboard) 5206e M/B 5272 M/B The definition of pin JCP1 Driver Board JCP1 (N/A) Paralle port (Black) JP34 Driver Board JP5 3 pin (White) Driver Board JS1 RJ45 JP25 Driver Board JP4... - Page 25 Mercury III Maintenance Manual V1.0 5272 V1 Mainboard (Red is mainboard, Green is Driver Board) 5272 Mainboard V2 The difference of outlook between 5272 main board and 5272 V2 main board are below. Most of the cables connect to 5272 and 5272 V2 main boards are the same (same position). The upgrade process below shows only the difference cable connections.
-
Page 26: Upgrade Process From 5272 Main Board To 5272 V2 Main Board
Mercury III Maintenance Manual V1.0 3.4 Upgrade process from 5272 main board to 5272 V2 main board The parts for upgrading to 5272 V2 main board are below: 209027890G M5272 V2 main board to 209027890G USB disk board cable Wafer cable... - Page 27 Mercury III Maintenance Manual V1.0 Remove the original USB adaptor and change to USB disk board adaptor. The mounting screw (red circles) use original two screws. Use Truss head screws (25200115G_GCC send) to mount the USB disk board (see 4...
- Page 28 Mercury III Maintenance Manual V1.0 M5272 V2 main board to USB disk board cable (209027890G) is connected on below position. (see two yellow circles below)The Wafer cable (209027890G) is connected to below position (see the green arrow pointed) It needs to remove the cover of extension power set first.
- Page 29 Mercury III Maintenance Manual V1.0 Before plug in Fiber cable (221000060G) into USB disk board and 5272 V2 main board, the red cap (see the yellow circle below) should be removed. The end of Fiber cable should be separated for 6cm, so the fiber cable can plug all the way down into fiber connector.
-
Page 30: A Comparison Table For Gcc Laser Power Supplies
Mercury III Maintenance Manual V1.0 To make sure the fiber cable is connected correctly. Turn on machine and see if the fiber connector LED connects to Off and Off connects to On. 3.4 A comparison table for GCC laser power supplies... -
Page 31: Chapter 4 - Components Replacement
Mercury III Maintenance Manual V1.0 Chapter 4 – Components Replacement 4.1 Control Panel Changing Process Open the top window, and loosen eight screws inside, then you can remove the whole top cover. (please refer to below pictures) Disconnect circles cables show in below picture(blue circles) and loosen four screws... -
Page 32: Power Power Changing Process
Mercury III Maintenance Manual V1.0 4.2 Power Power Changing Process Dismount six screws on the side panel (see red arrows below) Disconnect the AC cable (see picture below) - Page 33 Mercury III Maintenance Manual V1.0 Disconnect the DC cable (see picture below) Loosen five screws to remove the power board (see picture below)
-
Page 34: Motor & X Motor Pcb Changing Process
Mercury III Maintenance Manual V1.0 4.3 X motor & X motor pcb Changing process Open the top window, and loosen eight screws inside, then you can remove the whole top cover. (please refer to below pictures) Move the top cover away and it will be easier to replace x motor... - Page 35 Mercury III Maintenance Manual V1.0 Remove x motor power cable and signal cable and loosen the x motor belt tension cable. There are four screws on the bottom of x motor. Remove these four screws and the x motor can be removed and changed new one.
-
Page 36: Lens Carriage Roller Changing Process
Mercury III Maintenance Manual V1.0 6. Then loosen two screws and unplug the x motor flat cable and auto focus cable. The x motor pcb can be removed. 4.4 Lens carriage roller changing process Dismount two screws on the top of lens carriage (see red circles below) and the lens carriage can loosen from X axis rail. - Page 37 Mercury III Maintenance Manual V1.0 When mounting back the top rollers, the rollers and springs have to be correct sequence. After tighten the top rollers to the end, it needs to be loosen one circle back, otherwise the roller tension is too tight.
-
Page 38: Chapter 5 - Laser System
Mercury III Maintenance Manual V1.0 Chapter 5 - Laser System 5.1 How to measure the power output of a laser tube? In order to measure the power output of a laser tube, we need to use a power meter (12170001G) that will measure the heat generated and convert it to a power reading. The best place to measure the laser output power is at the immediate output of the laser tube (before to mirror 1). -
Page 39: How Does The Laser Beam Travel To The Working Area
Mercury III Maintenance Manual V1.0 5.2 How does the laser beam travel to the working area ? The laser beam generated by the laser source is reflected and guided by 4 optical lenses on to the working area. Therefore the proper adjustment and maintenance of them are crucial. - Page 40 Mercury III Maintenance Manual V1.0 5.2.2 Laser Beam and Red Beam Alignment Front Target Laser Beam Red Beam Laser Tube Prism Mount of Red Beam 5.2.3 How to Re-alignment Laser Beam and Red Beam Parallel To remove the side covers and prism mount for mirror 1.
-
Page 41: Chapter 6 - Software
Mercury III Maintenance Manual V1.0 Chapter 6 - Software 6.1 How to upgrade firmware GCC machines requires a firmware upgrader program to upload the firmware of machine through USB/Parallel port. 6.1.1 The Firmware Upgrader can be downloaded from GCC Distributor Club website :... - Page 42 Mercury III Maintenance Manual V1.0 6.1.2. Firmware can be downloaded from GCC Distributor Club http://gccf.gcc.com.tw/distributor/login.aspx 6.1.3. By the firmware upgrader, you can upgrade the firmware to the latest version or the version you want according to below steps : Step1. Refer to below data sheet, turn on the machine with pressing and holding the corresponding button, the machine will be boot in transfer mode and the communication port is decided by the button you press when turning on the machine.
-
Page 43: How To Set The Proper Usb Mode On Gcc Laser Machine And Printer Port Setting Of Windows
Mercury III Maintenance Manual V1.0 6.2. How to set the proper USB mode on GCC Laser Machine and printer port setting of windows system ? Step 1 Check loader version installed on the machine Press and hold “F4” on Control Panel then turn on the machine, if below page appears, the loader installed on the machine is the new loader, if the control panel shows nothing, the loader is an old loader. - Page 44 Mercury III Maintenance Manual V1.0 Step 2 Set the proper USB mode on both the machine and printer port setting of windows system according to following table : Loader Windows XP/Windows Vista/Windows 7 Laser series version 32 bit 64 bit...
- Page 45 Mercury III Maintenance Manual V1.0 Select “Machine setting” III. Select “Usb setup wizard”...
- Page 46 Mercury III Maintenance Manual V1.0 IV. Choice the USB mode you want to use and save it. Printer port setting I. Start Settings Printers and Faxes to enter “printers page”...
- Page 47 Mercury III Maintenance Manual V1.0 II. Right click on the printer you want to set the port and select “Properties” III. Turn to “Port” tab, select the proper port you want to set (in this case, it’s GCC USB)
-
Page 48: Chapter 7 - Trouble Shooting & Diagnostic
Mercury III Maintenance Manual V1.0 Chapter 7 - Trouble Shooting & Diagnostic 7.1 Firmware Error Message Message Laser Tube Error Laser tube is overheat press any key to stop Cause V30 laser tube responses the over-temp signal for a period of time, and firmware recognizes the laser tube is over temperature. - Page 49 Mercury III Maintenance Manual V1.0 Working table has reached the limit, please lower the table. Message Cause Platform reach the top limit Platform reach the bottom limit Certain object touches the limit switch Limit switch malfunction Solution 1. UP/Down platform to avoid the limit level...
- Page 50 Mercury III Maintenance Manual V1.0 No Language Data Please upload proper language data first Message Cause While using multi-language, precise language file is not imported. Solution Import correct language pack file. SmartMEMORY is full.Please remove some file Message Cause SmartMEMORY buffer is full...
- Page 51 Mercury III Maintenance Manual V1.0 Z motor malfunction For service please contact your local distributor Message Cause Z motor is abnormal Solution Verification: Check if the cable connections of Z motor are correct Check if there were any abnormal sounds from Z motor...
- Page 52 Mercury III Maintenance Manual V1.0 WARNING!The CCD unitis not detected. Press Back to leave CCD Message offset mode. Cause CCD is not installed Solution Install the CCD WARNING! No CCD Please remove include CCD command file Message Cause CCD is not installed...
- Page 53 Mercury III Maintenance Manual V1.0 Fail to locate registration mark. Align red beam to the first mark Message Cause The first registration mark can’t be recognized Solution Move the red beam to the first mark and do the recognition again.
-
Page 54: Error Lights
Mercury III Maintenance Manual V1.0 Message Drive Not Found!! USB storage dose not plug. Cause Solution Confirm if USB storage is plugged or try to replug again. No Valid File!! Message Cause File name is Chinese version or there is no prn and/or plt file mode under the folder. - Page 55 Mercury III Maintenance Manual V1.0 The LED circled in green is the 5V light. This light should always be “ON“ showing that there is a 5V supplied to the mainboard. Check that the power supply next to the mainboard that provides the 5V power is working properly if it is not “on”.
-
Page 56: 5272 V1 Mainboard
Mercury III Maintenance Manual V1.0 7.2.2 5272 V1 mainboard D1 : LED for USB Connection Indicator LED on : USB Connection LED off : USB Disconnection D2 : FPGA Download Done Indicator LED on : FPGA Download Done LED off : FPGA Download not ready... - Page 57 Mercury III Maintenance Manual V1.0 C RESET Indicator LED on : M/B RESET LED off : normal mode C.1 D8 : M/B RESET Indicator C.2 D9 : D/B RESET Indicator Light : M/B RESET Dark : normal mode D Power Ready Indicator...
- Page 58 Mercury III Maintenance Manual V1.0 D.2 D9 : M/B 2.5V Power Indicator D.3 D10 : M/B DDR 2.5V Power Indicator D.4 D13 : D/B 5V Power Indicator...
- Page 59 Mercury III Maintenance Manual V1.0 D.5 D12 : D/B 3.3V Power Indicator Door Open Indicator LED on : Door Close LED off : Door Open E.1 D20 : Door Open Indicator 1...
-
Page 60: Setting Tickle Pulse On Mercury Series Machines Equipped With Synrad Laser Sources
Mercury III Maintenance Manual V1.0 E.2 D21 : Door Open Indicator 2 E.3 D22 : Door Open Indicator 3 7.2.3 Setting tickle pulse on Mercury Series machines equipped with Synrad laser sources. By nature, Synrad laser sources require a tickle pulse to keep the laser ready for firing. The tickle pulse signal required depends on the individual laser tube. -
Page 61: Hidden Diagnostics
Mercury III Maintenance Manual V1.0 7.3 Hidden Diagnostics 7.3.1. Hidden Function To enter the Hidden Function , hold down the ▽ button and turn on the machine. 7.3.2 Setting Origin Pressing and holding “Enter” key and turn on the machine Adjust X、Y position by pressing... - Page 62 Mercury III Maintenance Manual V1.0 7.3.4 Hardware Test To enter the Hardware Test , hold down the 「Auto Focus」 button and turn on the machine. Following the instruction, pressing ▼、▲ to go to previous or next page. Contents of Hardware Test (Pressing 「Enter」 to start test):...
- Page 63 Mercury III Maintenance Manual V1.0 Y Motor Test Z Motor Test Y motor test checks that the Y motor is Z motor test checks that the Z motor is functional by asking user to use the keys on functional by asking user to use the keys on...
- Page 64 Mercury III Maintenance Manual V1.0 Buzzer Test Dual Head Test Dual head test checks if the optional Dual Buzzer test checks if the following items are Head module is functional. functional :Buzzer / Laser Diode / Air / Fans System buzzer will beep while user is...
- Page 65 Mercury III Maintenance Manual V1.0 Fire Alarm Test Stop Switch Test File Alarm Test checks if the optional Stop Switch Test checks if the Emergency SmartGuard is functional. Stop switch is functional. System buzzer will beep once fire is System buzzer will beep once user press detected.
- Page 66 Mercury III Maintenance Manual V1.0 Serial Port Test USB Test Serial port test checks that the serial port is USB port test checks that the USB port is functional by asking the user to send a file functional by asking the user to send a file through the serial port.
- Page 67 Mercury III Maintenance Manual V1.0 DRAM Test DRAM test checks the functionality of the DRAM.
-
Page 68: Charper 8 Basic Maintenance
Mercury III Maintenance Manual V1.0 Charper 8 Basic Maintenance 8.1 Suggested Cleaning and Maintenance Supplies Cleaning / Maintenance Tool Special notes Soap Solution or All-Purpose Cleaner Paper Towels Cotton Cloth Denatured Alcohol DO NOT use alcohol on any painted surface, plastic, or the laser system. -
Page 69: Cleaning The Optics System
Mercury III Maintenance Manual V1.0 *The recommended grease is AFA grease AFA Grease is a high-grade, long-life grease developed with a urea-based consistency enhancer using a high-grade synthetic oil as the base oil. �Features� (1) Long service life Unlike ordinary soap based grease for metal lubrication, AFA Grease excels in antioxidation stability and therefore can be used for a long period of time. - Page 70 Mercury III Maintenance Manual V1.0 Mirror 1 Mirror #1 is located inside the bottom left access door panel of the LaserPro Mercury Series. 1) Use a #2 Phillips Screwdriver to open the access panel located on the bottom left side of the LaserPro Mercury Series.
-
Page 71: Cleaning The Mirrors
Mercury III Maintenance Manual V1.0 Mirror 2 1) Unscrew and remove the black dust cover covering mirror 2. 2) Unscrew the thumbscrew holding mirror 2 in place. 3) Clean the lens in the proper manner. 4) Place the mirror back to the optics holder after cleaning. - Page 72 Mercury III Maintenance Manual V1.0 6) Make sure that the mirror is completely dry before reinstalling it. CAUTION If the center of the mirror is scratched, contact your GCC LaserPro representatives for replacement. DO NOT apply any finger pressure or any other cleaning solutions to the mirror or focal lens surface.
Need help?
Do you have a question about the Mercury III and is the answer not in the manual?
Questions and answers