Table of Contents
Advertisement
Quick Links
Advertisement
Table of Contents

Related Manuals for Returnstar Interactive Tech IQTouch TB1100 Pro Series


Summary of Contents for Returnstar Interactive Tech IQTouch TB1100 Pro Series
- Page 1 IQTouch Interactive Flat Panel Display TB1100 Pro Gen2 ——User Manual——...
-
Page 2: Table Of Contents
Contents 1. Safety Instruction ..........................3 2. .Installation ............................5 2.1. Bearing capacity ........................5 2.2. OPS installation ........................8 3. Enable the device ..........................9 4. Control panel ..........................10 5. Interface ............................11 6. Remote control ..........................12 7. Remote control area ........................13 7. -
Page 3: Safety Instruction
1. Safety Instruction For your safety, please read the following instruction before you use the product. Serious injury or property loss may be caused by improper operations. Do not try to repair the product without guidance. Placement Do not place the unit on an unstable cart, stand, tripod, racket, table, or shelf. ... - Page 4 Please don’t display the high brightness image on the screen for a long time. Sight Distance The best distance between audience and screen is 5-7 times that of screen diagonal. The best watching angle between audience and screen is within 178 ° Temperature ...
-
Page 5: Installation
Installation 2.1. Bearing capacity If the product is installed in a wall-mounted way, the bearing capacity of the surface for installation must be at least four times of the weight of the product. If the surface for installation is a wall or the ceiling of a building, the surface must be made of solid bricks, concrete or other materials with equal intensity. - Page 6 Step2: Expansion bolt installation Press the expansion bolt into 8 holes. (Ref. Picture 2) Step3:Wall mounting bracket A installation Install the wall mounting bracket A with 8pcs screws and gaskets. Please ensure that the wall mounting bracket A is installed horizontally. (Ref. Picture3) Step4: Install the left&...
- Page 7 Use screws fix the hang bracket B at the back of IQTouch. Please check the direction of hang bracket B before installation. (Ref. Picture 4) Step5: Hang IQTouch on the wall mounting bracket A Hanging the left &right hang bracket B to the wall mounting bracket A, please ensure two hang brackets B total hang on wall mounting bracket A, then tighten the screws of hang bracket B to prevent it slide.
-
Page 8: Ops Installation
2.2. OPS installation Install the OPS by the following steps: 1) Insert the OPS into the special slot on the rear of the interactive flat panel display. 2) Tighten the screws. 3) Confirm that the OPS is installed correctly. Handle facing outward... -
Page 9: Enable The Device
3. Enable the device 1) Connect the power cord to the port at the back of the device. 2) Plug the power cord to the electrical socket. 3) If the power LED light is not turn red please turn on the rocker switch at the back of the device. -
Page 10: Control Panel
4. Control panel Item Icon Function Description Power button: On or standby mode IR receiver:Receive infrared signals such as remote control Light sensor: Automatically adjust screen brightness according to ambient light USB Type C: Image, power, touch, audio and video transmission HDMI port used to connect an external display device Touch USB cable to realize the touch function of external device USB 3.0 port (Andriod &... -
Page 11: Interface
5. Interface Terminal Interface Side Interface... -
Page 12: Remote Control
6. Remote control Button Function Description Power on/off Mute Setting Up/down/left/right button Confirm Control sound volume Open/close menu Return to previous step Turn off speaker... -
Page 13: Remote Control Area
7. Remote control area The effective receiving area is about 3 meters with 30° angle from vertical point to the left and right. And the effective receiving area is about 5 meters from the front of device. Note that the remote control signal receiver locates at the position of power indicator. -
Page 14: Connecting And Setting
7. Connecting and setting For safety, please do not connect any power supply before the external devices setup. 7.1. External computer and touch connecting Audio IN VGA IN USB-Touch 1) Connect a VGA cable (15 pin) between the VGA and external PC. Connect an earphone cable between the PC and audio at the same time. -
Page 15: Av Connecting
7.2. AV connecting AV IN 1) Connect an AV cable with the device with AV-OUT (Yellow is Video, Red is Audio-R, White is Audio-L). 2) Plug the POWER cord and switch it on from the rear panel. 3) Press to turn on the panel. -
Page 16: Video-Out
Front HDMI/ HDMI 1/ HDMI 2 1) Connect a HDMI cable with the device with HDMI. 2) Plug the POWER cord and switch it on from the rear panel. 3) Press to turn on the panel. 4) Select Signal source to HDMI source according to the one you connected. 7.3. -
Page 17: Rs232
7.4. RS232 1) Connect a serial port cable with the device. 2) Plug the POWER cord and switch it on from the rear panel. 3) After connecting the central control system and unit, you can use some of the function such as power on/off or adjust the volume etc. RS232 code list RS232 Code for Android Firmware 16-byte command, baud rate 9600... - Page 18 AA BB CC 03 00 xx ** DD EE FF Note: xx = volume level value, for example, 00 — 100 if the volume is 30 (decimal) = 1E (hexadecimal), XX = 1E; ** = 03+00+1E (hexadecimal) = 21 Mute AA BB CC 03 01 00 04 DD EE FF Unmute AA BB CC 03 01 01 05 DD EE FF...
-
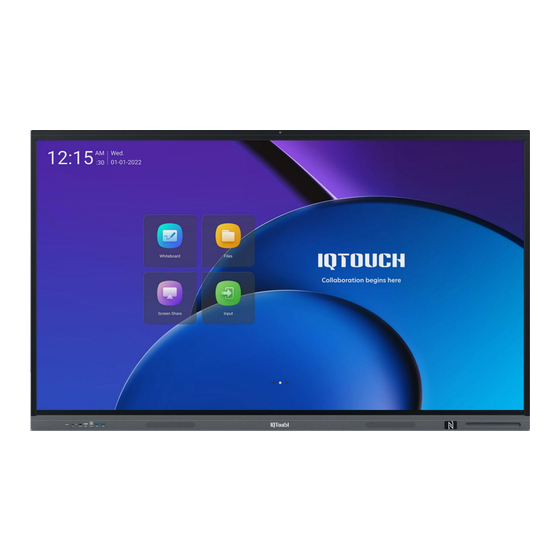
Page 19: Home Screen
8. Home screen Status display: Hotspot, Wired network, USB, Wi-Fi. Home Screen: Whiteboard, Files, Input, custom note. Recent Swipe right to go to recent pages for recent apps used, recent screenshots, and recent whiteboard. Whiteboard is a multi-functional writing application that helps users communicate... - Page 20 efficiently. It brings a relaxed experience and improves team efficiency. You can tap the Whiteboard icon on the start screen. After the meeting, you can scan the QR code to take away the content on the whiteboard. On the home screen, tap WhiteBoard icon.
-
Page 21: Share Via Qr Code
9. Share via QR code At the bottom tool bar on the left, tap Sharing. A QR code window will pop up. Follow the on-screen instructions, and use your smartphone to scan the QR code to access the File URL. ... -
Page 22: File
10. File 10.1. Open file At the bottom toolbar on the left, tap File. A File window will pop up. Follow the on-screen instructions, and open the file folder to select the whiteboard file you need. (With MHB file format). -
Page 23: Save Files
10.2. Save files At the bottom tool bar on the left, tap File. A File window will pop up. Follow the on-screen instructions. Save the whiteboard file locally or to a USB drive. 10.3. Whiteboard setting At the bottom toolbar on the left, tap Setting. A Setting window will pop up. ... - Page 24 drawing, and dual-color pen. Multiplayer Writing: Enable it to allow multiple people to write on the whiteboard at the same time. Chart Drawing: Enable the automatic graphic recognition feature. It is turned off by default, and the default option will be restored after restarting. ...
-
Page 25: About
white board contents. LAN Mode: Smartphones and tablets must be connected to the Local network before you can scan the QR code to take away the whiteboard contents. 10.4. About Check the current software version. Check the software license agreement. ... -
Page 27: Input Source
12. Input source Tap Input on the home screen to check the current valid input sources. Tap any input source to switch to the input source you want. Long tap any input source to edit the input source name if needed. -
Page 28: Custom Note
13. Custom note Long press the default IQ note to edit the note. A pop-out window will appear where you can enter 13 characters for the title and 65 characters maximum. -
Page 30: More Tools
14. More tools You can move more app tools to the home screen as a shortcut to features such as File Transfer, PollKit(vote), Record, Timer, Crop and Camera, and so on. 14.1. Annotation tool Tap > on the left side of the home screen. A functional menu will appear. Tap Annotation to allow you to make annotations on the current screen. -
Page 31: Fast File Transfer
14.2. Fast file transfer Tap More, then a pop-up window will appear, then select Fast File Transfer. And a QR code will appear. Scan the QR code to upload the file. After scanning the code, you can select file type: picture, text, and document. - Page 32 After the file you transferred appeared on the screen, tap the file. A task bar will appear. You can open the file, insert it into the whiteboard, save it, and delete it if needed.
-
Page 33: Recording
14.3. Recording Tap More Icon > Record Tap Rec to start recording. -
Page 34: Stopwatch
14.4. Stopwatch Tap > on the left of the screen, then tap Stopwatch to enable it. Tap Start, then you can tap Pause to stop timing or tap Lap to set and record the lap. After you tap Pause, you can tap Continue to continue the timing or tap Rreset to reset the timing if needed. -
Page 35: Timer
14.5. Timer Tap Start and select the start point for counting-down. Tick RING WHEN TIME IS UP if you want a ring to go off as a reminder when the time is up. 14.6. PollKit ( Voting tool) Tap More >... - Page 36 Tap Create vote code to generate a QR code with the number of voting options you defined, then scan the QR code and select the option. Tap Anonymous if you want to perform anonymous voting. Tap Multi for multi-choice selection. ...
- Page 37 Voting results can be displayed in the pie chart or histogram. You can insert the voting result into the whiteboard, or take away the voting result by scanning the QR code.
-
Page 38: Cropping Tool
14.7. Cropping tool Tap More icon > Crop You can adjust the cropping area, or you can select full screen to crop the entire screen. Tap E=mc² if you want to insert the cropped pictures into the whiteboard. ... -
Page 39: Calender
General mode: the camera will give a panoramic view. You use the gesture in front of the camera to enable the mode. Face Mode: the camera will automatically switch focus and include your face into a frame with enlarged image. You use the gesture in front of the camera to enable the face mode. -
Page 40: Split Screen
14.10. Split screen Tap More > Split screen, and select the app you want to put into the split screen. -
Page 41: Settings
15. Settings Swipe left to go to the Apps screen. Tap to go to Settings. The settings include Wireless&Network, Personal, Input&Output, System, and About. -
Page 42: Wireless Connection And Network
15.1. Wireless connection and network Ethernet: support wired and wireless network connection. It does not support Ethernet and Wi-Fi connection at the same time. Wi-Fi: support Wi-Fi connection. Hotspot: Supports 2.4GHz and 5GHz Hotspot connection. Bluetooth: support connection to Bluetooth devices. Files can be transferred via Bluetooth. - Page 43 Screen Saver: set the screen saver. The screen saver will show up when the display goes into screen saver mode. Screen Lock Password: When the screen lock password is set, users need to enter the password to unlock the screen when the display is on standby mode or is powered on.
- Page 44 Note: a screen lock password is required before you can use this feature. Long press with five fingers to turn off the screen: you can turn off the screen by long pressing the screen with five fingers. NFC lock: you can not only use NFC card to unlock the screen but also use it to set access permission for some apps.
- Page 45 You can use NFC card to control screen lock/unlock, turn off the screen, enable apps, and so on, but you are only allowed to select one type of NFC control each time. Which means NFC card is not applicable to all the functions at the same time. NFC lock screen unlock: enable it if you want to lock the screen with NFC card.
-
Page 46: Input&Output
15.3. Input&Output Touch Sounds: when it is enabled, you will hear a screen tap sound. Sound Output Setting: select Speaker, Lineout (for earphones), Mixed (audio-out for other audio devices) USB Lock: when the USB lock is enabled, the file in the USB flash drive cannot be read. -
Page 47: System
15.4. System Date&Time: support the 24-hour format and different time zone. It supports manual update and automatic update upon internet connection. Language&Keyboard: set system language and switch keyboard. - Page 48 Storage:check for current internal storage status and RAM usage. Support clearing app data. Startup & Shutdown: Supports for display’s automatic power-on/off.
- Page 49 Dormancy: Set the time duration of no operation (1-60 min.) before the display goes into sleep mode (screen turned off).
- Page 50 Screen Protection: set the time duration before the display goes into screen saver mode when the display detects no operation. It supports different screen-saver modes. System Update: check for the current system version and update it to the new version.
- Page 51 Reset Factory: clear all the data and restore the device to the factory setting.
-
Page 52: About
15.5. About Device Name: customize the device name Android Version: check the information related to the current Android version and related legal information. -
Page 53: Trouble Shooting
16. Trouble shooting Remote Control Check whether there is object between remote control and panel receiver; Remote control out of order Check whether the battery is installed correctly; Check whether the battery is drained. Touch Make sure infrared frames have not been obscured. ... - Page 54 Check the volume. Image displayed Check whether the Mute button on the remote properly, but no sound is control is pressed. played. Check whether the audio cable between the PC and interactive flat panel display is connected correctly. No image is displayed or Modify the color settings.
Need help?
Do you have a question about the IQTouch TB1100 Pro Series and is the answer not in the manual?
Questions and answers