Table of Contents
Advertisement
Quick Links
Advertisement
Table of Contents

Related Manuals for Returnstar Interactive Tech IQTouch TB1300 Pro


Summary of Contents for Returnstar Interactive Tech IQTouch TB1300 Pro
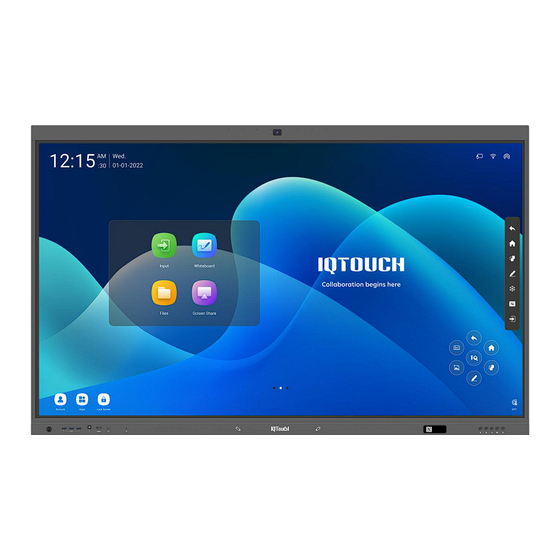
- Page 1 IQTouch TB1300 Pro Interactive Flat Panel Display ——User Manual——...
-
Page 2: Table Of Contents
Content Safety Instruction ................................4 1. Product Overview ............................... 9 1.1. Appearance Introduction ..........................9 1.2. Ports ................................11 2. Installation ................................17 2.1. Safety Precautions ............................17 2.2. Installation Step ............................. 17 2.3. Weight Loading ............................. 20 2.4. OPS Installation .............................22 3. - Page 3 4.6. Applications ..............................46 4.6.1. File Manager ............................46 4.6.2. Multi-window .............................48 4.6.3. Welcome page .............................49 4.6.4. Screen recording ..........................50 4.6.5. Screenshot ............................51 4.6.6. Gallery ..............................52 4.6.7. Voting System .............................52 4.6.8. Easy Upload ............................53 4.6.9. Timer ..............................54 4.6.10. Multi-users ............................55 4.7.
-
Page 4: Safety Instruction
Safety Instruction For your safety, please read the following instructions before you use the device. Serious injury or property damage may be caused by improper operations. Do not try to repair the device on your own. Disconnect the machine from power supply immediately if any major failures occur. - Page 5 If inspection, adjustment, or maintenance is required, contact the local distributor for help. Use the specified power supply. To prevent the machine from being damaged, do not use any cables other than the one provided with the machine. Use a three-wire socket and ensure that it is properly grounded. ...
- Page 6 Do not put an exposed fire source, such as a lit candle, on the machine. Pull out the power supply during thunderstorms. Do not touch the machine during a lightning storm, you may experience an electric shock. Install or place components that supply high enough voltage to cause personal ...
- Page 7 Do not lay the machine down in a way where the venting surface will be covered. Do not install the machine on carpet or cloth. Do not use a cloth, such as table cloth, to cover the machine ...
- Page 8 Do not expose the battery to overheated environments, such as sunlight or heat sources. Dispose of the used battery based on your local regulations. Additional advice: Use the machine in an environment with comfortable lighting. It is harmful ...
-
Page 9: Product Overview
1. Product Overview 1.1. Appearance Introduction Front View... - Page 10 Rear View Proximity Sensor Front Buttons Front Ports Top camera Light Sensor Microphone Speakers Power Supply Plug Magnetic Pen Placement Area Power Switch NFC Card Area Rear Ports Remote Control Receiver OPS Port...
-
Page 11: Ports
1.2. Ports Front USB ports and rear USB 3.0/USB 2.0 ports switch connections based on signal sources. If the current signal source is reading the data from an external product connecting to the port, please switch the signal source after the data reading is complete. Otherwise, the data or product may be damaged. For USB use, USB 2.0 provides up to 500Ma whereas USB 3.0 provides up to 900Ma of power. - Page 12 Item Icon Function Description When the screen is in ECO mode, the screen will automatically wake up when a person approaches the screen within 3 meters. USB 3.0 port (Andriod & PC) Realize touch function of external device...
- Page 13 HDMI port used to connect an external display device USB Type C: Image, power, touch, audio and video transmission Light sensor: Automatically adjust screen brightness according to ambient light The rear power output port supplies 5 V/2 A (maximum) power. Please purchase the power AC adapter for powering external devices.
- Page 14 1.3 Front Buttons Buttons Operations Functions Enter the preset function. Short press Note: Q button can be set in System Settings> General > Custom Key.
- Page 15 Short press Go to the home page. Short press Back to the previous menu. Short press Open the Quick Setting menu Power on Sleep mode Short press The red and white lights flicker alternately: Display enters Sleep mode. Long press for more Power off than 2 seconds...
- Page 16 1.4 Remote Control Buttons Functions Turn on/off Mute or unmute Number input Up/down/left/right button Channel BACK key VOL+/VOL- Control sound volume PgUp/PgDn Next/previous page in ops mode Active writing application Input Select different input source Menu Open/close menu HOME Back to Home page Enter Confirm...
-
Page 17: Installation
2. Installation 2.1. Safety Precautions Installation Environment Installation Direction 2.2. Installation Step... - Page 18 Step 1: Punching holes in the wall Mark 8 holes location on the wall according to wall mounting bracket A and use the drill bit to drill the 8 holes. Depth of holes should not be less than 90mm (Ref. Picture 1) Step 2: Expansion bolt installation Press the wall anchors into 8 holes.
- Page 19 Step 4: Install the left& right hang bracket B to IQTouch. Use screws to fix the hang bracket B at the back of IQTouch. Please check the direction of hang bracket B before installation. (Ref. Picture 4) Step 5: Hang IQTouch on the wall mounting bracket A Hanging the hang bracket B on the left and right onto the wall mounting bracket A, please ensure two hang brackets B completely hanged onto wall mounting bracket A, then tighten the screws of hang bracket B to prevent it slide.
-
Page 20: Weight Loading
2.3. Weight Loading Net weight of the machine(65",75",86"): 40kg(±1.5kg), 56kg(±1.5kg), 66kg(±1.5kg). When using a mobile stand, ensure that the weight of the machine is less than the loading capacity of the mobile stand. When using the wall-mount bracket, ensure that the wall can support the weight of the machine. We recommend that the wall surface be reinforced and have a loading capacity 4 times of the weight of the machine. - Page 21 Vertical Installation When installing, try to keep the machine vertical. The vertical tilt range allowed for wall-mount installation is ±3 degrees. An excessive tilt angle may cause the screen glass to fall off or the machine to collapse.
-
Page 22: Ops Installation
Ventilation Ensure adequate ventilation and/or an air-conditioned environment. We recommend keeping certain distances from the side of the product to the wall or panels. Ventilation requirements are shown in following figure: 2.4. OPS Installation The built-in computer does not support hot plugging. Therefore, you must insert or remove the built-in computer when the display is powered off. - Page 23 Step1 Unscrew the screws by hand to remove OPS shielding cover. Step2 Push OPS into the port at the rear of the machine from right to left. Step3 Secure OPS to the machine by using the screws.
-
Page 24: Getting Started
3. Getting Started 3.1. Power On Step 1: Ensure the power cable is fully seated into the panel and wall outlet before powering on the panel. Please confirm your wall outlet supports a power range of 100V to 240V with frequency at 50 Hz/60 Hz ±... -
Page 25: Power Off
Step 3: Press the power button on the front control panel or on the remote control. 3.2. Power Off Step 1: Press the power button on the front panel or the power button on the remote control to enter sleep mode. Step 2: Long press the power button on the front panel or the power button on the remote... - Page 26 the panel, and the power indicator will turn red. Step 4: If you want to completely turn off the product, turn off the rocker switch behind the panel (next to the power socket) and unplug the power cord. If an OPS is installed, the OPS and the screen will be simultaneously powered off when the power is turned off.
-
Page 27: Iq Os
4. IQ OS 4.1. Homepage 4.1.1. Start Guide The startup guide is the page that appears the first time the user turns on the device, guiding the user to quickly become familiar with the basic functions of IQTouch. It mainly includes language selection page, network setup page, time setting page, and device name page. -
Page 28: Introduction Of
4.1.2.Introduction of Page Elements 4.1.2.1. Wallpaper Display the unique wallpaper of IQ OS 5.0. 4.1.2.2. Time Long press to open the system settings. You can set date, time and formats manually. 4.1.2.3. Small components Supports displaying channel preview, scan to occupy the screen, or note show in System Settings > General > Custom >... -
Page 29: Status Bar
Long press the launcher title to pop-up editing window. The content of the small component will be retained after the system restarts, and the initial content can be displayed through the Reset Button on the launcher editing page. Channel preview In Channel Preview mode, you can preview the content of channels. -
Page 30: Sidebar
APPS: This function serves as the entry icon to the APPS page. Click to access the APPS page. Lock Screen: This function is the icon for locking the screen. Click to access the lock screen page. Users can make relevant settings in Settings -> System -> System Security. 4.1.4. -
Page 31: Compass
Home No matter which page you are currently on, click on the home page icon and quickly return to the Android home page. The current application goes back to the background that users can retrieve in multitasking. Multi-task Go to the system multitasking page to view and manage the running applications in the background. -
Page 32: Recent Page
The Compass consists of 6 functional modules, among which the Back, Home, Multitask are the default functions, and the others can be customized, you can set up common functions depend on your preference, the specific operations: System Setting > General > Compass. 4.1.6. -
Page 33: Whiteboard
Task previews are displayed, click to enter a task. Click the delete button next to a task to exit it. Click the delete icon on the top right to exit all tasks. Screenshot Recent tasks are listed at the top. Recent screenshots are displayed with a maximum of 10 previews. -
Page 34: Menu
4.2.1. Menu The menu contains New, Storage, Sharing, Close, and Setting up; basic operations are as follows: New: Click on “New” to create a new whiteboard, then the current document is closed; there will be a prompt if the current document is not saved. -
Page 35: Setting
Open: Enter the File Manager can see all the whiteboard files, click to open the file; there will be a prompt if the current document is not saved. Save: Click on "Save" to save the current document, you can customize file name, select storage path and file save format. -
Page 36: Page Management
4.2.3. Page Management Page management is mainly to manage the pages of each whiteboard, including: Page up: Click to switch to the previous page of the current page, not clickable on the first page. Page down: Click to switch to the next page of the current page, not clickable on the last page. -
Page 37: Erase
recognition, select it then you can convert your handwriting into printed text and pattern. 4.2.5. Erase You can erase your handwriting directly with the palm or back of your hand while writing, the following modes are also supported: Circle Eraser: Handwriting in the closed circle can be cleared with just a touch. ... -
Page 38: Insert
Select the element within a closed shape. 4.2.7. Insert Inserting function supports inserting multiple elements and contents into the whiteboard, including: Picture: Enter the file manager-picture page, click the picture to insert; you can select to 10) pictures then insert them into the whiteboard. ... -
Page 39: Undo And Redo
Shape: Click and select the shape that you want to draw, and then drag the brush to the whiteboard to draw the shape. Mind map: Click the mind map to insert the subject into the middle of the whiteboard automatically;... -
Page 40: Screen Sharing
4.3. Screen Sharing The main function of this application is to wirelessly transmit the content of mobile phones, tablets or computers to the display, and truly achieve the wireless screen transmission function of the projection device and the projected device (note: mobile phones, tablets or computers need to be on the same local area network). - Page 41 Activate it only through connecting network if you have purchased EShare serial number. Operating description 1) Android mobile phone connection network, scan the multi-screen interactive interface QR code to download and install E-share application software (Apple mobile phone does not need to download);...
-
Page 42: Special Instructions For Multi-Screen Interaction Interface
4.3.2. Special instructions for multi-screen interaction interface Device name Click icon, user can modify the device name In this interface, you can modify the device name and set the connection password. when an Android phone connects to touch screen, it needs to enter the connection password to connect to the screen. Multi-split screen: set the number of split screens Show Device Name on Screen: the device name is displayed on the screen when it is turned on... -
Page 43: Webcast Remote Screen Sharing
Airplay visible: Airplay is visible when it is turned on. Miracast visible: Miracast is visible when it is turned on. 4.3.3. Webcast remote screen sharing Click Enable Webcast to obtain the IP address for visitor on the center place of the current page. Open browser and input the IP address to share your personal screen from different places with no requirement of the same LAN. -
Page 44: Mini Whiteboard
shown below: Note: Before using the IQShare button wireless screen function, user needs to make sure that the hotspot of the Touch screen is turned on. Please refer to the User Manual of IQShare button for more instructions. 4.4. Mini Whiteboard Swiping up from the bottom of any page, can quickly slide out the mini whiteboard and write quickly;... -
Page 45: Annotation
code to obtain whiteboard content (picture format). You can open encryption, scan code after entering the generated password to obtain content. Minimization: Click or multi-fingers slide down to fold up whiteboard. 4.5. Annotation Click on the annotation icon in the sidebar or compass to enter annotation mode. You can write annotations on the screen. -
Page 46: Close&Save
If you need to switch pages or perform actions on the current page, click 'Minimize' to temporarily exit annotation mode. You can re-enter annotation mode through the sidebar or compass. You can view your previous annotations in page management. On the left of screen, click > check your previous annotations on different pages. - Page 47 Introduction File manager can view files within local and external devices of the system, providing two forms of viewing: All documents: Open in the folder directory. File type: Search files in the local and U disks by file type, such as whiteboard files, pictures, videos, music, compression packs, etc.
-
Page 48: Multi-Window
4.6.2. Multi-window Multi-window is to facilitate users to operate the functions of different applications at the same time and display different contents at the same time. The basic operations are as follows: Opening Multi-Window Users can open multiple windows in two ways: ... -
Page 49: Welcome Page
After opening multi- windows, you can click the corresponding window to select it at the bottom of the apps, and perform the following operations on it; Dragging: You can move a free window by pressing and holding the control bar at the bottom of the screen;... -
Page 50: Screen Recording
Multiple templates are built into the welcome page. You can click to enter. Users can modify and save the template as a new one. After entering the template page, users can modify the background, text, music, etc., after the setting, click the button ‘play’ to display. 4.6.4. -
Page 51: Screenshot
4)Click to minimize the application, fold up the screen recording function and display it as a square dot. 5) Click to close the screen recording. If the screen recording is in progress, it will prompt you to save. 4.6.5. Screenshot Screenshot can quickly capture and save the screen content. -
Page 52: Gallery
Click in the right corner to confirm the screenshot and prompt to save. 4.6.6. Gallery 1) Click the application icon to enter the app; or select the picture in the folder to open, enter the application. 2) App renders image preview and navigation. 3) Slide left and right to turn pages for display. -
Page 53: Easy Upload
Note: The voting device can be used only with network support. If there is no network, this function is unavailable. Click the app icon to enter the app. Display the voting theme and option setting page, click the input box to invoke the keyboard input. -
Page 54: Timer
Easy Upload is an application that can quickly upload pictures and text from mobile phones to the IFPD for sharing and display. The basic operation process is as follows: Click the application icon to enter the app. Scan the QR code on the screen with your mobile phone to enter the page for easy file uploading. -
Page 55: Multi-Users
Click Start to enter stopwatch function. During the stopwatch’s functioning, click to pause the timing. Click the reset button on the left to reset the time to zero. Click to enlarge the full-screen to enter the full screen display. ... -
Page 56: Android Settings
System, and User to create and manage user accounts. Add and enter multiple users (1)Under the main account, enter Settings -- System -- User, and turn on the multi-user switch to add a user. (2)Click "Add User" to enter the page for adding a user. (3)Type in the user name, role, and password to complete the creation. - Page 57 On-Off: Turn on/off wireless network. Refresh: Click refresh icon in the top-right corner to refresh Network List. Add: Click Add button to fill in network name and password to add hidden network. Connect: Select the network click connection, fill in the password connection. Ethernet ...
- Page 58 WiFi-AP (Hotspot) WiFi-AP Password: Displays the current WiFi-AP password, click to change.
-
Page 59: General
Connected devices: Display connected devices. Blacklist: Display blacklisted devices which can not be connected. 4.7.2. General... - Page 60 Wallpaper: The system provides 10 pieces of wallpaper with automatic rotate multicast; click users can upload the customized wallpaper. Small Components: Prompt language switch, control whether page prompt language will display. Display window, can control the switch and display content, also can choose the two functions of sourcing and scanning code to occupy the screen.
- Page 61 Sound setting is used to adjust the sound effects of the system : Volume: Adjust the volume, also can adjust by pushing the “volume+” and “volume-” button on remote control or device button. Maximum volume: Set the system maximum volume. ...
- Page 62 Display settings can adjust display effect of the screen. Brightness: Adjust backlight brightness, the lower the value, the darker the picture. Image mode: System default image mode: standard, bright, bright-colored, but also support customizing. Compass...
- Page 63 Compass setting is mainly to adjust the compass switch, display time, display style, and other functions, specifically as follows: Switch: Click the compass switch, you can switch the compass display state, it can not be called out under the closed state, you can long press the compass with five fingers to open the compass under the open state.
- Page 64 Gesture interaction The system has preset some gesture interactions where the users can switch settings. Double click with two fingers to sleep or wake up the screen. Move down the screen: slide down with three fingers to move down the screen on channel page. Screen recording...
- Page 65 Preset the screen recording function, including: Recording resolution: Three resolutions are optional. Sound source: Set up the sound source for the screen recording remix. Recording time limit: Maximum recording time, when the maximum recording time is reached it will prompt to save.
-
Page 66: Device
4.7.3. Device Device control page, mainly adjusts the external equipment of the device, including Bluetooth and Bluetooth devices, printer, microphone, camera. Bluetooth... - Page 67 Bluetooth function depends on model configuration. Enable the Bluetooth functioned, you can search for devices and transfer files, or find and connect other Bluetooth devices (Including but not limited to mouse, keyboard, headset, audio, mobile devices, PC, universal/ unidentified devices). Printer ...
- Page 68 Microphone: View the connected microphone device, all devices are presented in the list, and click to switch. Camera Camera: View the connected camera device, all devices are presented in the list, and click to switch.
- Page 69 On NFC page, you can add NFC cards to achieve specific functions using the NFC module.
-
Page 70: Input Channel
4.7.4. Input Channel Channel image Describes the status of the current access source. Scale mode: Set the display scale of the current input source. PC mode: Select screen display mode. Other settings... -
Page 71: System
No signal jump: If the current channel has no signal, the page will automatically switch, and the user can customize the jump page. Automatic jump: When the system is running, access the new signal source, it’ll automatically jump to the corresponding channel. ... - Page 72 Automatic update: Enable to synchronize network time(Need to connect to the Internet). Date and time: Turn off automatic update, click to adjust the date and time. Date format: Three date-display formats, according to your habit to choose one. ...
- Page 73 System Language: System language can be switched in Simplified Chinese, Traditional Chinese, English, French, German, Russian, Japanese, Korean, Polish, Portuguese, Vietnamese, Spanish, Italian, and Arabic. Power state Power on: After opening, the device directly enters the boot state when it is powered on. Otherwise, the standby mode is used by default.
- Page 74 Temperature protection: When the temperature ≥85℃, it will shut down the display automatically for the display protection. System update System update: Display the current firmware version, click refresh to detect the latest version. When there is a new version, present the update version button, click to enter the upgrade process.
- Page 75 Lock Screen: You can set the pattern or password to unlock. If you forget the password, you can only restore the equipment used by factory resets, please keep it properly. U Disk Lock Screen: Store the "usb_key" file in the root directory of the USB device. Automatically lock screen / unlock after receiving USB flash drive, no need to enter password to unlock.
- Page 76 restore the equipment used by factory reset, please keep it properly), you need to enter password to gain access to the USB stick. Allow third-party applications installation from unknown sources: Users can install third-party applications, or can only download and install applications from the Google Store. Multi-user Refer to the above, multi-user function introduction.
-
Page 77: Serial Port
5. Serial Port RS232 communication cable (please use cross data cables) This Device Computer RXD0 TXD0 TXD0 RXD0 RS232 port of panel Cover Connect RS-232 port to the PC or controlling product. Enable RS-232 serial port connection and complete the following configuration. - Page 78 Exit hibernation FE 08 58 42 48 43 4D 44 01 F3 CF FE 09 58 42 48 43 4D 44 01 F3 01 CF Get Device status FE 08 58 42 48 43 4D 44 02 08 CF FE 09 58 42 48 43 4D 44 02 08 XX CF Restart the system FE 08 58 42 48 43 4D 44 01 43 CF FE 09 58 42 48 43 4D 44 01 43 01 CF...
- Page 79 FE 08 58 42 48 43 4D 44 01 26 CF FE 09 58 42 48 43 4D 44 01 26 01 CF FE 08 58 42 48 43 4D 44 01 27 CF FE 09 58 42 48 43 4D 44 01 27 01 CF FE 08 58 42 48 43 4D 44 01 28 CF FE 09 58 42 48 43 4D 44 01 28 01 CF FE 08 58 42 48 43 4D 44 01 29 CF...
- Page 80 FE 09 58 42 48 43 4D 44 03 12 XX FE 0A 58 42 48 43 4D 44 03 12 XX YY Set mute / unmute Get mute status FE 08 58 42 48 43 4D 44 02 12 CF FE 09 58 42 48 43 4D 44 02 12 XX CF mute FE 08 58 42 48 43 4D 44 01 14 CF...
- Page 81 FE 09 58 42 48 43 4D 44 03 07 01 FE 0A 58 42 48 43 4D 44 03 07 01 XX Turn on child lock mode FE 09 58 42 48 43 4D 44 03 07 00 FE 0A 58 42 48 43 4D 44 03 07 00 XX Turn off child lock mode Get child lock mode status FE 08 58 42 48 43 4D 44 02 07 CF...
- Page 82 FE 09 58 42 48 43 4D 44 03 06 01 FE 0A 58 42 48 43 4D 44 03 06 01 XX Touch unlock Get touch status FE 08 58 42 48 43 4D 44 03 06 CF FE 09 58 42 48 43 4D 44 03 06 XX CF Get touch MCU firmware FE LL 58 42 48 43 4D 44 02 25 X1 X2 ...
-
Page 83: Troubleshooting
6. Troubleshooting Symptom Troubleshooting Methods The screen cannot be powered on or Check whether the power supply is connected. the power indicator light is off. Check whether the power supply plug is properly connected. Check whether the power outlet has electricity. Check whether the rocker switch is enabled. - Page 84 when the external signal source Ensure that the USB touch cable is connected to the channel is being used. proper port. For details, see section "Ports". Remove and insert the USB touch cable again. There is no sound when the HDMI in Remove and insert the HDMI cable again.
- Page 85 When you connect a handheld The front panel doesn’t support handheld microphone, microphone to a port on the front and needs to use the fixed microphone. To make sure panel, the distance from user to of the sound quality, the distance from user to microphone should be no less than 1 microphone should be no less than one meter.
Need help?
Do you have a question about the IQTouch TB1300 Pro and is the answer not in the manual?
Questions and answers