Table of Contents
Advertisement
Quick Links
Advertisement
Table of Contents

Related Manuals for Returnstar Interactive Tech IQTouch TE1200 Pro


Summary of Contents for Returnstar Interactive Tech IQTouch TE1200 Pro
- Page 1 IQTouch Interactive Flat Panel Display TE1200 Pro ——User Manual——...
-
Page 2: Table Of Contents
Contents 1. Safety Instruction ........................................ 0 2. Installation ......................................... 1 2.1. Bearing Capacity ....................................... 1 2.2. OPS Installation ......................................4 3. Enable the Device ........................................5 4. Control Panel ........................................6 5. Interface ..........................................7 6. Remote Control ........................................8 7. Remote Control Area ......................................9 8. - Page 3 12.2. Writing ......................................... 27 12.3. Erase ........................................27 12.4. Minimization ......................................27 12.5. Close&Save ......................................27 13. Applications ........................................28 13.1. File Manager ......................................28 13.2. Multi-window ....................................... 29 13.3. Welcome page ....................................... 30 13.4. Screen recording ....................................31 13.5. Screen shot ......................................31 13.6.
-
Page 4: Safety Instruction
1. Safety Instruction For your safety, please read the following instruction before you use the product. Serious injury or property loss may be caused by improper operations. Do not try to repair the product without guidance. Placement Do not place the unit on an unstable cart, stand, tripod, racket, table, or shelf. ... -
Page 5: Installation
Normal operating temperature is 0 ~ 40℃. Humidity Do not expose machine in rain, damp or place near water. Ensure the indoor drying, cool. Ventilation Keep the ventilation openings clear. Ensure that the unit has enough space for ventilation around: left, right and back >10cm, top> 20cm. Earphone ... - Page 6 Step2: Expansion bolt installation Press the expansion bolt into 8 holes. (Ref. Picture 2) Step3:Wall mounting bracket A installation Install the wall mounting bracket A with 8pcs screws and gaskets. Please ensure that the wall mounting bracket A is installed horizontally. (Ref. Picture3)
- Page 7 Step4: Install the left& right hang bracket B to IQTouch. Use screws fix the hang bracket B at the back of IQTouch. Please check the direction of hang bracket B before installation. (Ref. Picture 4). Step5: Hang IQTouch on the wall mounting bracket A Hanging the left &right hang bracket B to the wall mounting bracket A, please ensure two hang brackets B total hang on wall mounting bracket A, then tighten the screws of hang bracket B to prevent it slide.
-
Page 8: Ops Installation
2.2. OPS Installation Note: The OPS does not support hot-plugging. Please insert the plug of the OPS after the interactive Panel display is disconnected from the power. Install the OPS by the following steps: 1) Insert the OPS into the special slot on the rear of the interactive flat panel display. 2) Tighten the screws. -
Page 9: Enable The Device
3. Enable the Device 1) Connect the power cord to the port at the back of the device. 2) Plug the power cord to the electrical socket. 3) If the power LED light is not turn red please turn on the rocker switch at the back of the device. Press power button or put the battery in to remote control and use remote control to power on the device. -
Page 10: Control Panel
4. Control Panel Item Icon Function Description NFC card reader. Power indicator (on the right): red for idle state; green for running status. R receiver(on the left):Receive infrared signals such as remote control. Customized function button. Go to homepage. Return to previous page/ Go to setting. -
Page 11: Interface
5. Interface Terminal Interface Side Interface... -
Page 12: Remote Control
6. Remote Control Button Function Description Power on/off Mute OPS computer shortcut VGA mode shortcut HDMI HDMI mode shortcut MEDIA Multi-media mode shortcut F1-F12 Correspond to computer buttons F1-F12 Input Select different input source Open/close backlight Up/down/left/right button Confirm Menu Open/close menu Esc/Exit Stop current operation or exit menu... -
Page 13: Remote Control Area
7. Remote Control Area The effective receiving area is about 3 meters with 30° angle from vertical point to the left and right. And the effective receiving area is about 5 meters from the front of device. Note that the remote control signal receiver locates at the position of power indicator. -
Page 14: External Computer And Touch Connecting
8.1. External Computer and Touch Connecting Audio IN VGA IN USB- Touch 1) Connect a VGA cable (15 pin) between the VGA and external PC. Connect an earphone cable between the PC and audio at the same time. 2) Connect a USB cable between the external PC and USB terminal. 3) Plug the POWER cord and switch it on from the rear panel. - Page 15 1) Connect an AV cable with the device with AV-OUT (Yellow is Video, Red is Audio-R, White is Audio-L). 2) Plug the POWER cord and switch it on from the rear panel. 3) Press to turn on the panel. 4) Select Signal source to AV IN source. ...
-
Page 16: Video-Out
1) Connect a HDMI cable with the device with HDMI. 2) Plug the POWER cord and switch it on from the rear panel. 3) Press to turn on the panel. 4) Select Signal source to HDMI source according to the one you connected. 8.3. -
Page 17: Android Home Page
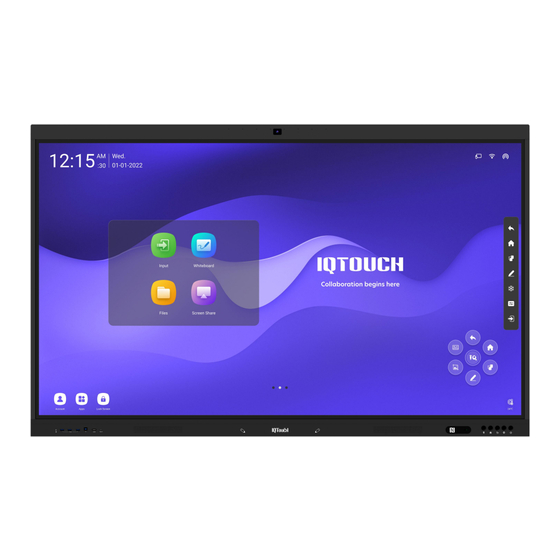
9. Android Home Page 9.1. Start-up Guide The startup guide is the page that appears the first time the user turns on the device, guiding the user to quickly become familiar with the basic functions of the IQTouch. It mainly includes language selection page, network setup page, time setting page, and device name page. -
Page 18: Introduction Of
9.2. Introduction of Page Elements Wallpaper: Display the unique wallpaper of IQ OS 5.0. Time: Long press to open the system settings. You can set date,time and formats manually. Note info: Preview the pre-set IQ fonts. Long-press the note window to edit the note title and content. ... - Page 19 The sidebar functions include: Back, Home, Multitasking, Annotation, Control Panel, and Signal Sources. Back Click it once to return to the previous step of the operation until back to the home page or the starting position of the operation. ...
-
Page 20: Compass
9.5. Compass The compass is a shortcut for the users, and the basic operation is as follows: Long press the interface with five fingers to open the compass. Click on the center circle of the compass to expand or retract the compass. ... -
Page 21: Whiteboard
10. Whiteboard 10.1. Menu The menu contains New, Storage, Sharing, Close, and Setting up; basic operations are as follows: New: Click on “New” to create a new whiteboard, then the current document is closed; there will be a prompt if the current document is not saved. -
Page 22: Setting
Open: Enter the File Manager can see all the whiteboard file, click to open the file; there will be a prompt if the current document is not saved. Save: Click on "Save" to save the current document, you can customize file name, select storage path and ... -
Page 23: Paintbrush
New page: Click to insert a new page after the current page, and jump to the new page. 10.4. Paintbrush Paintbrush 1 and 2: There are two paintbursh: paintbrush 1 and 2, click one to use, click again can change the brush style. -
Page 24: Select
10.6. Select Click on "Select" to switch to the Select mode. Click on the handwriting, picture or other elements on the screen to select it, and draw a free closed shape to select the elements within it. The selected element can be dragged, moved, multi fingers zoom operation. -
Page 25: Undo And Redo
whiteborad. Use the brush to enter content in the table, table width and height automatically adapt to the brush size; use the selection tool to select the table, and add or delete rows and columns, can also use the brush tool to draw the horizontal or vertical line in the same row or column through the table to add row or column, similarly, use the brush tool to draw "Z"... -
Page 26: Screen Sharing
11. Screen Sharing The main function of this application is to wirelessly transmit the content of mobile phones, tablets or computers to the display, and truly achieve the wireless screen transmission function of the projection device and the projected device (note: mobile phones, tablets or computers need to be on the same local area network). 11.1. -
Page 27: Special Instructions For Multi-Screen Interaction Interface
Operating description 1) Android mobile phone connection network, scan the multi-screen interactive interface QR code to download and install E-share application software (Apple mobile phone does not need to download); 2) The mobile phone needs to use the same network as the all-in-one. The Android mobile phone can open the E- share to cast the screen, and the Apple mobile phone can open the Air Play to cast the screen. -
Page 28: Webcast Remote Screen Sharing
In this interface, you can modify the device name and set the connection password. when an Android phone connects to touch screen, it needs to enter the connection password to connect to the screen. Multi-split screen: set the number of split screens Show Device Name on Screen: the device name is displayed on the screen when it is turned on Airplay visible: Airplay visible when it turned on. -
Page 29: Laptop Screen Sharing
Click Enable Webcast to obtain the IP address for visitor on the center place of the current page. Open browser and input the IP address to share your personal screen from different places with no requirement of the same LAN. -
Page 30: Mini Whiteboard
12. Mini Whiteboard Swiping up from the bottom of any page, can quickly slide out the mini whiteboard and write quickly; basic features include: Paint Brush: You can choose the color and write fast. Erase:Same as whiteboard erase, see 3.1.5 Erase. ... -
Page 31: Writing
12.2. Writing The default pen color is red. Click the writing icon to set the pen color, opacity, and thickness. 12.3. Erase Erase in the same way as in classic whiteboard mode. 12.4. Minimization If you need to switch pages or perform actions on the current page, you can click 'Minimize' to temporarily exit annotation mode. -
Page 32: Applications
13. Applications 13.1. File Manager Introduction File manager can view files within local and external devices of the system, providing two forms of viewing: All documents: Open in the folder directory. File type: Search files in the local and U disks by file type, such as whiteboard files, pictures, videos, music, compression packs, etc. -
Page 33: Multi-Window
13.2. Multi-window Multi-window is to facilitate users to operate the functions of different applications at the same time, and display different contents at the same time. The basic operations are as follows: Opening Multi-Window Users can open multiple users in two ways: On the menu screen, long press an app icon to pop up a management window, opting for a 'free window' to ... -
Page 34: Welcome Page
Left and right edge scaling: Tap the scale button on the left side of the control bar to scale an app by the left/right side of the screen. Operating two applications at the same time can achieve left and right split screen. -
Page 35: Screen Recording
13.4. Screen recording 1)Click the application icon to enter the application, and the application will open in a small window. 2)Click , you can start recording, start timing and recording screen; click again can pause timing and screen recording. 3)Click to end screen recording, and the saving option pops up. -
Page 36: Gallery
Click in the right corner for a full-screen screenshot. Click in the right corner to close the screenshot function. Click in the right corner to confirm the screenshot and prompt to save. 13.6. Gallery 1) Click the application icon to enter the app; or select the picture in the folder to open, enter the application. 2) App renders image preview and navigation. -
Page 37: Easy Upload
Click the app icon to enter the app. Display the voting theme and option setting page, click the input box to invoke the keyboard input. Click "Reset" to clear options and themes; Click ‘Next’ to set single/multiple, anonymous/real name ... -
Page 38: Timer
Click the "Close" icon in the upper right corner of the application box to close the easy upload app. After closing the app, all uploaded content will be cleared and no local saving will be performed. 13.9. Timer The functions of the timer and stopwatch in one are as follows: Stopwatch ... - Page 39 In order to solve the multi-purpose scenario of IFPD, the multi-user function is proposed. Multiple users have three permissions: primary user, common user, and visitor. Each device has a primary user by default. The primary user can access Settings, System, and User to create and manage user accounts.
-
Page 40: Android Settings
14. Android Settings 14.1 Network WLAN: Turn on the wireless network and automatically scan the available wireless network nearby. On-Off: Turn on/off wireless network. Refresh: Click refresh icon in the top-right corner to refresh Network List. Add: Click Add button to fill in network name and password to add hidden network. ... - Page 41 WiFi-AP (Hotspot) WiFi-AP Password: Displays the current WiFi-AP password, click to change. Connected devices: Display connected devices. Blacklist : Display blacklisted devices which can not be connected.
- Page 42 14.2 General...
- Page 43 Wallpaper: The system provides 10 pieces of wallpaper with automatic rotate multicast; click users can upload the customized wallpaper. Small Components: Prompt language switch, control whether page prompt language will display. Display window, can control the switch and display content, also can choose the two functions of sourcing and scanning code to occupy the screen.
- Page 44 Display settings can adjust display effect of the screen. Brightness: Adjust backlight brightness, the lower the value, the darker the picture. Image mode: System default image mode: standard, bright, bright-coloured, but also support customizing. Compass...
- Page 45 Compass setting is mainly to adjust the compass switch, display time, display style and other functions, specific as follows: Switch: Click the compass switch, you can switch the compass display state, it can not be called out under the closed state, you can long press the compass with five fingers to open the compass under the open state.
- Page 46 The system has preset some gesture interactions where the users can switch settings. Double click with two fingers to asleep or wake up the screen. Move down the screen: slide down with three fingers to move down the screen on channel page. Screen recording Preset the screen recording function, including: ...
- Page 47 * The Q button is actually the original C button. 14.3 Device Device control page, mainly adjust the external equipment of the device, including Bluetooth and Bluetooth devices, printer, microphone, camera.
- Page 48 Bluetooth Bluetooth function depends on model configuration. Enable the Bluetooth functioned , you can search for devices and transfer files, or find and connect other Bluetooth devices (Including but not limited to mouse, keyboard, headset, audio, mobile devices, PC, universal / unidentified devices).
- Page 49 Microphone: View the connected microphone device,all devices are presented in list, click to switch. Camera Camera:View the connected camera device,all devices are presented in list, click to switch. On NFC page, you can add NFC cards to achieve specific functions using the NFC module.
- Page 51 14.4 Input Channel Channel image Describes the status of the current access source. Scale mode:Set the display scale of the current input source. PC mode:select screen display mode. Other settings No signal jump: If the current channel has no signal, the page will automatically switch, and the user can customize the jump page.
- Page 52 Automatic wake-up: Under standby or sleep state, access the signal source and automatically wake up the device. Boot channel: Set up to access to a channel after the boot, can be set to Android or any source interface. ...
- Page 53 Keyboard: Users can select input method here. System Language: System language can be switched in Simplified Chinese,Traditional Chines, English, French, German, Russian, Japanese, Korean, Polish, Portuguese, Vietnamese, Spanish, Italian, and Arabic. Power state Power on: After opening, the device directly enters the boot state when it is powered on. Otherwise, the standby mode is used by default.
- Page 54 Automatic screen sleep: Choose this function, you can set the screen rest time. The screen will turn off at the end of the screen sleep time. Auto power-off, you can set the automatic power-off mode, you can choose to automatically power-off after no signal or automatic power-off after screen sleep.
- Page 55 System security Lock Screen: You can set the pattern or password to unlock. If you forget the password, you can only restore the equipment use by factory resets, please keep it properly. U Disk Lock Screen: Store the "usb_key" file in the root directory of the USB device. Automatically lock screen / unlock after receiving USB flash drive, no need to enter password to unlock.
- Page 56 Allow third party applications installation from unknown sources: Users can install third party applications, or can only download and install applications from the Google Store. Multi-user Refer to above, multi-user function introduction. About Click to view device information: Device name: Click on it to edit the device name. ...
-
Page 57: Built-In Pc Operation
15. Built-in PC Operation 1) Select PC signal source to enter PC interface. The following are three ways to select a signal source channel. Swipe your finger up from the left and right side to bring up a toolbar then click input. ... -
Page 58: Troubleshooting
16. Troubleshooting Remote Control Check whether there is object between remote control and panel receiver; Remote control out of order Check whether the battery is installed correctly. Check whether the battery is drained. Touch Make sure infrared frames have not been obscured. ... - Page 59 No image is displayed or the Modify the color settings. image is black and white. Check the color system. This is the general user manual for IQTouch TE1200 Pro interactive flat panel. Some details may be different from the actual product.
Need help?
Do you have a question about the IQTouch TE1200 Pro and is the answer not in the manual?
Questions and answers