Advertisement
Quick Links
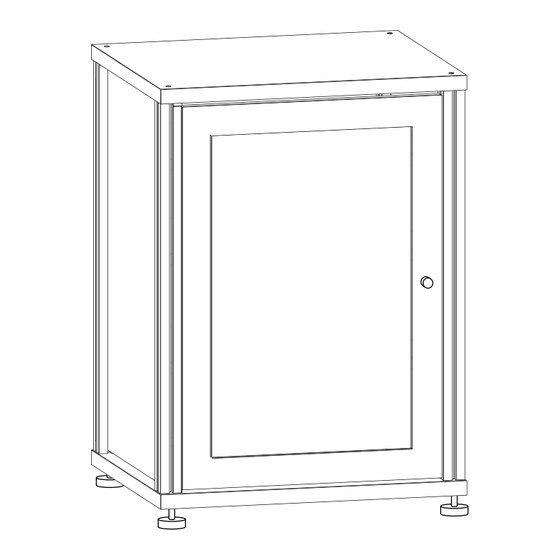
SYNERGY 303
Instructions
Includes:
(1) SU30 - Synergy Base Unit
(1) SS30 - 30" Side Panel Set
(1) SD30 - 30" Doors
BEFORE YOU BEGIN:
!
!
• Unpack all parts before beginning and refer to the drawing below.
• Shelf pegs and door hinges must slide into the channels of the post in the correct order.
• They cannot be removed individually without disassembling the whole unit.
Shelf Peg (8)
Heavy Duty Bracket (2)
Washer 300-470 (4)
Foot & Nut P-300-350 (4)
Top Shelf (1)
Adjustable Shelf (3)
Bottom Shelf (1)
Joint Connector Bolt 300-540 (4)
Sides (2)
Aluminum Post (4)
Door (1)
Doc No. 500-630/v5.24
303 - 1/5
Advertisement

Subscribe to Our Youtube Channel
Related Manuals for Salamander Designs SYNERGY 303


Summary of Contents for Salamander Designs SYNERGY 303
- Page 1 SYNERGY 303 Instructions Includes: (1) SU30 - Synergy Base Unit (1) SS30 - 30” Side Panel Set (1) SD30 - 30” Doors BEFORE YOU BEGIN: • Unpack all parts before beginning and refer to the drawing below. • Shelf pegs and door hinges must slide into the channels of the post in the correct order.
- Page 2 Connect Posts to Bottom Shelf WARNING: Tighten by screwing the leveler foot NOT the post. Square Post Square the post to the bottom shelf. Washer Connect Post Screw foot with metal washer through bottom shelf and onto Hex Nut the end of an extruded post. Hand tighten fully and use wrench on hex nut to tighten nut onto underside of shelf.
- Page 3 Add Shelf Pegs & Door Hinges Shelf Pegs They are designed to cradle the shelf in place. Refer to drawing. For Glass Cabinets, heavy duty brackets are used in place of shelf pegs. Insert Hinges, Shelf Pegs & Heavy Duty Bracket Note: The door can be either left or right side opening.
- Page 4 Attach Door Attach Hinges to Door Frames Note: The hinge can be separated by pulling the black tab Insert the hinges into the corresponding holes on the doors. and pulling apart the hinge from the hinge base. Separated Turn the screws 1/4 turn to the right to lock hinges in place. hinges snap back together.
-
Page 5: Final Assembly
Limited Warranty For five full years Salamander Designs Ltd. will repair or replace, at our option, any product defective in materials or craftsmanship. Salamander Designs Ltd. will not be responsible for any damage to or destruction of other equipment consequential to our equipment failure. Defective product must be given Return Authorization and is to be returned to the factory prepaid, in the original carton and packing material.
Need help?
Do you have a question about the SYNERGY 303 and is the answer not in the manual?
Questions and answers