
Related Manuals for Crestron IV-SAM-VX2 Series


Summary of Contents for Crestron IV-SAM-VX2 Series
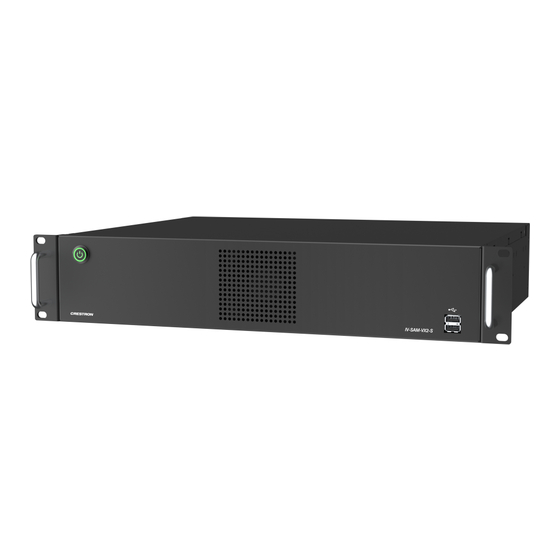
- Page 1 View this document in HTML crestron.com/docs/9488 Product Manual IV-SAM-VX2 Series Automate VX System Series 2 Voice- Activated, Multi-Camera Switching Solution Crestron Electronics, Inc.
- Page 2 Crestron disclaims any proprietary interest in the marks and names of others. Crestron is not responsible for errors in typography or photography.
-
Page 3: Table Of Contents
Contents IV-SAM-VX2 Series Features IV-SAM-VX2-S Features IV-SAM-VX2-P Features Automate VX2 Specifications IV-SAM-VX2-S Specifications IV-SAM-VX2-P Specifications Installation In the Box IV-SAM-VX2-S IV-SAM-VX2-P Install the Automate VX2 Rack Mounting Surface Placement Connect the Automate VX2 Initial Setup Connect to the Automate VX2 System Connect Locally to Automate VX2... - Page 4 Resources Crestron Support and Training Product Certificates iv • Contents Product Manual — Doc. 9488A...
-
Page 5: Iv-Sam-Vx2 Series
IV-SAM-VX2 Series Automate VX System Series 2 Voice-Activated, Multi-Camera Switching Solution The IV-SAM-VX2 Series camera switching systems bring a full multicamera studio experience to meetings, town halls, and classrooms. Crestron 1 Beyond cameras automatically switch based on the location of the active speaking participant. Visual AI enhanced camera switching intelligently frames camera shots with the participants centered. -
Page 6: Features
Features Refer to the following sections for more information on the features provided by Crestron 1 Beyond Automate VX2 systems. This section provides the following information: • IV-SAM-VX2-S Features • IV-SAM-VX2-P Features 6 • IV-SAM-VX2 Series Product Manual — Doc. 9488A... -
Page 7: Iv-Sam-Vx2-S Features
SDI to USB-A 3.0 converter. AutoFraming and Reframing with Visual AI Visual AI directs Crestron 1 Beyond optical zoom cameras to automatically center participants in camera shots via AutoFraming. Reframing continuously keeps the participant centered in the camera shot —... - Page 8 Automate VX Voice Activated Multi Camera Switching Solutions. Visit IV-PROSERVICE-1B for details. NOTE: For Crestron Intelligent Video Certified Engineers (IVC-E) planning to self deploy and self validate a purchased Automate VX system, the purchase of Remote Professional Services is optional, subject to verification by Crestron. Visit IV-PROSERVICE-1B for details.
-
Page 9: Iv-Sam-Vx2-P Features
SDI to USB-A 3.0 converter. AutoFraming and Reframing with Visual AI Visual AI directs Crestron 1 Beyond optical zoom cameras to automatically center participants in camera shots via AutoFraming. Reframing continuously keeps the participant centered in the camera shot —... - Page 10 Automate VX Voice Activated Multi Camera Switching Solutions. Visit IV-PROSERVICE-1B for details. NOTE: For Crestron Intelligent Video Certified Engineers (IVC-E) planning to self deploy and self validate a purchased Automate VX system, the purchase of Remote Professional Services is optional, subject to verification by Crestron. Visit IV-PROSERVICE-1B for details.
-
Page 11: Automate Vx2 Specifications
Automate VX2 Specifications Refer to the following sections for more information on the specifications of the Automate VX2 systems. This section provides the following information: • IV-SAM-VX2-S Specifications • IV-SAM-VX2-P Specifications Product Manual — Doc. 9488A IV-SAM-VX2 Series • 11... -
Page 12: Iv-Sam-Vx2-S Specifications
Can stream to any RTMP server NDI Support For inputs and program output Camera Control Can control Crestron 1 Beyond PTZ cameras and tracking cameras over IP. For a complete list of compatible cameras, refer to Compatible Cameras System Control... - Page 13 (1) 1/8 in. 3.5 mm connector, female TRS; Unbalanced line-level audio input Audio Output (1) 1/8 in. 3.5 mm connector, female TRS; Unbalanced line-level audio output (1) VGA connector, female (not used) (2) DB9 connectors, female (not used) Product Manual — Doc. 9488A IV-SAM-VX2 Series • 13...
- Page 14 Freestanding or 2U 19 in. rack-mountable (adhesive feet and rack ears included) Dimensions Height 3.47 in. (88 mm) Width 16.81 in. (427 mm) Depth 15.33 in. (389 mm) Weight 17.5 lb (7.94 kg) 14 • IV-SAM-VX2 Series Product Manual — Doc. 9488A...
- Page 15 Compliance Regulatory Model: M202214003 FCC Part 15 Class A, IC Class A, CE, Intertek® Listed for US and Canada Product Manual — Doc. 9488A IV-SAM-VX2 Series • 15...
-
Page 16: Iv-Sam-Vx2-P Specifications
Can stream to any RTMP server NDI Support For inputs and program output Camera Control Can control Crestron 1 Beyond PTZ cameras and tracking cameras over IP. For a complete list of compatible cameras, refer to Compatible Cameras System Control... - Page 17 Unbalanced line-level audio output (1) VGA connector, female (not used) (2) DB9 connectors, female (not used) Controls and Indicators Power (1) Push button with green LED backlight; For power on and off Product Manual — Doc. 9488A IV-SAM-VX2 Series • 17...
- Page 18 For a list of compatible DSPs, refer to Power Power 400 W, 100–240VAC Environmental Temperature 32° to 104° F (0° to 40° C) Humidity 5% to 90% RH (noncondensing) Heat Dissipation 477 BTU/hr typical; 1706 BTU/hr maximum 18 • IV-SAM-VX2 Series Product Manual — Doc. 9488A...
- Page 19 16.81 in. (427 mm) Depth 15.33 in. (389 mm) Weight 17.5 lb (7.94 kg) Compliance Regulatory Model: M202214003 FCC Part 15 Class A, IC Class A, CE, Intertek® Listed for US and Canada Product Manual — Doc. 9488A IV-SAM-VX2 Series • 19...
-
Page 20: Installation
Cable, 2 Pack, SATA to 6 (2063366) Pro Video BNC, FEMA (2061870) Converter, SDI2USB3 (2063351) Mounting Foot (2061693) Install the Automate VX2 The Automate VX2 may be mounted into a rack or onto a flat surface. 20 • IV-SAM-VX2 Series Product Manual — Doc. 9488A... -
Page 21: Rack Mounting
1. Attach the four mounting feet near the corners to the underside of the Automate VX2. 2. Place onto a flat surface or stack with other equipment. Connect the Automate VX2 Make all necessary connections to the Automate VX2 as shown in the following diagram. Product Manual — Doc. 9488A IV-SAM-VX2 Series • 21... - Page 22 IV-SAM-VX2-S Rear Connections 22 • IV-SAM-VX2 Series Product Manual — Doc. 9488A...
- Page 23 Only use the DisplayPort and HDMI listed for monitor output. ETH1 and ETH2 ports are only for connecting to a control system or local network. Use the ETH3 port for connecting Automate VX2 to the internet. Product Manual — Doc. 9488A IV-SAM-VX2 Series • 23...
-
Page 24: Initial Setup
For secure deployments, refer to the guidelines listed in the Automate VX2 Security Reference Guide. This section provides the following information: • Connect to the Automate VX2 System • Manage System Accounts • Connect Cameras to Automate VX2 • Update Firmware 24 • IV-SAM-VX2 Series Product Manual — Doc. 9488A... -
Page 25: Connect To The Automate Vx2 System
Connect the Automate VX2 to a monitor via the DisplayPort or HDMI ports on the system to access the user account splash screen. Use the Device Discovery tool within Crestron Toolbox™ software. 1. Connect the Automate VX2 to a network switch via the ETH3 Ethernet port on the rear of the device. -
Page 26: Connect To Automate Vx2 With Remote Desktop
Connect the Automate VX2 to a monitor via the DisplayPort or HDMI ports on the system to access the user account splash screen. Use the Device Discovery tool within Crestron Toolbox software. 1. Connect the Automate VX2 to a network switch via the ETH3 Ethernet port on the rear of the device. -
Page 27: Manage System Accounts
The user account is displayed when an Automate VX2 system is in a factory default state. The IP Address, Model Name, Software Version, and time are shown on the user account screen. Additionally, a QR code is provided for the Automate VX Software Product Manual. User Account Screen Product Manual — Doc. 9488A IV-SAM-VX2 Series • 27... -
Page 28: Administrator Account
NOTE: The default password for the administrator account is crestron (case sensitive). To change the password of the administrator account, follow the default Windows method of changing account passwords via Windows Settings. - Page 29 The following applications are available on the administrator account: Room Designer, Automate VX2 system settings, Crestron 1 Beyond Camera Manager 2 software, and Wirecast® streaming software. By default, the web configuration interface and Wirecast are started when the administrator account is signed into.
- Page 30 Automate VX2 uses Wirecast streaming software to change live shots, video layouts, and camera outputs. To access Wirecast, select the Wirecast icon on the bottom taskbar of the Automate VX2. Wirecast Shortcut 30 • IV-SAM-VX2 Series Product Manual — Doc. 9488A...
- Page 31 Wirecast Streaming Software For more information about configuring Wirecast for Automate VX2, refer to the Automate VX Software Product Manual. Product Manual — Doc. 9488A IV-SAM-VX2 Series • 31...
-
Page 32: Connect Cameras To Automate Vx2
NOTE: If cameras are connected via SDI to Automate VX2, the cameras still require a network connection for operation. The Crestron 1 Beyond cameras are now able to be discovered and connected to Automate VX2. For more information on camera setup within Automate VX software, refer to the... -
Page 33: Update Firmware
Update Firmware Automate VX can be updated with firmware provided by Crestron. To update an Automate VX2's firmware: 1. Download the firmware file from the respective Automate VX2 product pages or https://www.crestron.com/support/search-results?c=4&m=10&q=Automate%20VX. 2. Double-click the AVX desktop icon to open the firmware installer, and the firmware begins loading. - Page 34 3. Select one of two options in the Crestron Installer window: NOTE: The firmware update can be canceled by exiting the Crestron Installer window. Do not close the window once the firmware update is initiated. Crestron Installer Window Select the Install option to perform a clean install of the Automate VX2 firmware. This option reverts the system to a factory default state (with the new firmware).
- Page 35 6. Clear the browser cache in the respective browser being used configure and operate the Automate VX2 system. Product Manual — Doc. 9488A IV-SAM-VX2 Series • 35...
-
Page 36: Crestron Settings App
Crestron Settings App After setting up the Automate VX2 and connecting the required devices to the system, use the Crestron Settings app for further configuration. To open the Crestron Settings App, click > Crestron folder > Crestron Settings. The Crestron Settings app opens. -
Page 37: System
System Use the System menu to view firmware versions of connected system devices and the firmware packages stored on the Automate VX2. Crestron Settings App Product Manual — Doc. 9488A IV-SAM-VX2 Series • 37... -
Page 38: Ip Table
Click IP Table to display the IP Table menu. Configure the IP table to allow Automate VX2 to be used as part of a Crestron control system. An IP table is a lookup table used by Crestron Ethernet devices to map between IP IDs and IP addresses. Use the IP Table menu to enable and configure the system for communication with a Crestron control system. -
Page 39: Ip Table Entries
Click Remove. Other IP Table Functions Set the Automatically discover and respond to other Crestron devices setting to Off to hide the system from being discovered by other devices during auto-discovery. Multiple control systems listed on the IP table can be allowed to control the system. Set the Allow multiple IP Table entries setting to Off to allow only one control system on the IP table. -
Page 40: Diagnostics
Click Launch Event Viewer to open the Windows event viewer that shows system and application logs. Export Log Files Click Export Log Files to package and export all the log files (including all Crestron logs and system event logs) onto external storage. -
Page 41: Upload Log Files
Upload Log Files Click Upload Log Files to package and upload all the log files to a Crestron server for delivery to Crestron support personnel. NOTE: Internet access is required for uploading. Enhanced Logging Enable the enhanced logging feature only if instructed by Crestron support for advanced troubleshooting. - Page 42 Resources The following resources are provided for the IV-SAM-VX2 Series. NOTE: You may need to provide your Crestron.com web account credentials when prompted to access some of the following resources. Crestron Support and Training Crestron True Blue Support Crestron Resource Library Crestron Online Help (OLH) Crestron Training Institute (CTI) Portal...
- Page 43 Crestron Electronics, Inc. Product Manual — Doc. 9488A 15 Volvo Drive, Rockleigh, NJ 07647 05/30/24 Tel: 888.CRESTRON Specifications subject to Fax: 201.767.7656 change without notice. www.crestron.com...
Need help?
Do you have a question about the IV-SAM-VX2 Series and is the answer not in the manual?
Questions and answers