Table of Contents
Advertisement
Quick Links
Advertisement
Table of Contents

Subscribe to Our Youtube Channel
Related Manuals for Bristan TFP4001


Summary of Contents for Bristan TFP4001
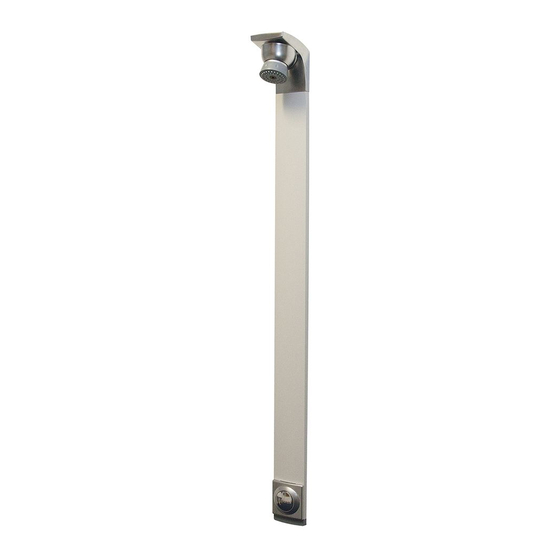
- Page 1 Installation Instructions and User Guide Timed Flow Panel with Adjustable Head Models Covered: TFP4001 Please keep this booklet for future reference. Installer, when you have read these instructions please ensure you leave them with the user.
-
Page 2: Table Of Contents
Contents Thank you for choosing Bristan, the UK’s leading showers and taps expert. We have designed this product with your enjoyment in mind. To ensure that it works to its full potential, it needs to be fitted correctly. These fitting instructions have been... -
Page 3: Important Safety Information
Important Safety Information • Please read these instructions thoroughly and retain for future use. • All products manufactured and supplied by Bristan are safe provided they are installed, used correctly and receive regular maintenance in accordance with these instructions. • This fitting needs to be installed in accordance with, and meet the requirements of the Water Supply (Water Fittings) Regulations 1999 and Scottish Byelaws 2004. -
Page 4: General Information
General Information The Bristan Timed Flow Shower Panel has been designed, manufactured and tested to the highest standards and satisfies the requirements of the Water Supply (Water Fittings) Regulations 1999 and current bylaws Designed to be used with systems designed to BS 6700. -
Page 5: Product Features
Product Features 1. Push button control Press the push button in to turn on the flow of water The water will flow for approximately 30 seconds depending on site conditions. 2. 360° swivel shower head The shower head swivels in any direction 360°. -
Page 6: Specifications
Specifications Inlet Connection: 3/4” BSP Male telescopic connection. Operating Pressure Range: Min: 1.0 bar – Max: 5.0 bar Maximum Static Pressure: 10.0 bar Flow Regulator: Supplied with a 10 litres per minute flow regulator fitted. Supply Requirements: A blended hot & cold water supply is required to the Timed Flow Shower Panel. -
Page 7: Installation Requirements
Installation Requirements These fittings need to be installed in accordance with the following Installation Requirements and Notes (IRN) to ensure they meet the requirements of the Water Supply (Water Fittings) Regulations 1999 and the ScottishByelaws 2004. IRN R001: See text of entry for Installation Requirement or Notes. -
Page 8: Installation
Installation Before Installation Flush through the pipework to ensure removal of debris. Turn off the water supply and close any isolating valves. 1. Fit wall Bracket Position the wall bracket onto the wall surface in the desired position bearing in mind the suggested distance (2100mm) from the floor to the shower head. - Page 9 Installation 2. Remove push button cover Using a suitable screw driver remove the bottom end cover. Pull the push button cover up from the panel and remove. 3. Pre fit shower panel Fit the shower panel against the wall and push it down so that the locking plate fits securely into the wall bracket.
- Page 10 Installation 4. Mark bottom fixings Ensure the shower panel is vertical (using a spirit level) and flat against the wall and mark the bottom fixing holes either side of the push button. Remove the shower panel from the wall by lifting it out of the wall bracket. Warning: Please check for any hidden pipes and cables before drilling holes in the wall.
- Page 11 Installation 5. Fit the shower panel Fit the shower panel to the wall ensuring the locking plate fits securely into the wall bracket and line up the holes in the bottom of the panel with the holes drilled in the wall surface. Secure the shower panel to the wall using the screws provided.
- Page 12 Installation 6. Connect water supply Ensure the telescopic connector is fully extended by pulling it up to access the Supply built in isolation valve. Pipework (not supplied) Tip: Screw a 3/4” BSP female connector (not supplied) onto the thread of the telescopic connector to easily pull it up Telescopic and fully extend.
-
Page 13: Operation & Commissioning
The shower head swivels 360° in any direction. See below for different positions. Before using the Bristan Shower panel please follow the below steps to commission the unit. Ensure the supply pipework is flushed through. Open the built in isolation valve and turn on the water supply. -
Page 14: Maintenance
For more information on hard water areas, scan the QR code or visit our website at www.bristan.com/hard-water-map Isolate the water supply to the shower panel by either: 3. Turn the 4. -
Page 15: Adjusting Time Flow
Maintenance Removing the push button cover Cleaning the shower head Your Bristan shower head has rub – clean nozzles for easy cleaning. Simply rub your fingers across the rubber spray jets regularly to remove any scale or debris. The hardness of the water in your area will determine how often you should clean your shower head. - Page 16 Adjusting Time Flow 4. The nominal 30 secs 3. Pull the flow 2. Invert the spray run time can be adjusted cartridge out from plate holder and use by inserting a 3mm the shower. to unscrew the locking hexagonal key as shown. collar.
-
Page 17: Troubleshooting
Troubleshooting Symptom Cause Remedy Open the isolation valve on the telescopic connection. Isolation valve closed. Check any isolation valves to the water supply are open. Remove the shower panel from Shower will not Bleed tube not fitted the wall and check the bleed turn on when correctly. -
Page 18: Notes
Notes 18 Need help? Give us a call on 0330 026 6273 and speak to one of our trained advisors. - Page 19 Notes Need help? Give us a call on 0330 026 6273 and speak to one of our trained advisors.
- Page 20 A Masco Company At Bristan, we want to make things as easy as possible for our customers. That’s why we offer solid guarantees on all our products, effective from the date of purchase, to give you peace of mind.
Need help?
Do you have a question about the TFP4001 and is the answer not in the manual?
Questions and answers