Table of Contents
Advertisement
Quick Links
Advertisement
Table of Contents

Related Manuals for Audient ORIA


Summary of Contents for Audient ORIA
- Page 1 ORIA Immersive Audio Interface & Monitor Controller Manual V1...
- Page 2 20 outputs with an efficient combination of hardware and software. Whether you are monitoring in 9.1.6 immersive, 7.1 surround sound, stereo or even Mono, ORIA is flexible and powerful enough to handle a plethora of contemporary audio standards.
- Page 3 Declaration of Conformities Installation/Setup What’s In The Box Initial Setup Mac Setup Windows Setup Using ORIA as a Standalone Monitor Controller Registration with Audient ARC Firmware Update Procedure Hardware Features ORIA Settings Mic Preamps Speaker Monitoring Headphone Monitoring Metering Connectivity...
- Page 4 Software Features Profiles Monitoring Room Solo/Mute Groups Metering Menu Bar System Panel Output Calibration Manual Calibration Keyboard Shortcuts Safety Information Rack Mounting Warranty Information...
-
Page 5: Declaration Of Conformities
Declaration of Conformities FCC Part 15B This apparatus has been tested and found to comply with the limits of a class-A digital device, pursuant to Part 15B of the FCC Rules. These limits are designed to provide reasonable protection against harmful interference in a residential installation. This equipment generates, uses and can radiate radio frequency energy and, if not installed and used in accordance with the instructions, may cause harmful interference to radio communications. - Page 6 As a device that provides power to other equipment power management features are inappropriate for this product. We, Audient, declare that the product, ORIA, to which this declaration relates, is in material conformity with the appropriate PSE standards and directives for an audio product designed for consumer use.
-
Page 7: Installation And Setup
Installation & Setup... -
Page 8: What's In The Box
What’s In The Box 1 x ORIA Unit 1 x Mains Power Cable 1 x USB C-C Cable 1 x Sonarworks (™) SoundID Reference Measurement Microphone... -
Page 9: Initial Setup
Initial Setup Unpack your ORIA, plug in the included power cable and connect it to a USB port on your computer. If your computer doesn’t have the appropriate USB port you may need to use a third party cable. Use ORIA’s Control Wheel to navigate through the front panel screen and take control of Motion UI. -
Page 10: Mac Installation
App into your applications folder. Windows Installation ORIA will require drivers to work on Windows to ensure your computer and ORIA will work together correctly. You can download the drivers from the ORIA website: audient.com/ORIA/downloads. Once downloaded, run the .exe file to start the installation process. - Page 11 ADAT input or via the Optional Dante Card using the Input source control of the ORIA software. You will still need to connect ORIA to the computer via USB initially in order to create your Profiles using the ORIA Desktop App and store them on ORIA. We would recommend...
- Page 12 You will then receive a verification email to your Inbox but you may need to check your Spam/Junk folders. Once you’ve verified your account, register your ORIA by entering the serial number and the unique 4-digit PIN found on the underside of ORIA.
-
Page 14: Firmware Update Procedure
Help > Check for Updates If an update is available, the ORIA control app will notify you. Click ‘OK’ to begin the firmware update process. The ORIA Desktop App will then launch the Audient Firmware Upgrade software. - Page 15 You can now choose to update from audient.com or from a local file. If your computer has an internet connection you would want to select ‘From audient.com’ to ensure you are installing the latest firmware version. If your computer does not have an internet connection, please contact support@audient.com...
-
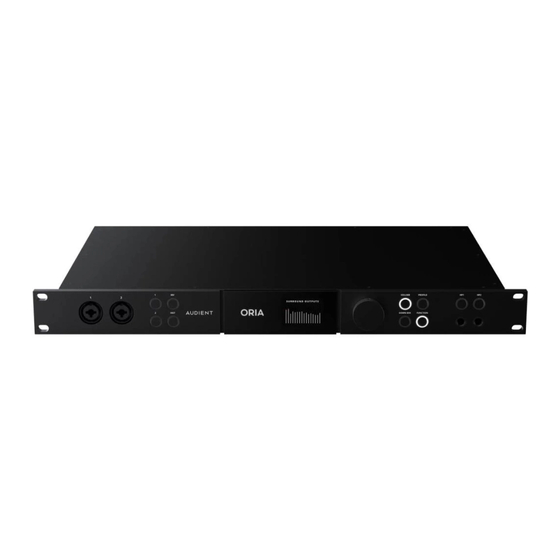
Page 16: Hardware Features
Hardware Features... - Page 17 Hardware Features Headphone Output Selection Buttons Profile Selection Button Channel Select Button Volume Button Control Wheel 48V Phantom Power Button Mic/Line/Inst Inputs Headphone Instrument Input Selection Button Motion UI Outputs Display Panel Function Button Down Mix Selection Button Stereo 2 Outputs Stereo 1 Optional AoIP Card...
- Page 18 ORIA. Use the Control Wheel to cycle through the options. Control Wheel Power Choose to switch off the ORIA (press the Control Wheel to power on the ORIA). Brightness Control the overall brightness of all LED’s and the display panel.
- Page 19 Function Change what feature is assigned to the ‘Function Button’: Status Check the current sample rate and clocking sources. If the status light is: Green • - this means that the unit has been successfully clocked • Amber - the unit has detected a clock signal but at the wrong sample rate •...
-
Page 20: Factory Reset
AOIP Check the status of the networked audio connection (Active or Unactive) and your ORIA’s IP address. Factory Reset Restore the ORIA to its factory settings. **Be aware that this will remove any of your currently saved settings and Profiles.**... - Page 21 Mic Preamps The ORIA features two Audient Console Mic Preamps that can deliver up to 60db of gain, as well as receiving Line and Instrument level sources via the front-facing combi-jacks. When you press either of the 1 or 2 buttons you can then affect settings for each input independently.
-
Page 22: Phantom Power
Phantom Power Press 48V to apply Phantom Power. The LED will turn red to indicate Phantom Power is now active on the selected Mic Preamp Channel. Phantom Power can only be applied to the XLR input, this to prevent accidental damage to external instrument sources. - Page 23 Speaker Monitoring You can quickly access a variety of monitoring options from the front panel. Volume Turn the Control Wheel to adjust the Volume for your chosen speaker configuration. When the Main Outputs are selected, hold down the Control Wheel to mute or un-mute the main outputs.
- Page 24 Toggle on/off a pre-selected monitoring process via the ‘Function Button’. The function of this button can be adjusted in the ORIA Desktop App and is explained later in this manual. • Polarity - to check the phase coherence of your stereo mix.
- Page 25 Active Profile. For example if your Profiles reference level volume is -20dB, however you are currently monitoring at -15dB, you can use RTR to quickly snap back to -20dB precisely. This will be shown on ORIA’s front panel screen in the System Menu.
-
Page 26: Headphone Monitoring
Panel in the ORIA Desktop App. Volume Use this setting to define which of ORIA’s outputs are assigned to each of the headphone outputs. For each headphone output, there is a dropdown menu - in this dropdown menu you can choose from the Left and Right outputs of the USB input, which duplicates the front left and right channels of the stereo or surround speaker outputs without the calibration features. - Page 27 Metering You can toggle through all of ORIA’s output meters (Surround, Headphone 1, Headphone 2, Stereo, ADAT or AoIP) by pressing the Control Wheel. The display panel will default back to metering the outputs of your chosen speaker configuration after 3 seconds without hardware interaction.
- Page 28 Connectivity...
-
Page 29: Stereo Outputs
Stereo Outputs ORIA provides two identical, balanced* stereo outputs (ST1 and ST2) to feed your chosen stereo speakers. These outputs are relay-switched from the Stereo channels of the surround outputs. Surround Outputs The ORIA also provides a comprehensive selection of balanced* surround outputs to feed your chosen speaker configuration. -
Page 30: Word Clock
Wordclock You can choose to have the ORIA be the source of your studio’s clock signal (Controller*) or receive a signal from an external source (Peripheral*) via the respective BNC Word clock Input and Output. - Page 31 Controller in a setup or you may get clicks and pops in your audio due to clocking errors. Oria as the Controller: Wordclock can be sent out of ORIA via the BNC Output to other devices to allow other devices to sync to ORIA’s clock.
- Page 32 Connecting ORIA to a single device via BNC: ORIA ASP880 75 Ohm termination engaged Connecting ORIA to multiple devices via BNC: ORIA 2 x ASP880 BNC-T Connector 75 Ohm termination engaged Key: BNC Word Clock Cable Optical TOSlink Cable...
- Page 33 ASP880 Optical TOSlink Cable Please note that ORIA cannot send the clock via ADAT as it has no ADAT outputs, if you wish to use the ORIA as a master clock for an ADAT device, then a BNC connection must be used.
-
Page 34: Setting The Clock Source
Once you have connected your external devices to ORIA as per the example diagrams, you will need to instruct ORIA where to take its clock from. This is done in the System Panel of the ORIA software. More information regarding this can be found in the System Panel section of the manual. -
Page 35: Technical Specifications
Technical Specifications Mic inputs: • Gain: 60dB • Max Input Level: +18dBu • Crosstalk: <105dB • THD+N: 0.0015% / -96dB • EIN: -129dB • CMRR: -85dB • SNR: 100dB • Frequency Response: ±0.5dB 20Hz to 40kHz • Input Impedance: 1.5kΩ Balanced Line input: •... -
Page 36: Headphone Outputs
Headphone Outputs: • Lineup Level: +18dBu • THD+N: 0.0007% (-103dB) • Dynamic Range: 124dB • Crosstalk: -115dB • Frequency Response: ±0.25dB 10Hz to 40kHz • Output Impedance: <50 Ω Unbalanced • Max Level @ 30R: 5.47V Peak, 3.87Vrms, 997mW • Max Level @ 60R: 7.4V Peak, 5.29Vrms, 912mW •... -
Page 37: Software Features
Software Features... - Page 38 Setup Panel Metering The ORIA Desktop App is an intuitive platform designed to monitor, calibrate and control your speaker array, with the ability to tailor the system to suit your layout and room. Audient have partnered with the groundbreaking speaker calibration company,...
-
Page 39: Creating A New Profile
Profiles which have been created for different monitoring formats or target modes. A total of 32 Profiles can be stored on ORIA itself. It is worth noting that although Profiles are stored directly on ORIA’s hardware, they are controlled using the Profiles Panel or the Profile button on the front of the unit. -
Page 40: Delete A Profile
Delete a Profile To delete a Profile, right click on the Profile name in the Profile Panel and select delete. A window will appear asking you to confirm your deletion. Profile Organisation The Profiles list is split into two sections. The ‘Favourite’ Profiles (F) are the four listed above the dividing line, each with their own number. -
Page 41: Selecting A Profile
Profile in the list. To Save the Profile, simply click this icon and wait a few moments for the Profile to be stored and loaded onto your ORIA. A green tick will appear when this is complete. - Page 42 If you try to change Profile or close the ORIA application without saving the changes you’ll see a Dialogue Box window asking if you wish to save the changes to the current Active Profile, create a new Profile or discard the changes.
- Page 43 Profile Status If you have imported a Profile from Sonarworks(™) then a small Sonarworks logo will appear next to it in the list. The logo’s colour will indicate it’s current status: • White ‘S’ logo - Your Sonarworks(™) licence (trial or full) is valid •...
-
Page 44: Input Source
Control Wheel on the front of the unit. Mute (M) Mute all speakers outputs. Reduce the overall volume by a chosen level. The level of reduction can be changed in the System Panel of the ORIA Desktop App. - Page 45 Sums the Left and right channels together for mono compatibility checking. Polarity Flips the Phase of the Left channel and sums the outputs to MONO. Return To Reference Returns the Output level of ORIA to the Active Profiles saved Output Level.
- Page 46 Room This section provides a visual display of your speaker configuration. The white USER icon indicates the direction that the listener would face. The colours of the units indicate which of the speaker Groups they belong to: • HEIGHTS = Light Purple •...
- Page 47 Solo /Mute Speakers in the Room may be Solo’d or Muted using the following keyboard shortcuts: • Mute - Left Click • Solo - Shift + Left Click Whilst a speaker is Solo’d, the Mute function will become unavailable for all other speakers and groups.
- Page 48 Groups This monitoring function allows you to Mute or Solo predetermined groups of speakers: • HEIGHTS (Ltf, Rtf, Ltm, Rtm, Ltr & Rtr) • SIDES (Lw, Rw, Ls, Rs, Lrs & Rrs) • FRONTS (L, R & C) • SUBS (LFE/SUB) •...
-
Page 49: Stereo Mode
This shows the signals entering the ORIA Desktop App from your DAW outputs. PRE is selected as the default. POST This shows the signals leaving the ORIA Desktop App after the output DSP and going to your speakers. POST Metering mode will take the volume control into account. LFE/SUB When in PRE metering mode, the Meter for the LFE channel will only show the audio being sent to it from your DAW on the LFE channel. -
Page 50: Muting Channels
Muting/Soloing Channels If a speaker channel is muted, then the meter for this channel will also be greyed out. If a channel or channels are Solo’d, all other channels will be blacked out. Muting Channels Soloing Channels Down Mix Status If you have configured a renderer in the System Panel then you can quickly check the current Down Mix Status in the bottom right of the meters. - Page 51 Menu Bar Light/Dark Mode The ORIA Desktop App can be viewed in Light or Dark mode, depending on your preference and your studio environment. Dark Mode Toggle Light Mode Toggle Master Bypass This allows you to bypass all DSP settings on the ORIA Desktop App.
-
Page 52: Speaker Channel
Speaker Channel Shows the name of the Channel currently being adjusted. Mute (M) You can Mute the individual speaker selected. You can Mute a channel by pressing the ‘M’ key on your keyboard whilst in Setup Mode. Solo (S) You can Solo the individual speaker selected. You can Solo a channel by pressing the ‘S’... - Page 53 Reset The Reset Button sets the channel back to its default settings. You can also reset the channel by holding the ALT key and left clicking. A Dialogue Box will appear to confirm you wish to reset the settings to ensure settings are not reset by accident. Each speaker output has its own EQ, featuring 8 bands that can adjust 12db between 20Hz - 20kHz and a Low and High shelf.
-
Page 54: Output Controls
Output Controls In this section you can control various options for each individual output: At the bottom of the Setup Panel, there are three further controls for speaker calibration. Trim The first control is Trim, which raises or lowers the level of this speaker by up to 12 decibels, in increments of 0.1 decibels. -
Page 55: System Panel
System Panel The System Panel at the top of the ORIA Desktop App lets us look under the hood at the more advanced settings for connectivity and control. The System Panel is split into 4 different Pages which are selectable using the tabs on the left-hand side... -
Page 56: Headphone Setup
If the indicator is amber, you will need to adjust either ORIA’s sample rate or the sample rate of your external device so that the two devices are operating on the same sample rate. - Page 57 Renderer The Renderer Page is for connecting ORIA directly to the Dolby Atmos Renderer, both to use the Down Mix Button on the ORIA hardware to cycle through different down mixing format options, but also so that the Dolby Atmos Renderer can feed back information to ORIA about which Down Mix format is in use.
- Page 58 16 channels this could result in complex and untidy cable routing. To alleviate this issue, we have implemented a solution in the ORIA hardware where you can connect any speaker output to any AES channel, enabling much neater cable routing than would otherwise be possible, where one AES stream can provide audio to two adjacent speakers rather than using the default routing configuration.
- Page 59 You can select either an Internal Source or External Talkback Source. The Internal Source uses one of the 2 Audient Console Mic Preamps found on ORIA or one of the 16 ADAT channels, whereas the Internal Source allows you to select another audio device connected to your computer, such as the built-in microphone, USB microphone or another audio interface.
-
Page 60: Output Calibration
Automatic Calibration When you purchase an ORIA you can take advantage of a 60 day free trial version* of the industry-leading measurement and calibration software SoundID Reference for Multichannel by Sonarworks(™). This comprehensive tool measures and calibrates a multichannel setup in less than an hour so you can get up and running (almost) immediately. - Page 61 SoundID Reference Profile with your desired Target Mode. For more information on this process please consult Sonarworks product documentation. Once complete, you’ll be given the option to ‘Export Preset to Device’. Select ORIA from the list of devices.
- Page 62 Now, select ‘Direct transfer to Audient ORIA application’ and click ‘Next’. This will automatically open the ORIA Desktop App and present you with a dialogue box asking you to choose whether you overwrite an existing Profile in the ORIA Desktop App or create a new one:...
- Page 63 If you create a new Profile, you’ll be prompted to give it a name. If you choose to overwrite an existing Profile, you’ll be given an option of which Profiles are available to overwrite. The new Profile will now appear in the Profile Panel. Please note Profiles created with SoundID Reference will be denoted by a Sonarworks ‘S’...
- Page 64 Windows Due to software limitations, at this moment in time, Sonarworks Sound ID Reference Profiles cannot be loaded into the ORIA Desktop App on Windows. This functionality will be added via a driver/firmware update imminently. Adjusting a Profile Please note that if you are using a Profile based on Sonarworks(™) measurements, the EQ in the Setup Mode section will automatically be locked to prevent alterations.
-
Page 65: Manual Calibration
If using a third party software, it is not possible to directly import your settings into ORIA, the speaker calibration settings must be entered manually. The third party software should give you an EQ curve you can apply to each channel, as well as Trim and Delay settings. -
Page 66: Keyboard Shortcuts
Keyboard Shortcuts Room Panel Buttons: Toggle Solo - Shift + Click on speaker button Clear all mutes - Option + Click on a muted speaker Clear all solos - Option + Click or Option + Shift + Click on a solo’d speaker Keyboard Shortcuts: Show/Bring up the Meter Window - Command + Shift + M Navigate EQ Bands* - Command + Left/Right arrows... -
Page 67: Safety Information
Safety Information Tel: 0044 1256 381944 IMPORTANT SAFETY INSTRUCTIONS • Read instructions - All the safety and operating instructions should be read before the product is operated. • Retain instructions - The safety and operating instructions should be retained for future reference. •... -
Page 68: Rack Mounting
Rack Mounting ORIA requires 1U of vertical rackspace and a minimum of 400mm rack depth, allowing for cables. It weighs 3.5kg and for fixed installations - such as a studio - the four front panel mounting screws will provide adequate support. The front panel depth is 8mm at the mounting positions. -
Page 69: Warranty Information
We accept liability to repair or replace your ORIA as described above. We do not accept any additional liability. This warranty does not affect any legal rights you may have against the person who supplied this product - it is additional to those rights.
Need help?
Do you have a question about the ORIA and is the answer not in the manual?
Questions and answers