Table of Contents
Advertisement
Advertisement
Table of Contents

Related Manuals for Audient EVO 4


Summary of Contents for Audient EVO 4
- Page 1 2in/2out Audio Interface User Manual 5.0...
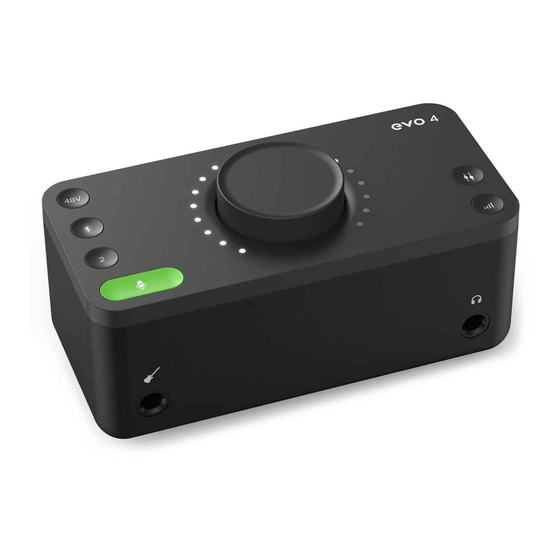
- Page 2 EVO 4 includes two High-Performance EVO Preamps with innovative Smartgain technology, a JFET Instrument Input, pristine converters and a powerful headphone amplifier. We hope you enjoy using EVO 4 and it helps you in your creative endeavours, whatever they may be! Work smarter not harder.
-
Page 3: Table Of Contents
Overview Software Features Show Loopback Source Smartgain Quit Channels 1 + 2 About EVO Monitor Mix + Pan Visit EVO Knowledge Base Phantom Power Check for Updates Volume Knob Set ASIO Buffer Size Output Volume Set Sample Rate Safety Instructions Audio Loop-back Using Audio Loop-back on Mac Declaration of Conformities... -
Page 4: Overview
OVERVIEW OVERVIEW 01 Smartgain Just start playing or singing and Smartgain mode will automatically set the level of your microphones perfectly. 02 Channels 1 + 2 Control the level of inputs, link to Smartgain or hold each button to mute. 03 Monitor Mix + Monitor Pan Blend between your outputs and inputs - ideal for minimising latency when recording. - Page 5 (including amplifiers) that produce heat In the event of a unit failure, do not attempt to open the EVO 4 yourself. Please contact Audient support so that a suitable method of Protect cables from being walked on or pinched particularly repair or replacement can be recommended.
-
Page 6: Declaration Of Conformities
We, EVO by Audient, Aspect House, Herriard, Hampshire, RG25 2PN, UK, 01256 381944, declare under our sole responsibility that the product EVO 4 complies with Part 15 of interference in a residential installation. -
Page 7: Installation/Setup
INSTALLATION / SETUP On macOS, EVO 4 will work straight away without needing to install any Carefully unpack your EVO 4 and connect it to a USB port on your Mac. drivers. However, we do recommend installing the EVO If your computer doesn’t have rectangular USB-A ports then you may application which gives you control over Audio Loop-back and lets you need to use an adaptor, dongle or third party cable. - Page 8 To set the EVO 4 as your default sound device, go to Control Panel > Hardware and Sound > Sound. Now select the Playback tab. In the list of devices, find EVO 4 Main Output 1+2, click on it and select Set Default Device.
- Page 9 USB hub. iPAD PRO (WITH USB-C PORT) To use EVO 4 with an iPad Pro, simply connect it using a USB-C to USB-C cable (not included). The USB-C port on iPad Pro will provide full USB...
-
Page 10: Registration With Arc
You will then receive a verification email to your inbox - double check your spam and junk folders if you cannot see this. Once you’ve verified your account, register your EVO 4 by entering the serial number and the unique 4 digit PIN found on the underside of EVO 4. -
Page 11: Hardware Features
To connect a microphone, use an XLR cable which has three pins. EVO 4 can lower the signal level by 8 decibels and boost it by up to 50 dec- ibels allowing you to get the perfect recording level, this is known as the Gain. - Page 12 EVO 4’s most exciting and game changing feature is ‘Smartgain’. Start playing or singing and Smartgain mode The EVO 4 Smartgain feature can help you take the guesswork out of will automatically set the level of your microphones. setting your gain levels and give you perfect levels quickly and easily.
-
Page 13: Stereo Linking
Stereo Linking The two inputs of EVO 4 can be stereo linked, which allows you to match the gain for both left and right channels at the same level. This would be used when recording an instrument using two microphones, such as a piano or guitar, or if inputting a stereo line signal like a synth or DJ decks. -
Page 14: Instrument Input
When a headphone jack is connected to this output, EVO 4 will automatically The DI port is found on the front of EVO 4 and accepts an unbalanced TS mute the Monitor Outputs for you to make life easier for you when moving 1/4”... -
Page 15: Smartmuting
The meter ring will illuminate to show you the relative volume level you are currently using. When you are listening to the inputs on EVO 4 using the Monitor Mix function, you’ll be hearing the Inputs directly which means there’s almost no delay! The Volume control applies to both the monitor outputs and headphone outputs. -
Page 16: Software Features
Occasionally we will release a firmware update for EVO 4 to help ensure compatibility with future computers or to add functionality. Clicking this will check if you’re EVO 4 is up to date and if there are any updates available, you’ll be prompted to install them. -
Page 17: Audio Loop-Back
The first step of using Audio Loop-back is setting up your computer to output sound to the Audio Loop-back outputs of EVO 4. On some soft- ware, you can change this in the software itself in the settings. For details on how this is done, we’d recommend contacting the developer of your... - Page 18 Audio Loop-back Output Channel, ready to be recorded or streamed. We need to tell EVO 4 to send the Audio Loop-back outputs to the Audio Loop-back Inputs. To do this, we go to the EVO app menu in the menu bar and click Set Audio Loop-back Source.
-
Page 19: Using Audio Loop-Back On Windows
Audio Loop-back output.* Using Audio Loop-back Channels on Windows We need to tell EVO 4 to send the Audio Loop-back outputs to the Audio As with macOS, the first step of using Audio Loop-back is setting up your computer Loop-back Inputs. To do this, we go to the EVO app menu in the menu bar to output sound to the Audio Loop-back outputs of EVO 4. -
Page 20: Specifications
SPECIFICATIONS DAC OUTPUTS: MICROPHONE PREAMPLIFIER: Maximum Output Level: +11dBu Mic Gain Range: 58 dB Line Gain Range: 58dB with -10dB Pad Digital Reference Level: 0dBFS = +11dBu Output Impedance: <100Ω Balanced Phantom Power: 48v +/-4v @ 10mA/Channel CMRR: >85dB @ 1kHz Frequency Response: +/-0.5dB 10Hz to Fs/2 Maximum Input Level:... - Page 21 Note for latency figures: USB 2.0 HIGH SPEED Performance may vary as stability at these low buffer sizes is dependant on No. Of Input Channels 2 Analogue many factors including CPU load, operating system and performance of other No. Of Output Channels 2 Digital drivers.
-
Page 22: Firmware Update Procedure
During the update procedure, the unit will restart multiple times. Once complete, reboot the EVO 4 by removing the USB cable, waiting a couple of seconds and reconnecting it. FIRMWARE UPDATE... -
Page 23: Warranty Information
Distributor responsible for the country in which you purchased the product. Audient Dealer (defined as a Dealer which has purchased the product directly from Audient in the UK, or one of our Authorised Distributors outside the UK). Some of the products returned under warranty are found not to exhibit any Please note that if you purchased the product from outside of your country of fault at all when they are retested at our Service Centre’s so it’s always useful to... -
Page 24: Warranty Limitations
The warranty does not cover components which have a limited life, and which are expected to be periodically replaced for optimal performance. We do not warrant that the unit shall operate in any other way than as described in this manual. For further details please contact: support@audient.com Tel: 0044 1256 381944 support@audient.com support.audient.com...
Need help?
Do you have a question about the EVO 4 and is the answer not in the manual?
Questions and answers